
Android Studio is the primary tool used to create Android apps. It’s both free and simple to use, so it’s easy for anyone to get started. As long as you know how to program using Java or Kotlin, developing using Android Studio should be fairly easy. Here’s our simple guide on how to use Android Studio to help you develop the next big app.
Android Studio: An Overview

Before Android Studio, many Android app developers used a different integrated development environment (IDE) called Eclipse IDE. This was a general program that allowed users to make Android apps using Java and other programming languages. However, it isn’t nearly as tailored to the Android operating system as Android Studio.
Thankfully, Google later announced that it had developed an Android-specific IDE back in 2013. One year later, the tech giant launched Android Studio after numerous beta versions. Through Android Studio, developers could now create apps specially made for Android OS.
 How To Use Android Studio
Now that you know what Android Studio is, it’s now time to dig into it. Read on to learn the basics, including setup, navigation, starting projects, and file management.
Setup
Before you start, the first thing you need to do is download the necessary programs. Simply head over to the website to pick up Android Studio and the Android Software Development Kit (SDK) for free. If you’re using Java, head here to download the Java Development Kit.
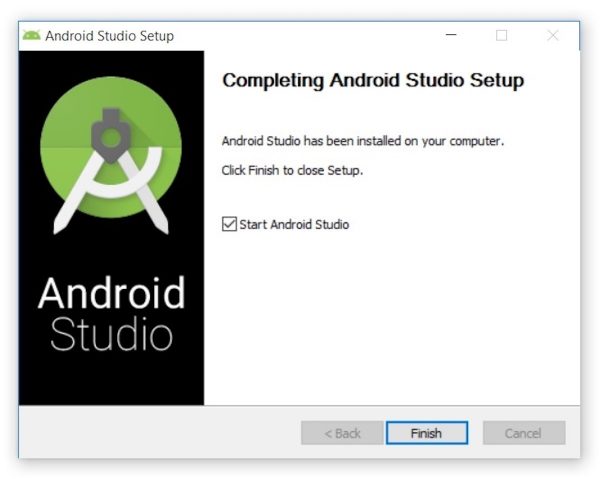
Once your download finishes, follow the on-screen instructions to finish setting up. Just remember to check the box that also installs Android SDK so you don’t have to download it separately.
Starting Your Project
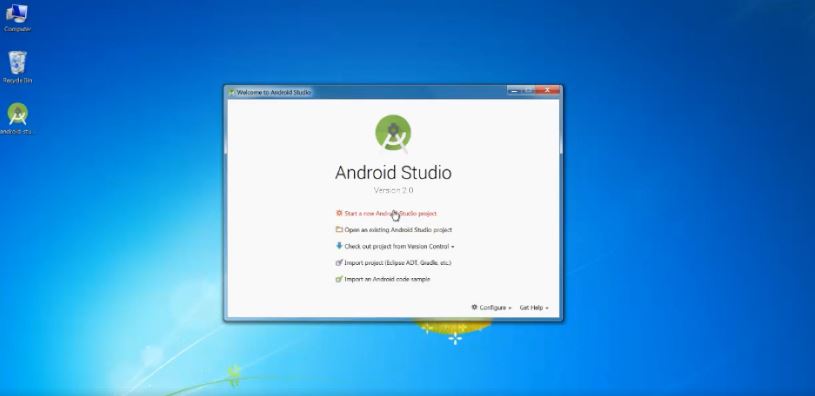
Once you’ve successfully installed the necessary programs, it’s time to start your first project. To do this, open Android Studio and select New Project. Otherwise, you can also go to File > New > New Project if you’re already in Android Studio’s workspace.
Once you create a new project, Android Studio should give you options for various activity types. These activity types are the screens you should see in your new app. Depending on the nature of your app, this screen could house your entire app’s features. You can also transition from one screen to another with more than one activity.
By default, you can start with either the Basic Activity or Empty Activity template. Otherwise, you can choose to begin with Add No Activity if you have different plans for your app. If you select Basic Activity, you’ll gain access to a menu button and a FAB (floating action button) to add actions. Conversely, Empty Activity is the same as Basic Activity, but without the menus and buttons.
Make sure you have your app in mind before you choose an activity template. That’s because Android Studio will provide you with file types that are tailored to the template. In addition, this is also where you can input your app’s name and Android SDK. It’s also where you can add the package name, aka the final name for your app on the Play Store. This should combine both your app and developer name.
Main Files & File Types
Once you’ve selected an activity, you might find numerous unfamiliar files within Android Studio. Your primary code is located under the Java file using your activity name. If you’re having trouble, this should be named MainActivity.Java by default, unless you changed the name. Under this file, you can enter your Javascript, create an Android Studio toast, and code what your app does.
Conversely, the activity_main.xml is where you’ll develop the visual layout of your app. If you’re unfamiliar with XML, it’s a markup language that allows you to layout documents, similar to HTML. Hence, if you want to add layouts like buttons, for example, you should do so under this file.
However, coding what the button does still goes under MainActivity.Java. You can use the XML files to define a Javascript’s layout, which in turn is called a class. At the top-right of your Java code, you recognize this from the line: “setContentView(R.layout.activity_main):”
This line instructs Android Studio that it can find the layout for this Javascript under activity_main.xml. You can also use this same XML file to write the layout for multiple Java classes. However, you can also use multiple XML files to simply write one Java classes’ layout.
For example, a Basic Activity template will provide you an activity_main.xml to set the layout for the FAB. However, it will also provide a content_main.xml file for laying out content in the screen’s center.
Navigation
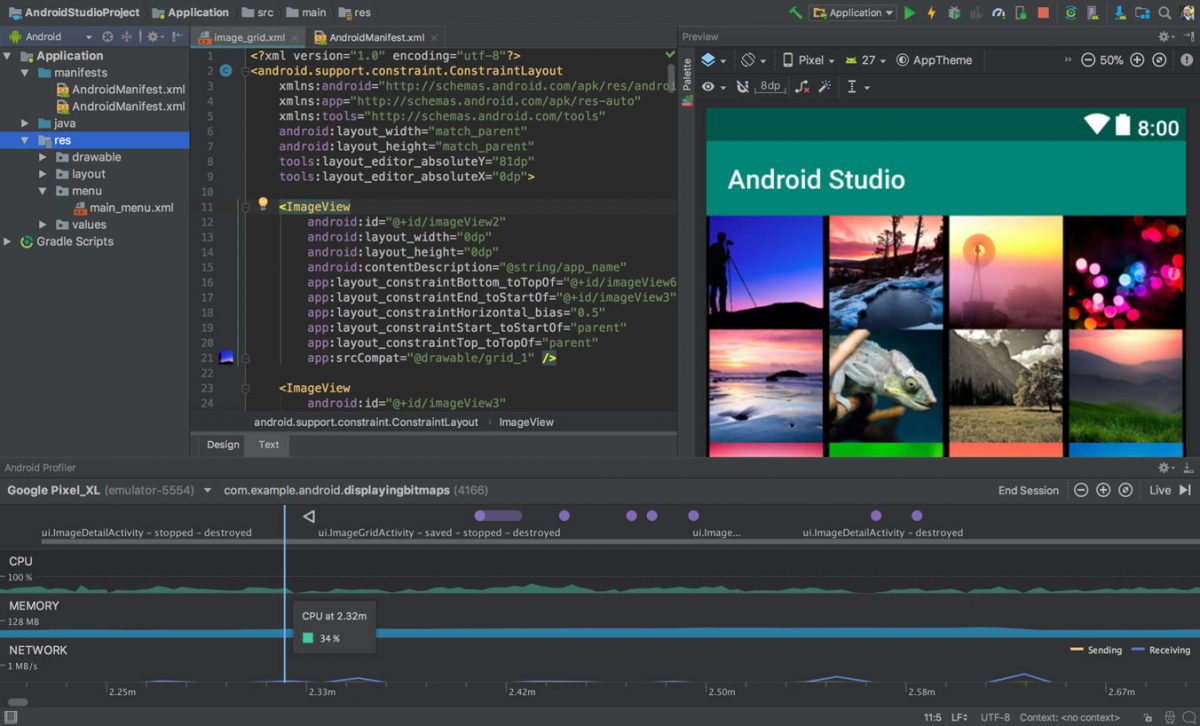
Android Studio is the environment that houses and lets you manage different files for codes and layouts. You might have already figured out that the left window is your file hierarchy, containing your files and folders. However, the files on the left-hand side aren’t the only things you need to understand.
The next main window on the right side of Android Studio is the other most important element. That’s because it displays your scripts and the content of your files. Within this window, you can open multiple files and switch between them through the tabs on the top. You can open files by clicking any of the files on the file hierarchy.
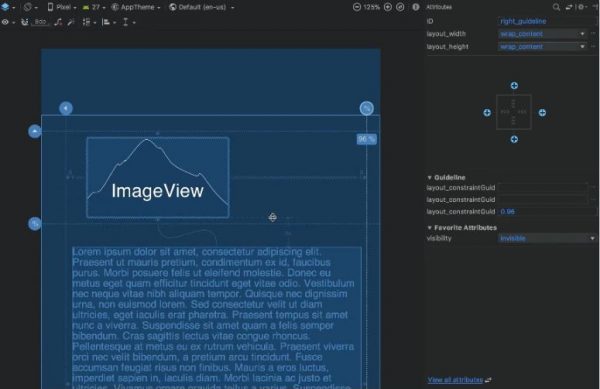
Opening and editing your Java files is pretty straightforward. Just select the Java folder and open your Java file. However, editing XML files adds two bottom-left tabs called Text and Design. The Text tab lets you code the XML files by adding scripts and lines.
As for the Design tab, it lets developers add, delete, and move different elements of the layout. However, you can also preview the layout from the Text tab provided your display is large enough.
Other Files & File Types
You might have noticed that, unlike Java, there’s no designated “XML” folder for XML files. That’s because different folders house XML files under one umbrella folder called res. The res folder is short for resources. It contains drawables (app images), layout (layout XML files), values (variable values like names and colors), and more.
The manifests folder contains the very important AndroidManifest.xml file. This file defines many essential parts of your app, including the activities, the app’s name, permissions, etc.
Of course, you can make more XML files, java classes, and activities if you need to. However, one thing you need to know about the res folder is that everything needs to be in lower case. Hence, most people use underscores to distinguish file names.
To add files and folders, just right-click on a directory and select New. Afterward, choose the element you want to add. Alternatively, you can also open your project’s directory by right-clicking and selecting “Show in Explorer.”
Gradle
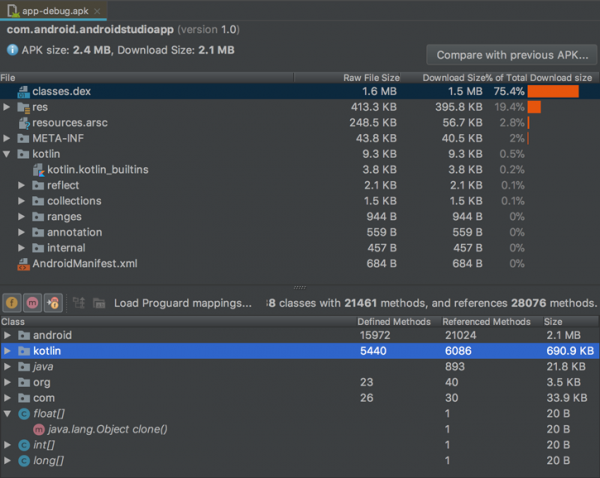
From time to time, you might find Android Studio mentioning “Gradle” as you develop your app. This is Android Studio’s build automation tool that converts your files into an APK. Gradle automates the process for you for the most part to keep things simple. However, sometimes you do have to edit the build.gradle files to add a dependency or advanced functions.
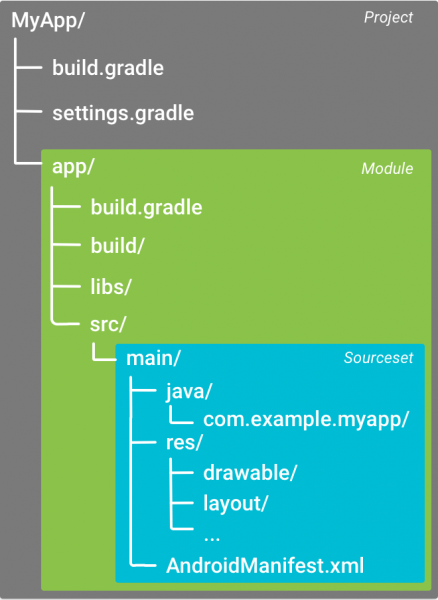
You can find build.gradle files under the Gradle Scripts folder below your app folder. Usually, this comes in two forms: one file for the overall project and the other for the module (app). In addition, you can also select Build > Clean Project when your project stops functioning. This just confirms your files, folders, and their roles.
Testing & Debugging
Now, you know how to develop an entire Android app using Android Studio. However, things don’t stop here, as there’s the all-important step of testing your app. This is where Android Studio flexes its testing and debugging features.
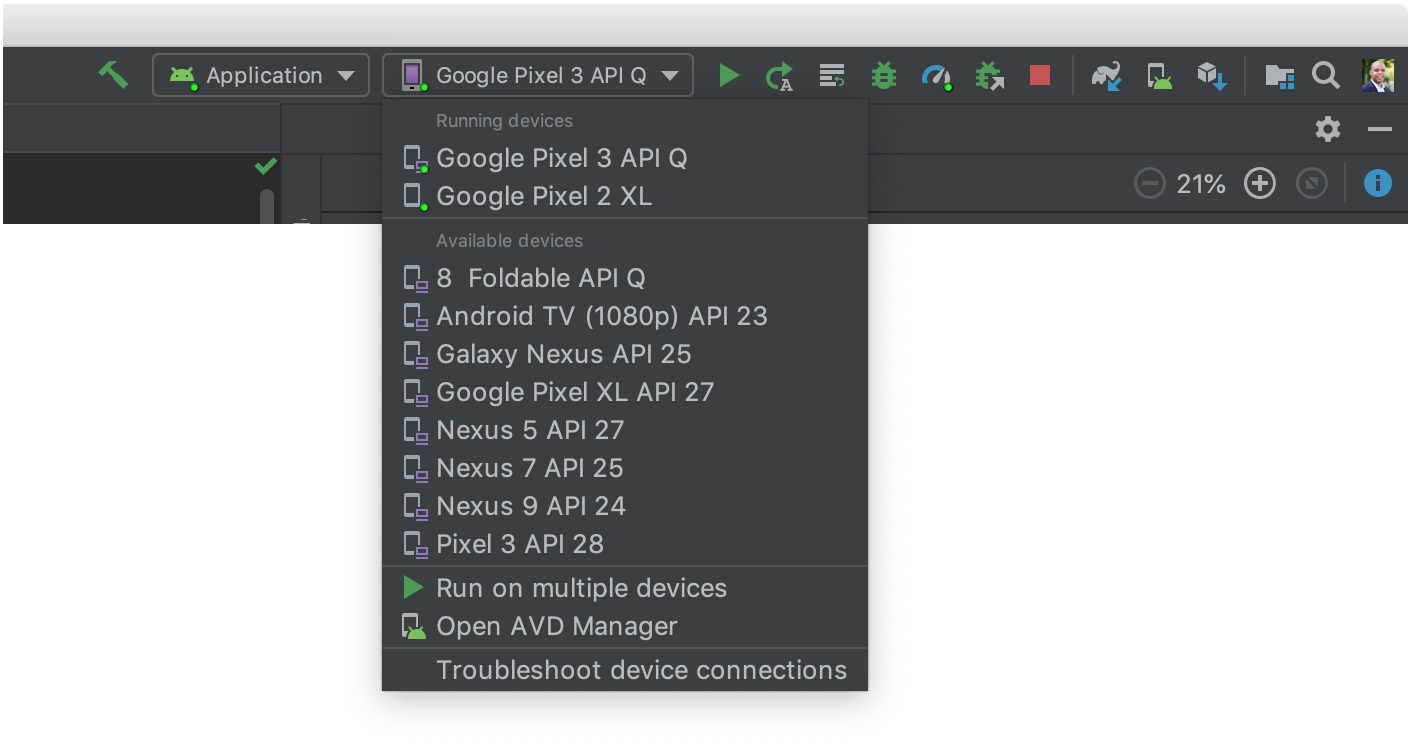
Firstly, you’ll have to decide whether you want to test your app on an emulator or physical Android device. Most developers have a physical Android phone on hand, so we’ll cover that first. It’s pretty simple. All you have to do is plug your Android phone into your computer via USB.
Once you’ve done this, you can press the green play button or select Run > Run App. However, make sure you enable your phone’s settings to allow unknown sources to debug and install files on your phone.
Afterward, you should see a notification that the Gradle build is running. This just means that Android Studio is converting your files and scripts into an app. Once it’s finished, you can run and test the app as you please. As you’re doing this, Android Studio will provide live feedback through the Android Monitor’s logcat tab.
You should find the logcat on the lower half of your monitor. Here, you can find red text descriptions when an error occurs or your app becomes unresponsive. This helps you decipher the problem quickly without having to play guessing games. You can also filter the messages you see here within Android Studio to target specific problem areas.
Apart from this, you can also check the “monitors” tab to find other information like your app’s CPU usage. You can monitor all of your app’s elements at once within this tab in the Android Device Monitor.
AVD Manager
Android phones and tablets often come in many different sizes. That’s why it can be tricky to develop apps for Android OS. Thankfully, Android Studio has a tool that allows users to emulate Android devices. This helps developers with fragmentation which is the process of developing apps for different screen sizes. Moreover, it’s very handy when you don’t have an Android device on hand to test your app.
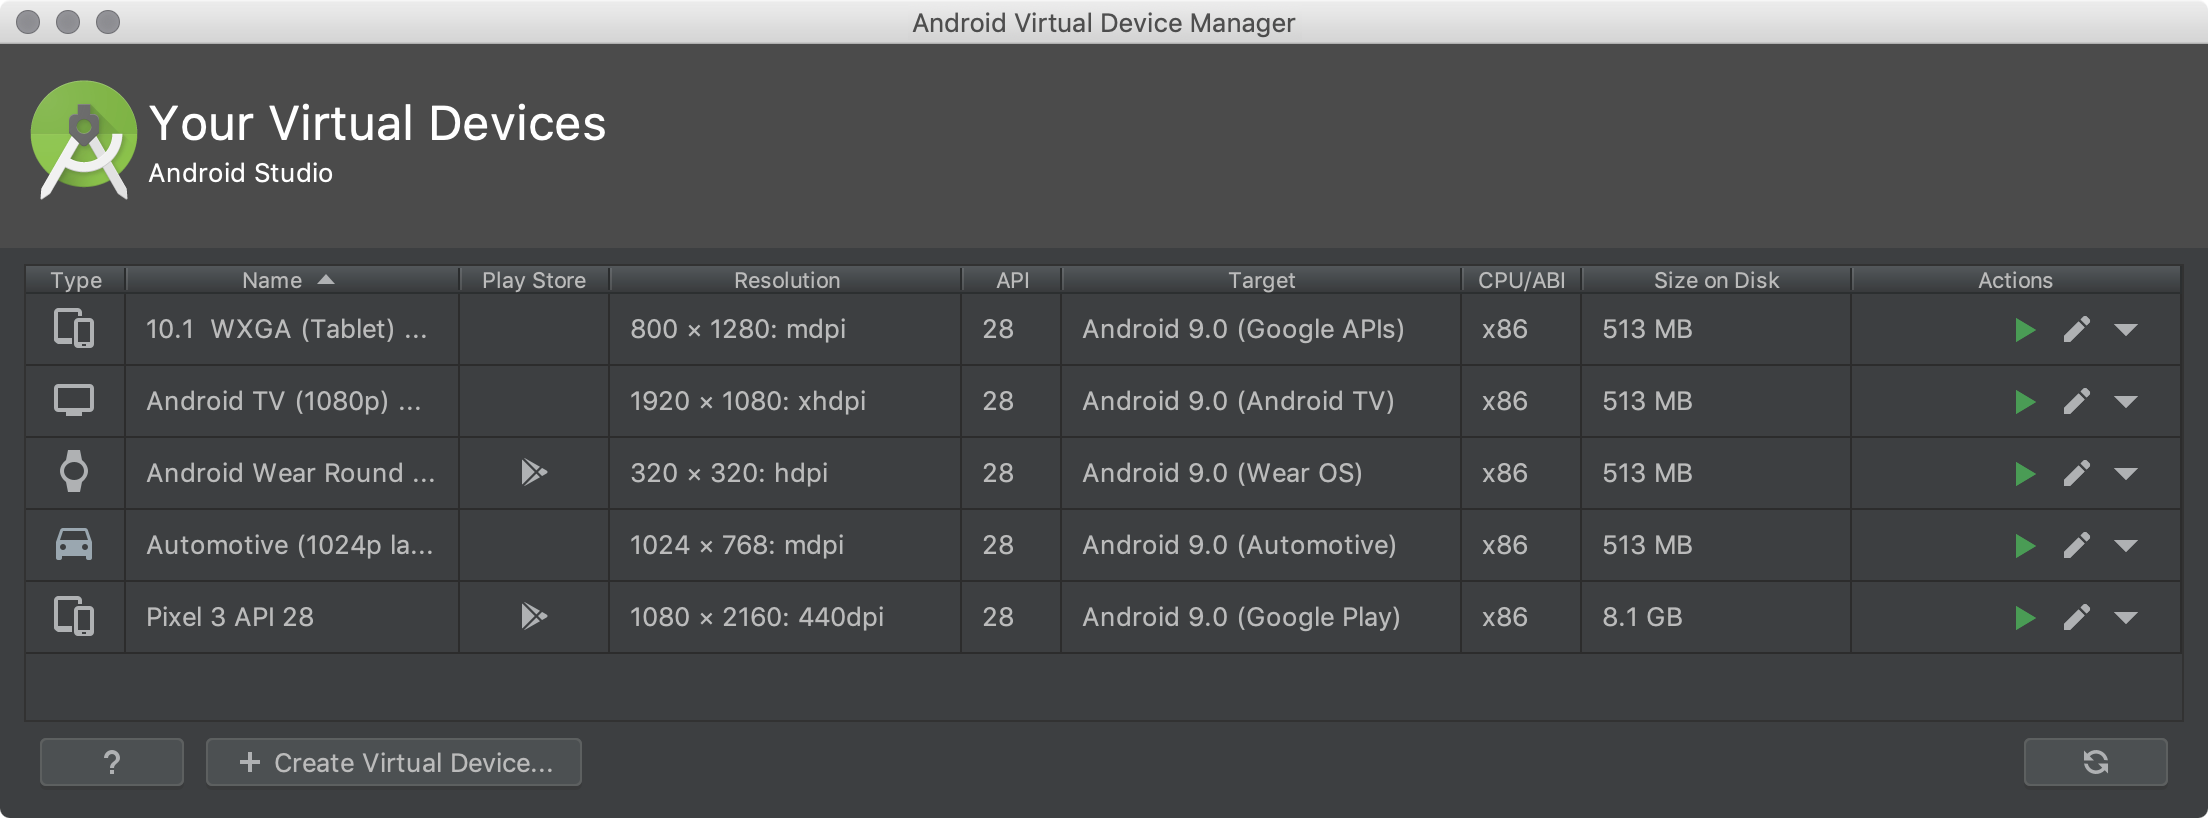
This tool is called the Android Virtual Device (AVD) manager. It emulates not only the screen size of other Android devices but also the settings, power, Android version, and performance. To use it, you have to download the necessary parts and modify the settings according to your desired Android specification. Just go to Tools > Android > AVD Manager to start.
Within the AVD Manager, you can select the hardware and Android platform you wish to emulate. Through this process, you can set up multiple Android device emulations. These will appear whenever you test run your app. However, take note that you have to have a capable computer to run these emulations.
SDK Manager
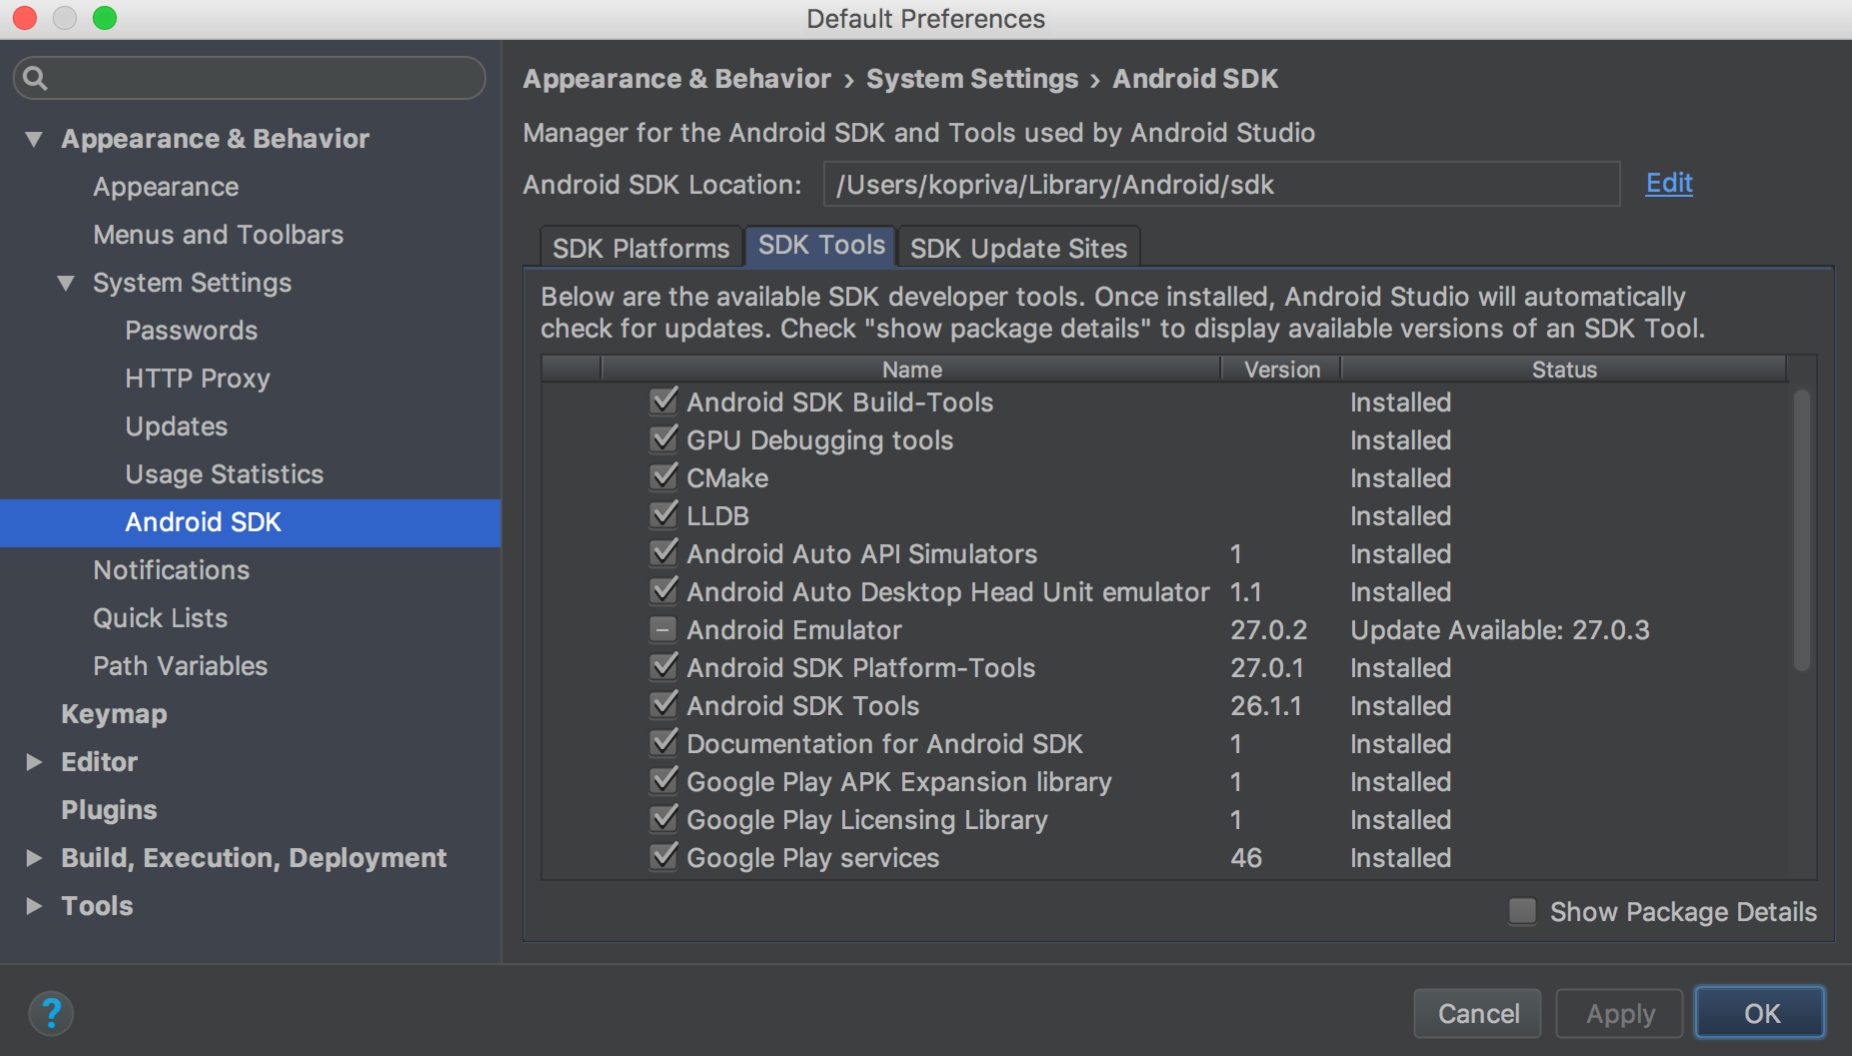
Android Studio can develop apps for any Android version, but testing on those versions requires the necessary tools. You can’t create an emulation for older Android versions without them.
This is where the specific platform and SDK tools come in. Just go to your SDK manager under Tools > SDK Manager. You can find all the tools you need here, including the Google Glass Development Kit and the Android Repository. Just check the boxes next to your required components and hit OK.
Signed APK Generation
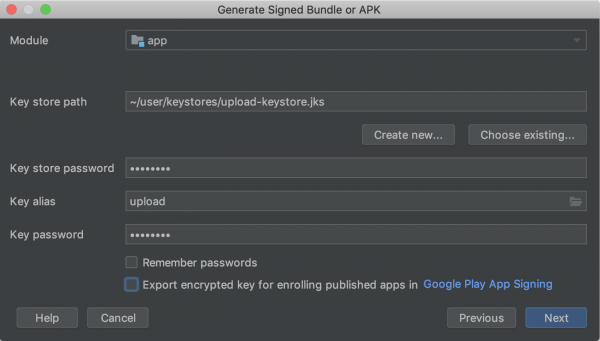
Finally, after finishing your coding and testing through Android Studio, you’ll want to launch it. To do this, select Build > Generate Signed APK. Once finished, you should have the final file that you can upload to Google Play.
This process will also require you to create or enter a certificate of authenticity called a Key store. Make sure not to lose this file because it’s the only way to update your app. Afterward, just select the release build type and then hit finish.
The Bottom Line
Creating an app is pleasantly easy with Android Studio and the Android SDK. All of these provide you the necessary tools for coding, organizing, testing, and generating an Android app. Just make sure you have the necessary hardware and coding skills to do the job.