
Android devices regularly receive updates to fix bugs and bring new features to your device. It sometimes gives you useful updates and keeps your phone secure. But, this isn’t always the case. Some updates bring more bugs and slow down your device. It can also cost more problems and make your phone in a worse condition. If this happens to you, learning how to downgrade Android devices might help you.
How to Downgrade Android Firmware?
The difficulty of downgrading your Android device depends on its manufacturer. Some manufacturers make it easy for users to “flash” firmware image into their phones while some make it extremely impossible.
The usual process to go about the downgrade requires you to unlock your bootloader first. Remember, not all Android phones allow this so you will need to be responsible to check whether the manufacturer of your device offers an official method for unlocking the bootloader, otherwise you will need to find an alternative method.
Root Your Android Phone
Keep in mind that unlocking your bootloader will delete your phone’s internal data. Don’t worry because the steps below will cover all of this to make sure that you have your data intact while you downgrade your mobile phone. Here’s our in depth guide about how to root your android phone. Be sure to check it out to kick start downgrading your Android OS.
Step 1. Back-up your Files

To prepare your phone for downgrading, the first step is to back up everything you can’t live without before you start. This is necessary in case something goes wrong or if you changed your mind. Also, your device must be fully charged before you root it. It would help to plug it in to a power source when you do so.
Step 2. Install the Android SDK Platform Tools
Back then, you needed to download Google’s entire Android development kit to downgrade your phone. But that’s not the case anymore. Nowadays, all you need is the Android SDK Platform Tools. This tool is available for Windows and Linux.
Step 3. Install Device Drivers on Your Computer
You need an appropriate USB driver to make sure that your computer communicates with your device properly. Thankfully, most of the Android devices have a built-in driver which automatically launches when connected to computers using a USB cable. But if your device has none, go to your manufacturer’s website and download a USB driver.
Step 4. Unlock the Bootloader
You should first unlock your device’s bootloader to completely root it. The bootloader is the program that loads the phone’s operating system. It is the one that determines which applications run during your device’s startup process.
Some manufacturers require a key to unlock the bootloader. Most of them provide guides on how to do so, but it will require you to register a developers account. For Honor and Huawei devices, their bootloaders can no longer be unlocked. If your device is one of them, you will need to use a third-party service like DC-Unlocker.
Please be reminded that doing the steps above will delete all your data and factory reset the device. Once your bootloader is finally unlocked, you can now continue to downgrade your Android device.
Find a Suitable Firmware Image
So now that you have installed the Android SDK tool and unlocked your bootloader, you will need to find a suitable firmware image. Your manufacturer must have one provided but if not, you will need to locate firmware images for your device. You can check out the XDA-Developers forum. It is a good place to find suitable downgraded firmware images for your particular Android device but be sure you have searched your manufacturer’s website for official firmware images before doing so.
Manually Flashing Using ADB and Fastboot

Once you have finished the steps below, you will need to connect your phone to your PC. The steps below are for Windows 10 users, the ADB and fastboot commands should work the same way on macOS and Linux.
Step 1. From your computer, open the file explorer and go to the location where you saved the Android SDK installation. Be sure to have the Android image files you need to flash in this location too. The files usually come in .zip format with multiple IMG files inside. Unzip the files to the location.
Step 2. On the same folder location, hold the shift key on your keyboard, right-click inside the window, and then click the “Open PowerShell Window Here” button. If you are using a macOS or Linux, you can navigate this folder through the terminal application.
Step 3. Next, Type “adb devices” in the Windows Powershell window to make sure that your Android phone is detected. If it is, type in “adb reboot bootloader” to restart your device and boot into the Android bootloader menu. If these ADB commands don’t work, type in “.\adb”
Step 4. Most manufacturer firmware usually comes with a “flash-all” script that flashes all the relevant image files to your device. When your device is in bootloader mode, type this “flash-all” on the command line to start the flashing process.
Step 5. If this script doesn’t work for you, you will need to flash the individual items in the folder. You can type in the following commands into Windows PowerShell or Terminal, whichever operating system you’re using. Make sure that you are hitting the enter key after each command.
Once this process is complete, your device should restart. If the flashing process was successful, your phone’s Android firmware image is downgraded. You are good to go.
How to Downgrade Android Firmware Using Third-Party Flashing Tools
Lucky for you, third-party flashing tools are available because of volunteer developers. This manufacturer-specific firmware flashing tools offer you an alternative process so you flash your firmware without the need for fastboot mode. But if there isn’t an available third-party tool for your device, it is best to still use the fastboot method listed above.
For Samsung devices, you can make use of Odin to downgrade your phone. This is one of the most popular flashing tools other than the official fastboot method. The Odin interface is not the most user-friendly, but it will allow you to flash on to some Samsung devices, including the latest Galaxy phones.
Remember, some service providers lock down the bootloader on devices sold through its stores. These cellular carriers can be reluctant to allow users to unlock their phones unless the payment for the device is complete.
There additional tools are available for other manufacturers. You can check out this post at XDA developer lists various flashing tools for Motorola devices, including the recommended RSD Lite. If you own a Huawei device, you can use the Huawei Recovery Updater (HuRuUpdater) instead.
Since these tools came from third-party developers, keep in mind that they are not guaranteed to work and they don’t come with approval from manufacturers. Whether you use a third-party tool or the fastboot method, the risk of downgrading your phone remains the same. Always remember to back up your phone before you begin this process because flashing your device will wipe all your internal storage.
If the above steps didn’t work for your device, no need to worry. Below are some manufacturer-specific steps you can follow to downgrade your phone.
How to Downgrade Android Firmware on Samsung Devices
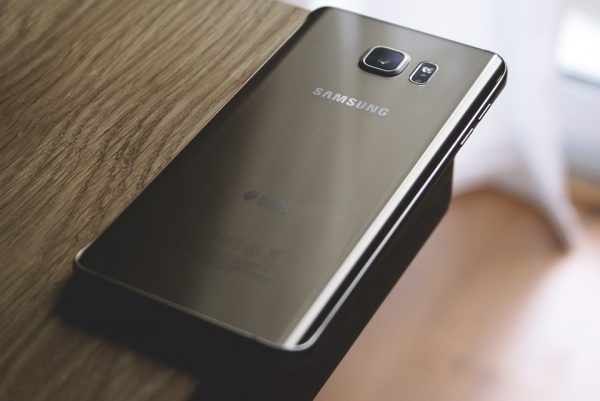
If you own a Samsung phone and you wish to downgrade the operating system, you’re in luck. Samsung phones are some of the easiest phones to flash with an older version of the operating system. To start the process, all you need is access to a computer. Then follow the steps below:
Step 1. Download the Odin flash tool on your computer. You will also need to download an older version of the stock firmware for your device on your computer.
Step 2. Next, extract files from both stock firmware and Odin. Launch the Odin tool and click the “PDA” button and select your extracted firmware file.
Step 3. Select both “Auto Reboot” and “F. Reset Time” options in the tool and uncheck the “Repartition” option.
Step 4. Shut down your device. For a few seconds, press and hold the Volume Down, Home, and Power buttons simultaneously. There will be a prompt on the screen, all you have to do is press the “Volume Up” and the phone will reboot into the download mode.
Step 5. Use a USB cable to connect your phone to your computer. Then, click “Start” from the Odin screen and it will start flashing the firmware file on your phone.
Step 6. Your device will reboot once the file is flashed. After the phone reboots, your device is now operating on an older version of Android.
How to Downgrade Android Firmware on Google Pixel Phones
Google provides you the factory images for your Nexus and Pixels devices. Remember, the steps below will wipe your phone’s data. You can use these images to go downgrade your firmware, just follow these steps:
Step 1. Download the factory image of the Android version you prefer on your Google device. Extract the files on your computer. Follow these four steps mentioned above: preparing for downgrade, installing the Android SDK platform tools, installing device drivers, and unlock the bootloader.
Step 2. Use a USB cable to connect your phone to your computer. Open the folder where your image files are located, hold down the Shift key, right-click on the window, and click “Open command window here”.
Step 3. Type in “adb reboot bootloader’” into the command line and press Enter. This will launch the device to bootloader mode.
Step 4. Type in “fastboot flashing unlock” to unlock your device’s bootloader. You will get a prompt on your phone, just accept that.
Step 5. Once you’ve unlocked the bootloader, type this command “flash-all” to start flashing the stock firmware on your phone. This will take a couple of minutes.
Step 6. Type “fastboot flashing lock” to relock the bootloader.
Step 7. Lastly, turn on your phone and your device is now running on your chosen version of Android OS.
How to Downgrade Android Firmware on Sony Android Phones
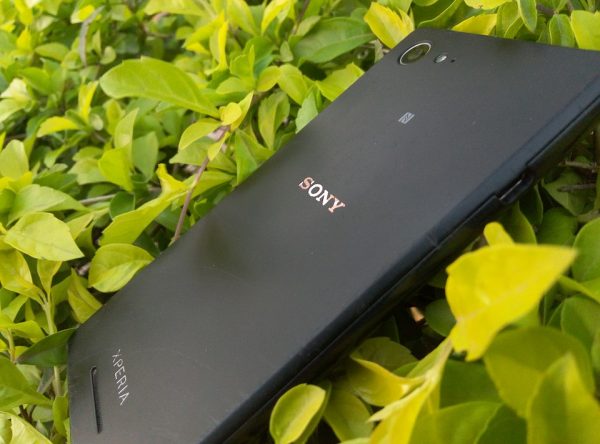
Sony smartphones can be easily downgraded, thanks to the Flashtool utility. It allows you to flash the stock firmware on your phone. Follow the steps below to downgrade your Sony phone:
Step 1. Download and install the Flashtool on your computer. Also, download the stock firmware for your Sony phone.
Step 2. Copy the .ftf firmware file, then paste it in this location C:\Flashtool\firmwares folder.
Step 3. Open the Flashtool, click on the thunder icon located on the top and select “Flashmode”.
Step 4. Choose your firmware file on the following screen. Make sure to check all the options in the Wipe section and click “Flash” at the bottom.
Step 5. Turn off your device. Connect your phone to your computer, then press the “Volume Down” button. Flashtool must automatically start the flashing process.
Step 6. Once the device is flashed, restart your phone.
How to Downgrade Android Firmware on LG Android Phones

If you want to downgrade your LG device, you won’t need to run any commands. You just need to download the stock firmware and a tool. Follow these simple steps:
Step 1. Download LG Flash Tool and the Android version you prefer on your computer.
Step 2. Turn off your device and connect it to your computer. Press-hold the “Volume Up” button on your phone to reboot your phone to the download mode.
Step 3. Open the LG Flash Tool on your computer and select the options as the following:
Select Type>CDMA
PhoneMode>DIAG
Select KDZ file>select the stock ROM file from your computer
Then, click the “CSE Flash” option.
Step 4. Click “Start” on the following screen.
Step 5. When you’re asked to select your country and language, don’t choose anything and just click “OK”.
Step 6. After the stock ROM is flashed, your phone will be replaced with an older version of the Android operating system.
Why You Wouldn’t Downgrade Android Devices?
Before you begin downgrading your Android phone or tablet, you should be aware that there are risks in doing so. Downgrading your Android isn’t generally supported and there might be some repercussions in doing so. Knowing what might happen to your device before downgrading is necessary. First, learning how to downgrade Android devices is a tedious task. It is not an easy process and is most certainly will result in deleting all your data. If you think your device is at risk of malware, there are Antivirus Apps to download on Android.
When you downgrade your operating system, you will be losing the features you originally have from your updated one. Be sure that you really want the features of the older version rather than the one you have. Additionally, rooting and downgrading your phone will disable the option for you to upgrade your phone. You will no longer receive updates and you might be stuck with the downgraded one you have.
Lastly, if you downgrade your latest Android OS, you might void your warranty and may potentially brick your phone making it nothing but just e-waste. Even though learning how to downgrade an Android device sounds scary, it is actually simple if you follow all the steps properly.