
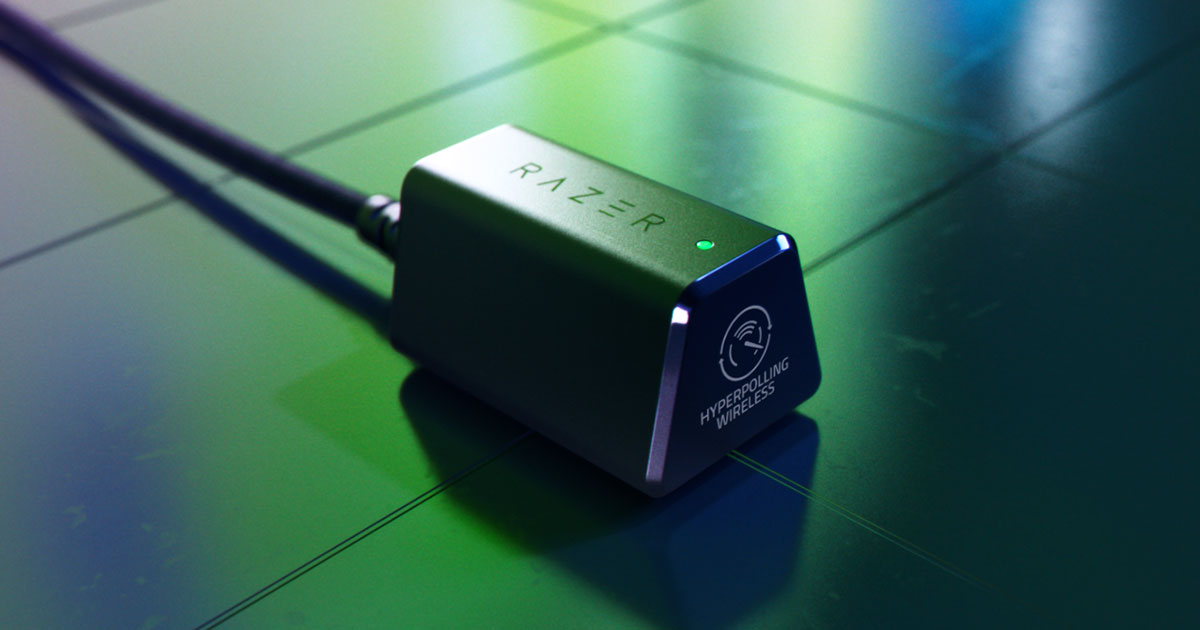
Are you a fan of Razer gaming peripherals and curious about how to pair the Razer Hyperpolling Dongle? Look no further! In this comprehensive guide, we will walk you through the process step by step, ensuring that you can unleash the full potential of your Razer devices. The Razer Hyperpolling Dongle is a game-changing accessory that provides a wireless connection with incredibly low latency, allowing for a smooth and responsive gaming experience. Whether you are a professional esports player or a casual gamer, the Razer Hyperpolling Dongle can significantly enhance your gameplay. So, let’s dive into the world of Razer Hyperpolling Dongle pairing and unlock the true power of your gaming setup!
Inside This Article
- Step 1: Checking Dongle Compatibility
- Step 2: Powering On Your Razer Device
- Step 3: Inserting the Hyperpolling Dongle
- Step 4: Activating Hyperpolling Mode
- Step 5: Finalizing the Pairing Process
- Troubleshooting – Issue 1: Dongle Not Recognized – Issue 2: Device Disconnecting
- Conclusion
- FAQs
Step 1: Checking Dongle Compatibility
Before you begin pairing your Razer Hyperpolling dongle, it’s crucial to ensure that it is compatible with your device. Not all devices are compatible with the dongle, so it’s essential to double-check this before proceeding.
The Razer Hyperpolling dongle is designed to work with select Razer devices, providing an enhanced wireless connection for improved gaming performance. To check the compatibility of your device, refer to the product specifications or user manual provided by Razer.
If you’re unsure about the compatibility or need further assistance, you can visit the Razer website or contact their customer support for clarification. They will guide you through the process and help you determine if your device is compatible with the Hyperpolling dongle.
Checking the compatibility beforehand will save you time and frustration, ensuring that you have the right equipment for a seamless pairing experience. Once you confirm your device’s compatibility, you can move on to the next step of powering on your Razer device.
Step 2: Powering On Your Razer Device
Once you’ve confirmed the compatibility of your Razer device with the Hyperpolling Dongle, the next step is to power on your device. The process may vary slightly depending on the specific Razer product you own, but generally, it involves a few simple steps.
To begin, locate the power button on your Razer device. It is usually located on the side or the front of the device, often marked with a power symbol. Press and hold the power button until you see the device’s indicator lights or display turn on. This indicates that your Razer device is now powered on and ready to be paired with the Hyperpolling Dongle.
Ensure that your Razer device has sufficient battery power to complete the pairing process. If your device is running low on battery, consider plugging it into a power source or charging it before proceeding with the pairing.
Once your Razer device is powered on, you’re now ready to move on to the next step of inserting the Hyperpolling Dongle. Make sure to keep your Razer device and the dongle within close proximity for a smoother and faster pairing process.
Step 3: Inserting the Hyperpolling Dongle
Inserting the Hyperpolling dongle into your device is a simple process that will enable you to take advantage of its enhanced wireless performance. Follow these steps to ensure a successful connection:
1. Locate the USB port on your device. This is typically found on the side or the back of your device, depending on the model.
2. Gently insert the Hyperpolling dongle into the USB port. Ensure that it is inserted securely but avoid using excessive force, as this may damage the port.
3. Once the dongle is inserted, you may need to wait a few moments for your device to recognize it. This can vary depending on the device and operating system you are using.
4. If your device prompts you to install any necessary drivers or software, follow the on-screen instructions to complete the installation process. This is usually a one-time setup and ensures optimal functionality.
5. Check for a confirmation message or indicator light on your device that signifies the successful connection of the Hyperpolling dongle. This may differ based on the device model, so refer to your device’s user manual if needed.
Once the Hyperpolling dongle is inserted and recognized by your device, you can begin enjoying the benefits of its enhanced wireless performance. Be sure to keep the dongle inserted for as long as you are using the device, as removing it will result in the loss of the Hyperpolling capabilities.
If you encounter any issues during the dongle insertion process or the device does not recognize the dongle, refer to the troubleshooting section for assistance.
Step 4: Activating Hyperpolling Mode
Once you have successfully inserted the Razer Hyperpolling Dongle into your device, it’s time to activate Hyperpolling Mode. This mode delivers an unparalleled gaming experience, providing you with ultra-fast and responsive wireless connectivity. Here’s how you can activate Hyperpolling Mode:
1. On your device, navigate to the settings menu. This is usually represented by a gear icon or can be found in the control panel.
2. Look for the “Wireless” or “Bluetooth” settings option. Select it to access the wireless settings menu.
3. Within the wireless settings, you should see an option for “Razer Hyperpolling Mode” or something similar. Click on this option to enable Hyperpolling Mode.
4. Once the Hyperpolling Mode is activated, you will notice a significant improvement in responsiveness and latency reduction. Your Razer device will now be optimized to deliver the highest performance for your gaming sessions.
Note: Depending on your device, the exact steps to activate Hyperpolling Mode may vary. If you are unsure about the process, refer to your device’s user manual or visit the Razer website for detailed instructions specific to your device model.
By activating Hyperpolling Mode, you can unlock the true potential of your Razer device and enjoy a superior gaming experience. Whether it’s in intense multiplayer battles or demanding single-player campaigns, the low-latency wireless connection provided by Hyperpolling Mode ensures you have the edge over your opponents.
Step 5: Finalizing the Pairing Process
Congratulations! You’ve made it to the final step of pairing your Razer Hyperpolling Dongle. This step is crucial to ensure that your device is properly connected and ready to deliver an exceptional wireless gaming experience. Follow these simple instructions to complete the process:
1. Once you have inserted the Hyperpolling Dongle into your device and activated Hyperpolling mode, the pairing process will begin automatically. This may take a few seconds to establish a solid connection.
2. During this time, it’s essential to avoid any interference or obstacles that could disrupt the pairing process. Keep your device and dongle in close proximity for the best signal strength.
3. You will know that the pairing process is complete when the LED indicator on the dongle stops blinking and stays illuminated. This indicates a successful connection between your Razer device and the dongle.
4. Once the LED indicator remains steady, you can start using your Razer device wirelessly. Enjoy the freedom of movement without compromising on performance!
It’s worth mentioning that if you experience any connectivity issues or the LED indicator continues blinking, it’s advisable to try reinserting the Hyperpolling Dongle or restarting your device. These troubleshooting steps often resolve minor pairing issues.
Remember to keep the dongle and your device in close proximity to maintain a stable connection. Additionally, it’s recommended to keep your dongle firmware up to date to ensure optimal performance.
With the pairing process successfully completed, you’re ready to immerse yourself in an unparalleled gaming experience with Razer’s Hyperpolling technology. Say goodbye to lag and interference, and focus on unleashing your true gaming potential.
Troubleshooting – Issue 1: Dongle Not Recognized – Issue 2: Device Disconnecting
While pairing your Razer Hyperpolling Dongle with your device, you may encounter a couple of common issues. Let’s take a look at each problem and explore possible solutions.
Issue 1: Dongle Not Recognized
If you’re experiencing difficulties with your Razer Hyperpolling Dongle not being recognized by your device, here are a few troubleshooting steps to try:
- Ensure that the dongle is properly inserted: Double-check that the dongle is securely connected to the USB port of your device. Sometimes, it may not be properly seated, leading to connectivity issues.
- Try a different USB port: Occasionally, certain USB ports may encounter compatibility issues. Unplug the dongle and try connecting it to a different USB port on your device.
- Restart your device: A simple restart can often resolve recognition issues. Restart your device and see if it now recognizes the dongle.
- Update device drivers: Outdated or incompatible device drivers can cause problems with recognizing external devices. Visit the manufacturer’s website and ensure that you have the latest drivers installed for your device.
If you have followed these steps and your dongle is still not being recognized, consider reaching out to Razer customer support for further assistance. They have a team of knowledgeable technicians who can help diagnose and resolve the issue.
Issue 2: Device Disconnecting
If you find that your Razer device keeps disconnecting or experiencing intermittent connectivity while using the Hyperpolling Dongle, try the following troubleshooting steps:
- Check the dongle connection: Ensure that the dongle is securely connected to the USB port of your device. A loose connection can lead to frequent disconnections.
- Remove nearby sources of interference: Other electronic devices or wireless signals in close proximity to your dongle and device can cause interference. Move these devices away or turn them off to improve connectivity.
- Update device firmware: Visit the Razer website and check for any available firmware updates for your specific device. Updating the firmware can often resolve connectivity issues.
- Reset the dongle: If all else fails, try resetting the dongle to its default settings. Check the user manual or Razer’s support website for instructions on how to perform a reset.
If you have exhausted these troubleshooting steps and your device continues to disconnect, it is advisable to contact Razer customer support for further assistance. They can provide more in-depth troubleshooting steps and guide you towards a resolution.
Remember, troubleshooting steps may vary depending on the specific model of your Razer device. Consulting the user manual or reaching out to customer support can provide you with the most accurate and tailored solutions to address these issues.
Conclusion
In conclusion, pairing the Razer Hyperpolling dongle is a simple and straightforward process that allows you to unlock the full potential of your wireless gaming setup. By following the steps outlined in this guide, you can ensure a seamless connection between your mouse and dongle, providing you with a highly responsive and lag-free gaming experience.
Remember to keep your dongle and mouse within close proximity during the pairing process and ensure they are both in pairing mode. Should you encounter any issues, such as connection drops or latency, try resetting both the dongle and mouse and repeating the pairing process. Additionally, make sure to check for firmware updates on both your mouse and dongle to ensure optimal performance.
With the Razer Hyperpolling dongle, you can enjoy the freedom of wireless gaming without sacrificing speed and precision. Take advantage of this innovative accessory and elevate your gaming experience to new heights.
FAQs
1. What is a Razer Hyperpolling Dongle?
2. How do I pair my Razer Hyperpolling Dongle with my device?
3. Can I use the Razer Hyperpolling Dongle with other devices?
4. Is the Razer Hyperpolling Dongle compatible with all Razer accessories?
5. Can I connect multiple Razer Hyperpolling Dongles to one device?