
Have you ever experienced a dead battery at the most inconvenient time? It’s frustrating, isn’t it? One of the possible causes of a dead battery is a faulty alternator. The alternator in your vehicle is responsible for charging the battery while the engine is running. If the alternator is not working properly, it may not be generating enough electricity to keep the battery charged, resulting in a drained battery.
Fortunately, there is a simple method to test the alternator’s functionality. By disconnecting the battery while the engine is running, you can determine if the alternator is effectively charging the battery. In this article, we will guide you through the steps to test your alternator by disconnecting the battery. This straightforward procedure will help you identify if your alternator is the culprit behind your battery problems, allowing you to take appropriate action and ensure a reliable vehicle.
Inside This Article
- Point 1: Understanding the Alternator
- Point 2: Precautions and Safety Measures
- Point 3: Steps to Disconnect the Battery
- Point 4: Testing the Alternator
- Conclusion
- FAQs
Point 1: Understanding the Alternator
The alternator is a crucial component of your vehicle’s electrical system. It is responsible for generating electrical power and charging the battery while the engine is running. Understanding how the alternator works is essential to effectively diagnose any issues related to it.
An alternator is essentially an electromechanical device that converts mechanical energy, provided by the engine’s crankshaft, into electrical energy. It consists of several key components, including a rotor, stator, voltage regulator, and diode bridge.
The rotor is a coil of wire that spins within the stator, which is a set of stationary coils. As the engine rotates the rotor, a magnetic field is created, inducing an electrical current in the stator windings. This current is then rectified and regulated by the voltage regulator before being sent to the battery and other electrical systems.
The alternator’s primary function is to keep the battery charged and supply electrical power to the vehicle’s electrical systems, such as lights, radio, and ignition system. It ensures that the battery remains fully charged and capable of providing the necessary power to start the engine and run the various electrical components.
Having a good understanding of how the alternator works will help you diagnose any potential issues more accurately. If you notice dimming headlights, a weak battery, or frequent battery replacements, it could be a sign of alternator problems. By knowing how the alternator functions, you can better assess the health of your vehicle’s electrical system and take appropriate action.
Point 2: Precautions and Safety Measures
When performing any operation involving your car’s electrical system, it is crucial to prioritize safety. Here are some precautions and safety measures to keep in mind when testing your alternator by disconnecting the battery:
1. Ensure that you are working in a well-ventilated area. The fumes that may come from the battery can be harmful if inhaled in a confined space.
2. Always wear appropriate protective gear, such as gloves and goggles, to shield yourself from any potential hazards. This is particularly important when handling the battery, as it contains corrosive acid.
3. Before starting, make sure the engine is turned off and the ignition key is removed. This will prevent any accidental starting of the engine during the procedure.
4. Take note of the battery’s polarity, which is indicated by the positive (+) and negative (-) signs. Ensure that you disconnect the negative terminal first to avoid any short circuits or electrical shocks.
5. Use insulated tools when handling the battery or any electrical components. This reduces the risk of electrical shock and damage to the components.
6. Never disconnect the battery or perform any electrical work while the engine is running. This can lead to voltage spikes and damage the alternator or other electrical components.
7. Avoid touching the terminals of the battery with bare hands or any metal objects. Doing so can cause a dangerous electrical shock or create a spark that could ignite battery gases.
8. If you notice any corrosion or damage on the battery terminals or cables, take the necessary precautions and address the issue before proceeding. Clean the terminals with a mixture of baking soda and water, and ensure a secure connection.
9. Double-check all connections and ensure that everything is properly tightened before reconnecting the battery. Loose or incorrect connections can lead to electrical malfunctions.
Remember, safety should always be your top priority when working with your car’s electrical system. By following these precautions and safety measures, you can minimize the risk of accidents and ensure a successful and safe alternator testing process.
Point 3: Steps to Disconnect the Battery
Disconnecting the battery is an essential step in testing the alternator. It ensures that there is no power running through the electrical system, making it safe to proceed with the testing process. Follow these steps to disconnect the battery:
Step 1: Start by locating the battery in your vehicle. It is typically found under the hood, although in some car models, it may be located in the trunk or under the rear seat.
Step 2: Before proceeding, make sure the engine is turned off and the vehicle is in a well-ventilated area. This will prevent any accidents and ensure your safety during the process.
Step 3: Identify the battery terminals. The positive terminal is typically marked with a “+” sign, while the negative terminal is marked with a “-” sign. Sometimes, the positive terminal may be marked with a red or pink cover.
Step 4: Put on a pair of gloves and safety glasses to protect yourself from any potential hazards. Battery terminals can be dirty and may contain corrosive substances, so it is important to take necessary precautions.
Step 5: Using a wrench or a socket, loosen the nut that secures the negative terminal. In most cases, the negative terminal is disconnected first to prevent any accidental electrical discharge.
Step 6: Once the nut is loose, gently pull the negative terminal clamp away from the battery post. Be careful not to touch any metal surfaces with the terminal clamp or tools to avoid creating a short circuit.
Step 7: After disconnecting the negative terminal, repeat the same process for the positive terminal. Loosen the nut, pull the positive terminal clamp away from the battery post, and set it aside.
Step 8: Congratulations! You have successfully disconnected the battery. Remember to store the disconnected terminals away from the battery posts to prevent accidental contact.
Now that the battery is disconnected, you can proceed with testing the alternator to determine if it is functioning optimally or needs any repairs or replacements. It’s important to follow these steps carefully and take safety precautions to ensure a smooth and successful testing process.
Point 4: Testing the Alternator
After safely disconnecting the battery, the next step is to test the alternator to ensure that it is functioning properly. Testing the alternator will help you determine if it is charging the battery correctly, as well as identify any potential issues that may need to be addressed.
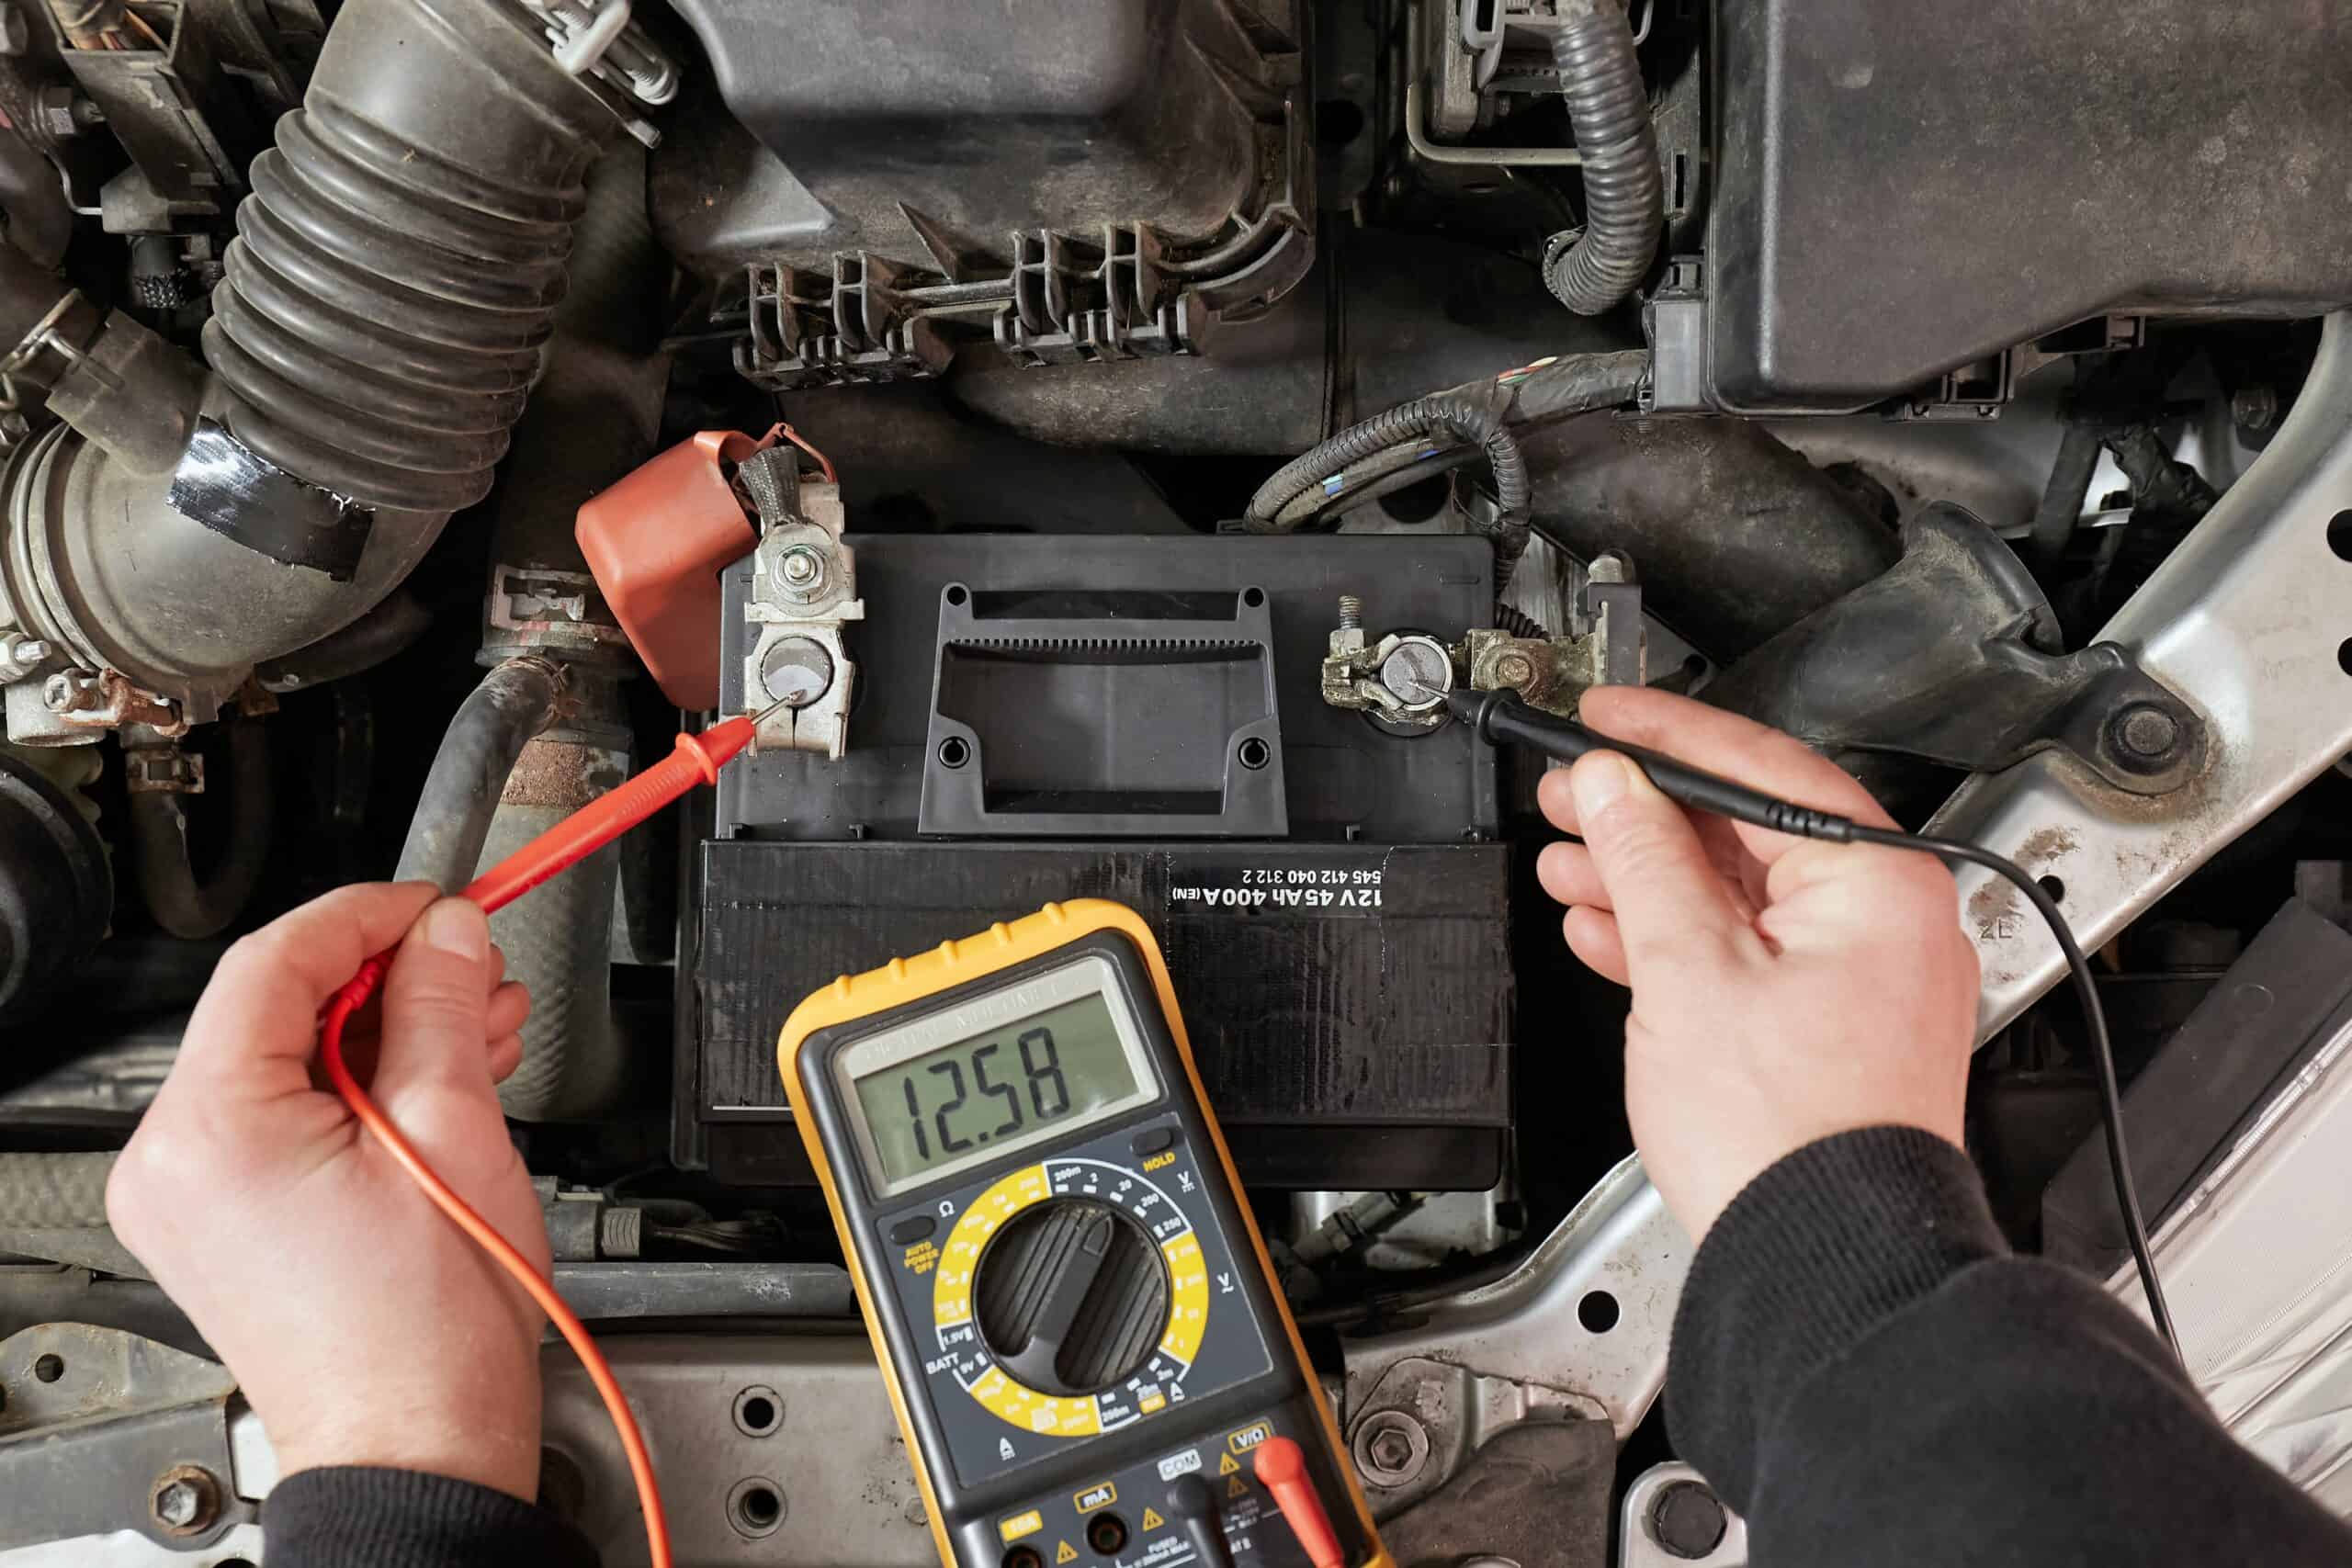
There are several methods you can use to test the alternator. One of the simplest ways is to use a multimeter, which is a handy tool for measuring voltage, current, and resistance. Here’s a step-by-step guide on how to test the alternator using a multimeter:
- Start by setting your multimeter to the DC voltage setting.
- Connect the positive (red) lead of the multimeter to the positive terminal of the battery.
- Connect the negative (black) lead of the multimeter to the negative terminal of the battery.
- Turn on your vehicle’s engine and let it run at idle speed.
- Observe the voltage reading on the multimeter. A healthy alternator should be producing a voltage between 13.8 to 14.4 volts.
- If the voltage reading falls below 13.8 volts, it may indicate a problem with the alternator, such as a faulty voltage regulator or a worn-out alternator belt.
- You can also perform a load test on the alternator by turning on electrical accessories like headlights, air conditioning, and radio while observing the voltage reading. A working alternator should be able to maintain a steady voltage even with the increased load.
- Please note that if the voltage reading is significantly higher than 14.4 volts or fluctuates erratically, it may indicate a defective alternator that needs to be replaced.
Remember, if you’re not comfortable performing these tests yourself, it is always recommended to consult a professional mechanic who has the necessary tools and expertise to accurately diagnose alternator issues.
Conclusion
In conclusion, testing your alternator by disconnecting the battery can be a helpful diagnostic method to determine if your alternator is functioning properly. It allows you to assess the charging system’s performance and identify any potential issues that may affect your car’s electrical system.
Remember, always exercise caution when performing any electrical tests on your vehicle. If you are not comfortable or have doubts about your abilities, it is best to consult a professional mechanic to ensure accurate and safe results.
By understanding the symptoms of a failing alternator and utilizing the method of disconnecting the battery to test it, you can save time and money by identifying and addressing any issues early on. Proper maintenance and regular inspections are crucial to keep your alternator and electrical system in optimal condition, ensuring the reliability and efficiency of your vehicle.
FAQs
Here are some frequently asked questions (FAQs) about testing an alternator by disconnecting the battery:
1. Why would I want to test the alternator by disconnecting the battery?
Testing the alternator by disconnecting the battery is a diagnostic technique used to determine if the alternator is functioning properly. When the battery is disconnected, the alternator is the sole provider of electrical power to the vehicle. By observing the behavior of the vehicle’s electrical system, you can assess the performance of the alternator.
2. How do I disconnect the battery to test the alternator?
To disconnect the battery, locate the negative terminal (-) and use a wrench or socket to loosen the bolt securing the cable. Once loosened, gently remove the negative cable from the battery post. Be careful to avoid touching any metal surfaces with the cable during the testing process.
3. What should I look for when I disconnect the battery?
After disconnecting the battery, start the vehicle and observe the behavior of the electrical system. If the alternator is functioning properly, the engine should continue to run smoothly, and the lights should be bright and not flickering. If the engine stalls or the lights dim or flicker, it may indicate a problem with the alternator.
4. Can I test the alternator without disconnecting the battery?
Yes, you can test the alternator without disconnecting the battery by using a multimeter to measure the voltage output. However, the disconnection method provides a more accurate assessment of the alternator’s performance under load.
5. What are the risks of disconnecting the battery to test the alternator?
Disconnecting the battery can reset certain settings in the vehicle’s electronic systems, such as the radio presets or the clock. Additionally, be cautious when working with the battery as it contains corrosive acid and can produce sparks. It’s recommended to wear safety goggles and gloves when handling the battery.