
Introduction:
Roomba vacuum cleaners have revolutionized the way we keep our homes clean. These smart devices effortlessly navigate our floors, leaving them spotless. However, like any other electronic device, Roombas require regular maintenance, and one crucial component that may need replacing over time is the battery. Whether you’re experiencing a decrease in runtime or your Roomba won’t hold a charge anymore, replacing the battery can breathe new life into your cleaning buddy.
In this comprehensive guide, we will walk you through the process of replacing a Roomba battery. From understanding the different battery types to the step-by-step procedure, we’ve got you covered. So, let’s dive in and get your Roomba back up and running in no time!
Inside This Article
- Step 1: Gather necessary supplies
- Step 2: Prepare the Roomba for battery replacement
- Step 3: Remove the old battery
- Step 4: Install the new battery
- Step 5: Test the new battery
- Conclusion
- FAQs
Step 1: Gather necessary supplies
Before you begin replacing the battery of your Roomba, it is important to gather all the necessary supplies. Having everything at hand will ensure a smooth and efficient battery replacement process. Here is a list of items you will need:
- New Roomba battery: Make sure to purchase a compatible battery for your specific Roomba model. Refer to the Roomba user manual or contact the manufacturer for the correct battery model.
- Small screwdriver set: You will need a set of small screwdrivers to remove the screws that secure the battery compartment.
- Anti-static wrist strap (optional): An anti-static wrist strap is recommended to prevent any static electricity from damaging sensitive components of the Roomba.
- Clean cloth or paper towel: It is always a good idea to have a clean cloth or paper towel nearby to wipe any dust or debris that may accumulate during the battery replacement process.
By making sure you have all these supplies ready, you can proceed to the next steps of the battery replacement process without any interruptions.
Step 2: Prepare the Roomba for battery replacement
Before diving into the battery replacement process, it’s crucial to properly prepare your Roomba. Taking the time to follow these steps will ensure a smooth and successful battery replacement:
- Turn off your Roomba: Before doing any work on the Roomba, make sure it’s powered off completely. This will prevent any potential accidents or malfunctions.
- Remove the cleaning bin: The cleaning bin is typically located on the back of the Roomba. Look for the latch or release button to disengage it. Slide out the cleaning bin and set it aside for now.
- Inspect and clean the Roomba: Take a moment to inspect the Roomba’s body and cleaning brushes for any debris or dirt. Use a soft cloth or brush to gently remove any buildup and ensure a clean working environment for the battery replacement.
- Remove the side brush and filters: Depending on the model of your Roomba, there may be a side brush and filters that need to be removed. Check your Roomba’s user manual for specific instructions on how to remove these components.
- Secure the Roomba: It’s important to secure the Roomba in a stable and elevated position during the battery replacement process. This can be done by placing it on a flat surface or using a clamp or grip mechanism to hold it in place.
Once you have completed these steps, your Roomba is now ready for the battery replacement process. By taking the time to prepare the Roomba properly, you ensure a safe and efficient battery replacement experience.
Step 3: Remove the old battery
Now that you have gathered the necessary supplies and prepared the Roomba for battery replacement, it’s time to remove the old battery. This step may vary depending on the model of your Roomba, so make sure to consult your user manual for specific instructions. Here is a general guide to help you through the process:
1. Ensure that your Roomba is turned off and disconnected from the charging station. Safety should always be the top priority when handling any electronic device.
2. Flip your Roomba over so that the underside is facing up. You may want to place a soft towel or cloth underneath to prevent any scratches or damage to the surface.
3. Look for the battery compartment. On most Roomba models, it is located at the back of the device. It is a rectangular-shaped compartment with a latch or a screw securing it in place.
4. If there is a latch, use your fingers or a small tool to release it. Gently pry it open without applying too much force. If there is a screw, use a screwdriver to unscrew it and remove the cover.
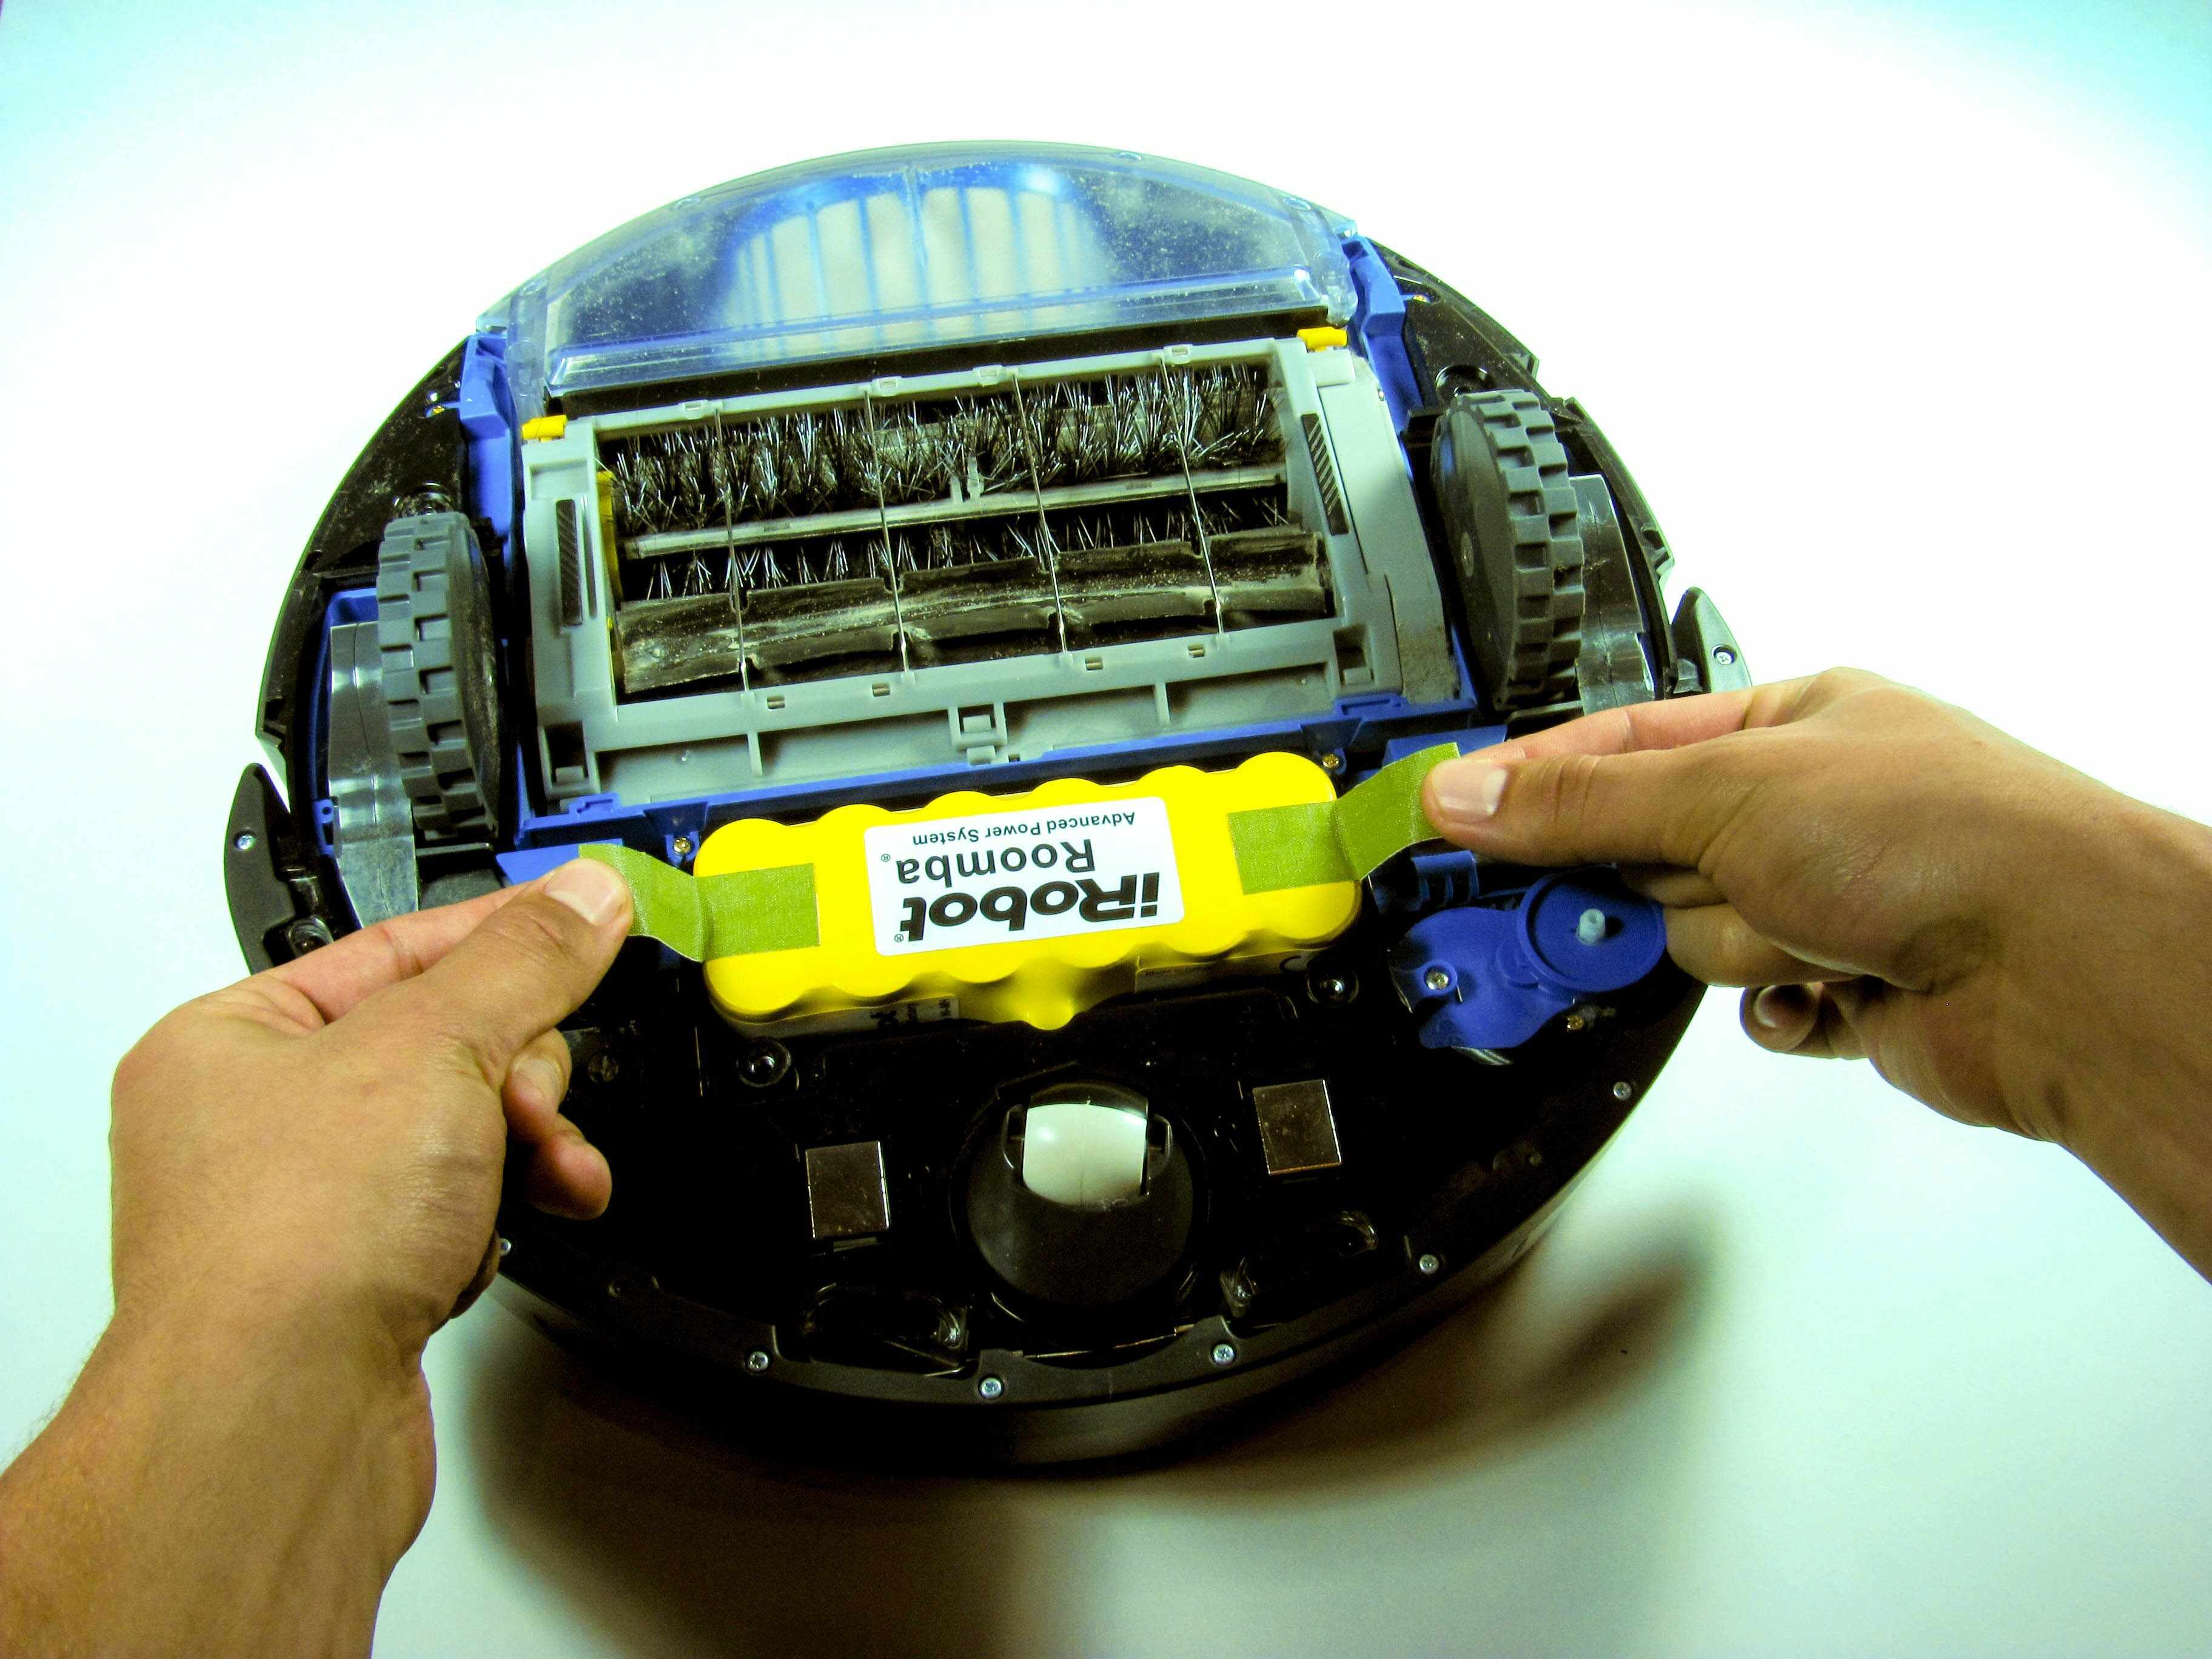
5. Inside the battery compartment, you will find the old battery. Depending on the model, it may be attached with wires or connectors. Carefully disconnect any wires or detach the connectors, making sure to remember their positions for reassembly later.
6. Once the connections are detached, carefully lift the old battery out of the compartment. Be cautious not to damage any surrounding components or wires.
7. Take a moment to inspect the battery and check for any signs of wear, damage, or leakage. If you notice any issues, it’s best to dispose of the old battery properly and select a new one for replacement.
8. After removing the old battery, clean the battery compartment area using a soft, dry cloth. This will help ensure a clean environment for the new battery installation.
With the old battery successfully removed, you can now proceed to the next step – installing the new battery. Remember to handle the old battery with care, and if applicable, dispose of it following appropriate guidelines for battery recycling.
Step 4: Install the new battery
Now that you have successfully removed the old battery from your Roomba, it’s time to install the new one. Follow these steps carefully to ensure a proper installation:
- Prepare the new battery: Start by unpacking the new battery and inspecting it for any visible damage. Ensure that the contacts on the battery are clean and free from any debris.
- Align the battery: Position the new battery so that the contacts line up with the corresponding contacts in the battery compartment of the Roomba. Make sure the battery is properly oriented, with the positive and negative terminals aligned correctly.
- Insert the battery: Gently slide the battery into the battery compartment, ensuring that it fits snugly and securely. Be careful not to force the battery in, as this could damage the contacts or the battery compartment itself.
- Secure the battery: Once the battery is fully inserted, you may need to secure it in place using any provided clips or fasteners. Refer to the manufacturer’s instructions to determine if this step is necessary for your particular Roomba model.
- Reassemble the Roomba: Now that the new battery is installed, carefully reattach any covers or panels that were removed earlier in the process. Ensure that they are securely fastened to prevent any dust or debris from entering the Roomba.
- Charge the new battery: Before using your Roomba, it’s important to give the new battery a full charge. Place your Roomba on its charging dock and allow it to charge for the recommended amount of time specified by the manufacturer.
- Reset the Roomba: In some cases, you may need to reset your Roomba after installing a new battery. Refer to the Roomba’s user manual or manufacturer’s instructions to determine if a reset is necessary and how to perform it.
By following these steps, you can successfully install a new battery in your Roomba and ensure that it continues to efficiently clean your floors. Remember, it’s always best to consult the manufacturer’s instructions specific to your Roomba model for the most accurate installation process.
Step 5: Test the new battery
Once you have successfully installed the new battery in your Roomba, it’s crucial to test it to ensure everything is functioning as it should. Testing the new battery will give you peace of mind knowing that your Roomba will continue to clean your home efficiently. Follow the steps below to test the new battery:
- Place the Roomba on its docking station and ensure it is properly connected.
- Allow the Roomba to charge for at least 3 hours or until the battery indicator on the Roomba turns green, indicating a full charge.
- Once the Roomba is fully charged, remove it from the docking station and place it in an open area with plenty of space for it to navigate.
- Press the “Clean” button on the Roomba to start a cleaning cycle.
- Observe the Roomba as it starts cleaning. Pay attention to its movements, speed, and any unusual sounds.
- Monitor the battery level indicator on the Roomba. It should gradually decrease as the Roomba continues to clean.
- Allow the Roomba to clean until the battery level reaches critically low, or until the Roomba returns to its docking station for recharging.
- Check the overall cleaning performance of the Roomba. Is it cleaning efficiently and effectively? Are there any areas that it is not reaching?
If you notice any issues during the test, such as the Roomba not starting, running out of battery too quickly, or not cleaning as expected, it may indicate a problem with the new battery or the installation process. In such cases, it is recommended to double-check the battery installation and consult the manufacturer or a professional for further assistance.
On the other hand, if the Roomba performs well during the test, you can rest assured knowing that the new battery is working properly, and your Roomba will continue to provide excellent cleaning performance in the future.
Conclusion
Replacing a Roomba battery is a simple and cost-effective solution to ensure your robot vacuum continues to perform at its best. By following the step-by-step instructions, you can safely and efficiently replace the battery in your Roomba. Remember to choose a compatible battery and take proper safety precautions during the replacement process.
Whether you want to extend the lifespan of your existing Roomba or restore the cleaning power of an older model, a new battery can make a significant difference. With the right tools and knowledge, you can enjoy uninterrupted cleaning sessions and a fresh battery that lasts longer.
Don’t let a worn-out battery hinder your Roomba’s performance. Take care of your robot vacuum by routinely checking and replacing the battery when needed. Discover the satisfaction of owning a Roomba that consistently delivers exceptional cleaning results in every corner of your home.
FAQs
1. How often do I need to replace the battery on my Roomba?
Typically, Roomba batteries last between 1 to 2 years, depending on the usage and charging habits. However, some factors like excessive use or improper charging can shorten their lifespan. If you notice a significant decrease in your Roomba’s runtime or it fails to hold a charge, it may be time to replace the battery.
2. How do I know if my Roomba’s battery needs replacement?
There are a few signs that indicate it’s time to replace the battery of your Roomba. These include a consistently short runtime, difficulty holding a charge, or the Roomba not charging at all. Additionally, if the battery is visibly damaged or swollen, it’s essential to replace it immediately for safety reasons.
3. Where can I purchase a new battery for my Roomba?
You can find replacement batteries for your Roomba on several online platforms, including official Roomba distributors, e-commerce websites such as Amazon and eBay, and specialized retailers for mobile accessories. Make sure to choose a reputable seller and select a battery compatible with your specific Roomba model.
4. Can I replace the battery of my Roomba myself?
Yes, you can replace the battery of your Roomba yourself, as it is designed for user-friendly maintenance. Simply follow the instructions provided by the manufacturer or refer to online tutorials for guidance. Remember to handle the battery with care and ensure proper disposal of the old battery according to local regulations.
5. How long does it take to replace the battery of a Roomba?
The time required to replace the battery of your Roomba can vary depending on your experience and familiarity with the process. On average, it can take around 15 to 30 minutes to complete the replacement, including disassembling the Roomba, replacing the battery, and reassembling the unit. However, it may take longer for first-time users or those facing any difficulties during the process.