
If you often find yourself frustrated with weak cell phone signals and dropped calls, a WeBoost signal booster might be just the solution you need. Whether you live in a rural area with spotty coverage or a building with thick walls that obstruct the signal, a signal booster can significantly improve your mobile network experience. In this article, we will guide you through the process of installing a WeBoost signal booster step by step. From understanding the components to finding the optimal placement, we will cover everything you need to know to boost your cell phone signal strength. Say goodbye to missed calls and slow internet, and say hello to reliable and fast mobile connectivity.
Inside This Article
- Things to Consider Before Installing a WeBoost Signal Booster
- Step 1: Unpack the Signal Booster Kit
- Step 2: Mounting the External Antenna
- Step 3: Installing the Indoor Antenna
- Step 4: Connecting the Cables
- Step 5: Powering On the Signal Booster
- Troubleshooting Tips
- Conclusion
- FAQs
Things to Consider Before Installing a WeBoost Signal Booster
Installing a WeBoost signal booster can significantly improve your cell phone signal strength and enhance your mobile network experience. However, before you go ahead and install the signal booster, there are a few important things to consider:
- Check your signal strength: Before investing in a signal booster, it’s crucial to determine the strength of your existing cell phone signal. You can do this by using your phone’s signal strength indicator or by downloading a signal strength app. If your signal is consistently weak or intermittent, a signal booster may be a viable solution.
- Identify the problem areas: Take note of the specific areas in your home or office where you experience the weakest signal. This will help you decide where to install the signal booster for maximum effectiveness. It’s important to ensure that the signal booster is placed strategically to cover the areas that need improvement the most.
- Understand your network compatibility: Different signal boosters are designed to work with specific networks, such as GSM, CDMA, or LTE. Make sure you choose a signal booster that is compatible with your network provider. This information can usually be found on the product packaging or on the manufacturer’s website.
- Check local regulations: Some countries or regions may have specific regulations governing the use of signal boosters. Before installing a signal booster, it’s essential to check whether you need any permits or approvals to avoid any potential legal issues. You can consult your local authorities or check with your network provider for guidance.
- Evaluate your space: Consider the size of the area you want to cover with the signal booster. Some signal boosters are more suitable for smaller spaces like apartments, while others are designed to cover larger areas like offices or multi-floor buildings. Choose a signal booster that matches the size of your space to ensure optimal signal enhancement.
- Assess your installation options: Signal boosters typically come with different installation options, including window-mounted, wall-mounted, or attic-mounted. Assess your space and determine the most convenient installation method for your needs. Keep in mind that certain installation options may require additional equipment or tools.
By considering these factors before installing a WeBoost signal booster, you can ensure a smoother installation process and maximize the benefits of your signal booster. Now that you are equipped with this knowledge, you can proceed with confidence and enjoy improved cell phone signal strength and network connectivity.
Step 1: Unpack the Signal Booster Kit
Before you begin the installation process for your WeBoost signal booster, it’s essential to properly unpack the signal booster kit. This step ensures that you have all the necessary components and accessories to set up your signal booster effectively.
Here are the key steps to unpacking your signal booster kit:
- Open the box containing your WeBoost signal booster.
- Check to make sure that all the components are present. Typically, your signal booster kit will include an external antenna, an indoor antenna, a signal booster unit, coaxial cables, and power adapters.
- Inspect each component for any visible damage. If you notice any defects or missing parts, contact WeBoost customer support for assistance.
- Read the user manual and familiarize yourself with the setup instructions. This will give you a better understanding of the installation process and ensure that you don’t overlook any important steps.
- Organize the components and accessories in a neat and orderly manner, so they are easily accessible during the installation process.
By taking the time to thoroughly unpack your signal booster kit, you’ll have a clear picture of what’s included and be better prepared to proceed with the installation process. This step ensures a smoother and more efficient setup overall.
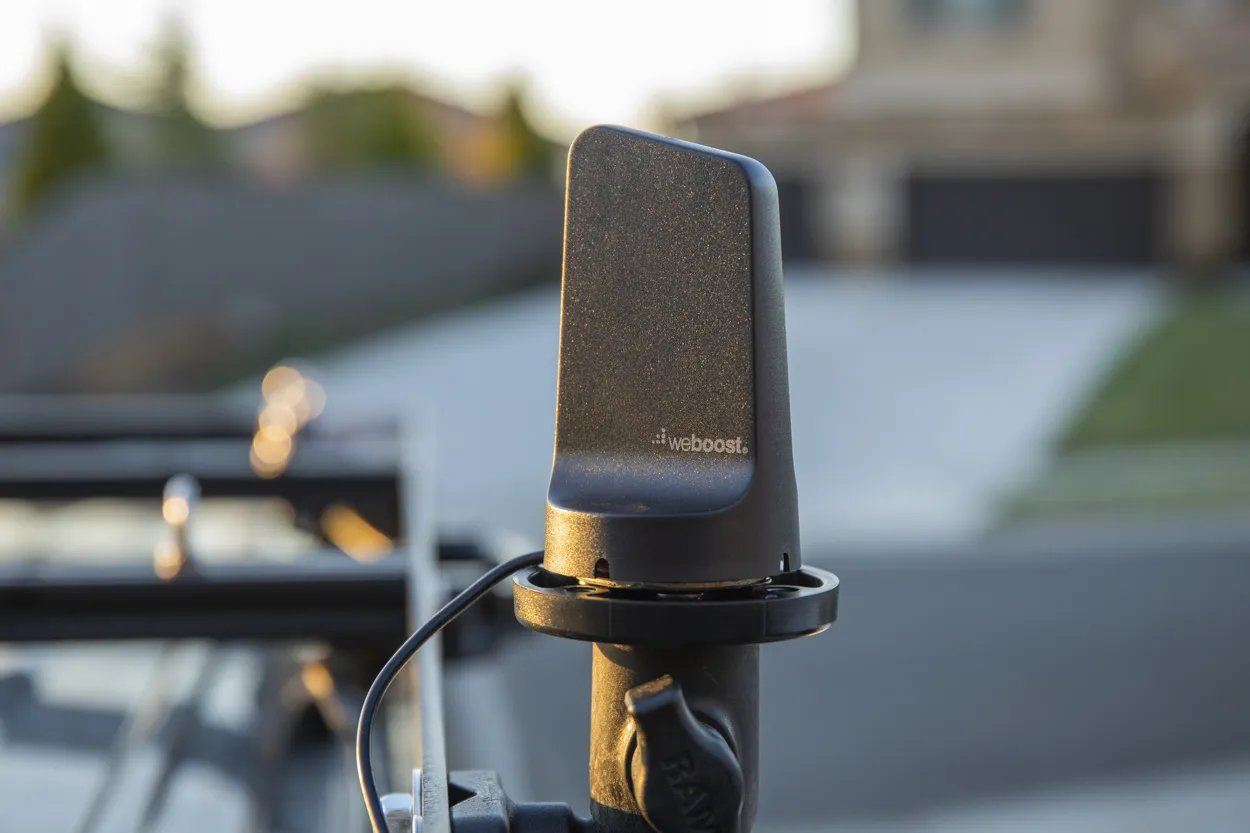
Step 2: Mounting the External Antenna
Mounting the external antenna is a crucial step in the installation process of your WeBoost signal booster. The external antenna is responsible for capturing the weak cell signal from outside your building and transmitting it to the signal booster. Here’s a step-by-step guide on how to mount the external antenna:
- Choose the Right Location: Start by selecting the optimal location for the external antenna. Ideally, it should be placed where the cell signal is strongest. This could be on the roof, at the highest point of your building, or on a pole outside. Take into consideration factors such as obstructions, distance from the nearest cell tower, and surrounding buildings.
- Find the Best Mounting Option: WeBoost offers various mounting options for the external antenna, such as brackets, poles, or adhesive mounts. Choose the mounting option that suits your specific situation and provides the most secure and stable installation.
- Assemble the Mounting Components: Follow the instructions provided in the WeBoost signal booster kit to assemble the mounting components. This may involve attaching the antenna to the pole, installing brackets, or securing the adhesive mounts.
- Position the Antenna: Once the mounting components are assembled, position the external antenna according to the chosen location. Make sure it is facing towards the nearest cell tower and is elevated as much as possible to maximize signal reception.
- Secure the Antenna: Use the appropriate tools and hardware to securely fasten the external antenna to its mounting location. Ensure that it is tightly in place to withstand any weather conditions and vibrations.
- Connect the Cable: Carefully connect the cable from the external antenna to the designated port on the signal booster. Ensure that the connection is secure and tight to avoid any signal loss.
- Seal and Protect: After connecting the cable, it is important to seal any openings or gaps around the cable entry point. This will prevent water or moisture from entering the building and causing damage to the signal booster or antenna.
By following these steps, you will successfully mount the external antenna for your WeBoost signal booster. A properly installed and positioned external antenna will greatly enhance your cell signal reception and improve the overall performance of your signal booster system.
Step 3: Installing the Indoor Antenna
Once you have successfully mounted the external antenna in the previous step, it’s time to move on to installing the indoor antenna. The indoor antenna plays a crucial role in distributing the improved signal within your home or office.
Before you begin, make sure you have chosen a suitable location for the indoor antenna. Ideally, it should be placed in an area with good signal coverage, such as near a window or at the center of your space.
Here are the steps to follow for installing the indoor antenna:
- Identify an ideal location: Find a spot where the indoor antenna will have an unobstructed line of sight to the area where you need signal improvement the most.
- Mount the indoor antenna: Using the included mounting bracket or adhesive pad, securely attach the indoor antenna to a stable surface. Make sure it is positioned vertically and at a sufficient height for optimal signal distribution.
- Connect the cable: Take the cable connected to the indoor antenna and plug it into the corresponding port on the signal booster unit. Ensure that it is firmly and securely connected to avoid any signal loss.
- Secure the cable: To prevent tripping hazards and maintain a neat appearance, use cable clips or adhesive pads to secure the cable along the wall or baseboard, leading it from the indoor antenna to the signal booster.
- Check signal strength: Once everything is properly set up, power on the signal booster and check the signal strength on your mobile device. Walk around your space to ensure the improved signal is reaching all areas that previously had weak or no signal.
Installing the indoor antenna is a crucial step to ensure effective signal boosting. By strategically placing it in the right location and following these steps carefully, you can maximize the performance of your WeBoost signal booster and enjoy a reliable and strong cellular signal throughout your premises.
Step 4: Connecting the Cables
Once you have successfully mounted both the external and indoor antennas, it’s time to connect the cables to complete the installation of your WeBoost signal booster. Properly connecting the cables is crucial for ensuring optimal signal amplification and performance of your booster.
Here are the steps to connect the cables:
- Take the coaxial cable connected to the outdoor antenna and connect it to the “Outdoor” or “Donor” port on the signal booster unit. Make sure to securely tighten the connector to avoid any signal loss.
- Locate the coaxial cable that came with your signal booster kit. Connect one end of this cable to the “Indoor” or “Coverage” port on the signal booster unit.
- Now, find the other end of the coaxial cable and connect it to the indoor antenna. Again, ensure that the connection is tight and secure.
It’s essential to route the cables properly to avoid any interference or signal degradation. Keep the cables away from other electrical or metal structures that could cause signal interference. You can use cable clips or ties to secure the cables in a neat and organized manner along walls or ceilings.
Once you have connected all the cables, double-check the connections to ensure they are properly secured. A loose connection can result in weakened signal transmission and reduced performance of your signal booster.
As a final step, you can power on the signal booster unit and monitor the signal strength on your devices. With properly connected cables, you should notice a significant improvement in signal reception and coverage.
Remember that every installation may have specific requirements depending on the model of your WeBoost signal booster. Always refer to the user manual or instructions provided by the manufacturer for accurate and detailed installation steps.
Step 5: Powering On the Signal Booster
Now that you have successfully mounted the external and indoor antennas and connected the necessary cables, it’s time to power on the signal booster. This step is crucial as it ensures the proper functioning of the booster and enhances your mobile network signal.
To power on the signal booster, locate the power supply unit that came with your WeBoost signal booster kit. The power supply unit usually consists of a plug that needs to be inserted into a power outlet.
Next, connect the other end of the power supply cable to the power port on the signal booster unit. Ensure that the connection is secure to avoid any interruptions or power-related issues.
Once the power supply is connected, you should see the signal booster unit light up. Most signal boosters have indicator lights that display the status of the device. These lights indicate if the booster is functioning correctly or if there are any errors or issues that need to be addressed.
Take a moment to familiarize yourself with the indicator lights on your specific WeBoost signal booster model. The lights might vary slightly depending on the model, but they generally include indicators for power, signal strength, and any potential error codes.
After powering on the signal booster, it will start amplifying the mobile network signal. This amplification helps to improve the cellular reception in your area, providing you with a stronger and more reliable mobile network connection.
It’s important to note that the signal booster might take a few minutes to fully optimize the signal. During this time, monitor the signal strength indicator lights on the booster unit. If you notice any error codes or a lack of improvement in signal strength, refer to the troubleshooting tips provided in the signal booster manual or contact the WeBoost support team for assistance.
Once the signal booster is powered on and functioning properly, you can enjoy the benefits of improved mobile network coverage. Whether you’re at home, in the office, or on the road, you’ll experience fewer dropped calls, faster data speeds, and better overall connectivity.
Remember to periodically check the indicator lights on the signal booster unit to ensure it continues to function correctly. If you encounter any issues or notice a significant decline in signal strength, it may be a sign that the signal booster requires maintenance or adjustment.
By following these steps and properly powering on your WeBoost signal booster, you’ll ensure optimal performance and enjoy a better mobile network experience.
Troubleshooting Tips
If you’re experiencing any issues with your WeBoost signal booster, don’t worry! Here are some troubleshooting tips to help you resolve common problems:
1. Check the power source: Ensure that your signal booster is properly connected to a power source. Double-check the power adapter and make sure it’s plugged in securely. Consider trying a different power outlet to ensure it’s not an issue with the electrical supply.
2. Inspect the cables: Examine all the cables connected to your signal booster. Ensure that they are firmly plugged in and free from any damage or fraying. Replace any faulty cables or connectors if necessary.
3. Reposition the antennas: The placement of your external and indoor antennas plays a crucial role in signal reception. Try adjusting the position and direction of the antennas to optimize signal strength. Experiment with different locations to find the best placement for maximum coverage.
4. Check for signal interference: Other electronic devices or structures in your vicinity can interfere with the signal reception of your booster. Move away or turn off devices like microwaves, cordless phones, or Bluetooth devices. Additionally, ensure that the external antenna is positioned away from any metal objects or obstacles that could block the signal.
5. Check for signal overload: In some cases, if the incoming signal is too strong, the booster may struggle to amplify it properly. This can result in a weak or unstable signal. Install an attenuator, which reduces the strength of the incoming signal, to prevent signal overload.
6. Update your firmware: Check if there are any available firmware updates for your signal booster. Manufacturers often release firmware updates to improve performance and address certain issues. Visit the manufacturer’s website or contact their support for the latest firmware version and instructions on how to update it.
7. Contact customer support: If you’ve tried all the troubleshooting tips and are still experiencing issues, don’t hesitate to contact the customer support of WeBoost or the retailer you purchased the signal booster from. They have experts who can provide personalized assistance and guide you through the resolution process.
Remember, troubleshooting may vary depending on the specific model of your WeBoost signal booster. Consult the user manual for your device for more detailed troubleshooting steps and guidance.
Conclusion
Installing a WeBoost signal booster is a great solution to improve the signal strength and quality of your cell phone network. Whether you are struggling with weak signals in a remote area or facing signal interference in your home or office, a signal booster can make a significant difference.
By following the step-by-step guide outlined in this article, you can easily set up a WeBoost signal booster and enjoy improved call quality, faster data speeds, and better overall connectivity. Whether you are a business professional, a remote worker, or simply someone who relies on their cell phone for communication, the installation of a signal booster can greatly enhance your mobile experience.
Don’t let weak signals hinder your productivity or communication. Take the leap and experience the benefits of a WeBoost signal booster today!
FAQs
1. What is a WeBoost Signal Booster?
A WeBoost Signal Booster is a device that enhances cellular signal strength for mobile devices. It amplifies weak signals from the mobile network and improves data speeds and call quality.
2. How does a WeBoost Signal Booster work?
A WeBoost Signal Booster consists of an outdoor antenna, an amplifier, an indoor antenna, and cables. The outdoor antenna captures the weak signal from the mobile network, sends it to the amplifier, which then boosts the signal strength. The boosted signal is then transmitted to the indoor antenna, providing improved mobile network coverage inside the building.
3. Can I install a WeBoost Signal Booster myself?
Yes, you can install a WeBoost Signal Booster yourself. The installation process typically involves mounting the outdoor antenna, routing the cables, connecting the amplifier and indoor antenna, and powering on the system. The WeBoost Signal Booster comes with detailed installation instructions, and there are also video tutorials available to guide you through the process.
4. Do I need any special tools to install a WeBoost Signal Booster?
The installation of a WeBoost Signal Booster does not require any special tools. However, you may need a ladder or other equipment to mount the outdoor antenna at a suitable height, depending on your building’s structure. Ensure you have a power source available for the amplifier as well.
5. Will a WeBoost Signal Booster work with all mobile carriers?
A WeBoost Signal Booster is designed to work with all major mobile carriers in the United States and Canada, including AT&T, Verizon, T-Mobile, and Sprint. It is compatible with both 3G and 4G LTE networks. However, it’s essential to check the specific model you are purchasing to ensure it supports the frequencies and bands used by your mobile carrier.