
Oh no! You accidentally dropped your iPhone into a pool or spilled water on it. Your heart sinks as you realize that the precious device could be damaged, especially the camera. The camera has become an integral part of our lives, capturing precious memories and allowing us to express our creativity.
In this article, we will explore the steps to take when water finds its way into your iPhone camera. Whether it’s a result of a water-related accident or simply getting caught in the rain, we’ve got you covered. From quick fixes to more advanced solutions, we’ll provide you with practical tips on how to get water out of an iPhone camera.
Inside This Article
- Section 1: Understanding the Issue – Signs of Water Damage in an iPhone Camera and the Importance of Taking Immediate Action
- Section 2: Turning Off the iPhone – Steps to turn off the device properly – Preventing further damage by removing power
- Section 3: Drying Techniques – Using Silica Gel Packets or Rice – Absorbing Moisture from the Camera
- Section 4: Vacuuming the Water Out – Safely using a vacuum cleaner – Removing water from the iPhone camera
- Section 5: Professional Assistance – When to seek professional help – Contacting Apple Support or authorized service providers
- Section 6: Preventive Measures- Waterproof cases and sleeves- Tips for keeping water away from your iPhone camera
- Conclusion
- FAQs
Section 1: Understanding the Issue – Signs of Water Damage in an iPhone Camera and the Importance of Taking Immediate Action
Water damage can be a nightmare for any iPhone user, especially when it affects the camera. Whether it’s due to accidentally dropping the iPhone in water or having it exposed to excessive moisture, water can quickly wreak havoc on the delicate components of the camera.
So, how can you tell if your iPhone camera has suffered water damage? There are several signs to watch out for. The most obvious one is a blurry or distorted image quality. If your photos suddenly appear hazy, out of focus, or have strange artifacts, it could be an indication of water damage.
In addition to visual abnormalities, you may also notice that your camera app is not functioning properly. The camera may fail to open, freeze, or crash frequently. These issues could be a result of water corroding the camera’s internal circuitry and disrupting its functionality.
Another sign of water damage in the iPhone camera is the presence of moisture or condensation inside the lens. If you notice foggy spots or droplets of water appearing on your camera lens, it’s a clear indication that water has infiltrated the device.
Now that you are aware of the signs of water damage, it’s crucial to take immediate action. Time is of the essence, as the longer you wait, the more severe the damage can become. Water can corrode the delicate electronic components of the camera, leading to permanent malfunctions or even a complete failure of the camera system.
By addressing the issue promptly, you can prevent further damage and increase the chances of restoring your iPhone camera to its full functionality. Acting quickly can also prevent water from spreading to other parts of the iPhone, such as the motherboard, which could result in more extensive damage.
In the next section, we will explore the steps you can take to mitigate the damage and potentially salvage your iPhone camera.
Section 2: Turning Off the iPhone – Steps to turn off the device properly – Preventing further damage by removing power
When your iPhone camera comes into contact with water, the first and most crucial step is to turn off the device immediately. By cutting off the power source, you can prevent any potential short circuits or electrical damage that could occur. Here are the steps you need to follow to turn off your iPhone properly:
1. Press and hold the power button located on the side or top of your iPhone depending on the model.
2. A slider will appear on the screen, which says “Slide to power off.” Slide it from left to right to shut down the device.
3. Wait for a few seconds until the screen turns completely black. This indicates that your iPhone is powered off.
It is important to note that in some instances, the touch screen may become unresponsive due to water damage. If this happens, you can force a shutdown by simultaneously holding the power button and the volume down button until the screen turns off.
By turning off your iPhone properly, you are taking the necessary step in preventing further damage. Removing the power supply reduces the risk of electrical components frying or short-circuiting, which can cause more harm to your iPhone camera.
Section 3: Drying Techniques – Using Silica Gel Packets or Rice – Absorbing Moisture from the Camera
When your iPhone camera gets exposed to water, it is crucial to dry it thoroughly to prevent further damage. One effective method is using silica gel packets or rice to absorb moisture from the camera. These drying techniques can help salvage your device and restore its functionality. Here’s how you can do it:
1. Using Silica Gel Packets: Silica gel packets are small pouches filled with silica beads, which are excellent at absorbing moisture. Here’s how to use them:
- Remove your iPhone from the water and power it off immediately. Do not attempt to test if it’s still working, as this can cause more damage.
- Take a few silica gel packets and place them in a shallow container.
- Place your iPhone, camera side down, on top of the silica gel packets in the container.
- Ensure that the camera lens is directly in contact with the silica gel packets.
- Seal the container with a lid or plastic wrap to create an airtight environment.
- Leave your iPhone in the container for at least 24 hours to allow the silica gel packets to absorb the moisture from the camera.
- After the designated time, remove your iPhone from the container and check if any moisture remains.
2. Using Rice: Rice is a readily available and affordable alternative if you don’t have silica gel packets. Although not as effective as silica gel, it can still absorb some moisture from the camera. Here’s what you should do:
- Power off your iPhone immediately after removing it from the water. Do not test if it’s still functioning.
- Find a container that is large enough to fit your iPhone comfortably.
- Fill the container with uncooked rice, ensuring that it forms a thick layer at the bottom.
- Place your iPhone, camera side down, on top of the rice layer in the container.
- Cover your iPhone completely with more rice, ensuring it is fully submerged.
- Seal the container with a lid or plastic wrap to create an airtight environment.
- Allow your iPhone to sit in the rice for at least 48 hours to maximize moisture absorption.
- After the allotted time, carefully remove your iPhone from the rice and check if any moisture remains.
Remember, using silica gel packets or rice is not a guaranteed fix, but it can increase the chances of drying out the camera and minimizing water damage. It’s always advisable to seek professional assistance if you’re unsure or if the water damage is extensive.
Section 4: Vacuuming the Water Out – Safely using a vacuum cleaner – Removing water from the iPhone camera
When your iPhone camera comes into contact with water, it’s vital to act quickly to prevent further damage. One effective method to remove water from the camera is by using a vacuum cleaner. However, it is crucial to do this safely to avoid causing any additional harm to your device. Here’s how you can safely vacuum the water out of your iPhone camera.
1. Begin by powering off your iPhone completely. This step is necessary to prevent any electrical components from short-circuiting. Make sure to disconnect any cables or accessories as well.
2. Next, take a small vacuum cleaner with a soft brush attachment. The brush attachment is essential as it reduces the risk of scratching or damaging the delicate camera lens.
3. Gently place the brush attachment of the vacuum cleaner over the affected area of your iPhone camera. Be cautious to avoid applying too much pressure, as it may cause further damage.
4. Turn on the vacuum cleaner on a low setting and direct the suction towards the camera lens. The gentle suction will help draw out the water from the camera components.
5. Gradually move the brush attachment around the camera lens and surrounding areas to ensure all pockets of water are removed. Take your time and be thorough during this process.
6. After vacuuming the camera, allow your iPhone to air dry for a while. Avoid using any heat sources, such as hairdryers, as excessive heat can damage the device. You can also place your phone in a container with silica gel packets or uncooked rice to help absorb any remaining moisture.
7. Once you’ve completed these steps, you can turn on your iPhone and check if the camera is functioning properly. If you still notice any issues or water damage, it’s recommended to seek professional assistance to avoid any further complications.
Remember, vacuuming your iPhone camera should be done with caution and gentle motions. If you feel uncertain or uncomfortable performing this process yourself, it’s best to seek assistance from an authorized service provider.
By taking the appropriate steps and being careful while using a vacuum cleaner, you can effectively remove water from your iPhone camera and potentially save your device from further damage.
Section 5: Professional Assistance – When to seek professional help – Contacting Apple Support or authorized service providers
While attempting to dry out your iPhone camera on your own can be a good first step, there may come a point where professional assistance is necessary. It’s important to know when it’s time to seek help beyond your own efforts.
If you have followed the drying techniques and turned off your iPhone as soon as possible but still notice water damage signs, it may be time to contact Apple Support or an authorized service provider. These professionals have the necessary knowledge and experience to assess the extent of the damage and provide the appropriate solutions.
It’s particularly important to seek professional assistance if you are unable to turn off the device or if there are other issues with your iPhone in addition to the water damage. Trying to fix complex issues on your own might cause further damage or void your warranty.
When contacting Apple Support or an authorized service provider, be sure to explain the situation and provide all the relevant information. This will help them understand the urgency and provide you with the necessary instructions to get your iPhone camera repaired.
Apple Support can be reached through their website or by calling the designated helpline. They will guide you through the troubleshooting steps, and if needed, will direct you to the nearest service center or help you set up a repair appointment.
If your device is still under warranty, Apple Support or authorized service providers might be able to replace the iPhone camera or provide a repair free of charge. However, if your device is out of warranty, there may be associated costs for repairs or replacements.
Keep in mind that the availability and exact procedures for contacting Apple Support or authorized service providers may vary depending on your location. It’s always a good idea to check Apple’s official website or contact their customer support for the most up-to-date information.
Remember, seeking professional assistance is crucial when dealing with water damage to your iPhone camera. It’s better to take proper measures and find the right solution to ensure the functionality and longevity of your device.
Section 6: Preventive Measures- Waterproof cases and sleeves- Tips for keeping water away from your iPhone camera
Water can wreak havoc on your iPhone camera, causing irreversible damage. To avoid the stress and expense of dealing with water damage, it’s essential to take preventive measures. In this section, we’ll explore two effective ways to protect your iPhone camera from water: using waterproof cases and sleeves, and following some handy tips.
Waterproof cases and sleeves
Investing in a waterproof case or sleeve is one of the best ways to keep your iPhone camera safe from water damage. These specially designed accessories provide a protective barrier against liquids, allowing you to confidently use your phone in wet environments. There are several reliable brands that offer high-quality waterproof cases and sleeves, ensuring maximum protection for your device.
When choosing a waterproof case or sleeve, consider factors like durability, ease of use, and compatibility with your iPhone model. Look for cases with a high waterproof rating (IP68 is preferable) to ensure optimal protection in various water-related scenarios, such as rain, splashes, or accidental submersion in shallow water.
Additionally, opt for cases or sleeves that provide access to the camera lens and buttons, enabling you to capture photos and videos without compromising on functionality. Remember to follow the manufacturer’s instructions for proper installation and maintenance of your waterproof case or sleeve to ensure its effectiveness in protecting your iPhone camera.
Tips for keeping water away from your iPhone camera
While using a waterproof case or sleeve offers significant protection, it’s important to exercise caution and follow some preventive tips to keep water away from your iPhone camera.
- Avoid exposing your iPhone to water for extended periods, even if it has a waterproof case. Prolonged exposure to moisture can still lead to potential damage.
- Be cautious when using your iPhone near water sources, such as swimming pools, lakes, or the beach. Accidental drops or splashes can cause water damage.
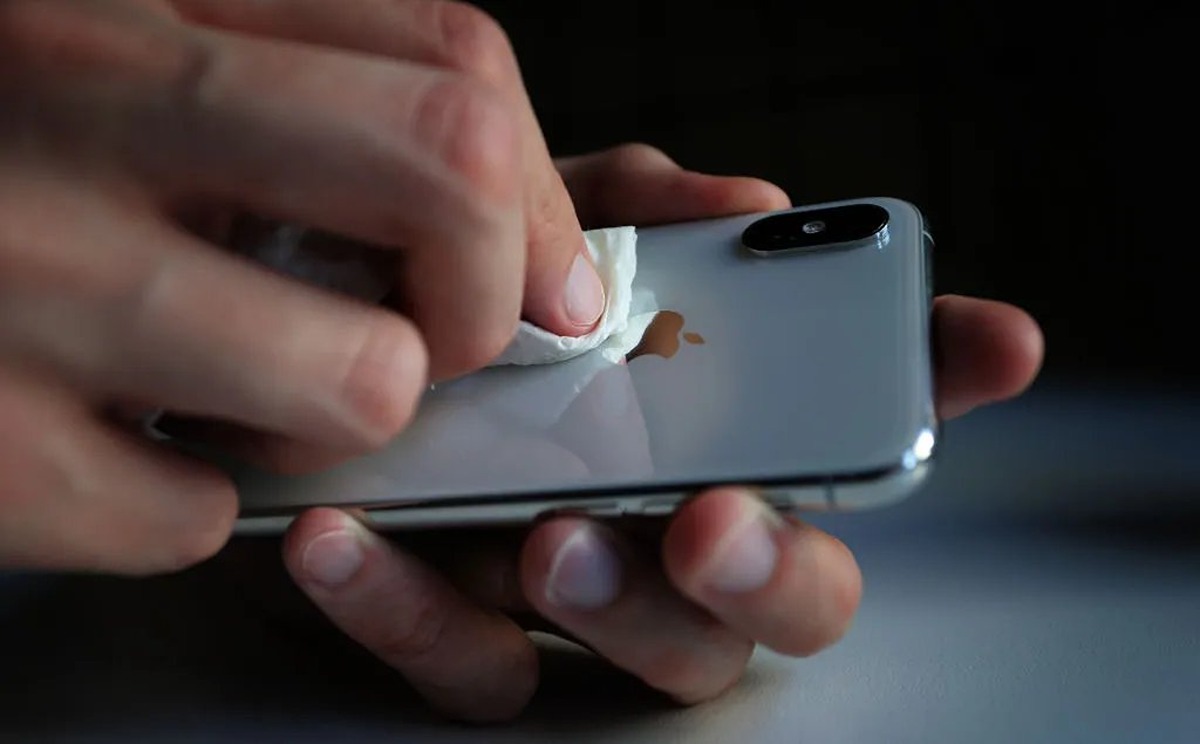
- If your iPhone gets wet, gently wipe it with a clean, soft cloth to remove any moisture. Avoid using harsh materials or applying excessive pressure.
- Never try to dry your iPhone camera using heat sources like hairdryers or ovens, as they can cause further damage.
- Consider using a wrist strap or lanyard to secure your iPhone when in potentially risky situations, reducing the chances of accidental drops into water.
- Regularly inspect your waterproof case or sleeve for any signs of damage or wear. Replace it if necessary to maintain optimal protection.
- Keep your iPhone away from humid environments, as moisture in the air can seep into the device.
By following these tips and using a reliable waterproof case or sleeve, you can significantly reduce the risk of water damage to your iPhone camera. Remember, prevention is always better than dealing with the costly consequences of water damage. Safeguard your device and capture precious moments worry-free!
Conclusion
In conclusion, there are several effective methods to get water out of an iPhone camera. By following the steps mentioned above, you can increase the chances of saving your device from water damage. Remember, time is of the essence when it comes to water exposure, so act quickly to prevent any further harm to your precious device.
It is important to note that while these methods can help remove water from the camera, there is no guarantee of complete restoration or functionality. If you are unable to salvage your iPhone camera on your own, it is best to seek professional help from an authorized service center or technician.
Additionally, prevention is always better than cure. Investing in waterproof phone cases or practicing caution around water can significantly reduce the risk of water damage to your iPhone camera.
By staying informed and taking the necessary precautions, you can enjoy your iPhone camera without the worry of water-related mishaps. So go out and capture those amazing moments, knowing that you have the knowledge and tools to handle any water-related incidents that may arise!
FAQs
1. Can water damage affect the camera on an iPhone?
Yes, water damage can have a detrimental effect on the camera of an iPhone. The camera components are not designed to be exposed to water, which can cause corrosion and malfunctioning of the camera module.
2. What should I do if water gets into the iPhone camera?
If water gets into the iPhone camera, the first step is to power off the device immediately. Then, gently wipe off any visible water on the exterior of the phone. It is important to avoid shaking or blowing into the camera module as it may push the water further inside. You should place the iPhone in a bag of uncooked rice or use a moisture-absorbing product to help absorb the excess moisture. It is advisable to take the phone to a professional technician to have it properly cleaned and inspected.
3. How long should I keep my iPhone in rice to get rid of moisture?
Keeping your iPhone in a bag of uncooked rice can help draw out moisture. It is recommended to leave the iPhone in rice for at least 24 to 48 hours. However, it’s important to note that rice is not a guaranteed solution and it may not completely remove the moisture from the camera or other internal components. Seeking professional assistance is still advisable.
4. Will the camera be fully functional after water damage?
Unfortunately, there is no guarantee that the camera will be fully functional after water damage. Even if the iPhone seems to have dried out, there may still be residual damage to the camera module. Water can cause corrosion and affect the delicate circuitry of the camera, leading to issues such as blurry images, a darkened screen, or complete camera failure. It’s best to have a professional technician assess the damage and determine the necessary repairs.
5. Can I prevent water damage to my iPhone camera?
While accidents can happen, there are measures you can take to minimize the risk of water damage to your iPhone camera. Using a waterproof or water-resistant case can provide an extra layer of protection when using your phone near water. Avoid exposing your iPhone to extreme water environments such as swimming pools or the ocean. If your device does come into contact with water, be sure to act quickly by powering it off and seeking professional assistance.