
Are you tired of dealing with a cracked or scratched protective glass on your iPhone? Removing the protective glass from your iPhone can seem like a daunting task, but with the right techniques and a steady hand, it can be done easily and safely. Whether you are looking to replace the protective glass or simply want to clean your iPhone’s screen thoroughly, this article will guide you through the step-by-step process. From gathering the necessary tools to carefully removing the adhesive, you will learn everything you need to know to successfully remove the protective glass from your iPhone. So, grab your iPhone and let’s get started on transforming your device back to its original pristine condition!
Inside This Article
- Overview
- Tools and Materials Needed
- Steps to Remove Protective Glass from iPhone
- Tips for a Safe Removal Process
- Conclusion
- FAQs
Overview
Removing the protective glass from your iPhone can be a daunting task. Whether you’re replacing it with a new one or simply prefer the feel of the bare screen, it’s important to do it safely and efficiently. In this article, we’ll provide you with step-by-step instructions on how to remove the protective glass from your iPhone without causing any damage to the screen or the device itself.
Before we dive into the removal process, it’s essential to gather the necessary tools and materials. This will ensure that you have everything you need at hand and minimize the risk of any mishaps during the process. Let’s take a look at the tools and materials you’ll need:
1. Microfiber cloth: This will help you clean the screen before and after removing the protective glass.
2. Adhesive remover solution: If your protective glass is glued to the screen, this solution will help loosen the adhesive.
3. Plastic card or spudger: You’ll need a thin, plastic tool to gently pry the protective glass away from the screen.
4. Tweezers: These can come in handy if you need to remove any small fragments of glass or adhesive residue.
Now that you have all the necessary tools and materials, let’s move on to the step-by-step process of removing the protective glass from your iPhone. It’s important to follow these steps carefully to avoid any accidental damage to your device.
Tools and Materials Needed
Removing protective glass from your iPhone requires a few essential tools and materials. Here is a list of what you will need:
- Microfiber cloth: This soft cloth is ideal for cleaning the screen and removing any dust or smudges.
- Tape: You will need a small piece of clear tape to help lift the protective glass off the screen.
- Plastic card: A sturdy plastic card, such as a credit card or an ID card, will be handy for gently prying the glass away from the edges of the screen.
- Isopropyl alcohol: This solution will help to effectively dissolve any adhesive residue left behind after the removal process.
- Cotton swabs: Use these to apply the isopropyl alcohol and clean any stubborn residue.
- Protective gloves: It is always a good idea to protect your hands with gloves to prevent any accidental injury during the process.
Having these tools and materials readily available will ensure that you can safely and effectively remove the protective glass from your iPhone without causing any damage to the screen or risking personal injury.
Steps to Remove Protective Glass from iPhone
Protective glass is a popular accessory that many iPhone users choose to apply to their screens to safeguard against scratches and cracks. However, there may come a time when you need to remove the protective glass, whether it’s because it’s damaged, needs to be replaced, or you simply want a change. Here is a step-by-step guide to help you safely remove the protective glass from your iPhone:
- Start by creating a clean and well-lit workspace. Find a flat surface where you can comfortably work without any distractions. It’s important to have good lighting to ensure you can see what you’re doing.
- Gently clean the surface of your iPhone screen. Use a microfiber cloth or a screen cleaning solution to remove any dust, fingerprints, or smudges from the screen. This will help ensure a smooth and clear view of the protective glass during the removal process.
- Identify the edges of the protective glass. Most protective glasses will have a slight lip or raised edge around the borders. Carefully examine your iPhone screen to determine where the protective glass starts and ends.
- Use a thin, pointed object to lift the edge of the protective glass. A plastic pry tool, a thin plastic card, or even a fingernail can work well for this. Start at one corner and gently insert the tool between the protective glass and the iPhone screen. Apply slight pressure to lift the edge of the glass.
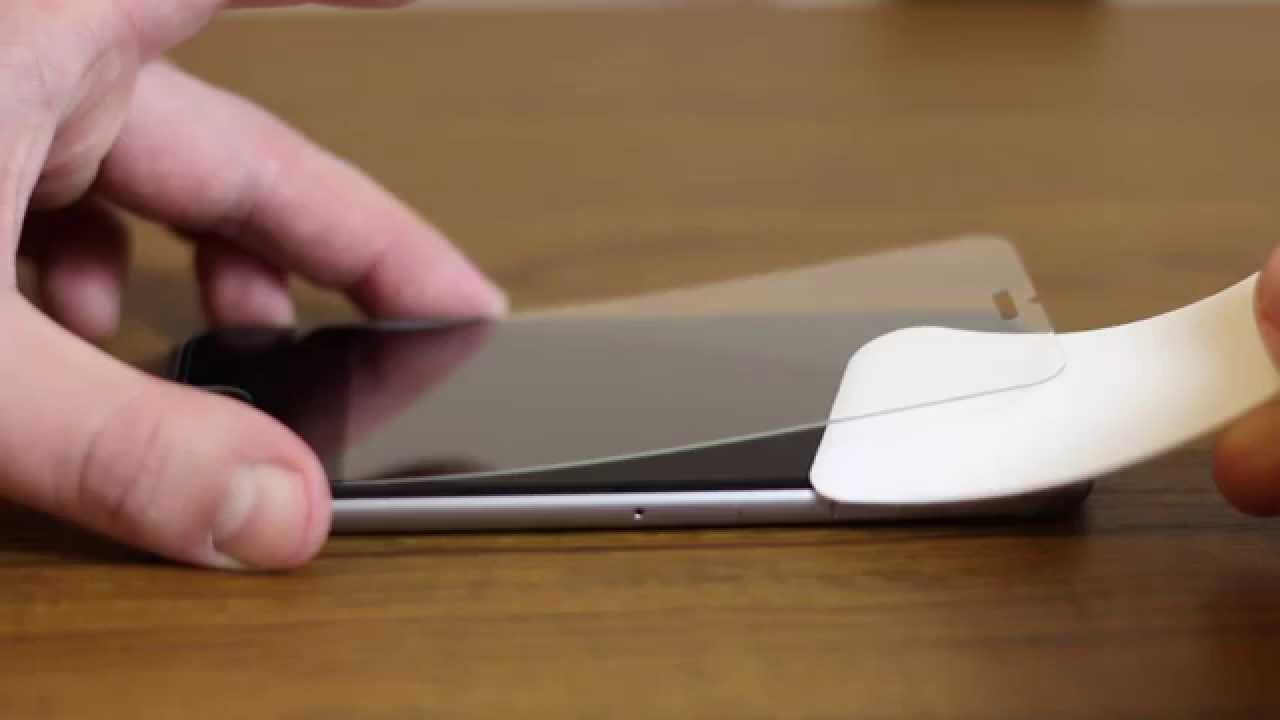
- Slowly and carefully peel off the protective glass. Once you have lifted the edge, use your fingers or the tool to gradually peel off the glass from the screen. Be patient and work slowly to avoid any accidental damage or cracks to the screen.
- Take a close look at the screen after removing the protective glass. Inspect the surface for any leftover adhesive residue. If you notice any sticky residue, use a mild adhesive remover or isopropyl alcohol on a clean cloth to gently wipe it off. Be sure to follow the appropriate safety precautions when using chemicals.
- Gently clean the iPhone screen again. After removing any residue, use a microfiber cloth or screen cleaner to give the screen a final wipe down. This will ensure a clean and clear surface for your iPhone.
- Apply a new protective glass (optional). If you removed the protective glass for replacement or want to apply a new one, now is the time to do so. Follow the manufacturer’s instructions for proper installation.
Removing protective glass from your iPhone is a relatively simple process when done correctly and with caution. By following these steps, you can safely remove the protective glass and maintain the integrity of your iPhone screen. Remember to work slowly, pay attention to detail, and always prioritize the safety of your device.
Tips for a Safe Removal Process
When removing the protective glass from your iPhone, it’s important to take certain precautions to ensure a safe and successful removal process. Here are some valuable tips to help you navigate this task:
1. Clean the phone thoroughly: Before attempting to remove the protective glass, make sure to clean your iPhone’s screen thoroughly. Use a microfiber cloth and a gentle, non-abrasive cleaning solution to remove any dirt, smudges, or fingerprints. This will make the removal process easier and prevent any residue from getting trapped between the glass and the screen.
2. Assess the condition of the glass: Take a close look at the protective glass and check for any cracks, chips, or defects. If you notice any damage, it’s best to consult a professional or contact the manufacturer for guidance. Removing damaged glass on your own may cause further harm to your device.
3. Use precision tools: To safely remove the protective glass, it’s advised to use specialized tools designed for this purpose. A suction cup or a thin blade can help lift the glass gradually without applying excessive force. Avoid using sharp objects that may scratch or damage the screen.
4. Heat the glass: Depending on the adhesive used, heating the protective glass slightly can help loosen the bond and make it easier to remove. You can use a hairdryer on low heat or a heat gun from a safe distance. Be cautious not to overheat the glass, as excessive heat can damage the phone’s components.
5. Apply gentle pressure: As you lift the protective glass, apply gentle and even pressure to avoid bending or breaking it. Gradually separate the glass from the screen, taking care not to pull or twist it forcefully. If the glass is firmly attached, try heating it again for a few seconds to loosen the adhesive further.
6. Clean any adhesive residue: Once the protective glass is removed, you might notice some adhesive residue on the phone’s screen. Use a mild adhesive remover or isopropyl alcohol on a microfiber cloth to clean the surface thoroughly. Be cautious not to saturate the screen with liquid.
7. Install a replacement glass: If you plan to replace the protective glass, follow the manufacturer’s instructions carefully. Ensure that the replacement glass is compatible with your iPhone model and align it properly before pressing it onto the screen. Use gentle pressure to secure it in place.
8. Test the touch functionality: After removing and replacing the protective glass, test the touch functionality of your iPhone. Check if all areas of the screen respond accurately to touch inputs. If you encounter any issues, recheck the installation or seek professional assistance.
By following these tips, you can safely remove the protective glass from your iPhone without causing any damage. Remember to exercise patience and caution throughout the process to preserve the integrity of your device.
Conclusion
Removing the protective glass from an iPhone is a fairly simple task that can be accomplished with a few careful steps. Whether you are replacing the tempered glass for an upgrade, or simply want to remove it temporarily for cleaning purposes, following the right techniques will help you get the job done without causing any damage to your device.
Remember to take your time and be gentle when removing the protective glass. Start by preparing the necessary tools and cleaning materials. Then, use a suction cup to lift the edges of the glass, making sure to avoid any sudden movements that could result in cracks or scratches. Once the glass is loosened, carefully peel it away from the screen using your fingers or a thin card. Clean the screen thoroughly and reapply a new protective glass, if desired.
By following these steps and exercising caution, you can safely remove the protective glass from your iPhone and keep your device in pristine condition.
FAQs
1. Can I remove the protective glass from my iPhone?
Yes, you can remove the protective glass from your iPhone. The protective glass is usually a separate layer that is applied on top of the actual screen. It is designed to protect the screen from scratches and cracks. However, if you want to remove it for any reason, you can do so by gently peeling it off.
2. How do I remove the protective glass from my iPhone?
To remove the protective glass from your iPhone, follow these steps:
- Start by turning off your iPhone and ensure that it is not connected to any power source.
- Use a microfiber cloth or a screen cleaning wipe to remove any dirt or fingerprints from the screen and the protective glass.
- Locate the edge of the protective glass and gently lift it using your fingernail or a thin plastic tool.
- Slowly peel off the protective glass from the screen, applying even pressure to avoid any damage to the screen.
- Once removed, clean the screen again to remove any remaining residue or adhesive from the protective glass.
3. Will removing the protective glass void the warranty of my iPhone?
No, removing the protective glass from your iPhone will not void its warranty. The protective glass is an accessory that can be easily removed without causing any damage to the device. However, it’s worth noting that any damage caused to the screen during the removal process might not be covered under the warranty.
4. Should I replace the protective glass after removing it from my iPhone?
If you remove the protective glass from your iPhone and wish to continue protecting the screen, it is recommended to replace it with a new one. The protective glass serves as an additional layer of defense against scratches and cracks, keeping your iPhone screen safe. You can find replacement protective glass designed specifically for your iPhone model from various retailers or online stores.
5. Are there any special precautions to take when removing the protective glass from my iPhone?
When removing the protective glass from your iPhone, it’s important to handle the process with care to avoid damaging the screen. Here are some special precautions to keep in mind:
- Avoid using any sharp objects or excessive force that can scratch or crack the screen.
- Make sure to clean the screen thoroughly before and after removing the protective glass to remove any dirt or adhesive residue.
- If you encounter any difficulty in peeling off the protective glass, you can warm it slightly using a hairdryer on low heat to soften the adhesive.
- If you are unsure about the removal process, it’s recommended to seek assistance from a professional or refer to the manufacturer’s guidelines.