
If you’re the proud owner of a Fitbit Versa 2, you may be wondering how to change the clock face on this sleek and stylish smartwatch. The clock face is an essential aspect of personalizing your Fitbit Versa 2, as it allows you to display information and customize the look and feel of your device. Whether you’re looking to add a touch of elegance, showcase your favorite sports team, or simply switch up your style, changing the clock face on your Fitbit Versa 2 is a breeze. In this article, we will guide you through the process step by step, so you can easily tailor your Fitbit Versa 2 to match your personality and preferences.
Inside This Article
- Setting Up Your Fitbit Versa 2
- Accessing the Clock Face Settings
- Choosing a New Clock Face
- Customizing the Clock Face Appearance
- Conclusion
- FAQs
Setting Up Your Fitbit Versa 2
Congratulations on your new Fitbit Versa 2! This sleek and stylish smartwatch is not only a great fitness companion but also a fashion statement. To make the most of your Versa 2, follow these steps to set it up and get started on your journey towards a healthier, more active lifestyle.
Step 1: Unboxing the Versa 2
When you first open the package, you’ll find the Fitbit Versa 2, charging cable, and user guide. Take a moment to familiarize yourself with the different components before moving on to the next step.
Step 2: Charging your Versa 2
Before you can start using your Versa 2, it’s important to ensure it has enough power. Connect the charging cable to the back of the Versa 2 and plug it into a USB port or a wall adapter. It may take a couple of hours to fully charge your device.
Step 3: Downloading and setting up the Fitbit app
To fully utilize the features of your Versa 2, you’ll need to download the Fitbit app on your smartphone. Open the app store on your smartphone, search for “Fitbit,” and download the app. Once installed, open the app and follow the instructions to create a Fitbit account and pair your Versa 2 with your smartphone.
Step 4: Pairing your Versa 2 with your smartphone
Make sure Bluetooth is enabled on your smartphone, then open the Fitbit app and tap the Account icon in the top left corner. Select “Set up a Device” and choose “Versa 2” from the list of available devices. Follow the on-screen instructions to complete the pairing process.
Step 5: Personalizing your Versa 2
After your Versa 2 is paired with your smartphone, you can personalize it to suit your style and preferences. Open the Fitbit app, go to the “Devices” tab, and select your Versa 2. From here, you can customize your clock face, set goals, and configure other settings according to your preferences.
Step 6: Exploring the features
Now that your Versa 2 is set up, it’s time to explore all the amazing features it has to offer. You can track your heart rate, monitor your sleep patterns, receive notifications from your smartphone, and even control your music playback. Take some time to explore the different menus and options within your Versa 2 to make the most of its capabilities.
Step 7: Maintaining your Versa 2
To keep your Versa 2 in optimal condition, make sure to regularly clean and care for it. Clean the screen with a soft, lint-free cloth and avoid exposing it to excessive heat or extreme temperatures. Additionally, removing your Versa 2 from the charger when it’s fully charged can help prolong its battery life.
Step 8: Stay motivated and have fun!
Your Fitbit Versa 2 is not just a tool for fitness tracking; it’s also a companion that can motivate and inspire you on your wellness journey. Set goals, challenge yourself, and enjoy the process of getting healthier and fitter. Remember, consistency is key, so make wearing your Versa 2 a daily habit!
Now that you’ve set up your Fitbit Versa 2, you’re ready to take on the world of fitness and wellness. Enjoy all the features and benefits that this incredible smartwatch has to offer, and let it be your guide towards a healthier, more active lifestyle.
Accessing the Clock Face Settings
Changing the clock face on your Fitbit Versa 2 is a fantastic way to personalize your device and showcase your style. Fitbit offers a wide range of clock faces to choose from, allowing you to find the one that best suits your preferences and aesthetic. To access the clock face settings, follow these steps:
1. Open the Fitbit app on your smartphone and tap on the “Account” tab located at the bottom right corner of the screen.
2. Scroll down and select the “Versa 2” device from the list of connected devices.
3. Tap on “Clock Faces” to enter the clock face customization settings.
4. Browse through the available clock face options and tap on the one you want to set as the default clock face on your Fitbit Versa 2.
5. Once you’ve selected the desired clock face, tap on “Select” or “Set” to apply the changes.
And that’s it! You’ve successfully accessed the clock face settings on your Fitbit Versa 2. Now, you can choose from a variety of clock faces to match your mood, style, or activity.
Choosing a New Clock Face
If you’re looking to add a touch of personalization to your Fitbit Versa 2, changing the clock face is a quick and easy way to do it. With a wide range of options available, you can customize the look and feel of your smartwatch to match your style and preferences. In this guide, we will explore three different methods you can use to change the clock face on your Fitbit Versa 2.
Option 1: Changing the clock face through the Fitbit app
The Fitbit app provides a convenient way to manage your device settings and personalize your Fitbit Versa 2. To change the clock face through the app, follow these steps:
- Open the Fitbit app on your smartphone or tablet.
- Tap on the device icon in the top-left corner of the screen to access your device settings.
- Scroll down and select “Clock Faces” from the list of options.
- Browse through the available clock faces and tap on the one you want to set.
- Customize any available settings for the selected clock face, such as color or complications, if applicable.
- Tap on the “Select” button to apply the new clock face to your Fitbit Versa 2.
- Sync your device to ensure the changes are reflected on your smartwatch.
Option 2: Changing the clock face directly on the Fitbit Versa 2
If you prefer to change the clock face directly on your Fitbit Versa 2 without using the app, follow these steps:
- From the home screen, swipe left to access the “Settings” menu.
- Scroll down and select “Clock Faces.”
- Browse through the available clock faces using the touchscreen.
- Tap on the clock face you want to set as your default.
- Customize any available settings for the selected clock face, if applicable.
- Press the back button or swipe right to return to the home screen.
Option 3: Exploring clock face customization settings
In addition to changing the clock face, the Fitbit Versa 2 offers various customization options to further personalize its appearance. To access these settings, follow these steps:
- From the home screen, swipe left to access the “Settings” menu.
- Select “Personalization.”
- Choose options such as changing the clock display, adding complications, or adjusting the brightness.
- Make any desired changes and customize your Fitbit Versa 2 according to your preferences.
- Press the back button or swipe right to return to the home screen.
By following these methods, you can change the clock face on your Fitbit Versa 2 to match your style and add a personal touch to your smartwatch. Whether you prefer a sleek and minimalistic design or a vibrant and colorful one, the options are endless. Enjoy exploring the different clock faces and customization features, and make your Fitbit Versa 2 uniquely yours!
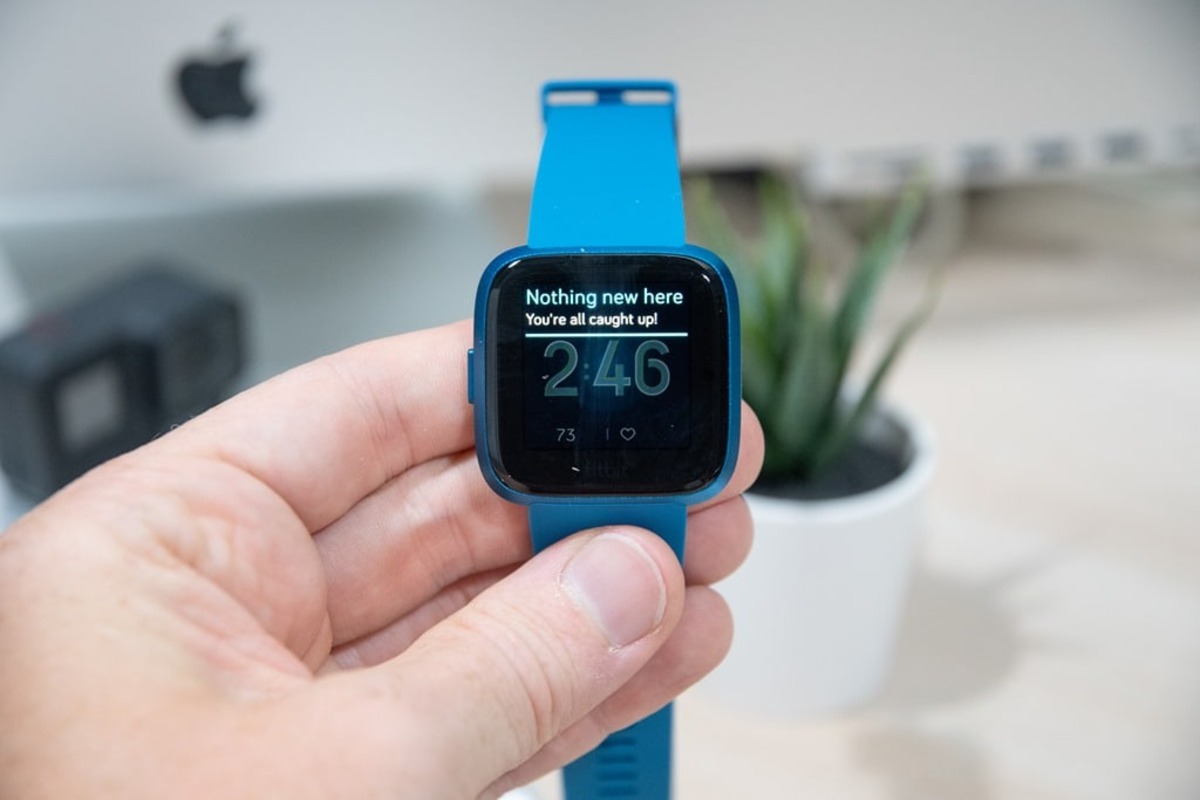
Customizing the Clock Face Appearance
One of the great features of the Fitbit Versa 2 is the ability to customize the clock face to match your style and preferences. With a wide range of clock face options available, you can choose the one that suits your mood, from sleek and minimalist designs to vibrant and colorful ones. Whether you prefer a digital or analog display, there’s a clock face for everyone.
To customize the clock face on your Fitbit Versa 2, you have several options at your disposal. Let’s explore the different ways you can change the look of your device’s clock face.
- Changing the clock face through the Fitbit app: The easiest way to customize your Versa 2’s clock face is through the Fitbit app on your smartphone. Simply open the app and tap on the device icon in the top left corner. From there, navigate to Clock Faces and browse through the available options. Once you’ve found the clock face you like, tap on it and select Set as Clock Face. Your Versa 2 will automatically sync and display the new clock face.
- Changing the clock face directly on the Fitbit Versa 2: If you prefer to customize the clock face directly on your device, you can do so by swiping left on the home screen to access the Clocks app. From there, you can swipe up or down to browse through the available clock faces. Tap on the one you want to use, and it will instantly update on your Versa 2.
- Exploring clock face customization settings: Once you’ve selected a clock face, you can further customize it to your liking. Some clock faces allow you to change the color scheme, toggle between 12-hour and 24-hour format, and even display additional information such as your heart rate or the weather. To access these settings, go to the Clocks app on your device and press and hold the clock face. This will bring up the customization options for that particular clock face.
With these options at your disposal, you can easily change the look of your Fitbit Versa 2’s clock face to match your personal style and preferences. Experiment with different designs and settings to find the perfect clock face that suits your needs. Whether you want a simple and elegant display or a more detailed and informative one, the Fitbit Versa 2 has you covered.
So go ahead, give your Fitbit Versa 2 a fresh new look by customizing its clock face. It’s just one of the many ways you can personalize your device and make it uniquely yours.
Conclusion
Changing the clock face on your Fitbit Versa 2 is a simple and fun way to personalize your device and make it truly your own. With a wide variety of clock face options available, you can choose one that suits your style and preferences.
By following the steps outlined in this article, you can easily navigate through the Fitbit mobile app and customize the clock face on your Versa 2. Whether you prefer a sleek digital display or a traditional analog look, the process is quick and straightforward.
Remember to regularly update your clock face for a refreshing change and explore the extensive library of options provided by Fitbit and third-party developers. With their eye-catching designs and helpful features, a new clock face can elevate your Fitbit Versa 2 experience and bring a touch of personalization to your fitness journey.
So go ahead, try different clock faces, find the one that resonates with you, and enjoy the unique and stylish display on your Fitbit Versa 2!
FAQs
1. How do I change the clock face on my Fitbit Versa 2?
2. Can I customize the clock face on my Fitbit Versa 2?
3. Are there any charges for changing clock faces on the Fitbit Versa 2?
4. How many clock faces can I store on my Fitbit Versa 2?
5. Can I download clock faces from third-party sources for my Fitbit Versa 2?