
Are you tired of your neighbors peering into your yard? Do you long for some privacy but don’t want to block out the view completely? Adding a privacy screen to your fence may be the perfect solution. A privacy screen not only offers protection from prying eyes but also adds a touch of style to your outdoor space. Whether you want to enjoy a peaceful afternoon in your backyard or simply unwind after a long day, a fence with a privacy screen gives you the privacy you need. In this article, we will guide you through the process of attaching a privacy screen to your fence step by step, ensuring that you can enjoy your personal sanctuary without any interruptions. So let’s get started and turn your fence into a private retreat!
Inside This Article
- Materials Needed
- Step 1: Measure the Fence
- Step 2: Choose the Privacy Screen Panels
- Step 3: Attach the Fence Brackets
- Step 4: Secure the Privacy Screen Panels to the Fence
- Conclusion
- FAQs
Materials Needed
When it comes to attaching a privacy screen to a fence, there are a few essential materials you’ll need to get the job done right. Here’s a list of items you’ll want to have on hand:
1. Privacy screen panels: These panels are the main component of your privacy screen. They come in various materials such as vinyl, metal, or wood and are designed to provide both privacy and aesthetic appeal.
2. Fence brackets and screws: Fence brackets are specially designed brackets that allow you to attach the privacy screen panels securely to your fence. They typically come with screws for easy installation.
3. Measuring tape: Precise measurements are crucial to ensure a proper fit for your privacy screen panels. A measuring tape will help you accurately measure the width and height of your fence sections.
4. Power drill: A power drill will come in handy for drilling pilot holes and attaching the fence brackets to your fence. Make sure to use the appropriate drill bit size for your screws.
5. Level: To ensure a straight and level installation, a level tool is essential. This will help you align the privacy screen panels and maintain a consistent height throughout the fence.
6. Pencil: Marking the placement of the fence brackets and other measurements is crucial. Having a pencil on hand will allow you to make accurate markings on both the fence and the privacy screen panels.
By having these materials ready, you’ll be well-equipped to attach a privacy screen to your fence effectively. Now that you have everything you need, let’s move on to the step-by-step process of installation!
Step 1: Measure the Fence
Before starting the process of attaching a privacy screen to your fence, it’s important to accurately measure the dimensions of your fence. Taking precise measurements will ensure that you buy the correct size privacy screen panels and determine the spacing and placement of the fence brackets.
Start by using a measuring tape to measure the height and length of your fence. Measure from the top of the fence to the ground to determine the height. For the length, measure from one end of the fence to the other. Take note of these measurements so that you can select the correct size privacy screen panels.
In addition to the overall dimensions, you should also measure the space between the fence posts. This will help you determine the number of privacy screen panels you will need to cover the entire fence. Measure the distance between each pair of fence posts and record these measurements as well.
Once you have gathered all the necessary measurements, it’s a good idea to double-check them to ensure accuracy. Measure twice to be absolutely sure before moving on to the next step. This will save you time and effort later on.
By measuring your fence accurately, you will be able to determine the correct size privacy screen panels and the number of panels needed. This will allow you to make informed decisions when purchasing materials and ensure a seamless and professional-looking installation.
Step 2: Choose the Privacy Screen Panels
Now that you have measured your fence, it’s time to choose the privacy screen panels that will best meet your needs. When selecting the panels, keep the following factors in mind:
- Material: Privacy screen panels come in a variety of materials, including wood, vinyl, metal, and composite. Consider the durability, maintenance requirements, and overall aesthetic appeal of each material before making your decision.
- Size and Dimensions: Measure the height and length of your fence to determine the appropriate size of privacy screen panels. Ensure that the panels are wide enough to cover the entire length of the fence and tall enough to provide the desired level of privacy.
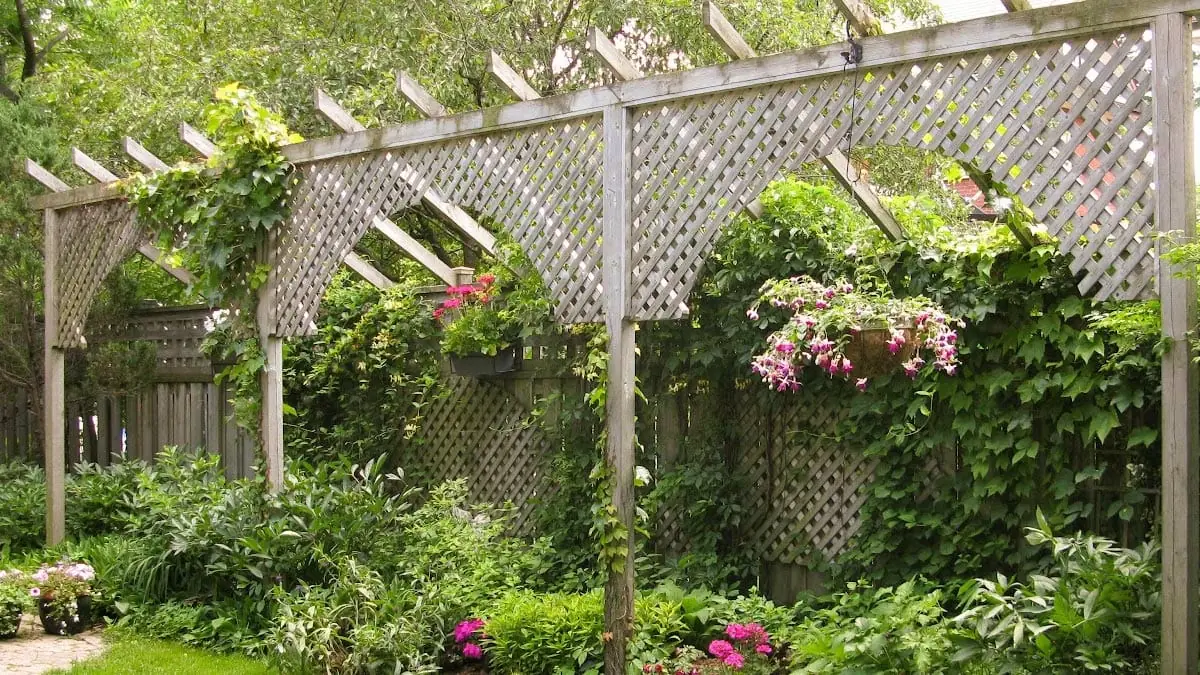
- Design and Style: Privacy screen panels come in various designs, from lattice patterns to solid panels. Choose a design that complements the overall look of your property and matches your personal taste.
- Privacy Level: Consider how much privacy you desire. Some privacy screen panels offer a high level of privacy by blocking a significant amount of visibility, while others provide a more open feel with limited visual obstruction. Keep in mind that the level of privacy may vary based on the material and design of the panels.
- Budget: Set a budget for your privacy screen panels and choose options within that range. Take into account both the upfront cost of the panels and any long-term maintenance expenses.
Taking the time to carefully evaluate these factors will help you choose the privacy screen panels that best meet your specific needs and preferences. Once you have selected the panels, move on to the next step: attaching the fence brackets.
Step 3: Attach the Fence Brackets
Attaching the fence brackets is a critical step in properly securing the privacy screen panels to your fence. These brackets provide stability and ensure that the panels remain securely in place.
To begin, make sure you have the appropriate fence brackets and screws that are compatible with your privacy screen panels and fence material. It’s important to choose heavy-duty brackets that can withstand the weight of the panels and withstand outdoor conditions.
Start by aligning the first bracket with the edge of the privacy screen panel, ensuring that it is positioned horizontally and flush with the top and bottom edges of the panel. Use a measuring tape to accurately determine the placement of the brackets on the panel.
Once you have marked the desired position of the bracket on the panel, hold the bracket firmly against the panel and use a pencil to mark the screw holes on both the panel and the bracket.
Next, use a power drill to create pilot holes on the marked spots. Make sure the size of the drill bit matches the size of the screws you will be using. This will prevent the wood or material from splitting when you insert the screws.
After drilling the pilot holes, position the bracket back on the privacy screen panel, aligning the screw holes. Insert the screws into the holes and tighten them using a power drill or a screwdriver, depending on the screw type.
Repeat the same process with the remaining brackets, spacing them evenly along the top, bottom, and sides of the privacy screen panel. Ensure that each bracket is aligned horizontally and vertically to maintain the panel’s stability.
It is essential to use a level to ensure the brackets are aligned perfectly. This will help prevent any unevenness in the panel installation and provide a visually pleasing result.
Continue attaching the fence brackets to each privacy screen panel that you intend to install. Take your time to ensure that each bracket is securely fastened and properly aligned.
Once all the brackets are attached, double-check the stability of the privacy screen panels by gently pushing on them. If any panels or brackets feel loose, tighten the screws or add additional brackets as needed.
By attaching the fence brackets accurately, you can ensure that your privacy screen panels are securely attached to the fence, providing you with the desired privacy and aesthetic appeal.
Step 4: Secure the Privacy Screen Panels to the Fence
Now that you have measured the fence, chosen the privacy screen panels, and attached the fence brackets, it’s time to move on to the final step: securing the privacy screen panels to the fence. This step will ensure that the panels are properly installed and will provide the privacy and security you desire for your outdoor space.
Before you begin, make sure you have all the necessary tools within reach, including a power drill, screws, and a level. Having these tools readily available will make the installation process more efficient.
Start by placing the privacy screen panel against the fence brackets that you installed in the previous step. Hold the panel firmly in place, ensuring that it aligns properly with the brackets.
Using your power drill, insert screws through the pre-drilled holes on the privacy screen panel and into the fence brackets. Be sure to tighten the screws securely, but avoid over-tightening, as this may cause damage to the panels or the brackets.
Continue this process for each privacy screen panel, making sure to align them properly and secure them tightly to the fence brackets. Double-check the level of each panel to ensure a straight and even installation.
Once all the privacy screen panels are securely attached to the fence brackets, step back and admire your work. You now have a beautifully installed privacy screen that offers both functionality and aesthetics.
If you notice any gaps or areas where the panels are not tightly secured, go back and adjust the screws accordingly. It’s important to have a secure installation to ensure the longevity and effectiveness of the privacy screen.
Now that the privacy screen panels are securely attached to the fence, you can enjoy the benefits of increased privacy and enhanced outdoor living. Whether you’re looking to create a secluded space for relaxation or seeking to block unsightly views, the privacy screen panels will provide the solution you need.
In conclusion, attaching a privacy screen to a fence is a practical and effective way to enhance privacy and security in your outdoor space. By following the steps outlined in this article, you can easily install a privacy screen and enjoy the benefits it offers. Whether you want to create a secluded retreat, keep prying eyes at bay, or reduce noise levels, a privacy screen is a versatile solution that can meet your needs.
Remember to choose a high-quality privacy screen that is made from durable materials to ensure longevity. Additionally, consider the design and aesthetics of your fence and outdoor area to select a privacy screen that complements your existing style. With proper installation and maintenance, a privacy screen can provide you with a sense of peace and tranquility in your outdoor environment.
FAQs
Q: How do I attach a privacy screen to a fence?
A: Attaching a privacy screen to a fence is a relatively simple process. First, ensure that you have the necessary materials, such as zip ties or screws, depending on the type of privacy screen and fence you have. Then, position the privacy screen against the fence and secure it using the chosen method. Make sure to evenly space the attachments to ensure stability and prevent sagging.
Q: Can I install a privacy screen on an existing fence?
A: Yes, you can install a privacy screen on an existing fence. Many privacy screens are designed to be easily attached to fences, whether they are new or already in place. Simply follow the instructions provided with the privacy screen or use zip ties or screws to secure it to the existing fence.
Q: What materials do I need to attach a privacy screen to a fence?
A: The materials needed to attach a privacy screen to a fence may vary depending on the type of privacy screen and fence you have. Generally, you will need zip ties or screws, a drill (if using screws), a measuring tape, and a level. Make sure to choose materials that are suitable for outdoor use and can withstand the weather conditions in your area.
Q: How high should a privacy screen be on a fence?
A: The height of a privacy screen on a fence depends on your specific needs and preferences. Typically, privacy screens range from around 4 to 8 feet in height. Consider factors such as the purpose of the screen, the level of privacy desired, and any local regulations or restrictions regarding fence heights.
Q: Can I attach a privacy screen to a chain-link fence?
A: Yes, it is possible to attach a privacy screen to a chain-link fence. There are privacy screen options specifically designed for chain-link fences, which can be easily attached using zip ties or other suitable fasteners. Ensure that the privacy screen is compatible with the size and spacing of the chain-link fence.