
The Carbon Monoxide (CO) detector is a critical safety device that helps protect your home and loved ones from the invisible threat of carbon monoxide poisoning. Over time, the batteries in your CO detector will need to be replaced to ensure its continued functionality.
In this article, we will guide you through the simple steps of changing the battery in your carbon monoxide detector. Whether you are a homeowner, a renter, or simply concerned about safety, understanding how to properly maintain and replace the batteries in your CO detector is essential.
We will provide you with clear instructions, useful tips, and important safety precautions to follow while changing the battery in your carbon monoxide detector. So, let’s get started and ensure your home remains a safe and healthy environment for you and your family.
Inside This Article
- Step 1: Prepare the necessary tools and materials
- Step 2: Locate the battery compartment
- Step 3: Remove the old battery
- Step 4: Insert the new battery
- Step 5: Test the detector
- Conclusion
- FAQs
Step 1: Prepare the necessary tools and materials
Before you begin the process of changing the battery in your carbon monoxide detector, it’s important to gather all the necessary tools and materials. This will ensure a smooth and efficient battery replacement. Here’s what you’ll need:
- New battery: Check the user manual or the label on the detector to determine the appropriate battery size.
- Screwdriver: Depending on the design of your detector, you may need a screwdriver (usually a small Phillips-head or flat-head screwdriver) to access the battery compartment.
- Cleaning cloth: It’s a good idea to have a soft, lint-free cloth on hand to clean the battery compartment and any other parts of the detector that may have accumulated dust or debris.
By having these tools and materials ready beforehand, you’ll save time and ensure that you have everything you need to complete the battery replacement process efficiently.
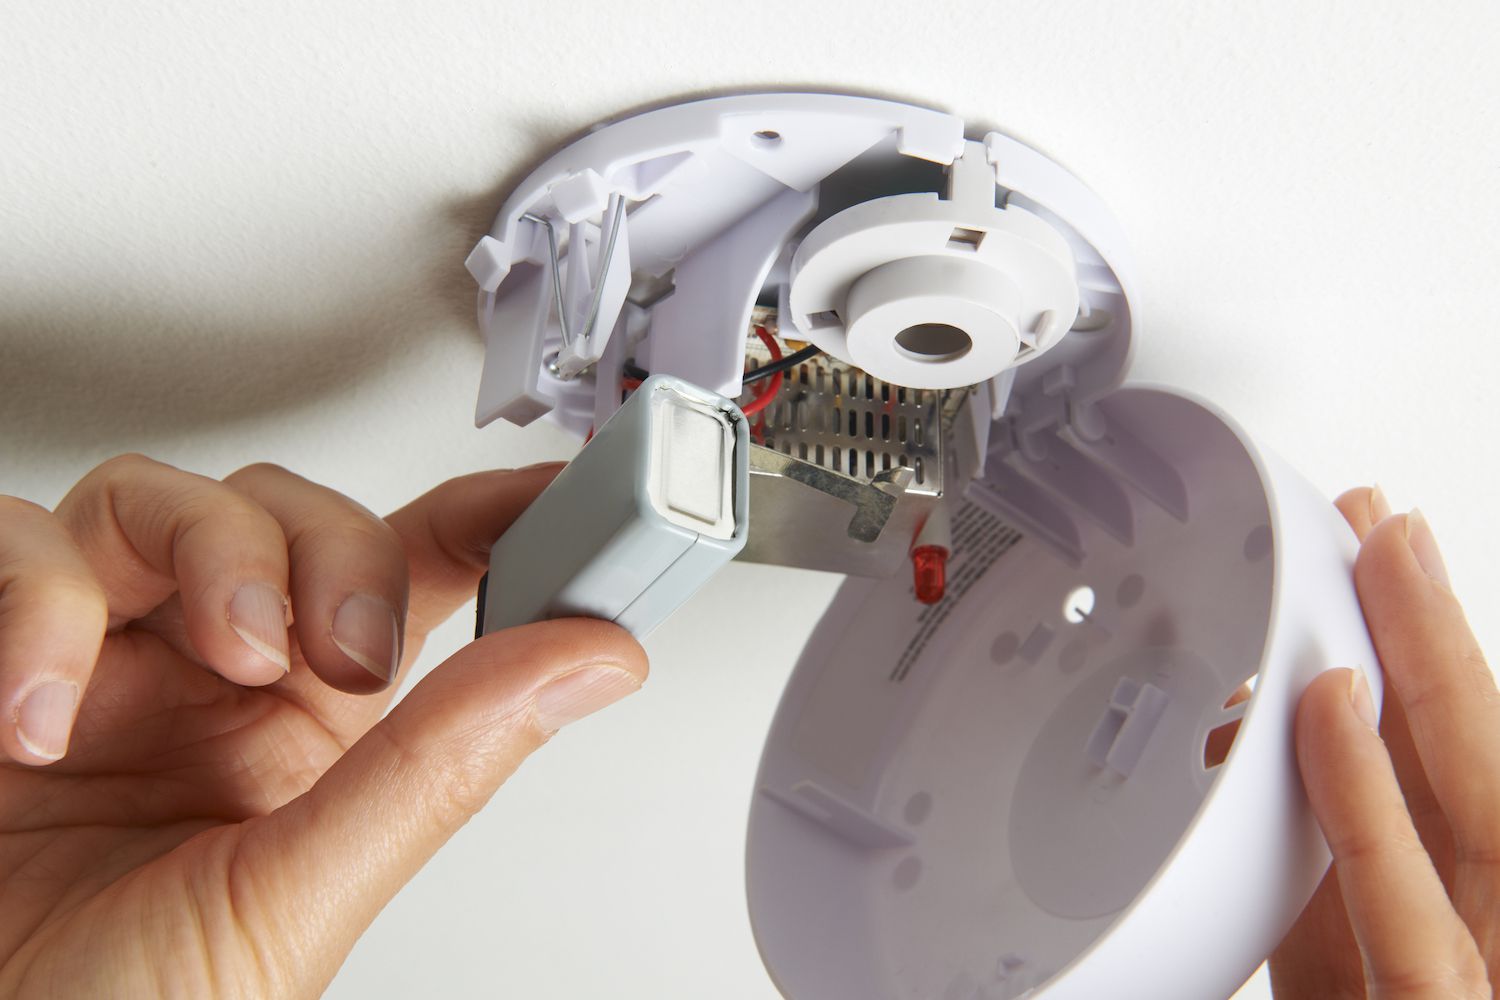
Step 2: Locate the battery compartment
Once you have gathered all the necessary tools and materials, the next step is to locate the battery compartment of your carbon monoxide detector. The battery compartment is where the old battery is housed and where you will insert the new one.
The location of the battery compartment may vary depending on the model of your detector. In most cases, the battery compartment is located on the back or the bottom of the device. Some detectors may have a small panel that can be slid open to reveal the compartment, while others may have a screw or latch that needs to be undone.
Take a close look at your carbon monoxide detector and try to locate any markings or indicators that may guide you to the battery compartment. Look for words like “battery” or symbols that resemble a battery icon. If you are having trouble finding the compartment, refer to the user manual that came with your detector for specific instructions.
It’s important to remember that each carbon monoxide detector model may have a slightly different design. So, don’t be discouraged if it takes some time to locate the battery compartment. Take your time, inspect the device from different angles, and use any provided guidance to help you find the compartment.
Once you have successfully located the battery compartment, you are one step closer to changing the battery in your carbon monoxide detector. Prepare yourself for the next step in the process: removing the old battery.
Step 3: Remove the old battery
Removing the old battery from your carbon monoxide detector is an essential step in the process of changing the battery. Follow these simple instructions to safely remove the old battery:
1. Once you have located the battery compartment, carefully open it. In most detectors, the battery compartment is located on the back or side of the device. Some models may have a latch or a sliding cover to access the battery compartment.
2. Take a moment to inspect the battery compartment and familiarize yourself with how the old battery is positioned inside. Note any markings or labels that indicate the correct orientation of the battery.
3. Gently remove the old battery from the compartment. Depending on the model, you may need to push a small tab or slide the battery out from its placement. Be cautious not to use excessive force that could damage the detector or cause injury.
4. Dispose of the old battery properly. Carbon monoxide detectors usually require standard AA or AAA batteries, which are commonly accepted for recycling. Check with your local recycling center or designated battery drop-off locations for the proper disposal of batteries.
5. Before proceeding to insert the new battery, take a moment to clean the battery compartment if needed. Use a dry cloth or a soft brush to remove any dust or debris that may have accumulated.
Removing the old battery is an important step in ensuring the optimal performance of your carbon monoxide detector. By following these steps carefully, you can safely remove the old battery and prepare for the next step of inserting the new one.
Step 4: Insert the new battery
Now that you have removed the old battery from your carbon monoxide detector, it’s time to insert the new one. Follow these simple steps to ensure a proper installation:
1. Check the battery specifications: Before you insert the new battery, make sure it matches the specifications recommended by the manufacturer. This information can usually be found in the user manual or on the label inside the battery compartment.
2. Orient the battery correctly: Determine the correct orientation for inserting the battery. Look for markings or symbols indicating the positive (+) and negative (-) terminals on the battery and inside the battery compartment.
3. Insert the battery: Carefully insert the new battery into the compartment, making sure to align the positive and negative terminals with the corresponding markings. Gently push the battery in until it is securely seated in the compartment.
4. Close the battery compartment: Once the battery is properly inserted, close the battery compartment securely. Ensure that it is fully latched or screwed shut to prevent accidental dislodging or tampering.
5. Check for proper fit: Double-check that the battery is snugly in place and that there is no movement when you gently shake the detector. A loose battery can cause the detector to malfunction or fail to detect carbon monoxide.
6. Power up the detector: If your carbon monoxide detector has a power button, press it to turn on the device. Some detectors may automatically power up once the battery is inserted. Refer to the user manual for specific instructions.
7. Perform a test: After inserting the new battery, it’s crucial to test your carbon monoxide detector to ensure it is functioning correctly. Follow the testing procedure outlined in the user manual. If the detector doesn’t sound an alarm or displays an error message, consult the troubleshooting section of the manual.
By following these steps, you can easily insert a new battery into your carbon monoxide detector and ensure its proper functioning. Remember to replace the battery according to the manufacturer’s recommended schedule to maintain the safety and effectiveness of your detector.
Step 5: Test the detector
After inserting the new battery, the next and final step is to test the carbon monoxide detector to ensure it is functioning properly. Testing the detector regularly is crucial for your safety and peace of mind.
To test the detector, locate the test button or switch, which is usually marked with a “Test” or “T” label. Press and hold the button for a few seconds until you hear a loud, audible sound. This sound indicates that the detector is functioning correctly and can properly detect carbon monoxide.
If you don’t hear any sound when you press the test button, it could mean that the battery is not properly inserted or that the detector itself is faulty. In this case, you should double-check the battery and ensure it is snugly in place. If the problem persists, you may need to replace the detector altogether.
Remember, never ignore a faulty carbon monoxide detector. It plays a critical role in keeping you and your loved ones safe from this silent, deadly gas. Regularly testing the detector and replacing the battery as needed ensures that it will be there to alert you in case of danger.
It’s also worth noting that carbon monoxide detectors typically have a lifespan of 5-7 years, after which they should be replaced entirely. Be sure to check the manufacturer’s instructions for the specific lifespan of your detector and replace it accordingly.
By following these step-by-step instructions and understanding the importance of testing and maintaining your carbon monoxide detector, you can take proactive measures to protect yourself and your family from this dangerous gas.
In conclusion, changing the battery in a carbon monoxide detector is a simple yet crucial maintenance task that ensures the continuous functioning of this life-saving device. By following the steps outlined in this article, you can confidently replace the battery in your carbon monoxide detector and have peace of mind knowing you and your loved ones are protected from the dangers of carbon monoxide. Remember to always use the right type and size of battery recommended by the manufacturer, and test the detector regularly to ensure it is functioning properly. By staying proactive and staying on top of the battery replacement, you can protect your home and safeguard the well-being of your family.
FAQs
1. Can I change the battery in my carbon monoxide detector myself?
Answer: Yes, you can change the battery in your carbon monoxide detector yourself. However, it is important to follow the manufacturer’s instructions and safety guidelines to ensure proper installation and functionality.
2. How often should I change the battery in my carbon monoxide detector?
Answer: It is recommended to replace the battery in your carbon monoxide detector at least once a year. Some detectors may have a specific battery replacement indicator or beep to notify you when the battery needs to be changed.
3. What type of battery should I use for my carbon monoxide detector?
Answer: Most carbon monoxide detectors use standard alkaline batteries, such as AA or 9-volt batteries. However, always refer to the manufacturer’s instructions to confirm the specific type of battery recommended for your detector.
4. How do I know if the battery in my carbon monoxide detector needs to be changed?
Answer: Some carbon monoxide detectors have a low battery indicator light or emit a beeping sound to alert you when the battery needs to be replaced. Additionally, if your detector is not functioning properly or has expired, it is a good idea to replace the battery.
5. Are there any safety precautions I should take when changing the battery?
Answer: Yes, before changing the battery in your carbon monoxide detector, ensure that the detector is turned off or disconnected from power. Carefully remove the old battery and dispose of it properly. Make sure to follow the manufacturer’s instructions for installing the new battery and securing the battery compartment. Test the detector after installing the new battery to ensure it is functioning correctly.