
Are you looking to connect your A10 headset to your Xbox One but unsure how to do it? Look no further! In this article, we will guide you through the process of connecting your A10 headset to your Xbox One, step by step. The A10 headset is known for its exceptional audio quality and comfort, making it a popular choice among gamers. Whether you’re an avid gamer or just enjoy casually gaming with friends, having a reliable and high-quality headset is essential for an immersive gaming experience. So let’s dive in and get your A10 headset connected to your Xbox One so you can start enjoying your games with crystal-clear audio and seamless communication with your teammates!
Inside This Article
- How to Connect A10 Headset to Xbox One
- Step 1: Check the Compatibility
- Step 2: Connect the A10 Headset to the Xbox One Controller
- Step 3: Adjust Settings on the Xbox One
- Step 4: Test the A10 Headset Connection
- Conclusion
- FAQs
How to Connect A10 Headset to Xbox One
If you’re a gamer and own an A10 headset, you’ll need to know how to connect it to your Xbox One for the ultimate gaming experience. Thankfully, the process is straightforward and doesn’t require any special technical knowledge. In this guide, we’ll walk you through the step-by-step process of connecting your A10 headset to your Xbox One.
Step 1: Xbox One Controller Setup
The first step in connecting your A10 headset to your Xbox One is to ensure that your Xbox One controller is properly set up. Make sure your controller is powered on and functioning correctly. If you’re using a wireless controller, ensure that it’s paired and connected to your Xbox One console.
Step 2: Connecting the A10 Headset
Now that your Xbox One controller is ready, it’s time to connect your A10 headset. Follow these steps:
- Locate the 3.5mm jack on your Xbox One controller. This is where you’ll plug in your A10 headset.
- Take the 3.5mm audio cable that came with your A10 headset and insert one end into the 3.5mm jack on your controller.
- Take the other end of the audio cable and plug it into the corresponding port on the A10 headset itself.
- Adjust the volume settings on your Xbox One to ensure optimum sound quality.
And that’s it! You have successfully connected your A10 headset to your Xbox One. Now you can enjoy immersive gaming with crystal clear audio.
Troubleshooting Tips
If you encounter any issues while connecting your A10 headset to your Xbox One, here are a few troubleshooting tips:
- Make sure both ends of the audio cable are securely plugged in.
- Try using a different audio cable to rule out any cable-related problems.
- Ensure that your Xbox One controller is updated with the latest firmware.
- If you’re using a wireless controller, make sure the batteries are charged or replace them if necessary.
- Check the audio settings on your Xbox One to ensure that the sound is not muted or set too low.
By following these steps and troubleshooting tips, you should now be able to connect your A10 headset to your Xbox One and enjoy an enhanced gaming experience. Happy gaming!
Step 1: Check the Compatibility
Before connecting your A10 headset to your Xbox One, it’s essential to ensure that the two devices are compatible. The A10 headset is designed to work seamlessly with the Xbox One console, providing you with an immersive gaming experience.
To confirm if your A10 headset is compatible with the Xbox One, check the product packaging or the manufacturer’s website. Look for any indications that the headset is specifically designed for Xbox One compatibility.
If you have purchased the A10 headset and are unsure about its compatibility, don’t worry. Astro, the manufacturer of the A10 headset, has made it compatible with various gaming platforms, including the Xbox One. This means you can enjoy your gaming sessions without any compatibility issues.
However, it’s important to note that certain versions of the A10 headset are specifically designed for Xbox One compatibility. These versions often come with additional features or modifications that enhance the gaming experience on the Xbox One console.
Step 2: Connect the A10 Headset to the Xbox One Controller
Once you have set up your Xbox One controller, it’s time to connect your A10 headset. Follow these simple steps to ensure a seamless connection:
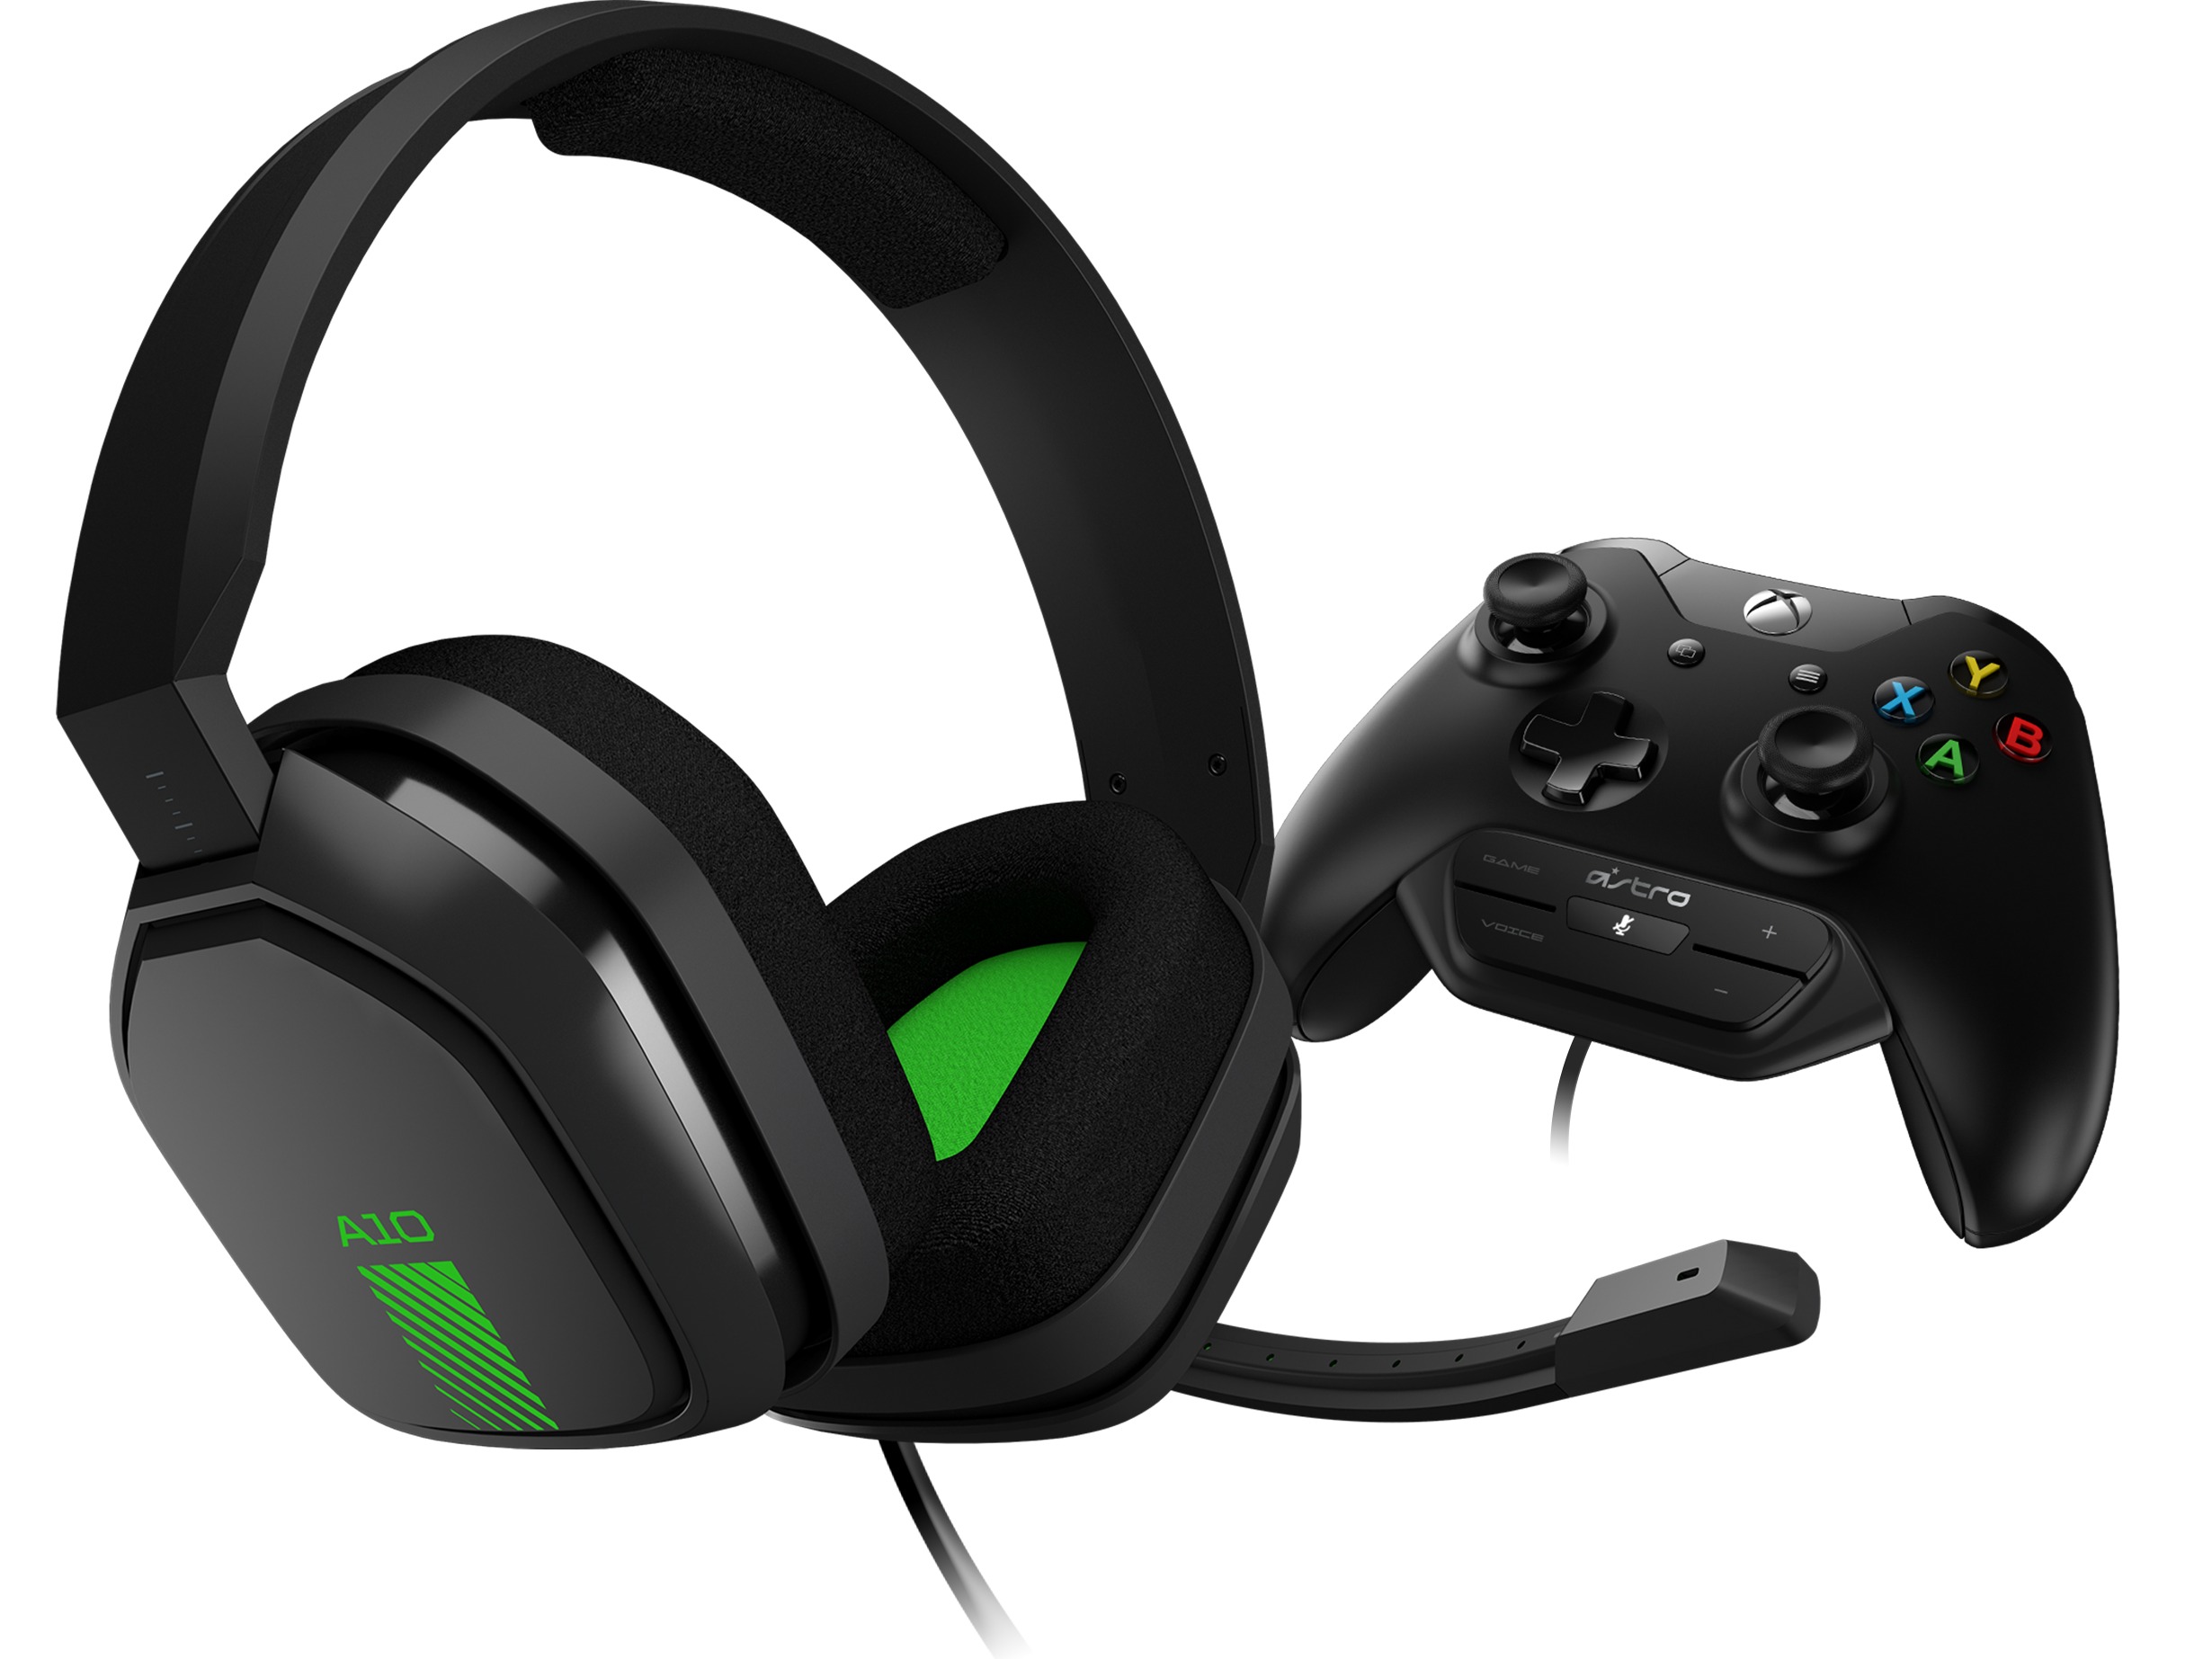
1. Locate the 3.5mm audio jack on your Xbox One controller. This is typically found at the bottom of the controller, near the charge port.
2. Take the 3.5mm audio jack from your A10 headset and insert it firmly into the audio jack on the Xbox One controller. Ensure that it is fully inserted to establish a secure connection.
3. Adjust the volume and chat mixer settings on your Xbox One controller. These settings allow you to control the overall volume and the balance between game audio and chat volume. Simply use the buttons or sliders on your controller to adjust these settings to your preference.
4. Put on your A10 headset and make sure it fits comfortably over your ears. Adjust the headband if needed to achieve a snug fit.
5. Test your A10 headset by opening a game or app on your Xbox One. Make sure the game audio and chat audio are coming through the headset and that you can communicate with other players if applicable.
That’s it! You have successfully connected your A10 headset to your Xbox One controller. Now, you can enjoy immersive gaming with high-quality audio and clear communication.
Remember, if you encounter any issues during the connection process, make sure all cables are securely plugged in and try adjusting the volume and chat mixer settings. If problems persist, consult the user manual or reach out to the manufacturer for further assistance.
Step 3: Adjust Settings on the Xbox One
After successfully connecting your A10 headset to the Xbox One controller, the next step is to adjust the settings on your Xbox One console for optimal audio experience. Here’s how you can do it:
- Turn on your Xbox One console and sign in to your account.
- Press the Xbox button on your controller to open the guide.
- Scroll right to the System tab and select “Settings”.
- In the Settings menu, choose “Display & sound”.
- Select “Audio output” to access the audio settings.
- In the Audio output, you will find several options. Here, we will focus on two essential settings:
- Headset format: Choose the format that matches your A10 headset. If you are unsure, check the user manual or the manufacturer’s website for the supported audio formats.
- Headset chat mixer: Adjust the chat mixer to find the desired balance between game audio and chat volume. If you want to prioritize in-game audio, move the slider towards “Game”. If you want to prioritize chat volume, move it towards “Chat”.
- Once you have adjusted the settings, exit the menu and go back to your game.
By following these simple steps, you can ensure that your A10 headset is properly set up on your Xbox One console. Enjoy the immersive audio experience and get ready to level up your gaming sessions!
Step 4: Test the A10 Headset Connection
Once you have successfully connected your A10 Headset to your Xbox One and made all the necessary adjustments, it is time to test the audio and microphone functionality. This step will ensure that your headset is working properly and ready to use for gaming or communication.
To test the A10 Headset connection, follow these steps:
- Turn on your Xbox One console and sign in to your account.
- Launch your preferred game or application that supports in-game chat or voice communication.
- Make sure the A10 Headset is securely plugged into the audio jack of your Xbox One controller.
- Put on the headset and adjust the volume to a comfortable level.
- Engage in a voice chat with a friend or test the microphone functionality by speaking into the headset’s built-in microphone.
- Ask your friend if they can hear your voice clearly and vice versa.
- If you are unable to hear your friend’s voice or if they cannot hear you, double-check all the connections and ensure that the volume levels are properly adjusted.
- If the issue persists, try connecting the A10 Headset to a different controller or restarting your Xbox One console.
- If none of the troubleshooting steps resolve the issue, refer to the troubleshooting section for further assistance or contact the A10 Headset support team.
By following these steps and testing the A10 Headset connection on your Xbox One, you can ensure that you are ready to immerse yourself in the game and communicate with other players effectively. Enjoy your gaming experience with the A10 Headset!
Connecting your A10 headset to your Xbox One is a straightforward process that allows you to enjoy immersive gaming experiences. By following the steps outlined in this guide, you can easily set up your headset and start communicating with your friends and teammates while playing your favorite games.
Remember to ensure that your headset is properly connected to the controller or console, and that all the settings are correctly configured in order to optimize your gaming audio experience.
With the A10 headset, you can enjoy crystal-clear sound, comfortable design, and durable construction, making it an excellent choice for gamers of all levels. So, get ready to step up your gaming experience with the A10 headset and immerse yourself in the virtual world of gaming like never before!
FAQs
Q: How do I connect an A10 headset to Xbox One?
To connect an A10 headset to Xbox One, follow these steps:
- Plug the headset into the 3.5mm audio jack on the Xbox One controller.
- Ensure that the headset switch is set to the “ON” position.
- On the Xbox One, go to Settings, then Devices & streaming, and select Audio.
- Under Headset audio, set the volume slider to the desired level.
- You can also adjust other audio settings, such as mic monitoring and chat mixer balance, from this menu.
- Your A10 headset is now connected and ready to use with Xbox One.
Q: Can I use an A10 headset with other devices?
Yes, the A10 headset is compatible with a variety of devices. It can be used with PC, Mac, PlayStation 4, Xbox Series X|S, Nintendo Switch, and mobile devices that have a 3.5mm audio jack. Simply plug the headset into the respective audio jack and adjust the settings on the device to ensure optimal audio output and microphone functionality.
Q: Are the A10 headset cables detachable?
No, the cables of the A10 headset are not detachable. The headset features a fixed cable that connects directly to the device using a 3.5mm audio jack. This design ensures a secure and reliable connection without the need for additional adapters or cables.
Q: How can I adjust the audio and microphone settings on the A10 headset?
The A10 headset does not have built-in controls for adjusting audio and microphone settings. To make adjustments, you will need to use the settings menu on the device you are using the headset with. For example, on Xbox One, go to Settings, then Devices & streaming, and select Audio. On PC, you can access audio settings through the Control Panel or the system settings menu. Check the user manual or the manufacturer’s website for specific instructions based on your device.
Q: Is the A10 headset compatible with virtual reality (VR) systems?
Yes, the A10 headset can be used with VR systems that have a 3.5mm audio jack. Whether you are playing VR games or immersing yourself in virtual reality experiences, the A10 headset offers high-quality audio and a comfortable fit. Please note that the A10 headset does not provide positional audio or advanced features specifically designed for VR, but it can still provide an immersive audio experience.