
If you are looking to connect wires securely and efficiently, crimping a spade connector is an essential skill to have. Spade connectors, also known as fork or spade terminals, are widely used in electrical and electronic applications, especially in automotive and audio systems. They provide a reliable and removable connection between wires and terminals.
In this article, we will guide you through the process of crimping a spade connector, step by step. Whether you are a DIY enthusiast or a professional, mastering this technique will ensure that you have a strong and durable connection that can handle the demands of your electrical system.
From choosing the right tools to properly crimping the connector, we will cover all the necessary steps to help you achieve a successful and secure spade connector crimp. So let’s get started and learn how to crimp a spade connector like a pro.
Inside This Article
- Materials Needed
- Step 1: Strip the Wire
- Step 2: Prepare the Spade Connector
- Step 3: Insert the Wire into the Spade Connector
- Step 4: Crimp the Spade Connector
- Step 5: Inspect the Connection
- Troubleshooting Tips
- Safety Precautions
- Conclusion
- FAQs
Materials Needed
Before you begin crimping a spade connector, gather the following materials:
- Spade connector: Make sure you have the appropriate size and type of spade connector for your application. They are available in various sizes and can be insulated or non-insulated.
- Wire stripper: You will need a wire stripper or a specialized tool to remove the insulation from the wire.
- Wire cutter: A wire cutter will be necessary to cut the wire to the desired length.
- Crimping tool: Invest in a quality crimping tool that is specifically designed for spade connectors. It will ensure a secure and reliable connection.
- Wire: Use a wire of the appropriate gauge and type for your needs. Copper wire is commonly used for its excellent conductivity.
Step 1: Strip the Wire
When crimping a spade connector, the first step is to strip the wire. Stripping the wire involves removing the insulation from the end of the wire, allowing for a clean connection with the spade connector.
To strip the wire, you will need a wire stripper tool. This tool has multiple size options to accommodate different wire gauges. Begin by selecting the appropriate size on the wire stripper tool based on the gauge of the wire you are working with.
Hold the wire stripper tool firmly in one hand and the wire in the other hand. Position the end of the wire into the appropriate size notch on the wire stripper tool. Apply gentle pressure and rotate the wire stripper tool around the wire, allowing the blade inside to slice through the insulation.
Once you have made a complete rotation, gently pull the wire stripper tool away from the wire, removing the section of insulation that has been cut. Be cautious not to nick or damage the strands of the wire during this process.
After stripping the wire, inspect the exposed copper strands. If there are any frayed or bent strands, use a pair of wire cutters or wire strippers to trim them, ensuring that only clean and straight strands remain.
It is important to note that the length of the exposed wire should be the same as the length of the metal sleeve inside the spade connector. Measure and adjust as needed to ensure a proper fit.
Once you have successfully stripped the wire and trimmed any frayed strands, you are now ready to move on to the next step in crimping the spade connector.
Step 2: Prepare the Spade Connector
Once you have stripped the wire in Step 1, the next step is to prepare the spade connector. The spade connector is the metal component that will be used to connect the wire to the desired terminal. Here’s how you can prepare the spade connector for crimping:
1. Select the appropriate size spade connector for your wire. It’s important to choose a connector that matches the gauge of your wire. Using an incorrect size can lead to a loose connection or even damage the wire.
2. Inspect the spade connector for any debris or corrosion. Clean the connector if necessary to ensure a good electrical connection. A clean connector will help maintain optimal conductivity between the wire and the terminal.
3. Slide the spade connector onto the stripped end of the wire. Make sure the connector fits securely and snugly over the exposed conductor. It should not be loose or able to slide off with ease.
4. Check the fit of the spade connector in the desired terminal or receptacle. Ensure that it aligns properly and sits flush against the metal contacts. A proper fit is important to maintain a solid electrical connection.
5. In some cases, you may need to crimp a small portion of the spade connector barrel to ensure a secure connection. This can be done using pliers or a specialized crimping tool. Apply gentle pressure to create a tight grip without damaging the connector or wire.
By properly preparing the spade connector, you are setting the stage for a secure and reliable connection between the wire and the terminal. Taking the time to ensure a proper fit and clean connection can help prevent future issues and ensure optimal performance.
Step 3: Insert the Wire into the Spade Connector
Once you have properly stripped the wire and prepared the spade connector, it’s time to insert the wire into the connector. This step is crucial to ensure a secure and reliable connection between the wire and the spade connector.
Here’s how to insert the wire into the spade connector:
- Take the stripped end of the wire and locate the opening on the spade connector. The opening is usually found at the top or side of the connector.
- Hold the connector firmly with one hand, ensuring that it is steady and won’t move around during the process.
- With your other hand, carefully align the stripped end of the wire with the opening on the spade connector.
- Gently push the wire into the opening, ensuring that it goes all the way in and makes full contact with the metal inside the connector.
- Continue inserting the wire until it is fully seated inside the spade connector. You should not be able to see any exposed wire once it is properly inserted.
It’s important to note that you need to choose the correct size of spade connector that matches the gauge of the wire you are working with. Using the wrong size connector can lead to a loose or unreliable connection.
Additionally, make sure that the wire is fully inserted and secured inside the spade connector. A loose or partially inserted wire may cause a poor electrical connection or result in a faulty connection.
By following these steps, you will successfully insert the wire into the spade connector, ensuring a secure and reliable connection.
Step 4: Crimp the Spade Connector
Now that the wire is securely inserted into the spade connector, it’s time to crimp the connector to create a tight and reliable electrical connection. Follow these steps to properly crimp the spade connector:
1. Position the crimping tool over the spade connector: Place the crimping tool jaws over the end of the spade connector barrel, ensuring that the jaws are aligned properly and centered.
2. Squeeze the crimping tool handles: Apply firm and even pressure on the crimping tool handles, compressing the barrel of the spade connector. Make sure to exert enough force to create a solid connection, but be cautious not to over-crimp or damage the wire.
3. Release the crimping tool: Once you’ve applied enough pressure, release the crimping tool handles and carefully inspect the crimped connection. The spade connector should securely hold the wire in place without any visible signs of damage or fraying.
4. Check for a proper crimp: To ensure a successful crimp, give the connector a gentle tug to verify that it holds the wire firmly. If the wire easily slips out, it indicates a faulty crimp and you’ll need to repeat the crimping process.
5. Repeat the process if necessary: If you have multiple wires or connections to crimp, repeat these steps for each one, ensuring consistent and reliable crimps throughout your project.
Crimping the spade connector effectively completes the electrical connection, providing a secure and low-resistance pathway for current flow. A properly crimped connector prevents loose connections that can lead to electrical failures or potentially hazardous situations.
Remember, it’s crucial to use the appropriate crimping tool designed specifically for spade connectors, as using improper tools could result in subpar connections and compromised electrical performance.
Once you have finished crimping all the required spade connectors, proceed to the next step to inspect and ensure the quality of your connections.
Step 5: Inspect the Connection
After successfully crimping the spade connector, it’s crucial to inspect the connection to ensure it is secure and reliable. The last thing you want is for the wire to come loose or for there to be a poor electrical connection. Here are a few steps to follow during the inspection process:
- Physical Examination: Begin by visually inspecting the crimped connection. Check if the wire is fully inserted into the spade connector and that the metal crimped area is securely enveloping the wire. Look for any signs of frayed or damaged wires, which could indicate a flawed connection.
- Tug Test: Gently tug on the wire to check the strength of the connection. It should hold firmly without any movement. If the wire wiggles or easily slips out of the connector, it’s a sign that the crimping process wasn’t successful, and you’ll need to repeat the crimping steps.
- Resistance Check: Use a multimeter set to the resistance mode to measure the electrical conductivity of the connection. Touch the multimeter probes to the spade connector and the other end to the wire or terminal. A secure connection will display a stable and low resistance reading.
- Functionality Test: Connect the spade connector to its corresponding terminal or device. Turn on the device or system and check if it operates properly. Make sure there are no sparks or signs of heat near the connection point, as this could indicate a faulty crimp or electrical issue.
By thoroughly inspecting the connection, you can have peace of mind knowing that your crimped spade connector is properly secured and ready for use. It ensures the safety and optimal performance of your electrical setup.
Troubleshooting Tips
While crimping a spade connector is a relatively straightforward process, there are a few common issues that may arise. Here are some troubleshooting tips to help you overcome any challenges:
1. Ensure Proper Wire Stripping: One of the most common problems is inadequate wire stripping. Make sure you strip the wire to the correct length, exposing enough copper for a secure connection. If the wire is not stripped properly, it may not make sufficient contact inside the connector, resulting in a weak or unreliable connection.
2. Use the Correct Size Connector: Using a spade connector that is too small for the wire gauge can also lead to problems. It may not provide a snug fit, causing the wire to slip out or result in a loose connection. Always ensure that the connector size matches the wire gauge for a proper, secure fit.
3. Check for Loose Connections: After crimping the spade connector, give it a gentle tug to check for any movement or looseness. If you notice any, it’s an indication that the crimping process was not successful. In such cases, you may need to redo the crimp or use a different connector to ensure a secure connection.
4. Inspect for Proper Alignment: When inserting the wire into the spade connector, ensure the wire is positioned correctly and securely within the connector’s barrel. Any misalignment can cause a weak connection and impact the overall performance and reliability of the connection.
5. Avoid Over-Crimping or Under-Crimping: Finding the right balance is crucial when crimping a spade connector. Over-crimping can damage the connector, making it prone to breakage, while under-crimping may result in a loose connection. Practice proper crimping techniques to achieve the ideal compression for a secure and durable connection.
6. Inspect for Wire Damage: Prior to crimping, carefully inspect the wire for any signs of damage, such as cuts or fraying. Damaged wires may lead to poor conductivity or intermittent connections. If you notice any damage, it’s best to cut and strip the wire again to ensure a clean and reliable connection.
7. Use Quality Materials: Investing in high-quality spade connectors and wire stripping tools can greatly improve the crimping process and the overall reliability of your connections. Cheap or subpar materials may result in poor connections and increased chances of failures or electrical hazards.
By following these troubleshooting tips, you can overcome common issues that may arise while crimping a spade connector. Remember to practice the proper techniques, use the right materials, and perform regular inspections to ensure optimal connectivity and safety for your electrical connections.
Safety Precautions
When working with any type of electrical connection, it is important to prioritize safety. Follow these safety precautions to ensure a secure and accident-free crimping process:
- Turn off the power: Before beginning any electrical work, make sure to turn off the power to the circuit you are working on. This will prevent any risk of electric shock or short circuits.
- Wear protective gear: Always wear protective gear, such as gloves and safety glasses, to protect yourself from potential injury. This is especially important when handling wires and working with tools that can cause cuts or burns.
- Inspect the tools: Before starting the crimping process, inspect your tools for any damage or defects. Faulty tools can make the crimping process more difficult and potentially unsafe. If any tools are damaged or not functioning properly, replace them before proceeding.
- Use the right wire size: Ensure that you are using the correct wire size for the spade connector. Using a wire that is too large or too small for the connector can result in an unreliable connection or even damage to the equipment.
- Double-check the polarity: Prior to crimping the spade connector, double-check the polarity of the wires. Connecting the wires incorrectly can lead to equipment failure or damage. Refer to the equipment’s manual or consult a professional if you are unsure about the polarity.
- Position the crimping tool correctly: Properly position the spade connector within the crimping tool to ensure a secure and reliable crimp. Misalignment may lead to a weak connection or a damaged spade connector.
- Apply even pressure: When crimping the connector, apply even pressure to ensure a tight and secure connection. Uneven pressure may result in a weak connection that can easily become loose over time.
- Avoid over-crimping: Be cautious not to over-crimp the spade connector. Over-crimping may damage the connector or cause it to become too tight, which can lead to connectivity issues or even breakage.
- Inspect the crimped connection: Once the crimping process is complete, thoroughly inspect the connection to ensure it is secure and properly crimped. Look for any signs of loose wires or damage to the connector.
- Test the connection: After crimping the spade connector, test the connection to verify its reliability. This can be done by gently tugging on the wire to ensure it remains securely connected.
- Seek professional help when needed: If you are unsure about any aspect of the crimping process or encounter any difficulties, it is always best to seek assistance from a professional electrician or technician.
By following these safety precautions, you can ensure a safe and successful crimping process when working with spade connectors. Protect yourself and your equipment by prioritizing safety at all times.
Conclusion
In conclusion, learning how to crimp a spade connector is a valuable skill for anyone working with electrical connections. Whether you’re a professional electrician or simply a DIY enthusiast, knowing how to properly crimp a spade connector ensures secure and reliable connections for your electrical projects.
By following the step-by-step instructions outlined in this article, you can confidently tackle any wiring job that requires the use of spade connectors. Remember to choose the right type and size of spade connector for your specific application, and take your time to ensure a proper crimp.
With practice, you’ll become proficient at crimping spade connectors, saving time and effort in your electrical projects. So, get your tools ready, follow the guidelines, and start mastering the art of crimping spade connectors today!
FAQs
Q: What is a spade connector?
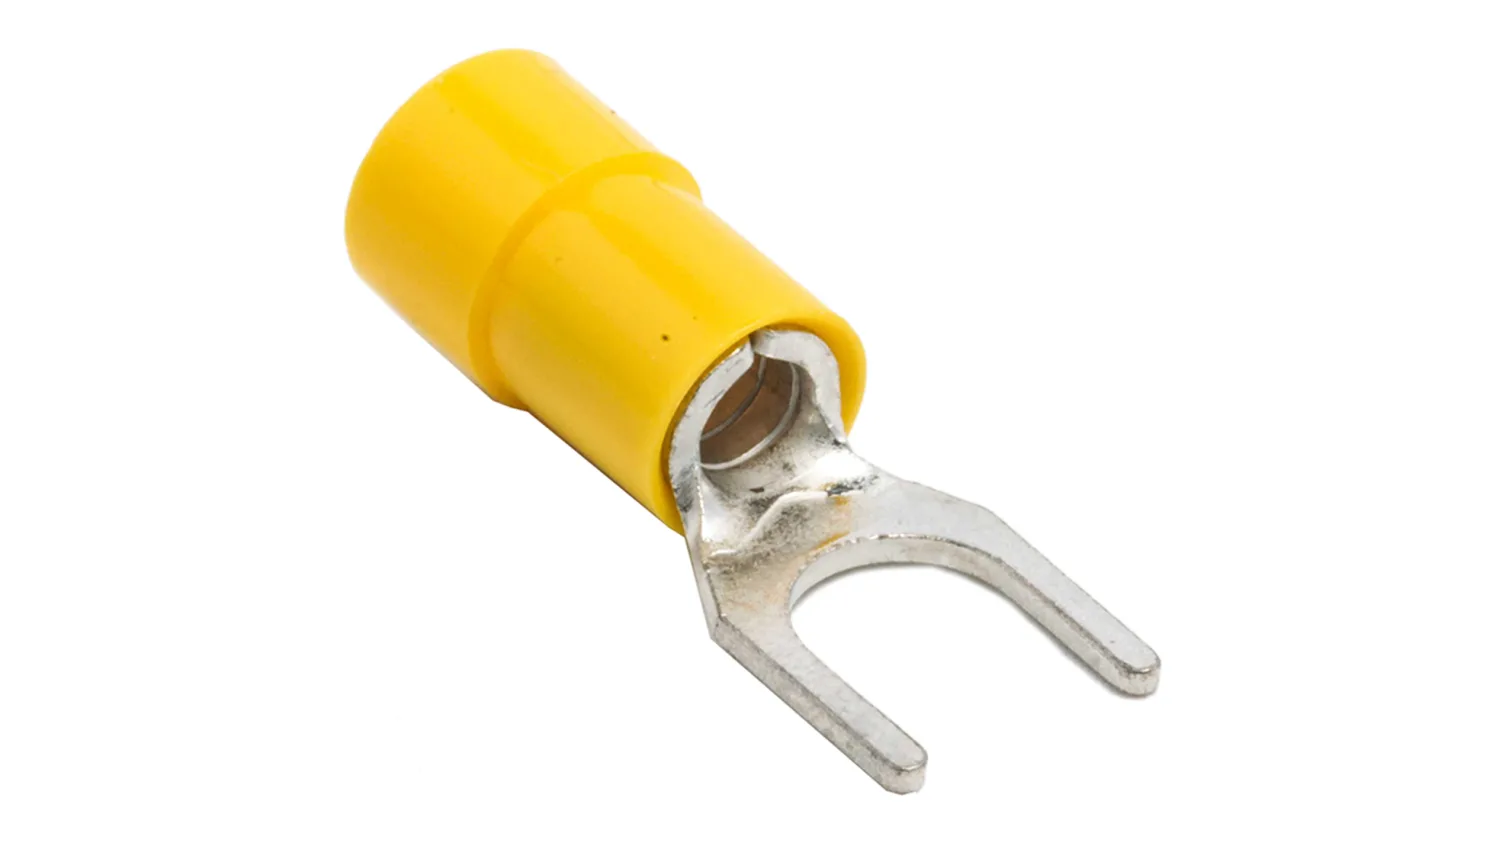
A: A spade connector, also known as a spade terminal or a fork terminal, is a type of electrical connector commonly used to attach wires to devices. It gets its name from its shape, which resembles a spade or fork, with a flat, blade-like end that can be inserted into the terminal block or terminal screw of a device.
Q: How do I crimp a spade connector?
A: Crimping a spade connector is a simple process. First, strip off a small section of insulation from the wire. Then, insert the stripped wire end into the spade connector’s crimping barrel. Use a crimping tool to squeeze the barrel tightly onto the wire, creating a secure connection. Ensure that the crimped connection is sturdy and there are no exposed wires.
Q: What tools do I need to crimp a spade connector?
A: To crimp a spade connector, you will need a few tools. The essential tools include a wire stripper to remove the insulation from the wire, a crimping tool specifically designed for spade connectors, and a pair of pliers for additional security and tightening. It is crucial to use the right tools to ensure a proper and secure crimp.
Q: Why is it important to use spade connectors?
A: Spade connectors provide a reliable and secure connection between wires and devices, ensuring proper electrical conductivity. They can easily be connected and disconnected, making them ideal for applications where frequent changes or repairs may be necessary. The use of spade connectors also helps to prevent wire damage and ensures a safer electrical connection.
Q: Can I reuse a crimped spade connector?
A: Reusing a crimped spade connector is generally not recommended. Once a spade connector has been crimped onto a wire, it is designed to provide a permanent connection. Attempting to reuse a crimped connector may compromise its integrity and result in an unreliable or insecure connection. It is best to replace the spade connector with a new one if reconnection is required.