
In today’s technology-driven world, owning a reliable battery charger is essential. Whether you’re constantly on the go or simply want to ensure that your devices never run out of power, having a battery charger is a game-changer. But why settle for a store-bought charger when you can make your own?
Building your own battery charger not only gives you the freedom to customize it to your specific needs but also allows you to gain a deeper understanding of how these devices work. From choosing the right components to assembling the circuit, creating your own battery charger can be an exciting and rewarding project.
In this article, we will walk you through the step-by-step process of making a battery charger. Whether you’re a DIY enthusiast or someone interested in learning more about electronics, this guide will provide you with all the information you need to create a functional and efficient battery charging device.
Inside This Article
- Materials Needed
- Understanding Battery Types
- Safety Precautions
- Building a Basic Battery Charger Circuit
- Conclusion
- FAQs
Materials Needed
Before you can start building your own battery charger, you will need to gather the necessary materials. Here is a list of items you will need:
- Battery: You will need a rechargeable battery that you want to charge. Make sure you choose a battery that is compatible with the charger circuit you will be building.
- Transformer: A transformer is needed to step down the voltage from the main power supply to a lower voltage suitable for the charger circuit. Choose a transformer with the appropriate voltage rating for your circuit.
- Rectifier: A rectifier is used to convert the alternating current (AC) from the transformer into direct current (DC). You can use a diode bridge rectifier or individual diodes for this purpose.
- Filter Capacitor: To smoothen the rectified output, you will need a filter capacitor. Choose a capacitor with the appropriate capacitance value and voltage rating.
- Regulator IC: Depending on the charging requirements of your battery, you may need a voltage regulator IC to ensure a consistent and controlled charging voltage. Choose the appropriate IC based on the battery specifications.
- Resistors and Capacitors: You will need various resistors and capacitors to support the functioning of the charger circuit. Refer to the circuit diagram or datasheets for the values and specifications.
- LEDs: LEDs can be used to indicate the charging status of the battery. You will need suitable LEDs and current-limiting resistors for this purpose.
- Printed Circuit Board (PCB): A PCB will provide a solid and organized platform to mount and connect all the components of the charger circuit. You can design your own PCB or use a pre-made one.
- Soldering Iron and Solder: You will need a soldering iron and solder to securely join the components on the PCB.
- Wire and Connectors: Wire and connectors will be needed to establish the necessary electrical connections between the components. Make sure to choose wires and connectors that can handle the required current.
- Tools: Basic tools such as wire strippers, pliers, and screwdrivers will be required during the assembly process.
By gathering these materials, you will have everything you need to get started on building your battery charger.
Understanding Battery Types
When it comes to batteries, there are various types available in the market, each with its own specifications and applications. Understanding the different battery types can help you choose the right one for your specific needs. In this section, we will explore some of the most common battery types:
1. Alkaline Batteries: Alkaline batteries are widely used in everyday devices like remote controls, flashlights, and portable radios. They are affordable, readily available, and offer a long shelf life. Alkaline batteries are single-use, meaning once they are depleted, they cannot be recharged.
2. Nickel-Cadmium (NiCd) Batteries: NiCd batteries were once popular but have been overshadowed by newer technologies. They are rechargeable and have a relatively low capacity compared to newer battery types. NiCd batteries are known for their “memory effect,” which reduces their overall capacity if they are not fully discharged before recharging.
3. Nickel-Metal Hydride (NiMH) Batteries: NiMH batteries are an improvement over NiCd batteries. They have a higher capacity and are free from the “memory effect.” NiMH batteries are widely used in portable electronics like cameras, toys, and cordless phones. They are also rechargeable.
4. Lithium-Ion (Li-ion) Batteries: Li-ion batteries are lightweight, have a high energy density, and are widely used in smartphones, laptops, and other portable electronic devices. They offer a longer lifespan and have a low self-discharge rate. Li-ion batteries are also rechargeable, making them a popular choice for many modern devices.
5. Lithium Polymer (LiPo) Batteries: LiPo batteries are a type of Li-ion battery that is commonly used in drones, remote-controlled vehicles, and other high-performance applications. They have a flexible and lightweight design, making them ideal for devices that require a compact power source.
It is important to note that each battery type has its own voltage and charging requirements. Failure to use the appropriate charger for a specific battery type can lead to damage or even pose safety risks. Therefore, it is crucial to understand the battery type and its corresponding charger before attempting to charge or use it.
Safety Precautions
When working with batteries and building a battery charger, it is crucial to prioritize safety. Batteries can be dangerous if mishandled or if the proper precautions are not taken. To ensure your safety and the safety of those around you, here are some important safety precautions to keep in mind:
-
Handle batteries with care: Always handle batteries with clean, dry hands. Avoid dropping them or exposing them to extreme temperatures and avoid placing them near flammable materials.
-
Protective gear: Wear appropriate protective gear, such as gloves and safety goggles, when handling batteries. This will help prevent contact with corrosive substances or potential accidents.
-
Work in a well-ventilated area: When charging or working with batteries, make sure you are in a well-ventilated area to prevent the build-up of potentially harmful gases.
-
Use the correct charger: Always use a charger specifically designed for the type and capacity of the battery you are working with. Using the wrong charger can lead to overcharging or damaging the battery.
-
Follow manufacturer instructions: Read and follow the manufacturer’s instructions for both the battery and the charger. This will ensure you are using the equipment correctly and safely.
-
Avoid short circuits: Be careful to prevent any metal objects from touching both battery terminals, as this can cause a short circuit. This can lead to overheating, explosions, or other dangerous situations.
-
Avoid overcharging: Never leave a battery charging for an extended period of time, as this can lead to overcharging. Overcharging can cause the battery to overheat, leak, or even explode.
-
Proper disposal: When disposing of old or damaged batteries, follow the correct disposal procedures. Many areas have designated recycling centers or drop-off locations for batteries, as they contain hazardous materials that should not be thrown away with regular trash.
By adhering to these safety precautions, you can minimize the risks associated with working with batteries and ensure a safe environment for yourself and others.
Building a Basic Battery Charger Circuit
Building your own basic battery charger circuit can be a rewarding and practical project. It allows you to customize the charger to your needs and ensures that your batteries are charged efficiently. Here are the steps to build a simple battery charger circuit:
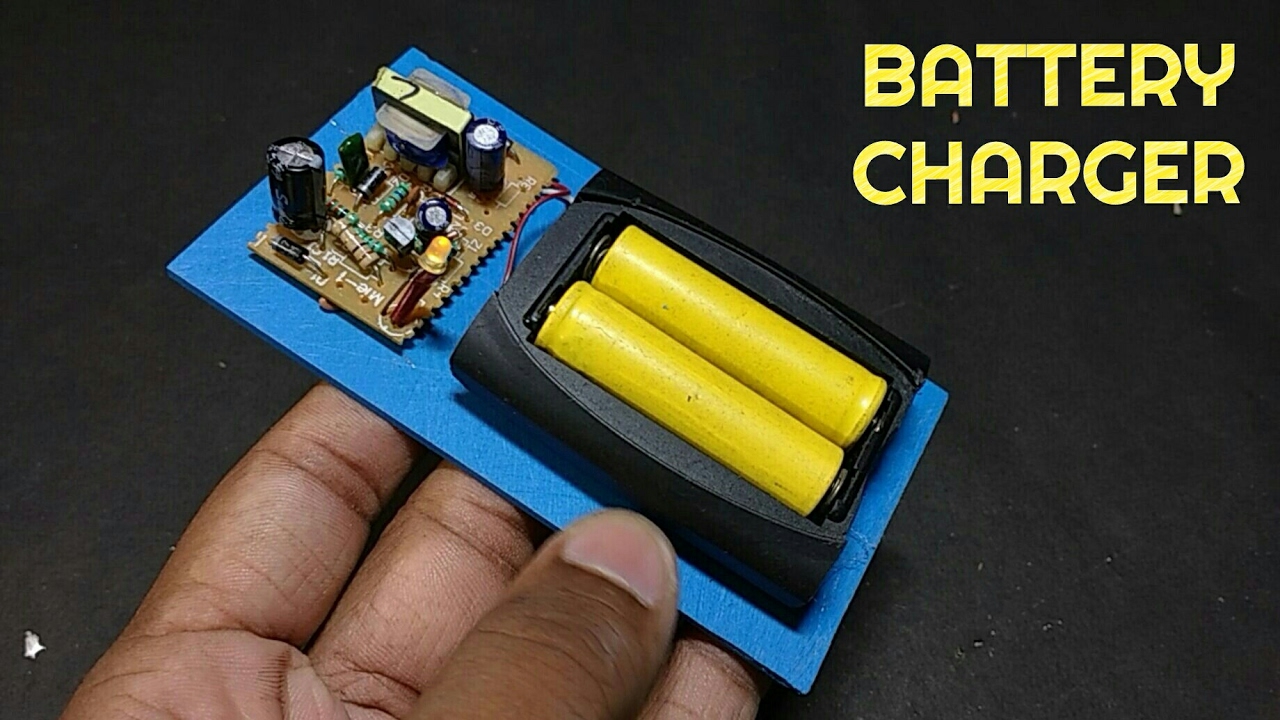
1. Select the appropriate components: To build a basic battery charger circuit, you will need a few key components. These include a transformer, rectifier diodes, capacitors, resistors, and an indicator LED.
2. Design the circuit: Start by designing the circuit on a breadboard or a circuit simulation software. This will help you visualize the connections and ensure that everything is in order before soldering the components.
3. Connect the transformer: Begin by connecting the primary side of the transformer to the AC power source. The secondary side of the transformer will provide the required voltage for charging the batteries.
4. Add rectifier diodes: Rectifier diodes are crucial for converting AC voltage to DC voltage. Connect the diodes in a bridge configuration to ensure that the negative and positive cycles of the AC voltage are converted into a consistent DC voltage.
5. Integrate capacitors: Capacitors are used to smoothen the DC voltage output and reduce any ripple effect. Connect capacitors in parallel with the DC input to eliminate any fluctuations in the voltage.
6. Include resistors: Add resistors in series with the charging circuit to control the charging current. Determine the appropriate resistance value based on the battery’s capacity and the desired charging rate.
7. Install an indicator LED: To indicate the charging status, connect an LED in series with a current-limiting resistor. The LED will light up when the battery is being charged and turn off when the charging process is complete.
8. Test the circuit: Once you have completed the circuit connections, test it using a multimeter and a battery. Ensure that the circuit is providing the desired voltage and charging the battery correctly.
9. Transfer the circuit to a PCB: After testing the circuit, you can transfer it onto a printed circuit board (PCB) for a more compact and permanent setup. Solder the components onto the PCB and ensure all connections are secure.
10. Safety precautions: Remember to follow safety precautions throughout the process. Disconnect the charger from the power source when not in use, avoid overcharging the battery, and handle the circuit and components with care.
Building a basic battery charger circuit is a fun and educational DIY project. Not only does it provide a practical solution for charging batteries, but it also allows you to explore the world of electronics and circuitry. With this basic knowledge, you can even modify the circuit to suit different battery types and charging requirements.
Conclusion
In conclusion, learning how to make a battery charger can be a rewarding and practical DIY project. By understanding the components involved and following proper safety precautions, you can create a charger that suits your needs. Whether you want to charge your mobile phone, tablet, or other electronic devices, having a reliable battery charger can ensure that you stay connected and powered up wherever you go.
Remember to always consult reliable sources and reference reputable guides or tutorials when embarking on any DIY electronics project. Safety should be your top priority, so make sure to handle electrical components with caution and adhere to any necessary guidelines. With the right tools, materials, and knowledge, you can confidently create a battery charger that meets your requirements.
So why wait? Start gathering the necessary supplies, do your research, and embark on the exciting journey of making your own battery charger. Not only will you save money, but you’ll also gain valuable knowledge and experience in the process. Happy charging!
FAQs
1. What is a battery charger?
A battery charger is a device used to recharge batteries and restore their power. It provides a controlled flow of electrical energy to the battery, allowing it to regain its charge.
2. Why do I need a battery charger?
A battery charger is essential for ensuring that your devices and gadgets always have a power source. It helps prevent the inconvenience of a dead battery and allows you to use your devices without interruption.
3. Can I make my own battery charger?
Yes, it is possible to make your own battery charger. However, it requires a good understanding of electronics and electrical circuits. It is recommended to consult a professional or follow a reliable guide to ensure safety and proper functionality.
4. What are the essential components of a battery charger?
A battery charger typically consists of a transformer to adjust voltage, rectifiers to convert AC to DC current, capacitors for filtering, and a control circuit to regulate the charging process. Depending on the type of battery, additional features may be required.
5. Are there different types of battery chargers?
Yes, there are different types of battery chargers available based on the type of battery they are designed to charge. Some common types include lead-acid battery chargers, lithium-ion battery chargers, and nickel-metal hydride battery chargers. It is important to select the appropriate charger that matches the battery type for optimal performance and safety.