
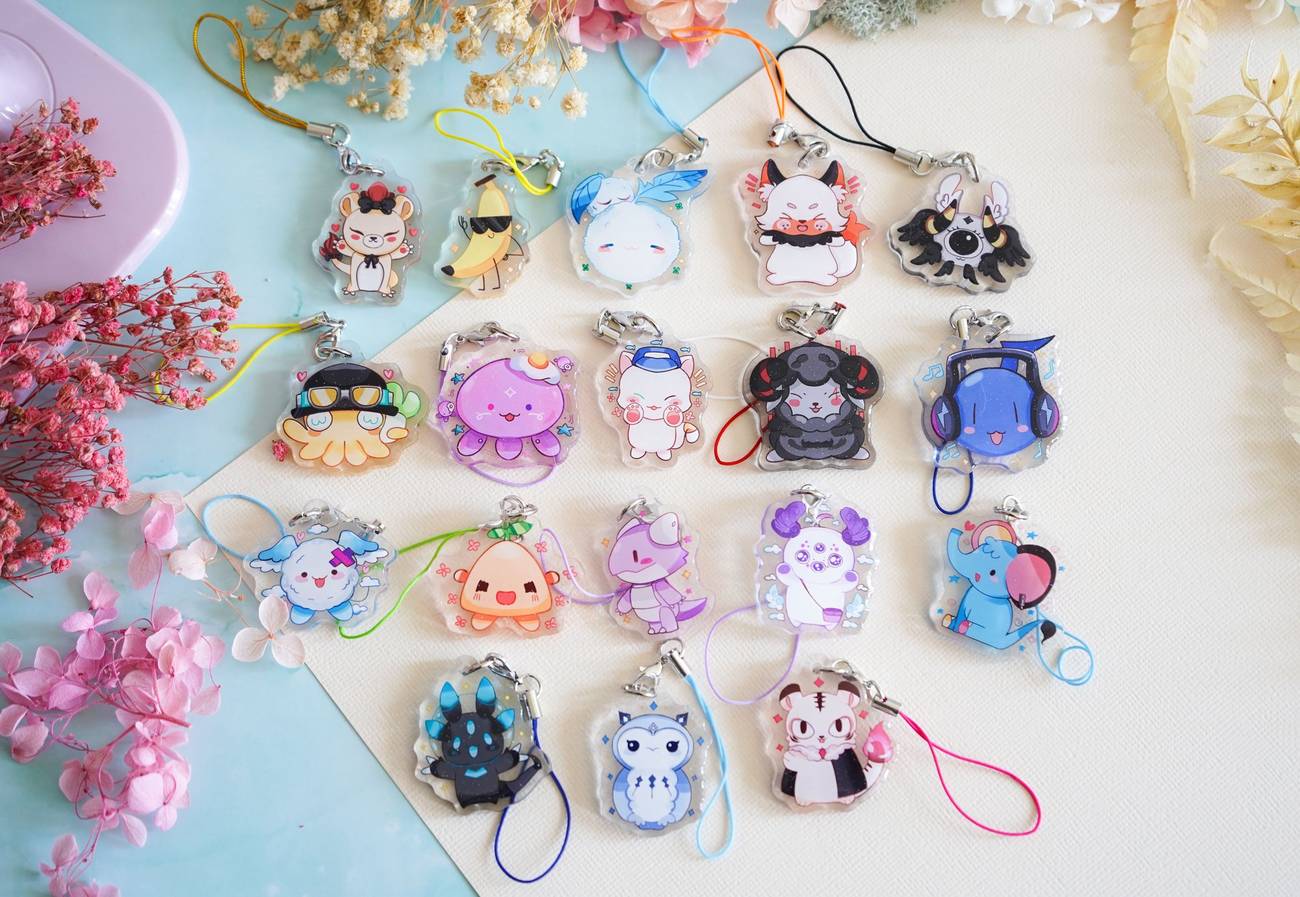
Phone charms have become a popular way to personalize and accessorize our beloved smartphones. And one of the most trending types of phone charms is the acrylic phone charm. These charming and versatile accessories give our phones a unique touch, allowing us to express our style and personality in a fun and creative way.
Making your own acrylic phone charms is not only a great way to unleash your creativity, but it also offers a budget-friendly alternative to purchasing pre-made charms. In this article, we will guide you through the process and provide you with helpful tips and ideas to create stunning acrylic phone charms that will make your phone stand out from the crowd.
Inside This Article
- Materials Needed
- Step 1: Preparation
- Step 2: Designing the Charms
- Step 3: Creating the Charms
- Step 4: Adding Finishing Touches
- Conclusion
- FAQs
Materials Needed
Before you start making acrylic phone charms, it’s important to gather all the necessary materials. Here’s a list of what you’ll need:
- An acrylic sheet: You can find these at craft stores or online. Choose a thickness that suits your preference, usually around 2-3mm.
- Design template: Create a design template for your phone charm. You can use a graphic design software or even draw it by hand.
- Acrylic cutting tool: Invest in a quality acrylic cutting tool or a sharp craft knife to cut the acrylic sheet.
- Sanding block or sandpaper: Smooth any rough edges and surfaces of the acrylic with a sanding block or sandpaper.
- Drill or hole punch: If you want to attach a chain or lanyard to your phone charm, you’ll need either a small drill bit or a hole punch.
- Decorative elements: Consider adding colorful beads, charms, or stickers to personalize your phone charm.
- Jump rings and pliers: If you’re using beads or charms, you’ll need jump rings and pliers to attach them securely.
- Clear adhesive: Use a strong and clear adhesive, such as E6000, to attach any additional elements to the charm.
Once you have all these materials ready, you’re well-equipped to make your own unique and stylish acrylic phone charms.
Step 1: Preparation
Before you dive into creating your acrylic phone charms, it’s important to gather all the necessary materials and set up your workspace. Here’s a step-by-step guide on how to prepare for this DIY project:
1. Gather the materials: The first thing you’ll need to do is gather all the materials you’ll need for making acrylic phone charms. These materials typically include:
- Premium quality acrylic blanks
- Design templates
- Alcohol wipes to clean the acrylic blanks
- Permanent markers or paint pens for coloring
- Jump rings or keychain rings for attaching the charms
- Clear adhesive tape for sealing the finished charms
- Jewelry pliers for attaching the rings
Make sure you have all these materials on hand before you begin.
2. Set up your workspace: Find a well-lit and well-ventilated area where you can comfortably work on your acrylic phone charms. Lay down some newspaper or a protective covering to protect your work surface from any accidental spills or damage.
3. Prepare your design: If you have a specific design in mind for your acrylic phone charms, gather your design templates or sketch out your ideas before starting the project. This will help you stay organized and focused during the creation process.
4. Clean the acrylic blanks: Before applying any designs or colors, make sure to clean the acrylic blanks with alcohol wipes. This will ensure that the surface is free from any dirt, oil, or smudges that could affect the final result.
Once you’ve completed these preparations, you’re ready to move on to the next step: designing your acrylic phone charms!
Step 2: Designing the Charms
Once you have gathered all the materials needed for making acrylic phone charms, it’s time to let your creativity shine by designing the charms. This step allows you to infuse your personal style and flair into the charms, making them unique and visually appealing.
Here are some key tips to consider when designing the charms:
- Brainstorm Ideas: Start by brainstorming different design concepts that resonate with you. Consider themes, colors, patterns, and shapes that you find visually appealing or that reflect your personality.
- Sketch It Out: After finalizing your design ideas, grab a piece of paper and a pencil to sketch out your desired charm designs. This step helps you visualize the layout, proportions, and details of each charm before moving on to the next phase.
- Consider Size and Shape: Keep in mind the size and shape of your phone charm. Acrylic charms can come in various shapes, such as squares, circles, hearts, or custom shapes. Consider the dimensions that best complement your design and ensure they fit well on a phone or phone case.
- Choose Colors Wisely: Select the colors that will make your design pop. Acrylic charms offer a wide range of color options, so choose shades that complement each other and enhance the overall aesthetic of the charm. Experiment with different color combinations to find the perfect match.
- Add Personal Touches: Consider incorporating personal elements into the design, such as initials, symbols, or meaningful quotes. These personalized touches make the charm even more special and can serve as a conversation starter or a reflection of your individuality.
- Experiment with Decorative Elements: Think outside the box and explore various ways to make your charms stand out. You can add glitter, sequins, beads, or even small trinkets to create texture and visual interest. The possibilities are endless, so let your imagination run wild!
Designing the charms is a fun and creative process that allows you to put your own stamp on your phone accessories. Remember to take your time, experiment with different ideas, and most importantly, have fun!
Step 3: Creating the Charms
Creating the charms is the exciting part of making acrylic phone charms. This step allows you to bring your design to life and turn it into a tangible accessory. Here’s how you can create your acrylic phone charms:
1. Set up your workspace: Make sure you have a clean and well-lit area to work in. Gather all the materials you need, including your acrylic blanks, paints, paintbrushes, and any other decorative elements you want to add to your charms.
2. Prepare the acrylic blanks: If your acrylic blanks have any protective film on them, make sure to remove it carefully. This will ensure that the surface is smooth and ready for painting.
3. Choose your painting technique: Decide how you want to decorate your charms. Acrylic paints offer a wide range of possibilities, from solid colors to intricate designs. You can use a paintbrush, sponge, or even create textures with different tools. Let your creativity guide you!
4. Paint the design: Start by sketching your design lightly on the acrylic blank using a pencil or a fine-tip marker. This will serve as a guide for painting. Then, carefully apply the acrylic paint using your chosen technique. Take your time and be patient to achieve precise and vibrant results.
5. Add additional elements: Once the paint has dried, you can enhance your charms by adding extra elements such as glitter, rhinestones, or stickers. Use a clear adhesive or a small amount of craft glue to attach these elements securely.
6. Let it dry: Allow your acrylic phone charms to dry completely before handling or attaching them to your phone. This will prevent smudging or damaging the design.
7. Attach findings: Finally, you’ll need to attach findings to your acrylic charms to turn them into functional accessories. Consider using jump rings, hooks, or phone charm straps to easily attach the charm to your phone or other items.
By following these steps, you’ll be able to create personalized acrylic phone charms that reflect your unique style and creativity. Whether you choose to paint intricate designs or go for a more minimalist approach, the process of creating your own charms can be incredibly rewarding.
Step 4: Adding Finishing Touches
After creating your acrylic phone charms and allowing them to dry, it’s time to add those final touches that will make them truly stand out. These finishing touches will not only enhance the visual appeal of your charms but also add durability and protect them from wear and tear. Here are a few tips on how to add those extra touches:
1. Sealant: Apply a sealant to your acrylic phone charm to protect the design and prevent it from fading or smudging over time. You can use a clear nail polish or a specialized sealant for crafts. Apply a thin, even coat and allow it to dry completely before handling the charm.
2. Attach a Jump Ring: To turn your acrylic charm into a wearable accessory, you’ll need to attach a jump ring. Simply use jewelry pliers to open the ring, thread it through the hole in your charm, and close it securely. This will allow you to easily attach the charm to a keychain, lanyard, or phone case.
3. Add a Lobster Clasp: If you want to make your charm more versatile, consider adding a lobster clasp. This will allow you to easily clip and unclip your charm from different items like bags or zipper pulls. Just like attaching a jump ring, use pliers to open the clasp, attach it to your charm, and close it tightly.
4. Decorative Embellishments: Get creative and add more visual interest to your charm by incorporating decorative embellishments such as beads, charms, or small trinkets. You can attach these using jewelry jump rings or glue them directly onto the charm’s surface. Choose embellishments that complement your design and add that personalized touch.
5. Personalization: Consider personalizing your acrylic phone charms by adding initials, names, or meaningful symbols. You can achieve this by using permanent markers, acrylic paint pens, or even by engraving the charm. Adding personalization will make your charm unique and meaningful to its owner.
By following these steps and adding the finishing touches, your acrylic phone charms will be ready to be enjoyed or given as personalized gifts. Remember to let your creativity shine through and have fun experimenting with different techniques and designs!
Conclusion
Creating acrylic phone charms is a fun and creative way to personalize your mobile device and add a touch of style to it. With the right materials and techniques, you can design unique charms that reflect your personality or match your mood. Whether you’re looking to make a statement or simply want to accessorize your phone, acrylic phone charms are a great choice.
By following the step-by-step guide in this article, you now have the knowledge and skills to create your own acrylic phone charms. Experiment with different designs, colors, and shapes to make each charm truly one-of-a-kind. Remember to consider safety guidelines when using tools and materials, and always allow your charms to fully dry before attaching them to your phone.
So go ahead, unleash your creativity, and start making beautiful acrylic phone charms that will make your device stand out among the rest!
FAQs
1. Can I make acrylic phone charms at home?
2. What materials do I need to make acrylic phone charms?
3. Do I need any special equipment to make acrylic phone charms?
4. How long does it take to make acrylic phone charms?
5. Can I customize the design of my acrylic phone charms?