
In today’s world of smart devices, having control over multiple electronics from one device is a game-changer. That’s where an Infrared (IR) blaster comes in handy. an IR blaster is a device that allows you to control your TV, air conditioner, DVD player, and other IR-enabled electronics from your smartphone or tablet. It acts as a bridge between your mobile device and your home appliances, turning your phone into a universal remote control.
In this article, we will explore how to make an IR blaster at home, step-by-step, using commonly available materials. Whether you’re looking to maximize convenience, simplify your entertainment setup, or just love a good do-it-yourself project, making your own IR blaster is an exciting endeavor that will give you greater control over your electronics.
Inside This Article
- Required Materials
- Step 1: Gathering the Components
- Step 2: Wiring the IR LED
- Step 3: Programming the IR Blaster
- Step 4: Testing the IR Blaster
- Troubleshooting Tips
- Conclusion
- FAQs
Required Materials
To make an IR blaster, you will need the following materials:
-
An Arduino board: You can use any Arduino board for this project, such as the Arduino Uno or Arduino Nano. The board will serve as the brain of your IR blaster.
-
An infrared (IR) LED: This is the crucial component of your IR blaster as it emits the infrared signals. You can easily find IR LEDs online or at your local electronics store.
-
A resistor: To prevent the IR LED from burning out, you will need to include a resistor in your circuit. The value of the resistor will depend on the specifications of your IR LED.
-
Jumper wires: These wires will be used to connect the components together. Make sure you have enough male-to-male and male-to-female jumper wires for your project.
-
A breadboard: This will serve as the platform to build and test your circuit. It allows you to easily connect and disconnect components without soldering.
-
A USB cable: You will need a USB cable to connect your Arduino board to your computer for programming and power.
With all these materials in hand, you are ready to start building your own IR blaster.
Step 1: Gathering the Components
Before you can start building your very own IR Blaster, you’ll need to gather all the necessary components. This step is crucial in ensuring you have everything you need for a successful project. Here are the key components you’ll need:
- Arduino board: This is the microcontroller that will serve as the brain of your IR Blaster. You can choose between different Arduino models, but make sure it has enough digital pins to connect the IR LED and other components.
- IR LED: The infrared LED is the main component that emits the infrared signals used to control various devices. Look for an IR LED compatible with the Arduino board you’re using.
- Resistor: A resistor is essential to control the current flowing through the IR LED. Choose a resistor with the appropriate resistance value based on the IR LED’s specifications.
- Breadboard: The breadboard provides a convenient platform for prototyping your circuit without the need for soldering. Ensure that the breadboard is compatible with your Arduino board.
- Jumper wires: Jumper wires are used to establish connections between different components on the breadboard. Make sure you have a variety of male-to-male, male-to-female, and female-to-female jumper wires.
- USB cable: You’ll need a USB cable to connect your Arduino board to your computer for programming and power supply.
Once you have gathered all these components, you’re ready to move on to the next step of wiring the IR LED to the Arduino board.
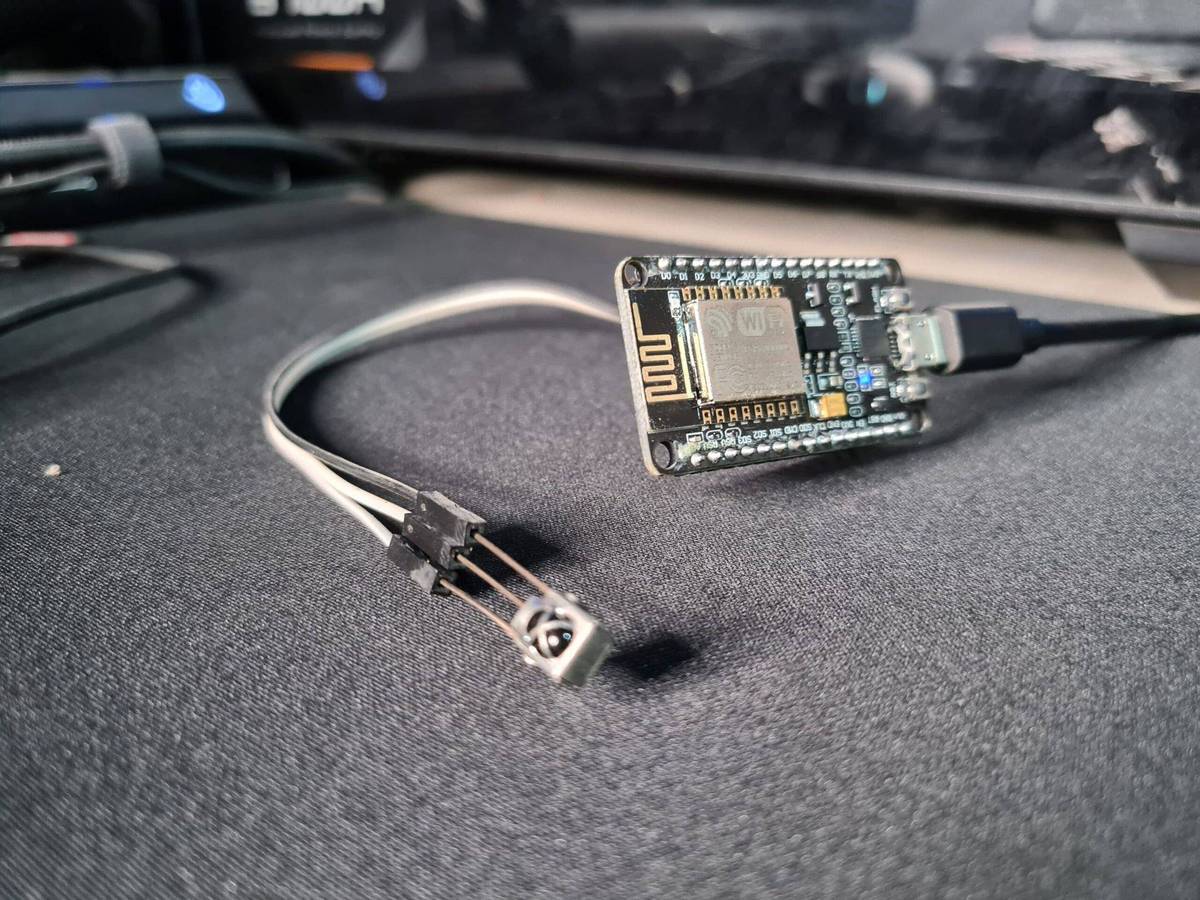
Step 2: Wiring the IR LED
Wiring the IR LED is a crucial step in constructing your own IR Blaster. This component is responsible for transmitting the infrared signals used to control your electronic devices. To properly wire the IR LED, follow the steps below:
1. Start by identifying the two leads of the IR LED. The longer lead is typically the positive (+) lead, while the shorter lead is the negative (-) lead. Make sure you have a clear distinction between the two.
2. Take one end of a jumper wire and connect it to the positive (+) lead of the IR LED. You can either use a soldering iron to secure the connection or use a breadboard to insert the wire into the appropriate slot.
3. Connect the other end of the jumper wire to a digital pin on your microcontroller or Raspberry Pi. Be sure to consult the documentation for your specific board to determine which pin is suitable for this purpose.
4. Next, take another jumper wire and attach it to the negative (-) lead of the IR LED. Again, you can use a soldering iron or a breadboard to make a secure connection.
5. Connect the other end of the jumper wire to the ground (GND) pin on your microcontroller or Raspberry Pi. This completes the wiring of the IR LED.
It is crucial to double-check your connections and ensure that there are no loose wires or faulty connections. This will prevent any potential issues or malfunctioning of your IR Blaster.
Once you have successfully completed the wiring, you are ready to move on to the next step: programming the IR Blaster.
Step 3: Programming the IR Blaster
Once you have successfully wired the IR LED, the next step is to program the IR Blaster to send signals to your devices. Programming the IR Blaster involves configuring it with the right codes for each device you want to control.
The first thing you need to do is to determine the specific IR codes for your devices. These codes are unique to each brand and model. You can usually find them in the user manual or by searching online. There are also databases available online that provide a wide range of IR codes for different devices.
Once you have the IR codes, you will need to use a microcontroller or an Arduino board to program the IR Blaster. If you are using an Arduino, you will need to install the Arduino IDE software on your computer. This software allows you to write and upload the code to your Arduino board.
To program the IR Blaster, you will need to load the IR library for Arduino. This library provides functions that make it easy to send IR signals using the IR LED. You can find the IR library in the Arduino Library Manager or download it from the official Arduino website.
After you have installed the IR library, you can start writing the code to control your devices. The code will consist of a series of commands that tell the IR Blaster which IR codes to send. You will need to specify the device, the specific function (such as power on/off or volume up/down), and the corresponding IR code.
Once you have written the code, you can upload it to your Arduino board using the Arduino IDE. Make sure your Arduino is connected to your computer via USB. After the code is uploaded, you can connect the IR Blaster to the Arduino board and power it up.
Now it’s time to test the IR Blaster and see if it can successfully control your devices. Point the IR Blaster towards the device you want to control, press the corresponding button on your Arduino, and see if the device responds to the command.
If the device responds, congratulations! You have successfully programmed the IR Blaster. If it doesn’t respond, you may need to double-check your wiring connections, verify that you are using the correct IR codes, or troubleshoot any issues with your Arduino board.
Remember, programming the IR Blaster can be a trial-and-error process, especially if you are working with devices that have unique or proprietary IR codes. It may take some time and experimentation to find the right codes and configurations for your specific devices.
Once you have successfully programmed the IR Blaster, you can enjoy the convenience of controlling multiple devices with a single remote. Whether you want to turn on your TV, adjust the volume of your sound system, or change the input on your DVD player, the IR Blaster will allow you to do it all with a simple command.
Step 4: Testing the IR Blaster
After completing the wiring and programming of your IR blaster, it’s time to test its functionality. Testing the IR blaster will ensure that it is working properly and can effectively transmit infrared signals to control your devices. Here is a step-by-step guide to testing your IR blaster:
- Prepare your device: Grab the remote control of the device you want to control with your IR blaster. Make sure the device is powered on and within the line-of-sight of the blaster.
- Choose a command: Decide which command you would like to send to your device. This could be turning the device on or off, adjusting the volume, changing the channel, or any other function that the remote control offers.
- Point the blaster: Position your IR blaster in front of the device you want to control. Ensure that the IR LED is directed towards the device’s infrared receiver.
- Send the command: Use your programming code or software to send the command to the IR blaster. The blaster will emit infrared signals, mimicking the signals of the remote control.
- Observe the device: Pay close attention to the controlled device and see if it responds to the command sent by the IR blaster. Check if the device turns on or off, volume adjusts, or any other expected action occurs.
If the device responds correctly and performs the desired action, congratulations! Your IR blaster is working effectively. Repeat this process with different commands to ensure all functions of the device can be controlled successfully.
However, if the device does not respond or behaves erratically, consider the following troubleshooting tips:
- Recheck the wiring: Make sure that all the connections between the IR LED and the microcontroller are properly soldered and secure. Check for loose or damaged wires.
- Verify the programming code: Double-check your programming code to ensure there are no syntax errors or incorrect configurations. Make sure the correct IR codes are being sent.
- Check the distance: Ensure that the IR blaster is close enough to the device being controlled. If the distance is too far, the infrared signals may not reach the device reliably.
- Replace the IR LED: If all else fails, there may be an issue with the IR LED itself. Consider replacing it with a new one and repeat the testing process.
By following these steps and troubleshooting tips, you can effectively test your IR blaster and ensure its proper functionality. Once you have verified that everything is working correctly, you can confidently control your devices using your newly created IR blaster.
Troubleshooting Tips
Creating your own IR blaster can be a fun and rewarding project, but sometimes you may encounter issues or face challenges along the way. Don’t worry! Here are some troubleshooting tips to help you get your IR blaster up and running smoothly:
- Double-check your connections: Ensure that all the wires are properly connected to the right pins on the Arduino board and the IR LED. A loose or incorrect connection can cause your IR blaster to malfunction.
- Verify the code: Go through your code and make sure it is correctly written and uploaded to the Arduino board. Pay attention to any syntax errors or missing libraries that may prevent the IR blaster from working properly.
- Check the power source: Ensure that your Arduino board is receiving enough power to operate. Low power levels can cause issues with the functionality of the IR blaster. Consider using a dedicated power supply if needed.
- Confirm the range: If your IR blaster is not transmitting signals to your devices from a reasonable distance, it may be due to a weak signal. Try increasing the power to the IR LED or adjusting the position and orientation of the IR LED for better coverage.
- Test with different devices: If your IR blaster seems to be working inconsistently or not at all with a particular device, it’s worth testing it with other devices. Some devices have unique IR protocols or require specific codes to function properly.
- Replace the IR LED: If all else fails, the issue may lie with the IR LED itself. Over time, LEDs can degrade or fail, affecting the performance of your IR blaster. Try replacing the IR LED with a new one and see if that resolves the problem.
Remember, troubleshooting is a normal part of any DIY project. Patience and persistence are key. Don’t be discouraged if you encounter challenges along the way. With a little troubleshooting, you’ll be able to overcome any obstacles and enjoy the benefits of your homemade IR blaster!
Conclusion
In conclusion, making your own IR blaster can be a fun and rewarding project for tech enthusiasts who want to expand the functionality of their devices. With a few simple components and a bit of technical knowledge, you can create a device that allows you to control various electronic devices using your smartphone or tablet.
By following the steps outlined in this article, you can learn about the principles of infrared communication and gain hands-on experience in building your own circuit. Whether you want to control your TV, DVD player, air conditioner, or any other IR-enabled device, an IR blaster can be a cost-effective solution.
Remember to have patience and attention to detail during the building process. Once you have successfully created an IR blaster, you can enjoy the convenience of controlling multiple devices from the palm of your hand.
So what are you waiting for? Start gathering the necessary components and embark on this exciting DIY adventure to make your very own IR blaster today!
FAQs
1. What is an IR blaster?
An IR blaster, or infrared blaster, is a device that allows you to control other electronic devices using infrared signals. It acts as a bridge between your smartphone or other smart devices and your TV, DVD player, air conditioner, or any other appliance that uses infrared remote control.
2. How does an IR blaster work?
An IR blaster emits infrared signals that are picked up by the infrared receiver on your electronic device. These signals communicate the commands from your smartphone or smart device to control various functions on the device, such as changing channels, adjusting volume, or turning the device on or off. It essentially replicates the functions of a traditional remote control.
3. Can I use an IR blaster with any smartphone?
Not all smartphones come equipped with built-in IR blasters. You will need to check the specifications of your smartphone to determine if it has this feature. Some popular brands like Samsung, LG, and HTC have included IR blasters in certain models. Alternatively, you can also purchase external IR blaster attachments that can be connected to your smartphone via the headphone jack or USB port.
4. Are there any apps for controlling devices with an IR blaster?
Yes, there are several apps available on both the Google Play Store and the Apple App Store that allow you to control devices using an IR blaster. These apps typically provide a user-friendly interface where you can select the brand and model of your device and use your smartphone as a virtual remote control. Some popular apps include Peel Smart Remote, AnyMote, and Sure Universal Remote.
5. What are the advantages of using an IR blaster?
Using an IR blaster offers several advantages. Firstly, it allows you to reduce clutter by eliminating the need for multiple remote controls. You can control multiple devices using just your smartphone or smart device. Additionally, it provides convenience by allowing you to control your devices from a single location, even if they are out of sight or in a different room. It also enables you to automate device control by integrating it with home automation systems or voice assistants like Amazon Alexa or Google Assistant.