
Landing a beautiful pair of high-quality headphones bring great joy to every audiophile. Whether you’re listening to your favorite tunes or playing online games with them, their sound quality makes a huge difference in your experience. After all, music and sound are essential to the experiences that media provides you with. All good things do have a downside, and for headphones, that would be their durability.
While the metal and plastic parts of headphones are durable, the same can’t be said for ear pads. That’s because ear pads are usually made of materials like protein leather that will inevitably wear out over time. Thankfully, there’s a way for you to replace your headphone ear pads when they’re worn out. Here’s a rundown on what you need to know:
When’s the Right Time to Finally Replace Your Headphone Ear Pads?
It’s a shame to throw out perfectly good headphones just because the ear pads are damaged. That’s why we recommend replacing your headphone ear pads to prolong their life. With that said, how do you gauge when it’s time to replace your ear pads?
We usually think of replacing our headphone ear pads when they become uncomfortable to wear. However, this is not the best way to determine a good time for ear pad replacement, as they wear and tear in different ways. Here are some of the key reasons why you should replace your headphone ear pads:
1. Cracking & Rough Texture
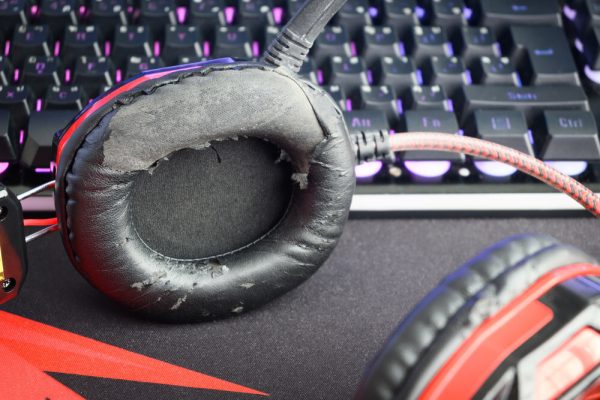
The first sign to watch out for is a change in texture on your headphone ear pads. This is the most common and visible deterioration that can happen to them. When this happens, you’ll find multiple tears and cracks on the pads that peel away their outer layer. This creates a rough texture that you will feel on your ears, making them uncomfortable to wear.
2. Rotting & Foul Smell
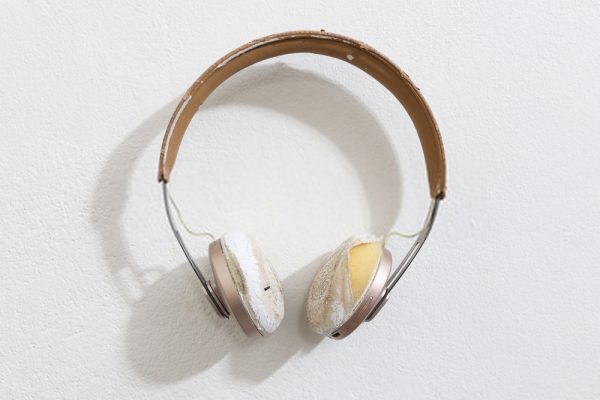
Not all headphone ear pads are made of materials that can tear or crack easily. Some are made from softer fabrics that don’t tear as easily. However, that doesn’t mean these headphones aren’t prone to deterioration. These fabrics can actually rot, the result of them being porous materials that readily absorb oil, sweat, and moisture. Cleaning is not enough to eliminate the problem, and so your only recourse is to replace the ear pads as soon as possible.
3. Disfiguration And Deformation
Disfiguration of your headphone ear pads may not be as obvious as the previous two problems, but it’s something you’ll want to keep an eye out for. You might be able to identify this problem from the way they feel when you put on your headphones. If they’re not as comfortable or don’t fit as well as they used to, they might have already deformed.
This comes about as a result of ear pads losing their spring and firmness over time, which will cause them to flatten.
Things to Know Before Replacing Your Headphone Ear Pads
Every replacement or refurbishing process comes with caveats that affect the original product. Replacing ear pads is no different and comes with its own drawbacks. That’s because the replacement will change your headphones in terms of both fit and quality unless you’re using original manufacturer replacements.
The first thing you should know before replacing your ear pads is that you may experience a change in audio quality. New ear pads will alter the audio output especially if their materials, shape, and size greatly differ from the original.
This goes without saying that replacing your ear pads will also make wearing your headphones feel different when you put them on. In some cases, the new ear pads may be uncomfortable to wear, especially if the material is not as breathable and soft as the original. That’s why if you’re using third-party replacement ear pads, be sure to do your due research on the materials, as it will determine how comfortable they are to wear over long periods.
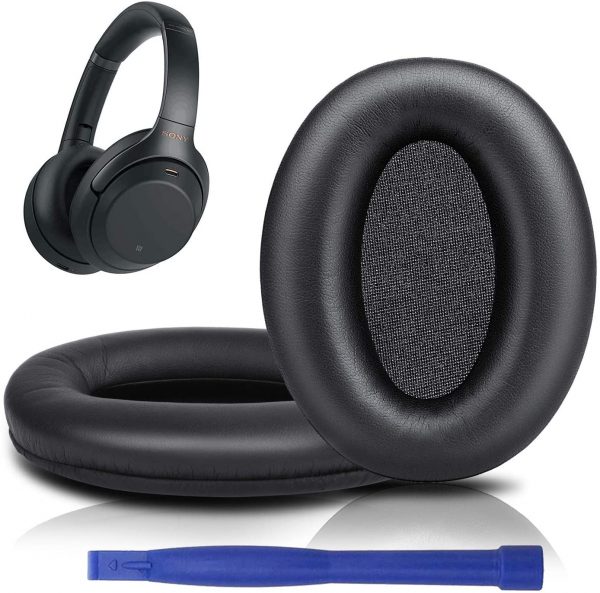
Finding Replacements For Your Headphone Ear Pads
Before you look into how to replace your headphone ear pads, you first have to find the right replacement pair. Simply buying a pair of headphone ear pads from the store won’t guarantee a good fit. That’s because different headphones are made by different manufacturers with their sizes and measurements.
Original Headphone Ear Pads From The Manufacturer
Of course, some headphones don’t come with easily replaceable ear pads. Unless you’re using Apple’s new headphones, swapping out the ear pads won’t be as easy. Some manufacturers do, however, provide replacements for their headphone models. For example, Bose sells ear pads that you can purchase to replace your current ones. Sony and Plantronics also have ear pads for sale, with Plantronics’ easily found on Amazon.
Buying replacement ear pads straight from the manufacturer is a sure-fire way of getting the perfect fit. Just type in your headphone model online to see if your manufacturer specifically sells its ear pad replacements.
Shopping For Replacements
Unfortunately, not all manufacturers sell replacements for their headphone models. There are different reasons for this, ranging from the replacements not being profitable enough or even your headphone model being very outdated. You may also choose to go for third-party replacements to change your headphones’ look and feel; Walmart is a solid place, as is Amazon for its selection of generic ear pads.
Before shopping for ear pads online, be sure to measure your headphones first.
Measuring Headphone Ear Pads
While it can be intimidating to measure your headphone ear pads because they’re circular, there’s still an easy way to get its measurements. All you need is to take a few measurements from your headphones and then use a simple equation. Here’s what you need to measure first:
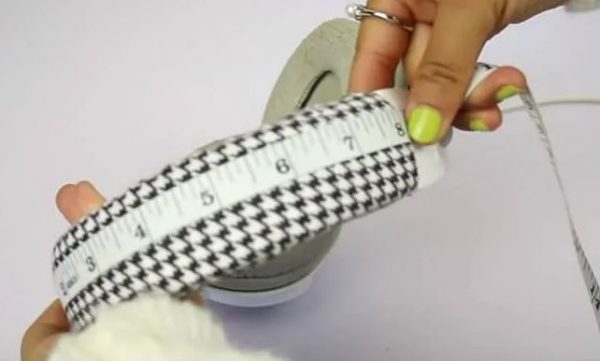
- Determine the length (L) in inches
- Measure the width (W) in inches
- Determine the average size (A) in inches and millimeters
With these two measurements, you can easily compute the average size. Here’s the simple and easy formula: A = (L + W) / 2. The average size of it is A. To solve A, just add the length and width in inches. Then, divide the result (L+W) by 2 to get the average. This will be your average size in inches. It’s also helpful to determine the average size in millimeters by doing a quick conversion. With these values, you should be able to find the right size online.
Determine Your Material

The great thing about buying third-party ear pads is that you can determine which material you want. Choosing the right material will have a significant impact on the sound quality, comfort, and durability of your headphones.
If you want a large soundstage with great comfort, you should choose Memory Foam. Velour will offer you clearer bass, but it’s less breathable and needs more cleaning. If you want to add bass to your sound, you should opt for Genuine Leather. While it’s more durable than other materials and easy to clean, it’s the least breathable material out of all the options. Lastly, Protein Leather will give you great bass and fewer problems in terms of maintenance. It’s also very durable and comfortable.
How to Replace Headphone Ear Pads
After picking your material and replacement of choice, let’s get to the ear pad replacement process. This will only take a few minutes and requires only a few materials.
Ready Your Materials
Here are the tools you need to replace your headphone ear pads:
Check Sony WH-1000XM3 on Amazon
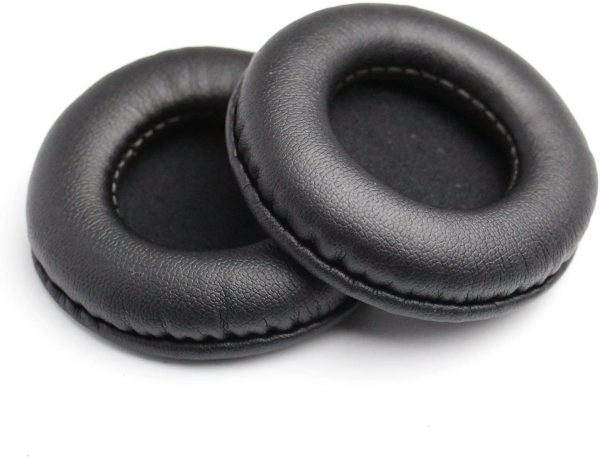
- Replacement pads
- Prying tool
- Earpad tape
- Toothbrush
By now, you should already have replacement ear pads at hand. Now, you only need a prying tool, earpad tape, and a toothbrush to finish the job. The prying tool can be anything you can use to remove your old headphone ear pads. Some people use plastic cards, dull knives, or just their fingers.
As for the earpad tape, these are what you use to stick your new pads to your headset. This tape is usually bundled along with replacement pads, although you can buy them separately online. Lastly, an old toothbrush is handy to clean dust and glue residue from your old ear pads.
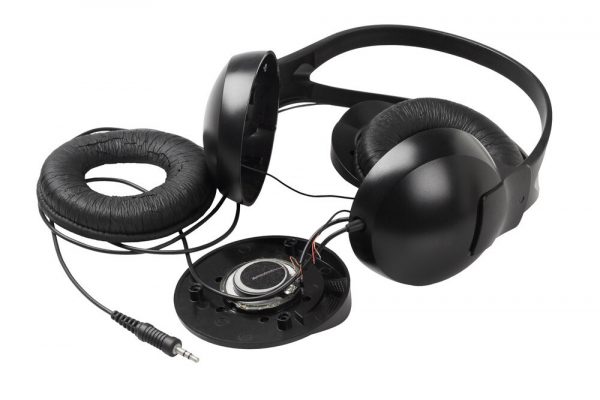
Removing The Pads
Next, it’s time to remove your old headphone ear pads. This process depends on what type of ear pads your headphones have. Some manufacturers make them easily removable, while others glue them on. Find out what type your headphones have and move to the appropriate step.
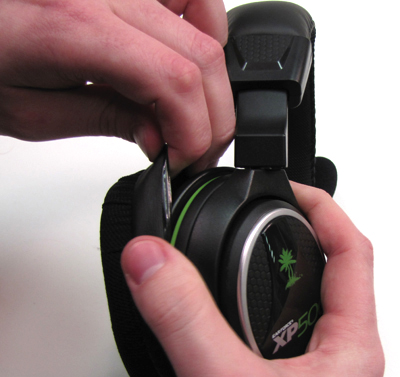
1. Easily Removable Headphone Ear Pads
The first and easiest method is for easily removable pads. You can use just your hands for these or use a prying tool if that’s easier to use. Either way, pry open and pull its outer edges. Continue to pry and pull out the ear pad to fully remove it from the headset.
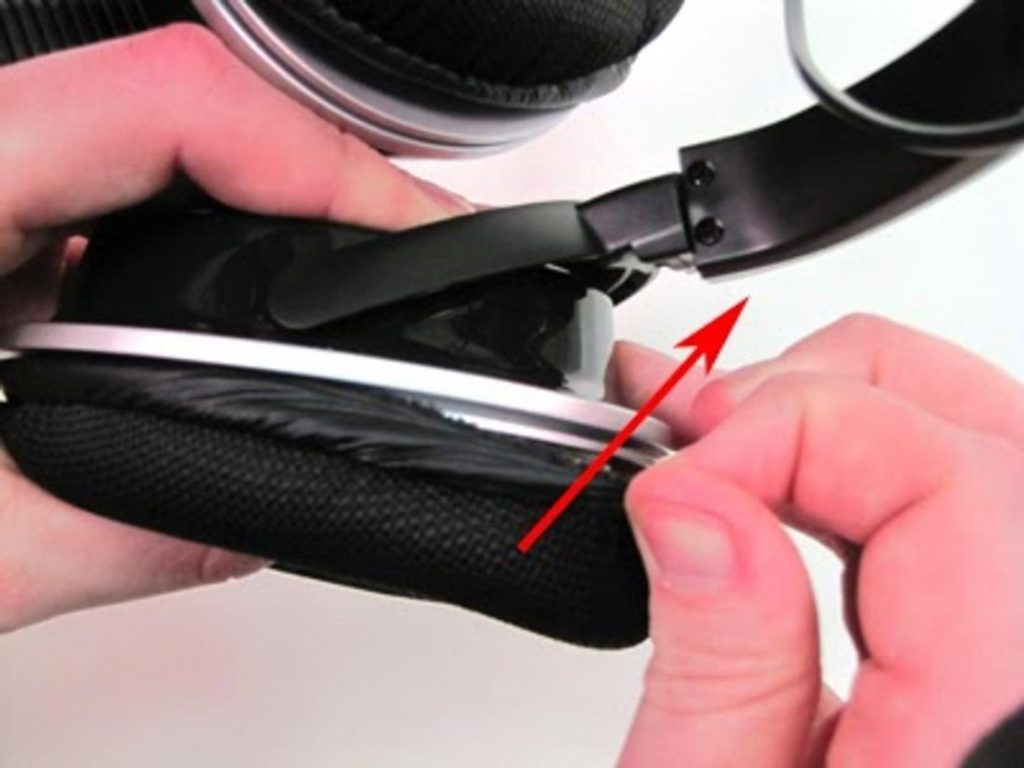
2. Glued Headphone Ear Pads
Glued ear pads are slightly more difficult to remove, but it’s not impossible. First, use the prying tool to gently squeeze in between your ear pad and the housing. Slowly pry the first section and then move towards the surrounding areas until the whole pad is pried open. Afterward, use the toothbrush to clean the housing and clear any dust, debris, or glue left over. You can also use a soft cloth with alcohol to clean more thoroughly.
Replacing the Headphone Ear Pads
After successfully removing it and cleaning the housing, it’s time to put on the replacements. Take your time with this step because you’re using adhesives to put on the replacement for glued-on ear pads.
© Photo by Headphonesty
1. Easily Removable Headphone Ear Pads
If you have easily removable headphone ear pads, then the installation process is pretty straightforward. First, you have to align the replacement ear pad to the shape of the housing. Then, slip in one side of the ear pad into the headset. Slowly make your way around until you’ve slid the entire ear pad in place. Afterward, just slightly rotate the ear pad from side to side to make sure it is tightly fitted.
2. Glued Headphone Ear Pads
With glued headphone ear pads, the process is slightly more complicated. First, you have to apply the earpad tape onto the back of your replacement pads. Make sure the earpad tape’s holes line up with the back of the replacement pads.
After applying the tape, peel off the paper to uncover the adhesive part of the tape. Then, align the replacement to the housing to make sure it’s properly oriented. Once you’re sure it has a good orientation, carefully attach the ear pads onto the housing. Press it down gently to ensure the adhesive fully sticks on.
Headphone Ear Pads Maintenance
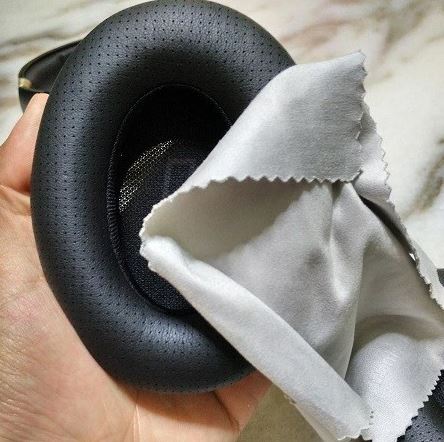
As a final note, we’ll give you a few tips on how to maintain the quality of your ear pads. After all, you’ve just installed new ones so you don’t want to replace them any time soon.
To maintain the ear pads’ quality, all you need to do is properly clean your headphones. That includes cleaning after each use and also cleaning once a week. This is especially important in more absorbent materials such as memory foam. If you sweat a lot or have oily skin, your ear pads run the risk of getting spoilt quickly. Make sure to clean them weekly with a damp cloth (with soap). You should also take the basic step of wiping the pads after each use to limit the amount of oil and sweat it absorbs.
Apart from these, you can apply other quality-maintaining practices like leather conditioner for leather pads. You also have to store your headphones properly in a sealed case so they don’t gather dust. It’s also ideal to clean your ears periodically to ensure that earwax doesn’t get onto your headphones.
Conclusion
It’s a shame when people throw away headphones just because of damaged ear pads. That’s why learning how to replace headphone ear pads is quite important for headphone users. Once you do, your headphones can easily look and feel as good as new. Just remember to maintain them properly to lengthen their life span.