
Setting up a ring light stand is a crucial step in achieving professional-looking lighting for photography or videography. Whether you’re a content creator, a makeup artist, or just someone who wants to elevate their selfie game, a ring light can make a significant difference in your final results. The right setup can enhance the lighting quality, eliminate shadows, and create a flattering glow on your subject.
In this guide, we will walk you through the step-by-step process of setting up a ring light stand. You’ll learn about the equipment needed, the various types of ring lights available, and the best practices for positioning and adjusting your ring light to achieve optimal results. So, get ready to illuminate your shots and take your content to the next level with a professionally lit ring light setup!
Inside This Article
- Choosing the Right Ring Light Stand
- Setting Up the Ring Light Stand
- Attaching the Ring Light to the Stand
- Adjusting the Ring Light for Best Lighting Angle
- Conclusion
- FAQs
Choosing the Right Ring Light Stand
When it comes to selecting the perfect ring light stand for your needs, there are a few factors you need to consider. Here’s a breakdown of what you should look for:
1. Height: The height of the ring light stand is crucial in ensuring you achieve the desired lighting angle. Consider your setup and the height you will be using the ring light at. Look for a stand that offers adjustable height options to accommodate different shooting scenarios.
2. Stability: Stability is key to prevent any accidents or disruptions during your shoot. Look for a ring light stand with a sturdy base and legs that provide excellent stability. This will ensure that your ring light stays securely in place, even during movement.
3. Portability: If you’re someone who frequently travels or shoots content outside of a studio, portability is a crucial factor to consider. Look for a ring light stand that is lightweight and easy to assemble and disassemble. This will make it more convenient for you to transport and set up your equipment on the go.
4. Compatibility: It’s important to ensure that the ring light stand you choose is compatible with your specific ring light model. Check the specifications and weight capacity of the stand to make sure it can properly support your ring light.
5. Price: Last but not least, consider your budget when selecting a ring light stand. While it’s important to invest in a high-quality stand, you also want to find one that offers good value for money. Compare prices and read reviews to make an informed decision.
Setting Up the Ring Light Stand
Setting up a ring light stand is a crucial step in achieving professional-level lighting for your photography or video projects. The ring light stand provides stability and adjustability, allowing you to position the ring light at the desired height and angle. Here’s a step-by-step guide on how to set up a ring light stand:
1. Start by unpacking the ring light stand and its components. Most ring light stands come with a tripod base, extendable pole, and mounting adapter for the ring light.
2. Extend the tripod legs to their full extent and make sure they are securely locked in place. This will ensure stability during use.
3. Attach the extendable pole to the tripod base. Align the screw holes and tighten the knob or latch to secure the pole in place.
4. To determine the desired height of the ring light, adjust the extendable pole accordingly. You can experiment with different heights to find the one that suits your needs.
5. Once you’ve set the height, tighten the knob or latch on the extendable pole to lock it in position. This will prevent the pole from sliding or collapsing during use.
6. Take the mounting adapter and attach it to the top of the extendable pole. There may be a screw or clamp mechanism to secure the adapter in place. Make sure it is tightly fastened.
7. Now, it’s time to attach the ring light to the mounting adapter. Most ring lights have a compatible mounting screw or bracket that fits securely onto the adapter.
8. Place the ring light onto the mounting adapter and align the screw holes or brackets. Use the provided screws or knobs to secure the ring light in place.
9. Once the ring light is attached, check for any wobbles or loose connections. Make sure all screws are tightened properly to ensure the ring light is secure.
10. Lastly, double-check the positioning and angle of the ring light. Use the adjustable settings on the ring light stand to tilt, swivel, or rotate the ring light for the desired lighting effect.
And there you have it! You’ve successfully set up your ring light stand. Now you can enjoy the benefits of professional lighting for your photography, videography, or even live streaming. Remember to always handle your ring light and stand with care to avoid any accidents and ensure their longevity.
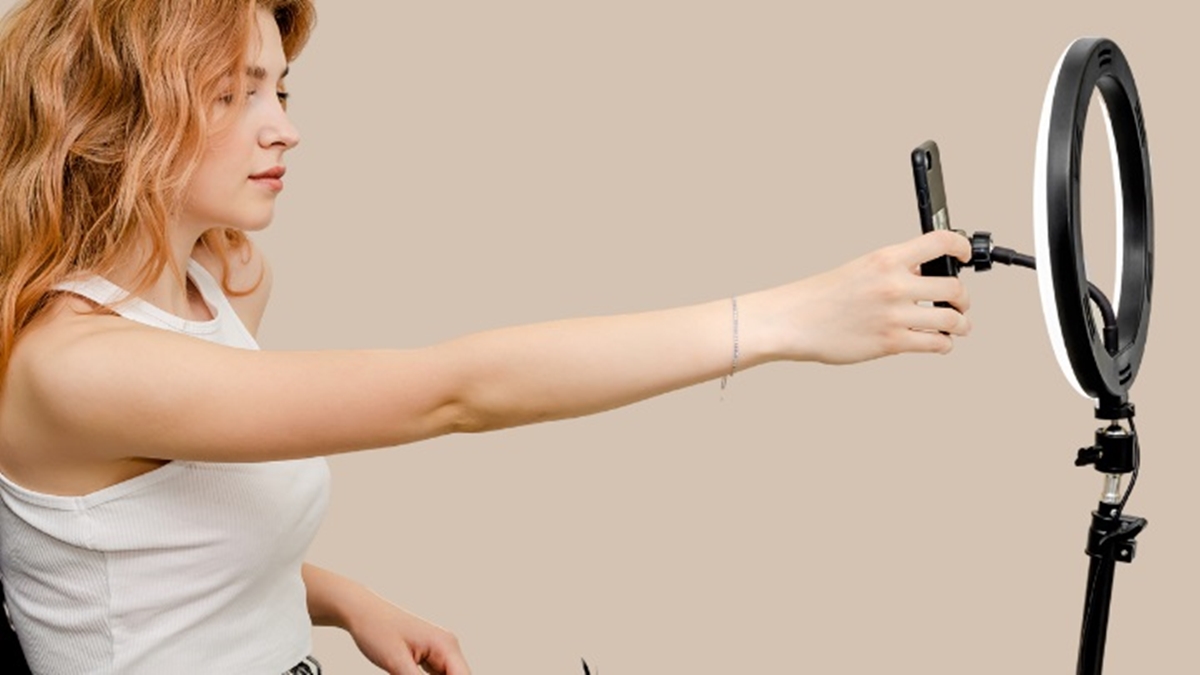
Attaching the Ring Light to the Stand
Once you have chosen the perfect ring light stand for your photography or video setup, the next step is to properly attach the ring light to the stand. Here are the simple steps to follow:
1. Start by locating the mounting bracket on the back of the ring light. This is usually a circular or rectangular metal plate with screw holes.
2. Align the mounting bracket with the top of the ring light stand. Depending on the design of the stand, there may be a screw or a clamp mechanism to secure the ring light in place.
3. If there is a screw, insert it through the screw holes in the mounting bracket and tighten it using a screwdriver or the provided tool. Make sure it is secure but be careful not to overtighten and potentially damage the mounting bracket.
4. For stands with a clamp mechanism, simply open the clamp and position it around the stand’s pole. Close the clamp tightly to secure the ring light in place. Ensure that the clamp is secure and does not slide down the stand.
5. Once the ring light is attached to the stand, double-check that it is stable and securely fastened. Give it a gentle shake to make sure it doesn’t wobble or come loose.
6. Connect the power cord of the ring light to a nearby power outlet or extension cord. Make sure to route the cord safely to avoid tripping hazards.
With the ring light now securely attached to the stand, you are ready to adjust the lighting angle and start capturing professional-looking photos or videos.
Adjusting the Ring Light for Best Lighting Angle
Once you have set up your ring light stand and attached the ring light, the next step is to adjust the ring light for the best lighting angle. The positioning of the ring light can significantly impact the quality of lighting and the overall outcome of your photos or videos.
Here are a few tips to help you adjust the ring light for the best lighting angle:
- Experiment with the distance: Start by experimenting with the distance between the subject and the ring light. Moving the ring light closer to the subject will create a more intense and focused light, while moving it farther away will produce a softer and diffused light. Try different distances to find the perfect balance for your desired lighting effect.
- Angle the ring light: Adjust the angle of the ring light to eliminate harsh shadows and achieve even lighting. Tilting the ring light slightly downward can help to soften shadows on the face, while angling it upward can create more dramatic lighting effects. Play around with different angles to find the most flattering and desired look for your subject.
- Use a reflector: Consider using a reflector in combination with your ring light to bounce light back onto your subject. A reflector can help fill in shadows and create a more balanced and evenly lit image. Position the reflector opposite to the ring light and experiment with different angles to achieve the desired effect.
- Adjust the brightness: Most ring lights come with adjustable brightness settings. Take advantage of this feature to fine-tune the lighting according to your needs. Whether you want a soft and subtle glow or a bright and vibrant look, adjusting the brightness can help you achieve the desired lighting effect.
Remember, every subject and situation may require different adjustments and settings. It’s essential to experiment and practice with your ring light to find the perfect lighting angle for every scenario. Whether you’re shooting portraits, makeup tutorials, or product photos, the right lighting angle can make a significant difference in the final result.
Conclusion
Setting up a ring light stand is a simple and effective way to elevate your photography or video content. With the right equipment and proper instructions, you can create professional-looking lighting setups that enhance the quality of your images or footage.
Remember to choose a sturdy and adjustable ring light stand that can accommodate different shooting angles and heights. Additionally, ensure that your ring light is securely attached to the stand to prevent any accidents or mishaps during your sessions.
By following the step-by-step guide and tips provided in this article, you’ll be well-equipped to set up your ring light stand and take your photography or video content to the next level. Experiment with different lighting techniques and have fun exploring the creative possibilities that a ring light stand offers.
Now, it’s time to get out there and capture stunning visuals with the perfect lighting setup – all thanks to your newly acquired knowledge of setting up a ring light stand!
FAQs
1. What is a ring light stand?
2. How do I choose the right ring light stand for my needs?
3. Can I use a ring light stand with my smartphone?
4. What are the benefits of using a ring light stand?
5. How do I set up a ring light stand?