
In a digital world where mobile devices have become an integral part of our daily lives, finding the right accessories to enhance their functionality has become crucial. One such accessory that has gained popularity in recent years is the Wavlink USB Universal Docking Station. This innovative device allows users to connect multiple peripherals and accessories to their laptops or desktops with ease. While the docking station offers a plethora of features, turning on the screen can sometimes be a bit tricky for users who are new to this technology. In this article, we will provide step-by-step instructions on how to turn on the screen using the Wavlink USB Universal Docking Station. So, whether you’re a tech-savvy individual or just starting out with your mobile device, keep reading to unlock the full potential of your docking station.
Inside This Article
- Overview of Wavlink USB Universal Docking Station
- Connecting the Docking Station to Your Computer
- Powering on the Docking Station
- Troubleshooting Common Issues with the Docking Station
- Conclusion
- FAQs
Overview of Wavlink USB Universal Docking Station
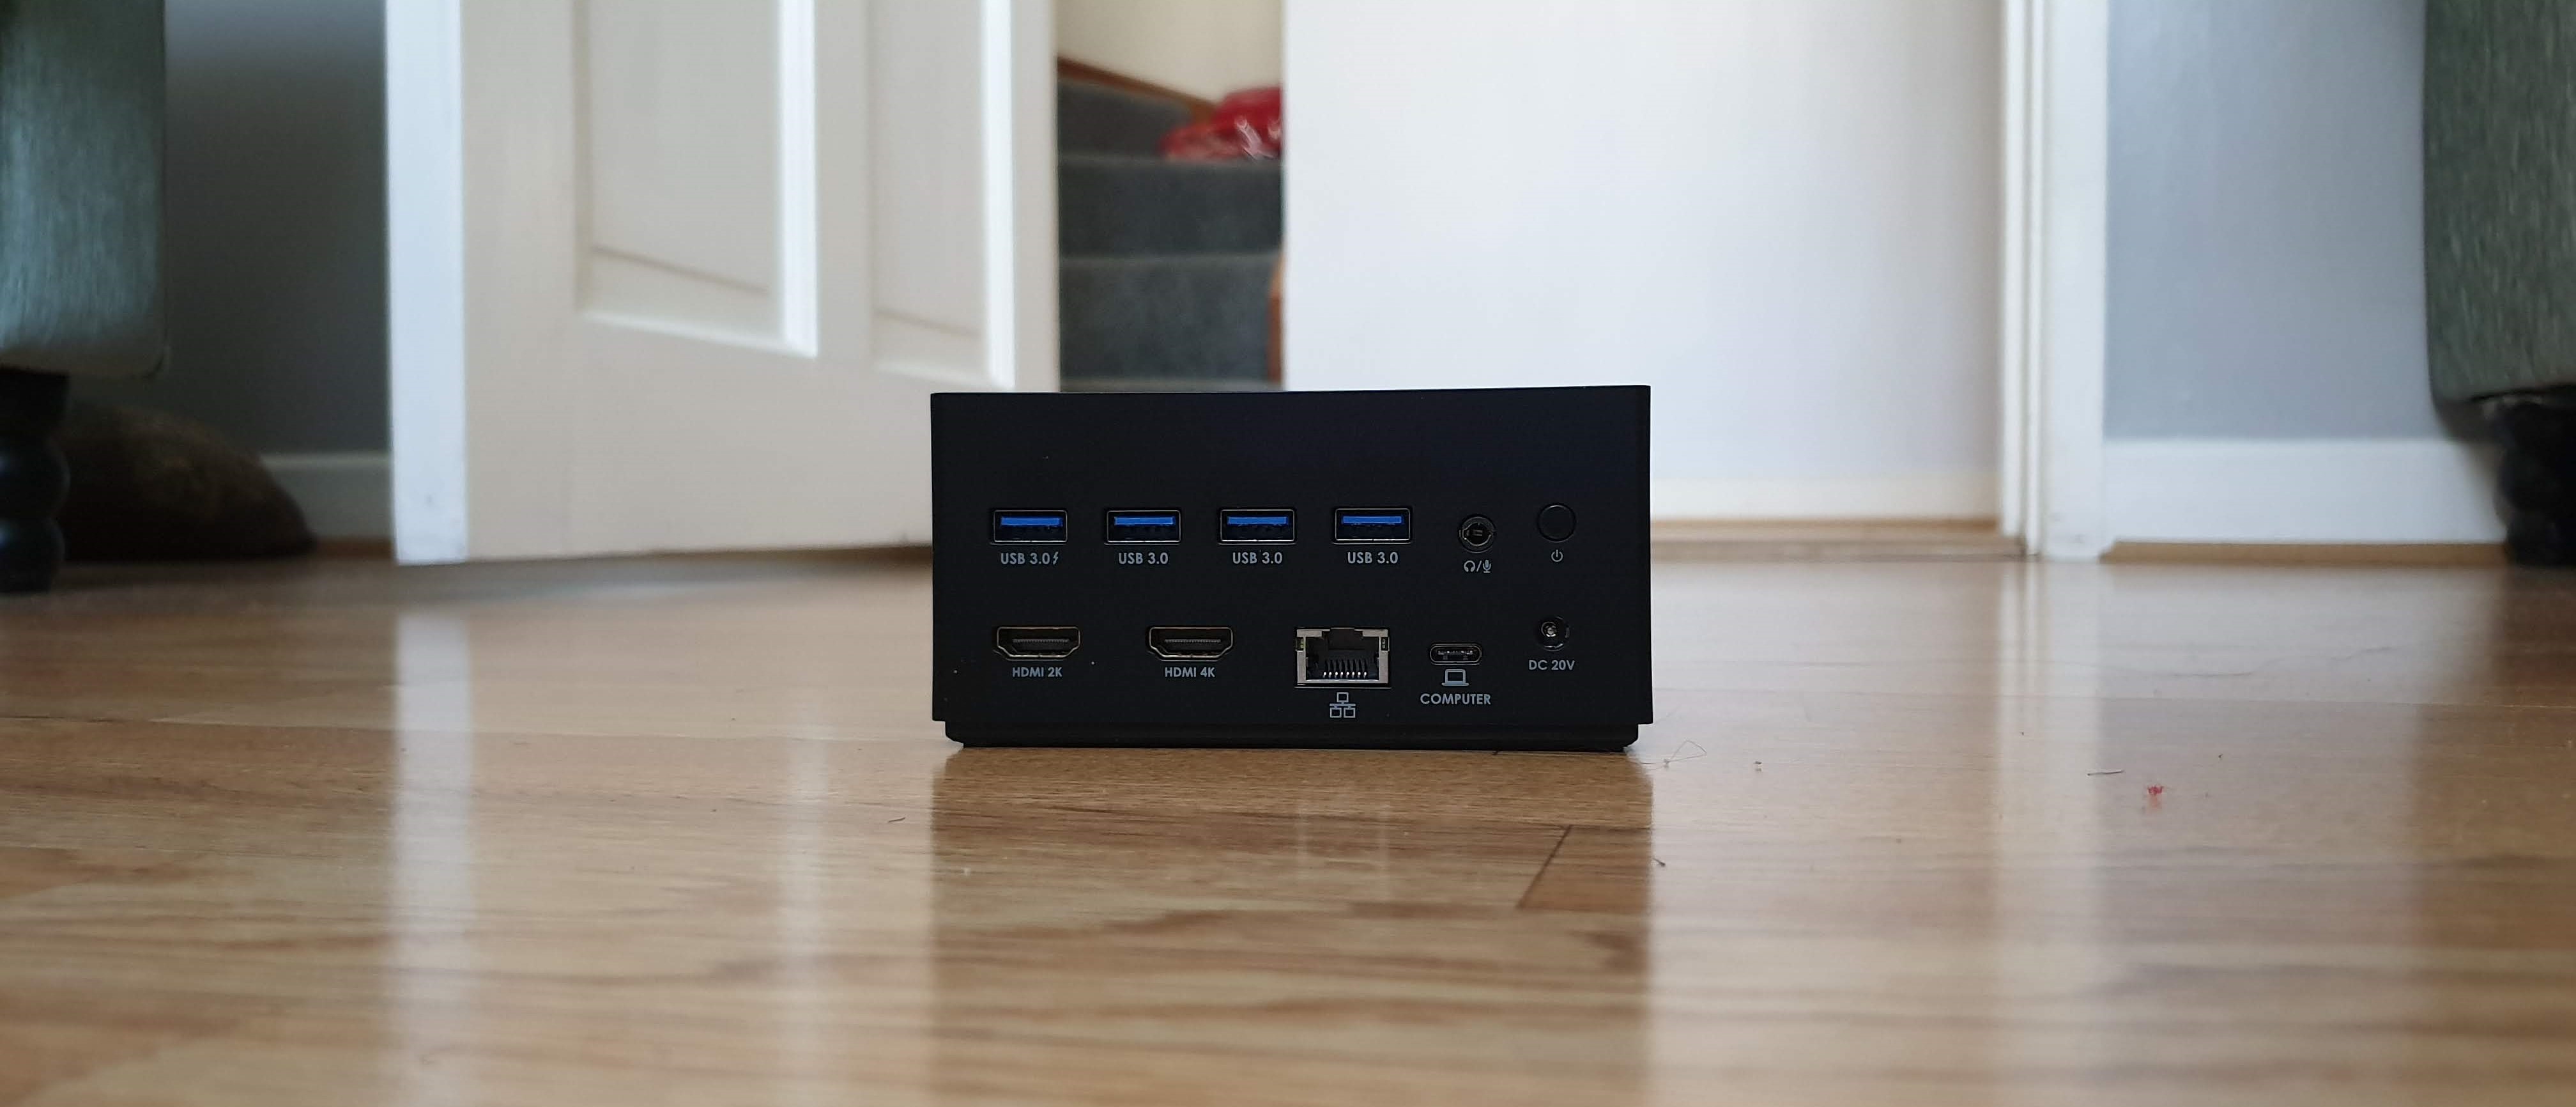
The Wavlink USB Universal Docking Station is a versatile device that helps you expand the connectivity options of your computer. It allows you to connect multiple peripheral devices to your laptop or desktop, making it a convenient solution for users who need to work with multiple accessories simultaneously. With a single USB connection, you can easily turn your computer into a powerful workstation with enhanced functionality.
Whether you need additional USB ports, HDMI or VGA outputs, Ethernet connectivity, or audio jacks, the Wavlink docking station has you covered. It provides a wide range of ports and connectors, allowing you to connect your peripherals, monitors, and other devices effortlessly. This means you can connect your external hard drives, printers, speakers, and other accessories without the hassle of plugging and unplugging them constantly.
One of the key features of the Wavlink docking station is its compatibility with both Windows and Mac systems. It supports various operating systems, including Windows 10, 8, 7, XP, and macOS, making it suitable for a wide range of users. Whether you are a student, professional, or casual user, this docking station offers a seamless connection experience.
The Wavlink docking station also enables you to extend your display to dual monitors, providing you with a larger workspace and increased productivity. With support for high-resolution displays, you can enjoy crisp and clear images, whether you are working, streaming videos, or playing games.
Setting up the Wavlink docking station is quick and easy. Simply plug it into an available USB port on your computer and install the necessary drivers. Once connected, you can start enjoying the benefits of extended connectivity and enhanced functionality.
Overall, the Wavlink USB Universal Docking Station is a reliable and convenient solution for those in need of additional ports and connectivity options. With its wide range of compatibility, ease of use, and ability to support dual monitors, it is a versatile accessory that can greatly enhance your computing experience.
Connecting the Docking Station to Your Computer
Connecting your Wavlink USB Universal Docking Station to your computer is a straightforward process that allows you to enjoy an expanded array of connectivity options. Here’s a step-by-step guide to get you started:
1. Check the compatibility: Before connecting the docking station, ensure that it is compatible with your computer’s operating system. Refer to the product documentation or the manufacturer’s website for compatibility information.
2. Position the docking station: Find a suitable location for the docking station near your computer. Make sure it is easily accessible and allows for proper ventilation.
3. Connect the docking station to a power source: Use the included power adapter to connect the docking station to a power outlet. Ensure that the power adapter is securely plugged in.
4. Connect the docking station to your computer: Use the provided USB cable to connect the docking station to a USB port on your computer. Ensure that the cable is inserted firmly into both the docking station and your computer’s USB port.
5. Install any required drivers: Depending on your operating system, you may need to install specific drivers for the docking station to function properly. Check the documentation or the manufacturer’s website for any driver downloads or installation instructions.
6. Power on the docking station: Once all the connections are secure, turn on the docking station by pressing the power button, if available. Some docking stations may power on automatically when connected to the computer.
7. Configure your computer’s display settings: Depending on your setup, you may need to configure your computer’s display settings to utilize the additional monitors or other peripherals connected to the docking station. Refer to your computer’s user manual or the operating system’s display settings for guidance.
8. Test the connectivity: Once everything is connected and configured, test the connectivity of the docking station by connecting various devices such as monitors, USB devices, and Ethernet cables. Ensure that all devices are recognized and functioning correctly.
By following these steps, you can easily connect your Wavlink USB Universal Docking Station to your computer. Enjoy the convenience and expanded connectivity options provided by this versatile accessory.
Powering on the Docking Station
Once you have successfully connected your Wavlink USB Universal Docking Station to your computer, the next step is to power it on. Powering on the docking station will allow you to access its various features and functionalities. Follow these simple steps to ensure a smooth power-on process:
1. Locate the power button or switch on the docking station. It is usually located on the side or back of the device. Depending on the model, the power button may be labeled or have a power symbol.
2. Press and hold the power button for a few seconds until the docking station’s indicator lights turn on. The lights may vary depending on the model but are typically a combination of power and connectivity indicators.
3. Once the indicator lights are illuminated, release the power button. At this point, the docking station is powered on and ready to use.
Keep in mind that some docking stations may require an external power supply. If this is the case, ensure that the power supply is connected securely to the docking station and plugged into a power outlet.
It’s important to note that the power-on process may vary slightly based on the specific model of your Wavlink docking station. Always refer to the user manual or manufacturer’s instructions for detailed information and guidance specific to your device.
With your Wavlink USB Universal Docking Station powered on, you can now enjoy the convenience of expanding your computer’s connectivity and enhancing your overall productivity.
Troubleshooting Common Issues with the Docking Station
While the Wavlink USB Universal Docking Station is a highly versatile and convenient accessory for your computer, there may be times when you encounter common issues. In this section, we will address some of these issues and provide troubleshooting steps to help you resolve them.
No Display Output: If you connect your docking station to the computer but do not see any display output on your monitor, there are a few things you can check. Firstly, ensure that all cables are securely connected to the docking station and the computer. If the issue persists, try connecting the docking station to a different USB port on your computer. Additionally, make sure the display settings on your computer are properly configured to extend or duplicate the display.
USB Ports Not Working: If the USB ports on the docking station are not functioning, it could indicate a driver issue. Start by checking if the drivers for the docking station are installed and up to date. Visit the manufacturer’s website to download the latest drivers if necessary. If the drivers are already updated, try connecting the docking station to a different USB port on your computer to rule out any port-specific issues.
Audio Not Working: If you are experiencing issues with audio output through the docking station, start by checking the audio settings on your computer. Ensure that the correct audio output device is selected. If the issue persists, try disconnecting and reconnecting the docking station to see if that resolves the problem. You may also want to verify that the audio drivers for the docking station are properly installed and updated.
Overheating: If you notice that your docking station is overheating, it is essential to address the issue promptly to prevent any damage. Make sure the docking station is placed on a flat and well-ventilated surface. Avoid blocking the airflow vents on the docking station and ensure that the surrounding area is free from any obstructions. If the issue continues, it may be necessary to contact the manufacturer for further assistance.
Compatibility Issues: Sometimes, certain devices or operating systems may not be fully compatible with the Wavlink USB Universal Docking Station. Before purchasing the docking station, check the compatibility specifications to ensure it will work with your computer and peripherals. If you encounter compatibility issues, visit the manufacturer’s website for any available updates or patches.
Inconsistent Performance: If you notice that the performance of the docking station is inconsistent or erratic, consider checking for software updates for your computer. Outdated operating systems or drivers can affect the functionality of the docking station. Installing the latest updates can often resolve performance issues. Additionally, make sure that you are not exceeding the recommended maximum resolution or bandwidth limits of the docking station.
By following these troubleshooting steps, you can quickly identify and resolve common issues with your Wavlink USB Universal Docking Station. If the problem persists or if you have any other concerns, it is recommended to reach out to the manufacturer’s customer support for further assistance.
Conclusion
In conclusion, the Wavlink USB Universal Docking Station is an excellent accessory that offers convenience and versatility for users looking to enhance their mobile experience. With its ability to connect multiple devices and peripherals, it provides a seamless and efficient way to turn on your screen, transfer data, and expand functionality.
Whether you are a professional who needs a reliable docking station for work or a student seeking a convenient solution for study and entertainment, the Wavlink USB Universal Docking Station is a worthy investment. Its easy setup, fast charging, and compatibility across various devices make it a must-have accessory for modern mobile users.
So, if you want to simplify your daily mobile routine, enhance productivity, and enjoy a clutter-free workspace, look no further than the Wavlink USB Universal Docking Station. It’s time to take control with this powerful accessory that brings all your devices together with just one click.
FAQs
1. How do I turn on the screen with the Wavlink USB Universal Docking Station?
To turn on the screen with the Wavlink USB Universal Docking Station, you will need to make sure that your laptop or desktop is connected to the docking station using a USB cable. Once connected, you can press the power button on the docking station or use the power button on your laptop or desktop to turn on the screen.
2. Can I use the Wavlink USB Universal Docking Station with any type of computer?
Yes, the Wavlink USB Universal Docking Station is compatible with both Windows and Mac computers. It supports a wide range of operating systems and can be used with laptops, desktops, and other devices that have a USB port.
3. How many displays can I connect to the Wavlink USB Universal Docking Station?
The number of displays you can connect to the Wavlink USB Universal Docking Station depends on the model you have. Some models support a single display, while others support dual displays or even more. Make sure to check the specifications of your specific model to determine the maximum number of displays it can support.
4. Can I use the Wavlink USB Universal Docking Station to charge my devices?
Yes, the Wavlink USB Universal Docking Station usually includes USB ports that can be used to charge your devices, such as smartphones, tablets, or other USB-powered devices. This allows you to conveniently charge your devices while they are connected to the docking station.
5. What are the main benefits of using a USB Universal Docking Station like Wavlink’s?
A USB Universal Docking Station, like the one offered by Wavlink, offers several benefits. It allows you to easily connect multiple peripherals to your computer with a single USB connection, including monitors, keyboards, mice, speakers, and more. It also provides additional charging ports for your devices, simplifying cable management and reducing the need for multiple adapters. This can greatly enhance productivity and convenience, especially for those who frequently switch between different workspaces or need to connect to multiple displays.