
When it comes to using a headset with a microphone, finding the right position for the mic is crucial for optimal sound quality and communication. Whether you’re using a headset for gaming, making calls, or recording audio, the placement of the microphone can greatly impact the clarity and effectiveness of your voice. In this article, we will explore different techniques and tips on where to position your headset mic to ensure clear and crisp sound transmission. From finding the sweet spot to avoiding common mistakes, we will cover everything you need to know to make the most out of your headset microphone and enhance your audio experience. So, let’s dive in and discover the best positions for a headset mic!
Inside This Article
- Choosing the Right Position for Your Headset Mic
- Factors to Consider When Positioning Your Headset Mic
- Tips for Positioning Your Headset Mic Correctly
- Common Mistakes to Avoid When Positioning Your Headset Mic
- Conclusion
- FAQs
Choosing the Right Position for Your Headset Mic
When it comes to using a headset mic, the position of the microphone can greatly impact the sound quality and overall performance. Whether you are using your headset for gaming, making calls, or recording audio, finding the right position for your mic is crucial. Here are some tips to help you choose the optimal position for your headset mic.
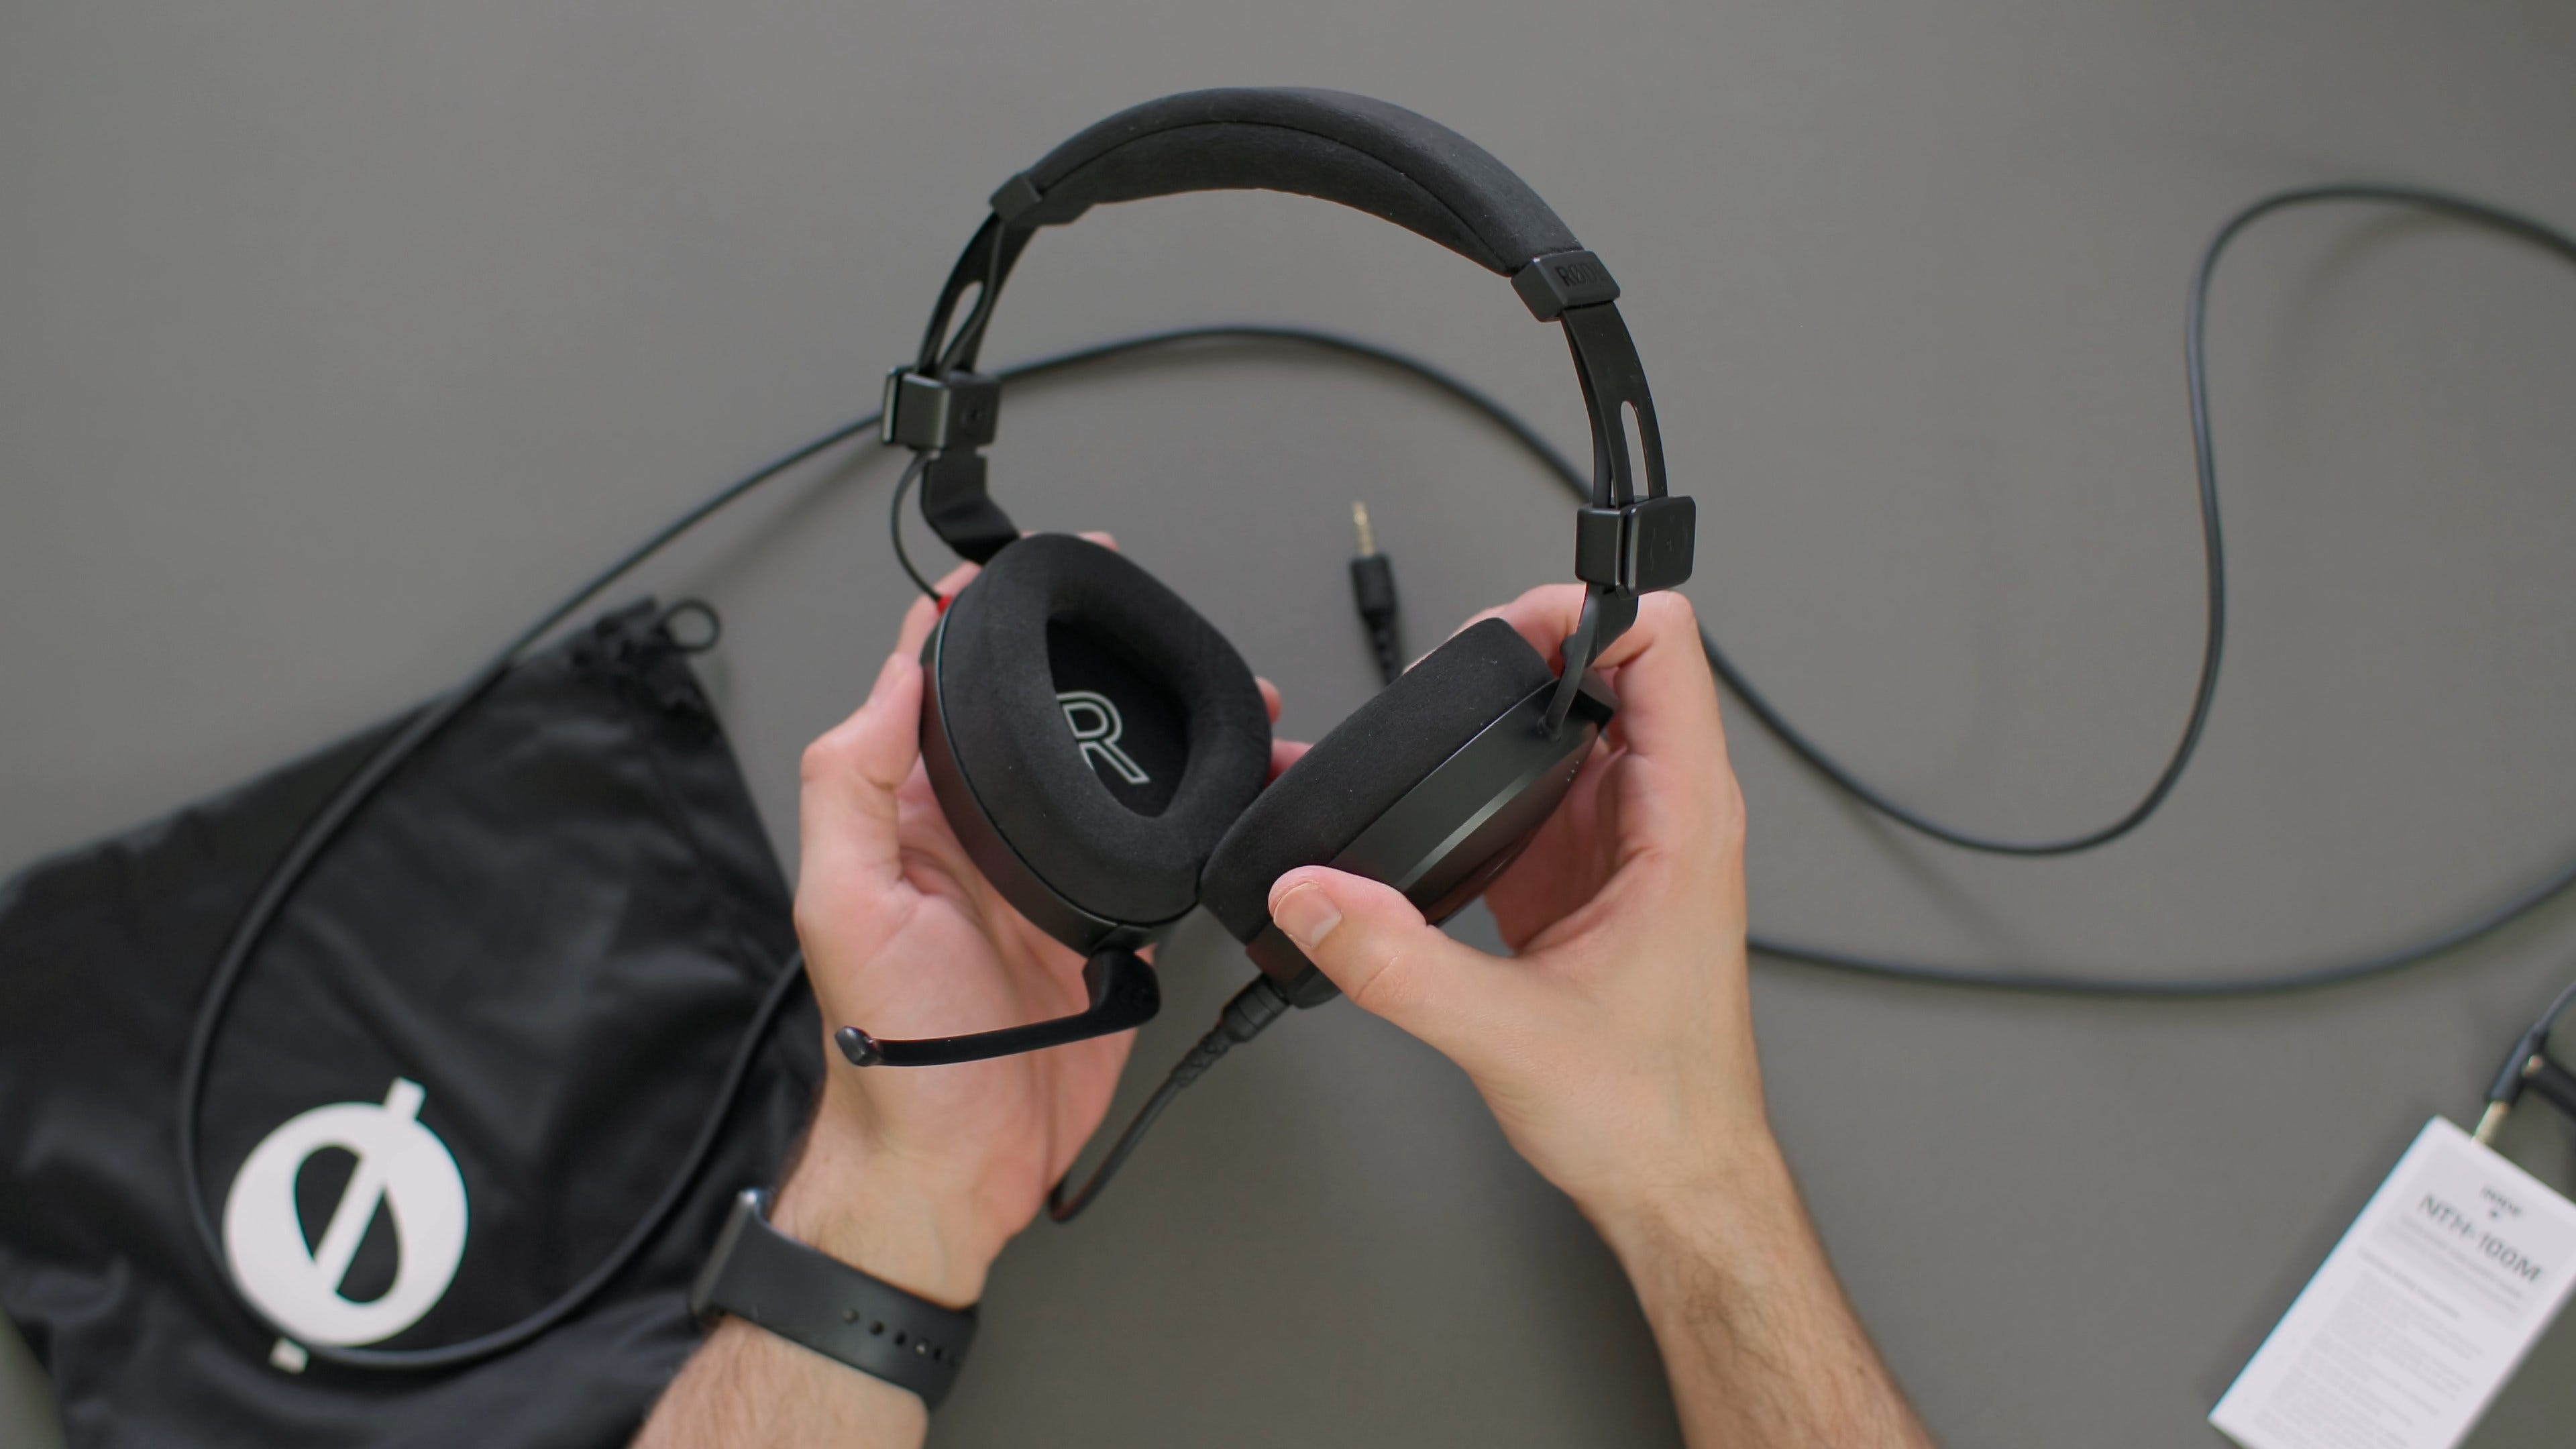
1. The Boom Mic Position: Many headset microphones feature a boom mic, which is a flexible arm that extends from the earcup. The boom mic allows you to position the microphone closer to your mouth for better sound capture. It’s important to adjust the boom mic so that it’s approximately 1-2 inches away from your mouth. This distance ensures clear and consistent audio while minimizing background noise.
2. The Inline Mic Position: Some headsets have an inline mic, which is a small microphone located along the headset cable. When using an inline mic, make sure it is positioned near your upper chest area. This placement allows the mic to capture your voice effectively and reduces the chances of rubbing against clothing, which can create unwanted noise.
3. Experiment with Angles: The angle at which you position your mic can have an impact on sound quality. Try angling the mic slightly downwards towards your mouth to capture your voice more accurately. Avoid pointing the mic directly at your mouth as it may pick up plosive sounds. Experiment with different angles to find the sweet spot that provides the best sound quality for your specific needs.
4. Noise-Cancelling Features: Some headsets come with built-in noise-cancelling features that can help eliminate background noise. In such cases, it’s important to position the mic close enough to your mouth to capture your voice clearly while taking advantage of the noise-cancelling technology. Adjust the mic position and test the audio quality to find the optimal balance between capturing your voice and reducing background noise.
5. Consider Your Environment: The environment in which you use your headset mic plays a role in finding the right position. If you are in a noisy environment, positioning the mic closer to your mouth can help minimize background noise. On the other hand, if you are in a quiet room, you may not need to position the mic as close. Consider the ambient noise level and adjust the mic position accordingly.
Remember, the right position for your headset mic may vary depending on the specific headset model and your preferences. Take the time to experiment, test the quality of the audio, and adjust the mic position until you find the optimal setup that works for you.
Factors to Consider When Positioning Your Headset Mic
Positioning your headset mic correctly is crucial to ensure clear and crisp audio quality during calls or recordings. Here are several factors to consider when finding the right position for your headset mic:
- Distance from your mouth: Maintain an optimal distance between the mic and your mouth. This distance may vary depending on the specific headset model, but typically a distance of around 1-2 inches is recommended. This allows for clear voice capture while reducing the chance of plosive or breathing sounds being picked up.
- Angle of the mic: Pay attention to the angle of the microphone. Position it so that the microphone element, the part that picks up sound, is directly facing your mouth. This ensures that the mic is capturing your voice accurately and minimizing background noise.
- Avoid obstructions: Keep the mic clear of any obstructions. Avoid placing it too close to your facial hair, clothing, or objects that may interfere with the microphone’s ability to capture your voice clearly. Obstructions can cause muffled or distorted sound quality.
- Consistency in positioning: Aim for consistency in mic placement. By positioning the mic in the same spot each time you use it, you can maintain a consistent audio level and quality, which is especially important if you are recording podcasts or videos.
- Context of use: Consider the context in which you will be using the headset mic. If you are using it for phone calls, you may need to position it closer to your mouth to ensure clarity. However, if you are using it for gaming or online streaming, you may want to adjust the mic further away to reduce potential breathing or mouth noise.
- Experimentation: Don’t be afraid to experiment with different positions and angles to find the optimal placement for your specific headset and voice. Each person’s voice may have different characteristics, and finding the sweet spot can make a significant difference in the audio quality.
By taking these factors into consideration and adjusting the position of your headset mic accordingly, you can ensure that your voice is captured accurately, leading to improved audio quality and a better overall experience for your audience or conversation partners.
Tips for Positioning Your Headset Mic Correctly
When using a headset mic, it’s essential to position it correctly to ensure clear and accurate audio transmission. Here are some tips to help you get the most out of your headset mic:
- Adjust the boom length: Most headset mics have a flexible boom that allows you to position the mic closer to your mouth. Adjust the boom length so that the mic is about a finger’s width away from your lips. This helps to capture your voice accurately without any distortion or background noise.
- Angle the mic towards your mouth: The angle at which you position the mic can significantly impact audio quality. Point the mic towards the corner of your mouth, rather than directly towards it. This helps to reduce plosive sounds (like “p” and “b” sounds) and allows for a more natural and balanced audio pickup.
- Experiment with mic placement: Every person’s voice and speaking style are unique, so it’s worth experimenting with mic placement to find the best position for you. Try positioning the mic slightly above or below your mouth, or slightly to the left or right. This can help to minimize any unwanted breathing sounds or sibilance (sharp “s” sounds).
- Consider using a pop filter: If you’re experiencing issues with plosive sounds, investing in a pop filter can make a significant difference. A pop filter is a screen that is placed in front of the mic to reduce the intensity of plosive sounds, resulting in clearer and more pleasant audio.
- Avoid blocking the mic: Be mindful not to obstruct the mic with your hand or any other objects. Blocking the mic can lead to muffled or distorted audio. Keep a comfortable distance between your hand and the mic, allowing for unobstructed sound capture.
- Monitor your audio: It’s important to listen to the audio playback and check for any issues with the mic position. Use headphones or earphones to monitor your voice and make adjustments as needed. This helps to ensure that your mic is correctly positioned for optimal audio quality.
By following these tips, you can position your headset mic correctly and enjoy clear, crisp, and professional-sounding audio during your calls, recordings, or online communication. Remember, finding the right position may take some trial and error, but it is worth the effort to achieve the best sound quality possible.
Common Mistakes to Avoid When Positioning Your Headset Mic
When it comes to getting the best audio quality from your headset mic, proper positioning is key. However, there are common mistakes that many people make when positioning their headset mic, which can negatively impact the sound quality. To help you avoid these pitfalls, here are some common mistakes to steer clear of:
1. Placing the mic too far away from your mouth: One of the most common mistakes is positioning the mic too far away from your mouth. This can cause the audio to sound distant and unclear. To ensure optimal sound quality, position the mic as close to your mouth as possible without touching it.
2. Positioning the mic too close to your mouth: On the other hand, placing the mic too close to your mouth can result in distorted or muffled audio. This is because the proximity effect can cause an overwhelming bass response. Maintain a distance of about 1-2 inches from your mouth to achieve a balanced sound.
3. Ignoring ambient noise: Failing to consider the ambient noise in your environment can lead to unwanted background noise being picked up by the mic. To minimize this, try to position yourself in a quiet location and use noise-canceling features if available.
4. Misaligning the mic boom: The mic boom is the adjustable arm that holds the microphone. Misaligning it can result in the mic being angled incorrectly, affecting sound capture. Make sure the mic boom is positioned parallel to your mouth to ensure optimal audio pickup.
5. Not adjusting for headset placement: If you wear your headset incorrectly, it can impact the placement of the mic. Ensure that your headset is worn correctly, with the ear cups covering your ears and the headband resting comfortably on your head. This will help maintain the correct positioning of the mic.
6. Neglecting to check mic sensitivity: Each headset mic has different sensitivity levels. Some are more sensitive and can capture even the slightest sounds, while others require more projection. Be aware of the sensitivity level of your mic and adjust your speaking volume accordingly to achieve optimal results.
7. Forgetting to test and adjust: Lastly, one of the most common mistakes is neglecting to test and adjust the mic positioning. Every environment and individual is unique, so it’s important to test the sound quality and make necessary adjustments. Experiment with different positions and angles to determine the optimal placement for your specific needs.
Avoiding these common mistakes when positioning your headset mic can greatly improve the audio quality and ensure clear and crisp communication. Take the time to set up your mic correctly and enjoy a seamless and immersive audio experience.
Conclusion
Choosing the right position for your headset mic can greatly impact the quality of your audio recordings or voice communication. By experimenting with different positions and considering factors such as distance, angle, and interference, you can find the optimal position that suits your needs.
Remember to consider the specific type of headset that you have, as different designs may require slightly different positioning techniques. It’s important to test and adjust the mic placement to ensure clear and crisp sound reproduction.
Whether you’re a content creator, gamer, or professional who relies on clear audio, taking the time to properly position your headset mic can make a significant difference in the overall audio experience. So, don’t hesitate to try out different techniques and find the perfect placement that helps you achieve exceptional sound quality.
Now that you have a better understanding of where to position your headset mic, go ahead and experiment, and enjoy crystal-clear audio in all your communications and recordings!
FAQs
1. Where is the best position to position a headset microphone?
The ideal position for a headset microphone is around 2-3 inches away from your mouth. This allows for optimal sound pickup while minimizing unwanted background noise.
2. Should I position the headset mic on the left or right side?
The choice of positioning the headset microphone on the left or right side is a matter of personal preference. Generally, it is recommended to position it on the side that feels most comfortable for you. However, if you plan to use your phone while wearing the headset, consider positioning the mic on the opposite side of your dominant hand to avoid inadvertently blocking it while interacting with your device.
3. Can I adjust the position of the headset mic?
Yes, most headset microphones come with adjustable booms that allow you to position the mic according to your needs. Ensure that the boom is securely positioned and close enough to your mouth for optimal sound capture. Experiment with different positions and angles to find the position that provides the best audio quality.
4. How do I prevent wind noise when using a headset microphone outdoors?
When using a headset microphone outdoors, wind noise can be a common issue. Consider using a windscreen or foam cover over the microphone to reduce the impact of wind noise. Additionally, positioning the microphone slightly below your mouth can help minimize direct exposure to the wind.
5. Are there any specific guidelines for positioning a headset microphone during public speaking or presentations?
When using a headset microphone for public speaking or presentations, it is essential to position the microphone correctly to ensure clear and audible sound projection. Place the microphone around 2-3 inches away from your mouth and adjust the boom for optimal positioning. It’s also important to maintain good posture and avoid excessive head movements to ensure consistent sound quality.