
Are you tired of dropping your phone constantly or struggling to hold it securely while using it? Look no further than the innovative Magsafe Popsocket, a game-changing accessory that combines the convenience of a Popsocket grip with the magnetic power of Apple’s Magsafe technology. This clever accessory provides a secure grip, wireless charging compatibility, and seamless compatibility with a wide range of Magsafe-enabled devices.
In this article, we will guide you through the steps on how to use the Magsafe Popsocket to get the most out of your mobile experience. We will cover everything from attaching and detaching the Popsocket to using it as a stand and exploring the various features it offers. With our expert tips, you’ll be able to unlock the full potential of this handy accessory and enjoy a more secure and convenient mobile experience.
Inside This Article
- Overview of Magsafe Popsocket
- Installation Guide for Magsafe Popsocket
- Adjusting and Positioning the Magsafe Popsocket
- Removing the Magsafe Popsocket
- Conclusion
- FAQs
Overview of Magsafe Popsocket
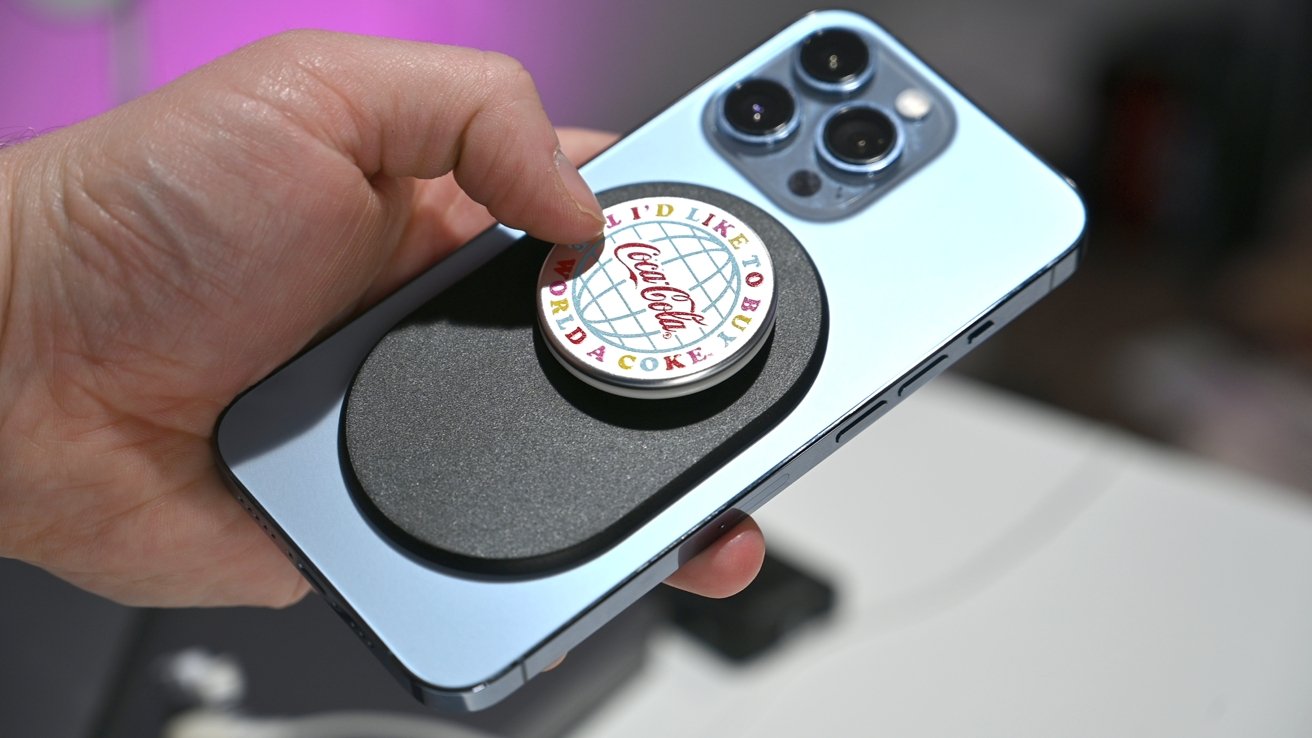
The Magsafe Popsocket is a revolutionary accessory that combines the convenience of a Popsocket grip with the magnetic power of Apple’s Magsafe technology. It is designed to enhance the functionality and usability of your iPhone 12 or iPhone 13, providing a secure grip and versatile stand options.
With the Magsafe Popsocket, you can easily attach and detach your phone from various magnetic surfaces, such as car mounts, refrigerator doors, or even Magsafe compatible wallets. The strong magnetic connection ensures that your device stays in place, giving you peace of mind while on the move.
One of the standout features of the Magsafe Popsocket is its compatibility with wireless charging. Unlike traditional Popsockets, which block the back of your phone, the Magsafe Popsocket is designed to work seamlessly with Magsafe wireless charging pads. This means you can effortlessly charge your device without the need to remove the Popsocket.
Another advantage of the Magsafe Popsocket is its adjustable design. The swappable top allows you to switch between different Popsocket designs to suit your style or mood. Whether you prefer a sleek and minimalistic look or a bold and vibrant design, there’s a Popsocket top to match your personality.
In addition to providing a secure grip, the Magsafe Popsocket also serves as a convenient stand for your iPhone. The collapsible accordion design allows you to prop up your device in both portrait and landscape orientations. Whether you’re watching videos, participating in video calls, or following a recipe while cooking, the Magsafe Popsocket ensures a comfortable and hands-free experience.
Overall, the Magsafe Popsocket is a game-changer for iPhone users who want to combine the functionality of a Popsocket grip with the magnetic power of Magsafe technology. Its versatility, compatibility, and adjustability make it a must-have accessory for anyone looking to enhance their iPhone experience.
Installation Guide for Magsafe Popsocket
Adding a PopSocket to your iPhone is a popular way to enhance your grip and improve the overall usability of your device. With the advent of the Magsafe PopSocket, installation has become even easier and more convenient. Here’s a step-by-step guide on how to install a Magsafe PopSocket on your iPhone:
- Start by ensuring that your iPhone is clean and free from any dust or debris. Wipe it down with a soft, lint-free cloth to remove any particles that could interfere with the adhesive.
- Locate the Magsafe PopSocket on the back of your iPhone. It is important to align it properly with the Magsafe connection on your device. You’ll notice a circular cutout on the PopSocket that fits perfectly onto the Magsafe module.
- Remove the protective backing from the adhesive on the Magsafe PopSocket. Be careful not to touch the adhesive surface with your fingers to avoid compromising its stickiness.
- Gently press the Magsafe PopSocket onto the back of your iPhone, aligning the circular cutout with the Magsafe module. Apply firm pressure for a few seconds to ensure a secure bond.
- Once the Magsafe PopSocket is installed, give it a few minutes to fully adhere to your device. Avoid placing any additional pressure on it during this time.
- You can now adjust the positioning of the Magsafe PopSocket to your desired location. Simply twist and rotate the PopSocket until it is in the desired orientation. The Magsafe connection ensures a strong magnetic hold, so you can trust that your PopSocket will stay in place.
- Once you’re happy with the position of your Magsafe PopSocket, it’s ready to use! Enjoy the added convenience and functionality that a PopSocket brings to your iPhone.
It’s worth noting that Magsafe PopSockets are specifically designed for Magsafe-compatible iPhones, starting from the iPhone 12 series. If you have an older iPhone model, you may need to explore alternative PopSocket options that are compatible with your device.
When it comes to removing the Magsafe PopSocket, the process is straightforward. Simply twist and rotate the PopSocket in the opposite direction to loosen its grip. Once it’s loose, gently pull it away from your iPhone. The Magsafe connection allows for easy removal without leaving any residue or marks on your device.
With the Magsafe PopSocket, adding a convenient grip to your iPhone has never been easier. Follow these simple steps to install and enjoy the benefits of a PopSocket on your Magsafe-compatible device.
Adjusting and Positioning the Magsafe Popsocket
Once you have successfully installed your Magsafe Popsocket, you may find the need to adjust the positioning to suit your preferences. Here are some tips to help you with adjusting and positioning your Magsafe Popsocket:
- Rotate and Swivel: The Magsafe Popsocket is designed to rotate and swivel, allowing you to find the most comfortable and convenient position. To adjust the angle or orientation, simply hold the base of the Popsocket and rotate it in the desired direction.
- Extend or Retract: The Magsafe Popsocket also has the capability to extend or retract. If you prefer a longer grip, gently pull the Popsocket outward. If you want a shorter grip, push it back in. Experiment with different lengths until you find the one that suits you best.
- Reposition on the Magsafe-enabled device: If you wish to reposition the Magsafe Popsocket on your Magsafe-enabled device, simply lift it off and place it in the desired location. The adhesive backing of the Popsocket allows for easy removal and reattachment without leaving any residue on the device.
- Find a comfortable grip: Take some time to find the most comfortable grip for your hand. Experiment with different positions and angles until you find the one that feels secure and comfortable. The Magsafe Popsocket is designed to provide a stable grip, so don’t hesitate to adjust it until it feels just right.
- Consider the device’s balance: When positioning your Magsafe Popsocket, it’s essential to consider the balance of your device. Make sure the weight is evenly distributed to prevent any strain on the device or potential damage. Adjust the Magsafe Popsocket accordingly to achieve a balanced and secure grip.
Remember, the primary purpose of the Magsafe Popsocket is to enhance the functionality and usability of your Magsafe-enabled device. Don’t be afraid to experiment and find the positioning that works best for you.
Removing the Magsafe Popsocket
So you’ve been enjoying your Magsafe Popsocket, but now it’s time to remove it. Don’t worry, the process is simple and straightforward. Just follow the steps below:
- Start by locating the Magsafe Popsocket on your phone case. It should be securely attached to the Magsafe compatible surface.
- Next, gently pull on the Magsafe Popsocket. Apply even pressure and gradually increase the force until it starts to release.
- If the Popsocket seems stuck, try twisting it slightly while pulling. This can help loosen the adhesive and facilitate the removal process.
- Continue pulling and twisting until the Magsafe Popsocket comes off completely. Be careful not to exert too much force, as you don’t want to damage your phone case or the surface of the Magsafe-compatible area.
- Once you’ve successfully removed the Magsafe Popsocket, you may notice some residue left behind on your phone case. This is normal and can be easily cleaned off with a mild adhesive remover or isopropyl alcohol. Just apply a small amount to a clean cloth and gently wipe away the residue.
And there you have it! Your Magsafe Popsocket is now removed, and you’re ready to either use it on another Magsafe-compatible device or switch to a different phone case altogether.
Remember, the Magsafe Popsocket is designed to be reusable, so you can easily reattach it to another Magsafe-compatible surface whenever you want. Just make sure to follow the installation guide to ensure a secure and stable attachment.
Removing your Magsafe Popsocket allows you the flexibility to change up your phone case or use your Popsocket with other devices. So go ahead and give it a try! You’ll be amazed at how convenient and versatile the Magsafe Popsocket can be.
Conclusion
Using a Magsafe Popsocket is a convenient and versatile way to enhance your mobile phone experience. With its strong magnetic attachment, it securely holds your phone in place while providing support for a variety of functions.
By attaching the Magsafe Popsocket to the back of your phone, you can easily grip your device, reducing the risk of accidental drops. Additionally, the adjustable and collapsible design allows for a comfortable and ergonomic holding position.
Not only does the Magsafe Popsocket provide a secure grip, but it also serves as a convenient stand. Whether you’re watching videos, taking hands-free calls, or following a recipe, the popsocket can be adjusted to the perfect viewing angle for optimal comfort.
Furthermore, the Magsafe compatibility ensures a hassle-free attachment and detachment process. The magnetic connection is strong and reliable, ensuring that your popsocket stays in place even during heavy usage.
With its practicality and versatility, the Magsafe Popsocket is a must-have mobile accessory for anyone looking to enhance their phone usage experience. Invest in one today and make the most out of your mobile device!
FAQs
1. Can the MagSafe PopSocket be used with any phone?
Yes, the MagSafe PopSocket is designed to be compatible with the iPhone 12 series, which features built-in MagSafe technology. This means that it may not be compatible with other phone models that do not have MagSafe capabilities.
2. How do I attach the MagSafe PopSocket to my iPhone?
Attaching the MagSafe PopSocket to your iPhone is simple. Just align the circular disc on the back of the PopSocket with the MagSafe magnet on your iPhone, and it will automatically snap into place. Make sure to press down firmly to ensure a secure attachment.
3. Can I remove the MagSafe PopSocket from my iPhone?
Yes, you can remove the MagSafe PopSocket from your iPhone just as easily as you attach it. Simply pull or twist the PopSocket gently, and it will detach from the MagSafe magnet. This allows you to reposition or remove the PopSocket whenever you need to.
4. Will the MagSafe PopSocket interfere with wireless charging?
No, the MagSafe PopSocket is designed to work seamlessly with MagSafe wireless charging. The slim disc on the back of the PopSocket ensures compatibility, allowing you to charge your iPhone wirelessly without any interference. However, it’s worth noting that the thickness of some phone cases may impact the effectiveness of wireless charging.
5. Can I customize the design of my MagSafe PopSocket?
Yes, you can personalize the design of your MagSafe PopSocket. PopSocket offers a range of customization options, including different colors, patterns, and even the ability to add your own photos or designs. Visit the PopSocket website or retail stores to explore the various customization options available.