
Ever wondered what it would be like to explore a city from the comfort of your own home? With Apple Maps Flyover Tour, you can do just that. This innovative feature allows you to take a virtual tour of various locations around the world and experience a bird’s-eye view like never before. Whether you’re planning your next vacation or simply curious about new places, Apple Maps Flyover Tour offers a unique way to explore and discover. In this article, we will guide you through the steps to take an Apple Maps Flyover Tour, from finding a location to navigating the immersive 3D experience. Let’s dive in and see the world from a whole new perspective with Apple Maps Flyover Tour.
Inside This Article
- Overview
- Preparation before Taking the Flyover Tour
- How to Start the Flyover Tour
- Exploring the Flyover Tour Features
- Conclusion
- FAQs
Overview
Apple Maps Flyover is an incredible feature that allows you to take virtual tours of famous landmarks and cities around the world. With stunning 3D imagery and smooth navigation, Flyover provides a unique and immersive viewing experience. Whether you’re planning a trip or simply curious to explore different places, Flyover will transport you to another world without leaving the comfort of your home.
By leveraging advanced satellite and aerial imagery, Apple Maps has created a detailed model of various locations. You can zoom in and out, rotate the camera, and even tilt your device for a more dynamic perspective. It’s like having your own personal helicopter, offering an unprecedented bird’s-eye view of iconic sites.
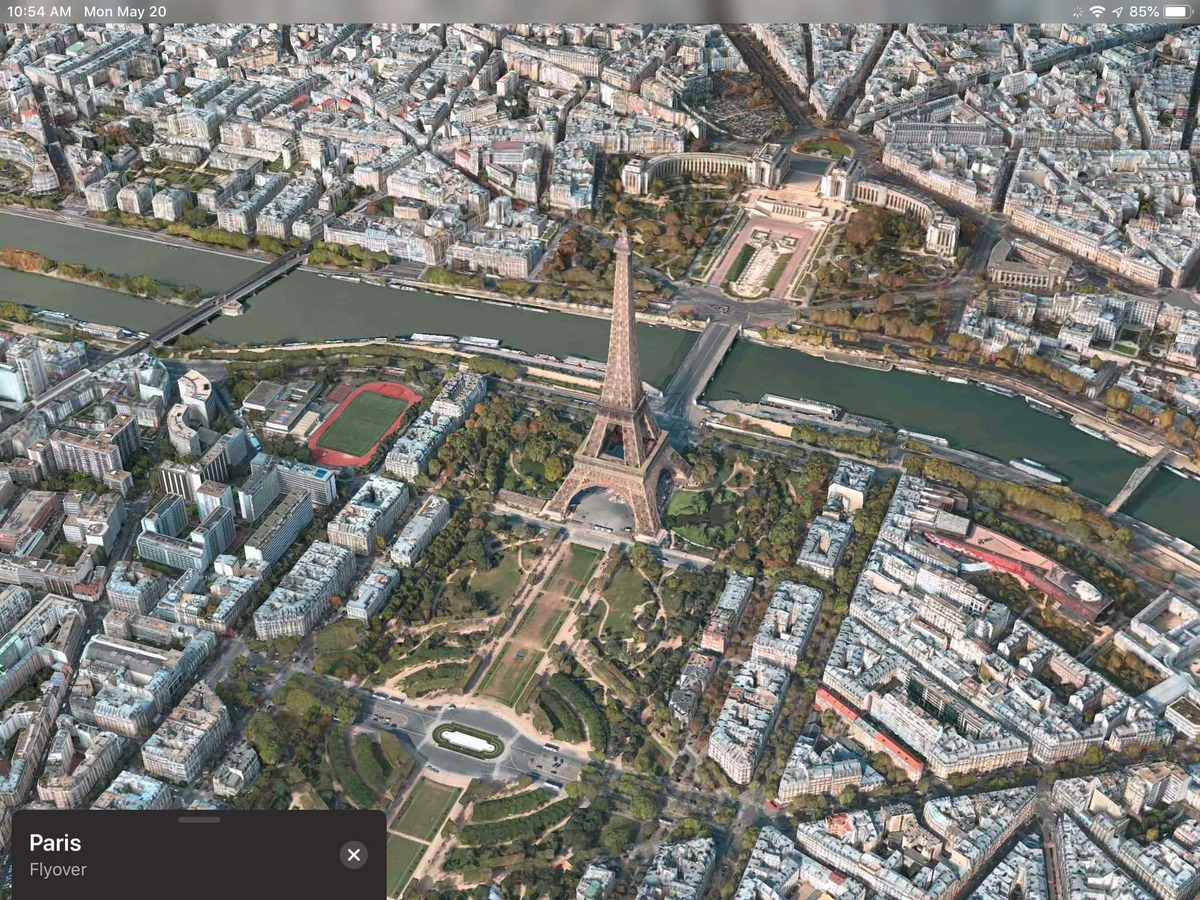
From the Eiffel Tower in Paris to the Sydney Opera House, the Flyover feature covers numerous cities and landmarks across the globe. It’s the perfect way to get a feel for a location before you visit or to reminisce about places you’ve already been.
Whether you’re a history buff, an architecture enthusiast, or simply someone who enjoys exploring new places, Apple Maps Flyover is a fascinating tool that caters to everyone’s interests. So let’s dive in and discover how to embark on a Flyover tour and make the most of this fantastic feature.
Preparation before Taking the Flyover Tour
Before embarking on an Apple Maps Flyover Tour, it’s important to make a few preparations to ensure a smooth and enjoyable experience. Whether you’re using the feature to get a sneak peek at a potential vacation destination or simply exploring a city from the comfort of your home, taking a few moments to prepare can enhance your overall experience. Here are some essential steps to take before diving into the Flyover Tour:
1. Update your Apple Maps app: Make sure you have the latest version of the Apple Maps app installed on your device. Updates often include bug fixes and performance enhancements that can optimize your Flyover Tour experience.
2. Check your internet connection: Since the Flyover Tour requires data to render the 3D visuals, ensure that you have a stable internet connection. It’s recommended to connect to a Wi-Fi network for seamless streaming and to avoid exceeding your mobile data limit.
3. Clear cache and close unnecessary apps: To ensure that your device is running smoothly during the Flyover Tour, clear your Maps app cache and close any unnecessary background apps. This will free up device resources and prevent any potential glitches or slowdowns.
4. Enable location services: Make sure that your device’s location services are enabled for the Maps app. This will allow the Flyover Tour to accurately track your location and provide an immersive experience that aligns with your surroundings.
5. Explore Flyover Tour destinations: Take some time to research the available Flyover Tour destinations in the Apple Maps app. Familiarize yourself with the cities, landmarks, and attractions you’re interested in visiting virtually. This will help you navigate through the experience more effectively and make the most of your tour.
6. Plan your viewing duration: Keep in mind that the Flyover Tour can last anywhere from a few minutes to several hours, depending on the location and your level of exploration. Plan your viewing duration accordingly to ensure that you have enough time to fully immerse yourself in the tour without feeling rushed.
By following these simple preparation steps, you’ll be ready to dive into the Apple Maps Flyover Tour and experience a captivating virtual journey through various cities and landmarks. Now that you’re prepared, let’s explore how to actually start the Flyover Tour.
How to Start the Flyover Tour
The Apple Maps Flyover Tour feature allows you to take a virtual tour of various locations around the world, providing a unique and immersive experience. Starting the Flyover Tour is a breeze, and in this section, we will guide you through the steps to initiate your journey.
1. Launch the Apple Maps app on your iPhone.
2. Enter the name of the location you want to explore in the search bar at the top of the screen. Apple Maps will suggest possible matches as you type, making it easier to find your desired destination.
3. Once you have selected the location, tap on the info card that appears at the bottom of the screen. The info card will display important details about the location, such as its name, address, and ratings.
4. Scroll down the info card until you see the “Flyover Tour” option. This option is only available for specific locations that support the Flyover Tour feature. If the location you have selected does not have a Flyover Tour, this option will not be displayed.
5. Tap on the “Flyover Tour” option. The Apple Maps app will now start loading the Flyover Tour for the chosen location. The duration of the loading process may vary depending on your internet connection speed.
6. Once the Flyover Tour is loaded, you will be immersed in a 3D view of the location. You can navigate and explore the area by moving your device and using gestures such as panning and zooming. The immersive visuals and smooth movement make it feel like you are actually flying over the location.
7. To enhance your Flyover Tour experience, you can make use of different gestures and features available. For example, you can tilt your device to change the viewing angle, or use the two-finger swipe gesture to look around. The app also provides information cards with interesting facts and landmarks as you explore different areas of the location.
8. Enjoy the Flyover Tour! Take your time to explore and appreciate the stunning visuals and informative content provided by Apple Maps. You can pause the tour at any time by tapping the screen, and resume it by tapping again.
And there you have it! You are now ready to start your Apple Maps Flyover Tour and embark on a virtual adventure. Whether you want to explore famous landmarks, iconic cities, or breathtaking landscapes, the Flyover Tour feature will transport you to your desired destination from the comfort of your own device.
Exploring the Flyover Tour Features
Once you start the Apple Maps Flyover Tour, you’ll be mesmerized by the stunning visuals and immersive experience. But that’s not all – Apple has packed the Flyover Tour with exciting features that allow you to dive deeper into the locations you explore. Let’s take a closer look at these amazing features:
1. 3D Buildings and Landmarks: One of the standout features of the Flyover Tour is the realistic 3D renderings of buildings and landmarks. As you soar through the virtual environment, you’ll be able to appreciate the intricate details of famous landmarks, iconic buildings, and even the bustling city streets below.
2. Panoramic Views: While on the Flyover Tour, you can enjoy breathtaking 360-degree panoramic views of the surroundings. You can turn your device in any direction to explore the scenery and capture stunning screenshots or videos to share with others.
3. Interactive Labels: Apple Maps Flyover Tour provides interactive labels that highlight points of interest as you glide over them. These labels offer additional information about famous landmarks, historical sites, and popular attractions, allowing you to discover fascinating facts along the way.
4. Guided Tours: Some Flyover Tours offer guided tours, which provide a curated experience with a narrative and interesting tidbits of information. These guided tours add an educational element to your exploration, making it even more engaging and informative.
5. Time-Lapse Mode: Another exciting feature of the Flyover Tour is time-lapse mode. With this feature, you can witness the transformation of a location over a specific period of time. It’s a captivating way to see changes like the shifting seasons or the progress of a construction project.
6. Flyover City Tours: Certain cities offer Flyover City Tours, which combine multiple Flyover locations into a single coherent journey. These tours showcase the highlights of a city, taking you on a virtual tour of famous landmarks, neighborhoods, and attractions.
7. Siri Integration: Apple Maps Flyover Tour is integrated with Siri, Apple’s virtual assistant. You can use voice commands to start or stop the Flyover Tour, navigate to specific landmarks, or ask for information about the places you’re exploring. It adds a hands-free aspect to your Flyover experience.
8. Customizable Flyover Tours: For a personalized experience, you can create your own customized Flyover Tours. Choose the locations you want to visit, set the order, and enjoy a tailor-made journey through your favorite places.
9. Accessibility Features: Apple Maps Flyover Tour is designed with accessibility in mind. It includes features like VoiceOver support, allowing visually impaired users to explore the virtual world and receive audio descriptions of the surroundings.
With these features and more, the Apple Maps Flyover Tour offers an immersive and engaging way to explore famous landmarks, cities, and landscapes right from your device. So, buckle up and get ready for an unforgettable virtual journey!
Conclusion
Exploring Apple Maps Flyover tours can be a truly immersive and captivating experience. With its stunning 3D visuals and smooth navigation, it allows you to virtually explore famous landmarks, iconic cities, and even natural wonders from the comfort of your own device. Whether you are a travel enthusiast looking for inspiration, a student studying geography, or simply someone who loves to discover new places, Apple Maps Flyover is a feature worth indulging in.
By following the steps outlined in this guide, you can easily take a Flyover tour and make the most out of this impressive feature. Remember to use a compatible device, update your iOS, have a stable internet connection, and navigate through the available Flyover locations. So, why wait? Start your virtual journey now and unlock a whole new way to explore the world!
FAQs
1. What is an Apple Maps Flyover tour?
An Apple Maps Flyover tour is a unique feature available on Apple Maps that allows users to virtually explore a location in 3D. It provides a more immersive and realistic experience by offering a bird’s-eye view of landmarks, buildings, and cities.
2. How can I access the Apple Maps Flyover tour feature?
To access the Apple Maps Flyover tour, simply open the Apple Maps app on your iPhone or iPad and search for a supported location. If the location supports Flyover, you will see a “Flyover” button or an icon that resembles a pair of binoculars. Tap on it to start the tour.
3. Are all locations supported for the Apple Maps Flyover tour?
No, not all locations are supported for the Flyover tour. Apple has gradually added support for various cities, landmarks, and points of interest. You can check the availability of Flyover tours by looking for the “Flyover” button or icon when searching for a location in the Apple Maps app.
4. Can I control the perspective and navigation during the Flyover tour?
Yes, you can control the perspective and navigation during the Flyover tour. You can use finger gestures to zoom in or out, rotate the view, and move around the 3D space. The tour also includes guided movements and transitions to highlight notable features of the location.
5. Do I need an internet connection to take an Apple Maps Flyover tour?
Yes, an internet connection is required to take an Apple Maps Flyover tour. The 3D imagery and related data are streamed from Apple’s servers, so a stable internet connection is necessary to load and display the content in real-time during the tour.