
Are you looking to take your mobile videography to the next level? Then you’ll be thrilled to know that the new iPhone 13 comes with an exciting feature called Cinematic Mode. This innovative camera mode allows you to capture stunning videos with a professional and cinematic feel, right from your smartphone. Whether you’re an aspiring filmmaker or simply want to enhance your social media content, Cinematic Mode on iPhone 13 can help you achieve your goals. In this article, we will explore everything you need to know about using Cinematic Mode on your iPhone 13, including how to activate it, tips for capturing breathtaking footage, and how to edit your videos for that coveted cinematic look. So, let’s dive in and unlock the full potential of your iPhone 13’s camera!
Inside This Article
- Setting up Cinematic Mode
- Adjusting the Depth Effect
- Shooting in Cinematic Mode
- Editing Cinematic Mode videos
- Conclusion
- FAQs
Setting up Cinematic Mode
Apple’s latest flagship iPhone 13 comes packed with exciting features, and one standout addition is Cinematic Mode. This cutting-edge feature allows you to capture stunning videos with a depth-of-field effect, reminiscent of professional cinematography. To make the most of Cinematic Mode and capture breathtaking footage, here’s a step-by-step guide on setting it up:
- Update to the Latest iOS: Before diving into Cinematic Mode, ensure that your iPhone 13 is running the latest iOS version. To do this, go to Settings > General > Software Update, and install any available updates.
- Open the Camera App: Once your iPhone 13 is up-to-date, locate the Camera app on your home screen and tap to open it. Cinematic Mode is compatible with both the rear and front cameras.
- Select Cinematic Mode: With the Camera app open, swipe to access different camera modes. Look for the “Cinematic” option, often represented by a film reel icon. Tap on it to switch to Cinematic Mode.
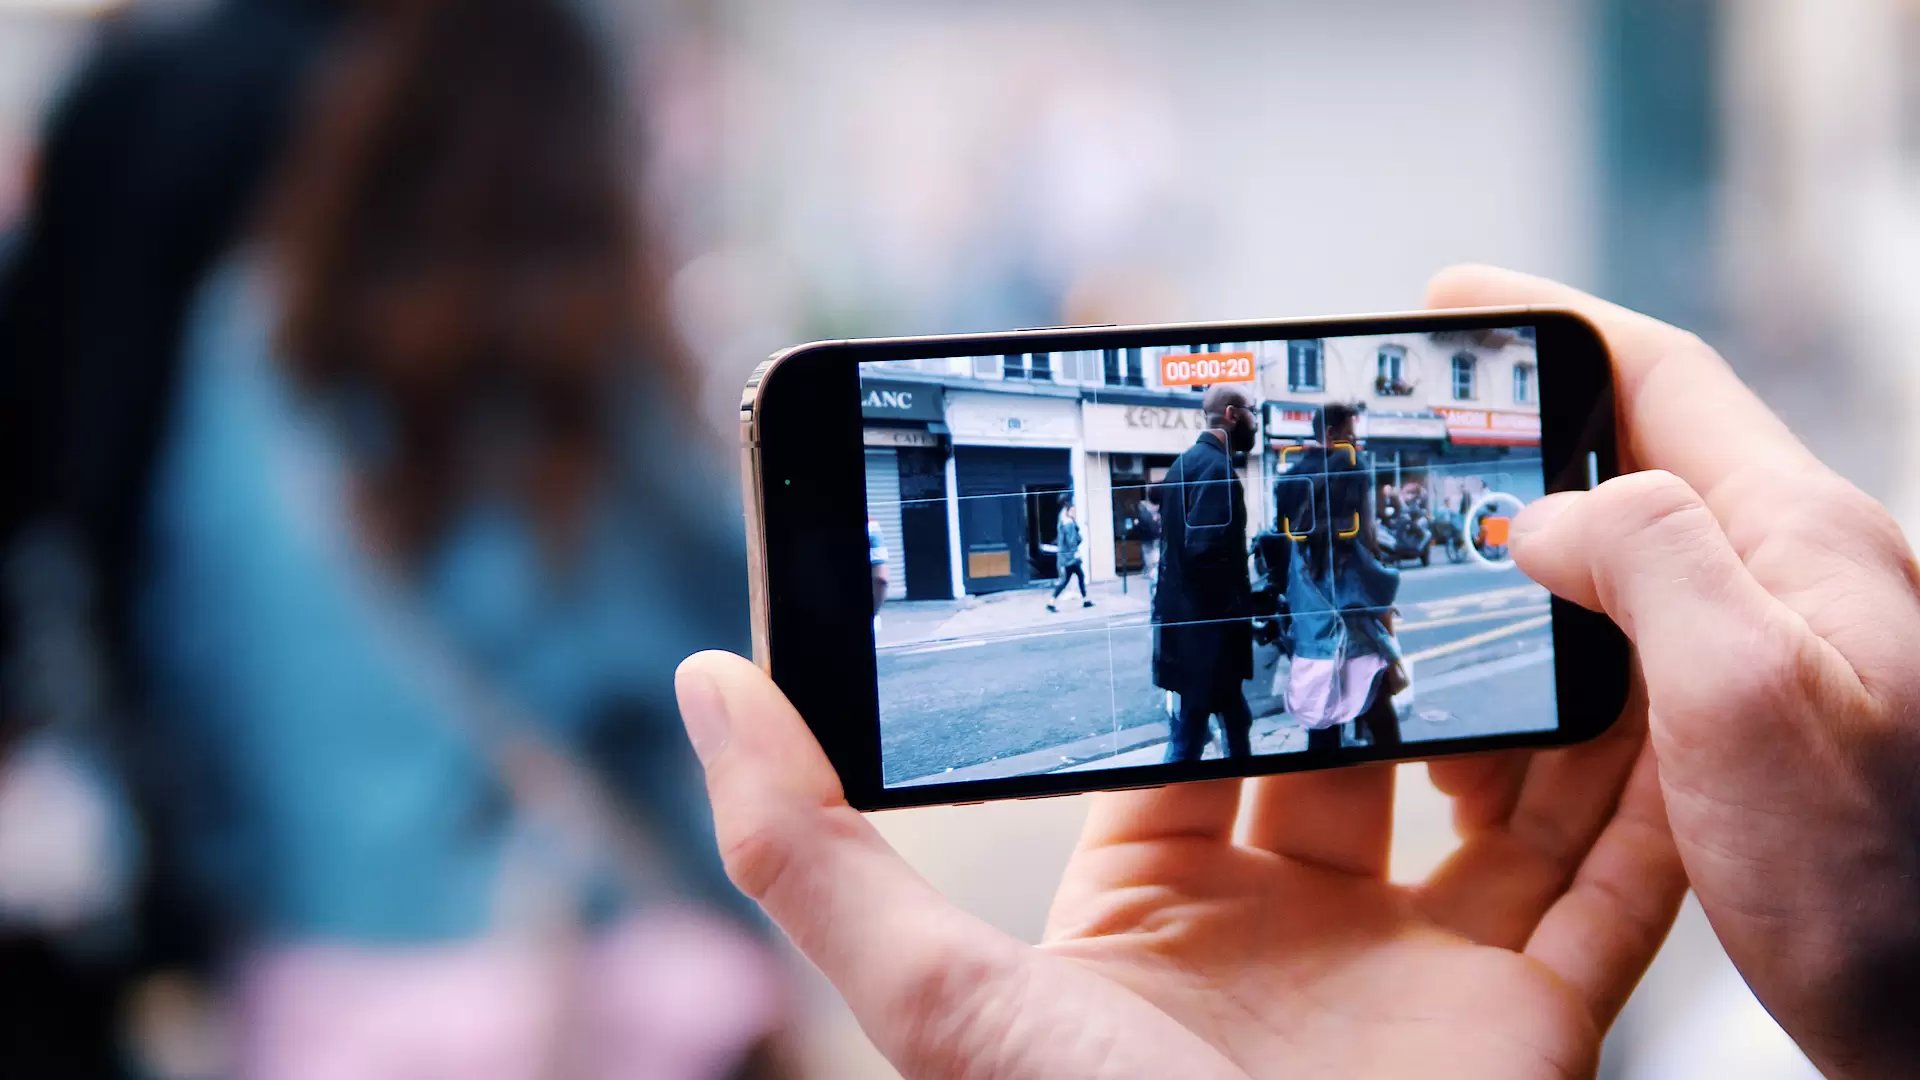
- Focus and Frame your Shot: Once in Cinematic Mode, you’ll notice a yellow box highlighting the area of focus. To change the focus point, tap on the screen where you want the subject to be in sharp focus. You can also adjust the exposure by sliding your finger up or down the screen.
- Enable or Disable Automatic Focus Changes: By default, Cinematic Mode utilizes automatic focus changes to enhance the depth-of-field effect. However, if you prefer manual control, you can disable this feature by going to Settings > Camera > Preserve Settings and toggling off “Cinematic Mode.” This way, your focus and depth effect settings will be retained between shots.
With these simple steps, you’re ready to start using Cinematic Mode on your iPhone 13 and capture incredible videos with a professional touch. Whether you’re recording a special moment with loved ones or documenting your adventures, Cinematic Mode takes your iPhone camera capabilities to the next level.
Adjusting the Depth Effect
One of the standout features of the Cinematic Mode on the iPhone 13 is the ability to adjust the depth effect in your videos. This feature allows you to create stunning visual effects by controlling the focus on different subjects within your frame. Whether you want to highlight a specific person or object or create a beautiful background blur, adjusting the depth effect can help you achieve the desired result.
To adjust the depth effect, follow these simple steps:
- Open the Camera app: Launch the Camera app on your iPhone 13.
- Select Cinematic Mode: Swipe to the right until you reach the Cinematic Mode option. Tap on it to enable the feature.
- Compose your shot: Frame your subject or scene in the viewfinder. You can tap on the subject to focus on it.
- Adjust the depth effect: Once you have composed your shot, you can adjust the depth effect by using the Depth slider. Slide it to the left to increase the background blur or slide it to the right to reduce the blur.
- Preview and capture: After adjusting the depth effect to your liking, preview the shot and capture the video by pressing the shutter button.
It’s important to note that the depth effect can be adjusted both before and after capturing the video. This gives you the flexibility to experiment and fine-tune the effect to get the perfect result. Moreover, you can also make use of the Portrait Lighting feature to further enhance the overall look of your videos.
By adjusting the depth effect in Cinematic Mode, you can add depth and dimension to your videos, creating a professional and cinematic look. So, don’t hesitate to explore this feature on your iPhone 13 and unleash your creativity.
Shooting in Cinematic Mode
Shooting in Cinematic Mode on your iPhone 13 allows you to capture stunning videos with a depth of field that mimics professional film-making techniques. Whether you’re capturing a memorable moment or creating content for social media, Cinematic Mode elevates your videos to a whole new level.
To start shooting in Cinematic Mode, simply open the camera app on your iPhone 13 and select the video mode. Once in video mode, you’ll notice a new icon at the top of the screen that resembles a film camera reel. Tap on it to activate Cinematic Mode.
Once you’ve enabled Cinematic Mode, your iPhone 13’s camera will intelligently analyze and track the subjects in your frame, automatically adjusting the focus and depth of field as needed. This creates a beautiful background blur, known as bokeh, which enhances the cinematic look of your videos.
When shooting in Cinematic Mode, it’s important to consider the composition of your shot. Think about the storytelling elements and the narrative you want to convey through your video. Position your subjects, objects, and scenery strategically to capture visually compelling footage.
When it comes to movement, Cinematic Mode shines. The camera on the iPhone 13 utilizes advanced stabilization technology to ensure smooth and steady footage, even when you’re on the move. So don’t be afraid to experiment with panning, tracking shots, or even capturing action sequences.
Another handy feature of Cinematic Mode is the ability to change the focus after capturing your footage. You can do this in the Photos app on your iPhone 13. Simply open the video you want to edit, tap on “Edit,” and then use the focus adjustment slider to change the point of focus in your video.
To make your Cinematic Mode videos even more captivating, consider experimenting with different lighting conditions. Play with natural light, artificial light, or even experiment with creative lighting setups to add depth and drama to your footage.
Remember to keep an eye on your iPhone 13’s battery life, as shooting in Cinematic Mode may consume more power than regular video recording. It’s always a good idea to have a spare battery or a portable charger handy, especially if you plan on recording for an extended period.
So, go ahead and unleash your creativity by experimenting with Cinematic Mode on your iPhone 13. Master the art of visual storytelling and create videos that truly captivate your audience.
Editing Cinematic Mode videos
Once you’ve captured stunning videos using the Cinematic Mode on your iPhone 13, the next step is to enhance and refine them through editing. Fortunately, Apple provides powerful built-in tools that allow you to edit your Cinematic Mode videos easily and efficiently.
To begin editing your Cinematic Mode videos, open the “Photos” app on your iPhone 13. Find the video you want to edit and tap on it to open it in full screen view. Then, tap the “Edit” button at the top right corner of the screen.
Within the editing interface, you’ll have access to a wide range of editing options. First, you can trim the video to remove any unwanted footage by dragging the sliders at the beginning and end of the frame. This allows you to refine the timing and make your video more concise.
In addition to trimming, you can also apply filters to add visual effects and enhance the mood of your video. Choose from a variety of pre-set filters by exploring the “Filter” tab. Simply tap on a filter to apply it and adjust the intensity as desired.
Furthermore, you can adjust the brightness, contrast, and saturation of your Cinematic Mode video. Head over to the “Adjust” tab and experiment with the sliders to achieve the perfect balance and make your footage more vibrant and captivating.
If you want to add a touch of creativity to your video, you can also apply various effects. From the “Effects” tab, explore options such as “Dramatic”, “Silhouette”, “Vignette”, and more. Experiment with different effects and find the one that complements your video’s theme and atmosphere.
Moreover, Apple’s Photos app allows you to add text and captions to your Cinematic Mode videos. Simply tap the “Markup” button and select the “Text” option. You can then enter your desired text, choose the font style, size, and color, and position it on the screen. This is a great way to add context or convey a message within your video.
Once you’ve finished editing your Cinematic Mode video, tap the “Done” button at the top right corner to save the changes. The edited video will be seamlessly integrated with your existing library, ready to be shared with friends and family across various platforms.
Conclusion
In conclusion, the Cinematic Mode feature on the iPhone 13 brings a new level of creativity and immersion to mobile filmmaking. With its ability to create professional-looking depth-of-field effects, this feature allows users to capture stunning videos with a cinematic feel.
Whether you’re a budding filmmaker or simply enjoy recording special moments, the Cinematic Mode on the iPhone 13 provides a powerful tool to elevate your video content. By using it strategically and experimenting with different techniques, you can enhance the storytelling aspect of your videos and make them more captivating.
With Apple once again pushing the boundaries of what a smartphone camera can do, the iPhone 13 and its Cinematic Mode demonstrate the company’s commitment to innovation and delivering cutting-edge technology to its users. So grab your iPhone 13 and start exploring the possibilities it offers with Cinematic Mode. Lights, camera, action!
FAQs
1. What is Cinematic Mode on iPhone 13?
Cinematic Mode is a new feature introduced in iPhone 13 that allows users to capture professional-quality videos with depth-of-field effects. It adds a cinematic touch to your videos, blurring the background and keeping the subject in focus, just like in movies.
2. How do I activate Cinematic Mode on my iPhone 13?
To activate Cinematic Mode on your iPhone 13, simply open the Camera app and select the video mode. A small icon resembling two circles will appear on the top right corner of the screen. Tap on this icon to enable Cinematic Mode. You can now start capturing videos with the depth-of-field effect.
3. Can I adjust the intensity of the depth-of-field effect in Cinematic Mode?
Yes, you can adjust the intensity of the depth-of-field effect in Cinematic Mode on iPhone 13. After activating Cinematic Mode, you will see an aperture icon on the top left corner of the screen. Tap on it to adjust the depth-of-field effect. You can choose from different options, such as “More Depth” or “Less Depth,” depending on your preference.
4. Do I need any special skills to use Cinematic Mode?
No, you don’t need any special skills to use Cinematic Mode on your iPhone 13. The feature is designed to automatically detect and track the subject, blurring the background to create a cinematic look. However, it might take some practice to perfect the framing and composition of your shots to achieve the desired effect.
5. Can I use Cinematic Mode for live videos or FaceTime calls?
Unfortunately, Cinematic Mode is currently only available for capturing pre-recorded videos in the Camera app. It is not applicable for live videos or FaceTime calls. However, you can still use other camera features, such as portrait mode, to add depth-of-field effects to your live videos or FaceTime calls.