
The rotary phone, also known as the dial phone, was once a staple in every household’s communication setup. In an age where modern smartphones dominate the market, it’s easy to forget the charm and nostalgia that come with using a rotary phone. But for those who appreciate the vintage appeal and want to experience a piece of history, learning how to use a rotary phone can be both intriguing and rewarding. In this article, we will guide you through the steps of using a rotary phone, from dialing a number to making a call. So, dust off that antique device and let’s dive into the world of rotary phones.
Inside This Article
- Overview
- Step 1: Understanding the Rotary Phone
- Step 2: Dialing a Number
- Step 3: Making a Call
- Step 4: Answering a Call
- Step 5: Hanging Up the Phone
- Step 6: Troubleshooting Common Issues
- Conclusion
- FAQs
Overview
In today’s digital age, rotary phones may seem like a relic of the past. However, these vintage communication devices still hold an undeniable charm and nostalgia. If you’ve come across a rotary phone and are unsure how to use it, fear not! In this article, we’ll guide you through the steps of using a rotary phone, from dialing a number to troubleshooting common issues.
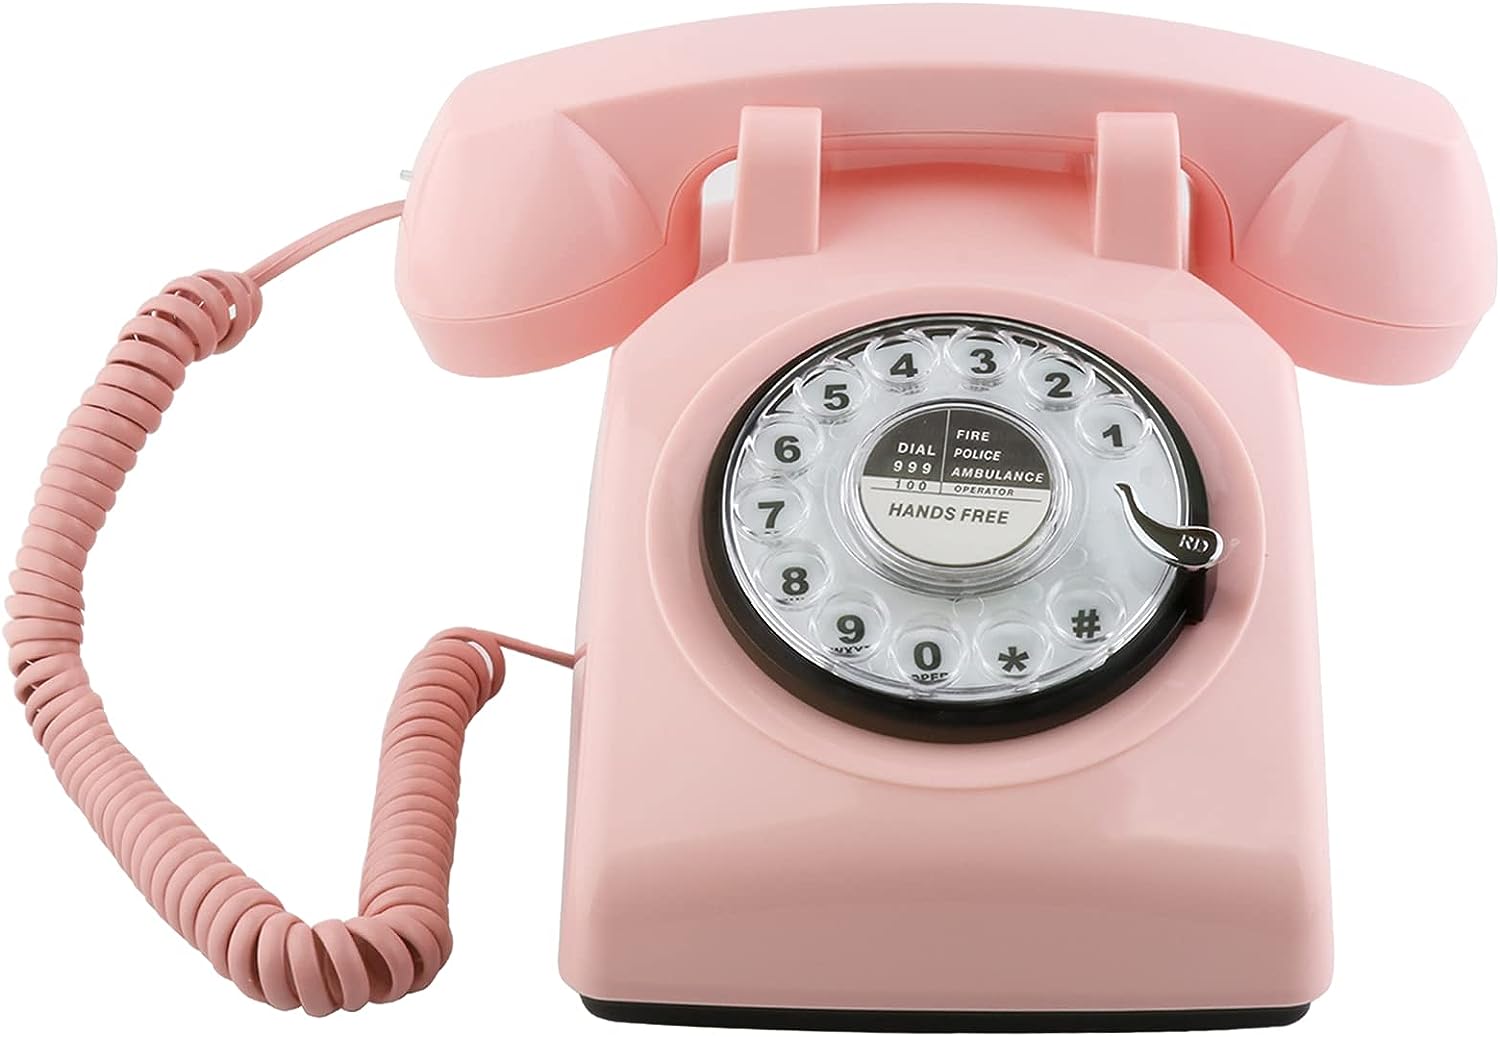
A rotary phone, also known as a dial phone, features a circular dial with finger-holes and numbers along the circumference. Unlike modern touch-tone phones where a simple press of buttons conveys the desired number, rotary phones require a more tactile approach to dialing.
Using a rotary phone is fairly straightforward once you understand the mechanism. By following a few simple steps, you’ll be able to make and receive calls on a rotary phone with ease.
So, if you’re ready to take a trip down memory lane and uncover the mysteries of the rotary phone, let’s dive in!
Step 1: Understanding the Rotary Phone
Before diving into how to use a rotary phone, it’s important to understand its basic structure and functionality. Rotary phones were widely used in the mid-20th century and feature a circular dial with numbered holes or slots. Each number corresponds to a specific digit, enabling users to dial phone numbers manually.
The rotary dial mechanism uses pulse dialing, which means that instead of pressing buttons, users rotate the dial until it reaches the desired number. As the dial returns to its original position, it generates electrical pulses that are transmitted to the telephone exchange, allowing the call to be connected.
Rotary phones are typically equipped with a receiver (the handset) and a base that contains the dial mechanism and other components. The receiver consists of a microphone for speaking and an earpiece for listening. The base also houses the dialing mechanism and may include additional features such as a ringer and a hook switch for answering and ending calls.
Understanding the physical components and how they work together is essential before proceeding with using a rotary phone. Once you have a grasp of the basics, you’re ready to move on to the next steps.
Step 2: Dialing a Number
Once you have familiarized yourself with the rotary phone, the next step is to learn how to dial a number. Dialing on a rotary phone is a bit different than using a standard keypad, but with a little practice, it will become second nature.
Here is a step-by-step guide to help you dial a number on a rotary phone:
- Take your finger and place it in the desired number’s corresponding hole on the rotary dial.
- Rotate the dial clockwise until your finger reaches the metal finger stop at the end of its travel.
- Release your finger from the hole and allow the dial to return to its original position.
- Repeat the process for each number in the phone number you are dialing.
For example, if you want to dial the number 555-1234, you would begin by placing your finger in the hole corresponding to the number 5. Rotate the dial clockwise until you reach the finger stop, then release your finger. Move on to the number 5 again and repeat the process. Finally, dial the numbers 1, 2, 3, and 4 using the same method.
It is important to note that rotary phones do not have any special characters, such as star (*), pound (#), or the plus sign (+), that are commonly found on modern keypads. If the phone number you wish to dial requires these characters, you may need to use an alternative method, such as using a touch-tone phone or utilizing a separate device for these functions.
Step 3: Making a Call
Now that you understand how to use a rotary phone and dial a number, it’s time to make your first call. Follow these simple steps:
1. Pick up the handset: Lift the receiver off the base of the rotary phone. Hold it to your ear and ensure it rests comfortably against your head.
2. Listen for the dial tone: After picking up the handset, you should hear a steady dial tone indicating that the phone is ready for you to make a call. If you don’t hear a dial tone, make sure that the phone is properly connected to the telephone line.
3. Start dialing: With the handset held to your ear, use your finger to rotate the rotary dial clockwise. Begin by placing your index finger into the desired number’s corresponding hole on the dial. Rotate the dial until your finger touches the metal finger stopper at the end of its travel.
4. Release the dial: After reaching the metal finger stopper, remove your finger from the dial and allow it to return back to its original position. This action will send electrical pulses corresponding to the number you dialed to the telephone exchange.
5. Wait for the connection: Once you complete dialing the number, you may hear a series of clicking or buzzing sounds. These noises indicate that the rotary phone is connecting your call to the desired destination. Be patient and wait for the call to connect.
6. Begin the conversation: Once the call connects, you will hear the other person’s voice on the line. Start the conversation by greeting the person or stating your purpose for calling. Remember to speak clearly and directly into the handset for optimal sound quality.
7. End the call: When you’re ready to end the conversation, simply hang up the handset by placing it back on the base of the rotary phone. This will disconnect the call and return the phone to its idle state.
Now that you know how to make a call using a rotary phone, you can easily communicate with your friends and family in a nostalgic and retro way. Enjoy the simplicity and charm of using this classic communication device!
Step 4: Answering a Call
Answering a call on a rotary phone is simple and straightforward. Here’s how you can do it:
1. When the phone rings, you will hear a distinct, traditional ringtone. It may sound different from the digital ringtones you are accustomed to on modern phones.
2. Lift the handset of the rotary phone off the cradle. The handset is the part of the phone that you hold against your ear and mouth to communicate.
3. Bring the handset close to your ear and listen for any sounds or voices on the line. Remember, rotary phones do not have caller ID, so you won’t know who is calling until you answer.
4. To answer the call, simply wait for the caller to speak or say “Hello” to indicate that you’re ready to start the conversation.
5. Engage in the conversation as you would with any other phone. Speak clearly into the handset and listen attentively to the person on the other end.
6. When you’re ready to end the call, proceed to Step 5: Hanging Up the Phone.
Remember, using a rotary phone may feel a bit different compared to modern cell phones, but once you get the hang of it, it becomes second nature. Enjoy the nostalgia and the simplicity of communicating with a piece of technology from the past!
Step 5: Hanging Up the Phone
After you have finished your conversation, it’s time to hang up the rotary phone. Hanging up the phone on a rotary phone is slightly different than on a modern push-button phone. But don’t worry, it’s still a simple process.
To hang up the phone, you need to take the handset and carefully place it back on the phone cradle. The phone cradle is the part of the rotary phone where the handset rests when it’s not in use. Make sure the handset is securely seated on the cradle to ensure the call is properly ended.
Unlike modern phones, rotary phones do not have a dedicated “hang up” button or an on-screen prompt. Instead, you have to physically place the handset back on the cradle to terminate the call.
When hanging up the phone, be gentle and avoid slamming the handset down. Rotary phones are more delicate than their modern counterparts, and slamming the handset can damage the internal components of the phone. So, always handle the handset with care and place it on the cradle gently.
Once the handset is back on the cradle, the call is officially concluded, and the line is disconnected. You will hear a click sound when the handset is properly seated on the cradle, indicating that the call has ended.
Remember, properly hanging up the phone is important not only to end the call but also to ensure the phone is ready for the next use. By carefully placing the handset back on the cradle, you are preserving the longevity of the phone and respecting its vintage design and functionality.
Step 6: Troubleshooting Common Issues
While rotary phones may be charming and nostalgic, they can sometimes encounter issues that need troubleshooting. Here are some common problems you may experience with a rotary phone and how to troubleshoot them:
1. No dial tone: If you pick up the handset and hear no dial tone, check if the phone is properly connected to the phone line. Make sure the cords are securely plugged in at both ends. If the issue persists, try testing the line with another phone to determine if the problem lies with the phone or the line itself.
2. Static or poor sound quality: If you hear static or experience poor sound quality during a call, first check the handset and the phone base for any loose connections. If all connections are secure, try cleaning the rotary dial and the contacts inside the phone. Dust or dirt accumulation can affect the sound quality. Using a small brush or a cotton swab dipped in rubbing alcohol, gently clean the dial and the contacts.
3. Sticky or stuck dial: If the rotary dial feels sticky or gets stuck while dialing, it might need cleaning or lubrication. To clean the dial, use a soft cloth moistened with rubbing alcohol to remove any dirt or debris. If the issue persists, you can use a small amount of silicone spray or powdered graphite to lubricate the mechanism. However, be careful not to use excessive lubricant, as it can attract more dirt and debris.
4. Incomplete or incorrect dialing: If you find that the numbers are not fully dialing or are not registering correctly when you rotate the dial, the contacts may be dirty or misaligned. Try cleaning the contacts, as mentioned earlier, to see if that resolves the issue. If the problem continues, you may need to contact a professional technician for further assistance or consider replacing the phone.
5. Phone not ringing: If your rotary phone is not ringing when an incoming call is received, check the ringer volume and ensure it is not turned off or set too low. Also, make sure the phone’s ringer switch is in the correct position. If the issue persists, there may be a problem with the phone’s internal wiring, requiring professional repair.
Remember, rotary phones are vintage devices, and some issues may require professional attention. If you are unsure about troubleshooting or dealing with more complex problems, it is always best to consult a qualified technician who specializes in vintage phone repairs.
In conclusion, while rotary phones may be a relic of the past, they hold a special place in the history of communication. They served as the primary means of making phone calls for decades, and their unique design and operation have garnered nostalgia and admiration from many people.
While rotary phones may not have the convenience and advanced features of modern smartphones, they offer a charming simplicity that can be appreciated. Their mechanical nature and tactile feedback provide a different experience from today’s touchscreen devices, allowing for a connection to the past and a greater appreciation for the evolution of technology.
Whether you come across a rotary phone at a museum or in someone’s vintage collection, taking the time to understand how to use it can be a fascinating experience. So next time you encounter a rotary phone, give it a whirl and transport yourself back to a time when communication was a bit slower but just as meaningful.
FAQs
1. Can I still use a rotary phone with modern phone systems?
2. How do I dial a phone number on a rotary phone?
3. Are rotary phones compatible with Caller ID and other modern features?
4. Can I use a rotary phone with a VoIP service?
5. Where can I find a rotary phone to purchase?