
The iPhone 7 Plus Camera is not just a regular smartphone camera, it’s a powerhouse in the palm of your hand. With its advanced features and capabilities, it allows you to capture stunning photos and videos with ease. Whether you’re a professional photographer or simply someone who loves taking pictures, the iPhone 7 Plus Camera has something for everyone.
In this article, we will explore the various features of the iPhone 7 Plus Camera and learn how to make the most out of its capabilities. From using different shooting modes to understanding the settings and options, we’ll cover it all. So, grab your iPhone 7 Plus and let’s unlock its full photographic potential!
Inside This Article
- Point 1: Understanding the Camera Features
- Point 2: Using the Camera App – Navigating the Camera app interface and its different modes – Exploring the various shooting modes, including Photo, Video, Portrait, and more – Understanding the Live Photos feature and how to capture them
- Point 3: Mastering Camera Settings
- Point 4: Enhancing Your Photos
- Point 5: Advanced Camera Features and Techniques
- Conclusion
- FAQs
Point 1: Understanding the Camera Features
When it comes to photography, the iPhone 7 Plus is truly a game-changer. With its advanced camera capabilities, this device has revolutionized the way we capture and share our precious moments. Let’s delve into the key features that make the iPhone 7 Plus camera a standout.
Firstly, let’s talk about the camera specifications and capabilities. The iPhone 7 Plus is equipped with a 12-megapixel dual-lens camera system. This dual-lens setup consists of a wide-angle lens and a telephoto lens, allowing you to capture stunning photos with remarkable clarity and detail. The telephoto lens enables optical zoom, which means you can zoom in without sacrificing image quality.
Another essential feature of the iPhone 7 Plus camera is image stabilization. This technology ensures that your photos and videos remain sharp and steady, even if your hand shakes while capturing the moment. With optical image stabilization, camera movement caused by hand tremors or shaky environments is minimized, resulting in better-focused and clearer shots.
Low light performance is another aspect where the iPhone 7 Plus excels. The camera sensor, combined with the wide aperture of the lens, allows more light to enter, resulting in brighter and more vibrant photos even in challenging lighting conditions. Whether you’re capturing a sunset on a beach or a candlelit dinner, the iPhone 7 Plus camera ensures that your memories are preserved with exceptional clarity and richness of colors.
Point 2: Using the Camera App – Navigating the Camera app interface and its different modes – Exploring the various shooting modes, including Photo, Video, Portrait, and more – Understanding the Live Photos feature and how to capture them
One of the standout features of the iPhone 7 Plus is its powerful camera capabilities. With its easy-to-use Camera app, you can capture stunning photos and videos with just a few taps. In this section, we will dive into the different modes and features of the Camera app, allowing you to make the most out of your iPhone camera experience.
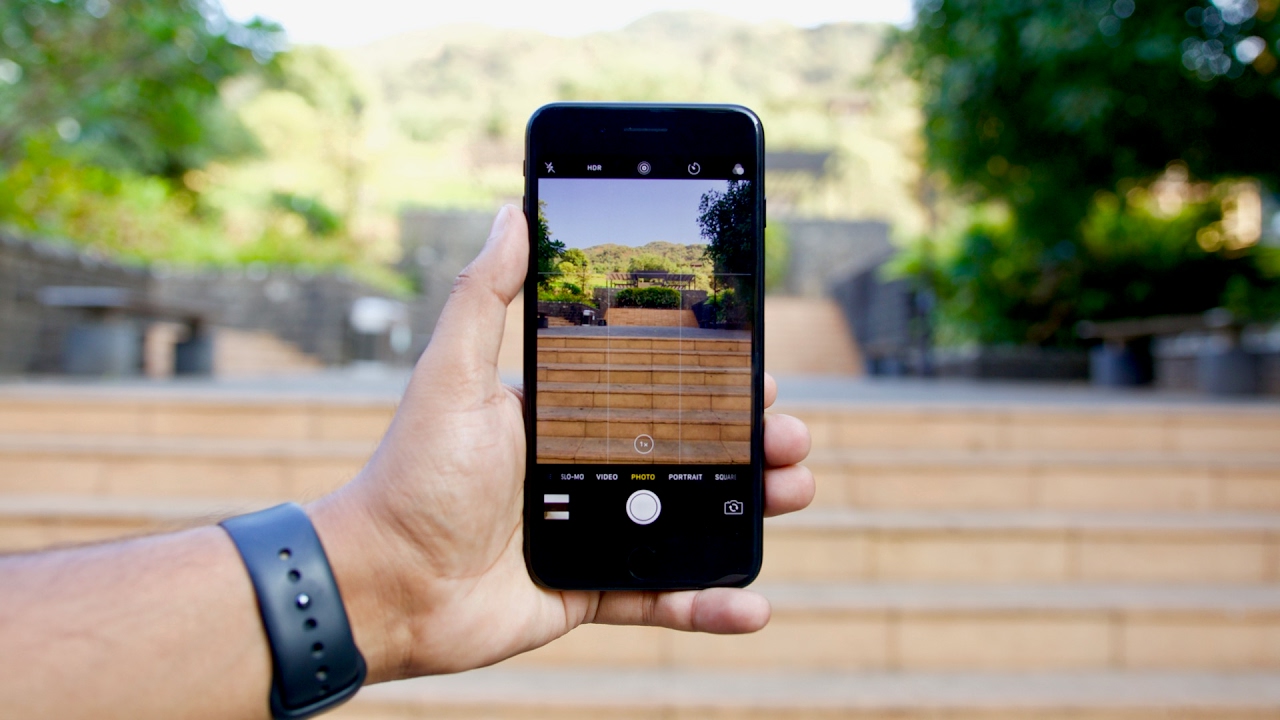
When you launch the Camera app, you’re greeted with a simple and intuitive interface. The main screen features a shutter button, along with shortcuts to commonly used settings such as flash, HDR, and timer. To navigate through the various shooting modes, simply swipe left or right on the screen.
The default mode is the Photo mode, which is perfect for capturing still images. Simply tap the shutter button to snap a photo. You can also use the volume buttons on the side of your iPhone to take a picture.
Swipe left to access other shooting modes, such as Video mode. This mode allows you to record high-quality videos with your iPhone’s camera. Simply tap the red record button to start recording, and tap it again to stop. You can even switch between the front and rear camera while recording by tapping the camera flip icon.
Another notable shooting mode is Portrait mode, available on iPhone 7 Plus and later models. This mode utilizes the dual-camera system to create stunning depth-of-field effects, blurring the background and keeping the subject in sharp focus. To use Portrait mode, simply select it from the shooting modes and follow the on-screen instructions to position your subject properly.
One unique feature of the iPhone camera is Live Photos. When enabled, Live Photos captures a short video clip along with the photo, allowing you to relive the moment with a simple touch. To capture a Live Photo, make sure it is enabled by tapping the Live Photos icon on the top of the screen. Then, simply tap the shutter button to take a photo. To view the Live Photo, open it in the Photos app and long-press on the image.
By exploring and experimenting with the various shooting modes and features of the Camera app, you can unlock your iPhone’s full photographic potential. Whether you’re capturing amazing landscapes in Photo mode, shooting stunning videos in Video mode, or creating professional-looking portraits with Portrait mode, the Camera app on your iPhone 7 Plus is a versatile tool that can help you capture and create memories in an instant.
Point 3: Mastering Camera Settings
When it comes to capturing stunning photos with your iPhone 7 Plus, mastering the camera settings is crucial. In this section, we will delve into three key aspects: adjusting exposure, focus, and white balance; exploring and customizing HDR settings; and utilizing gridlines and level tools for improved composition.
Adjusting exposure, focus, and white balance correctly can significantly enhance the overall photo quality. The iPhone 7 Plus allows you to manually control these settings, giving you more creative freedom. To adjust the exposure, simply tap on the screen where you want to focus and then swipe up or down to brighten or darken the image. This is especially useful when you want to capture subjects in challenging lighting conditions.
Next, let’s talk about focus. By default, the iPhone 7 Plus automatically focuses on the subject in the frame. However, if you want to manually adjust the focal point, simply tap on the screen where you want to ensure sharpness. This feature comes in handy when capturing detailed shots or portraits, as it ensures that your subject remains crisp and clear.
White balance is another important setting that can greatly impact the color accuracy of your photos. The iPhone 7 Plus offers multiple white balance options, such as Auto, Daylight, Cloudy, and more. Experiment with these options to find the one that best suits your lighting conditions and desired mood for the photo.
Now, let’s move on to HDR settings. HDR, or High Dynamic Range, is a feature that combines multiple exposures to create a well-balanced image, especially in high-contrast scenes. The iPhone 7 Plus has an HDR mode that can be turned on or off. When enabled, the camera automatically captures a series of photos at different exposures and combines them to create a final HDR image. This can be particularly useful when photographing landscapes or scenes with bright highlights and deep shadows.
In addition to the built-in HDR mode, you can also manually adjust the strength of the HDR effect. This can be done by going into the Settings app, selecting Camera, and then HDR. Here, you can choose between Auto, On, or Off, depending on your preferences and the shooting situation.
Utilizing gridlines and level tools can take your composition to the next level. Gridlines help you align your subjects and create balance in your photos. To enable gridlines, go to the Camera settings, select Grid, and turn it on. Gridlines can guide you in placing your subject on the intersections or following the rule of thirds, resulting in more visually pleasing photographs.
The level tool is another handy feature that helps you ensure straight horizons and avoid angled compositions. When using the Camera app, you may notice a small spirit-level icon. Tapping on it will activate the level tool, which helps you align your shots perfectly and avoid any unintentional tilting or sloping.
By adjusting exposure, focus, and white balance, exploring and customizing HDR settings, and utilizing gridlines and level tools, you can master the camera settings of your iPhone 7 Plus. These features will unleash your creativity and enable you to capture stunning photos with outstanding quality. Experiment with these settings, and let your photography skills shine!
Point 4: Enhancing Your Photos
One of the great features of the iPhone 7 Plus camera is the ability to enhance your photos right within the Photos app. With a few simple taps, you can take your photos to the next level.
The Photos app comes with a range of built-in editing tools that allow you to adjust exposure, brightness, contrast, and saturation. You can also apply filters, crop, straighten, and rotate your photos.
When it comes to cropping, you can use the rule of thirds to create a more balanced composition. This involves dividing your image into a 3×3 grid and placing your subject along one of the gridlines. By doing so, you can create a more visually appealing and dynamic photo.
Another way to enhance your photos is by exploring third-party photo editing apps. These apps offer additional features and effects, allowing you to unleash your creativity and add a personal touch to your photos.
Some popular third-party photo editing apps for iPhone include Snapseed, Adobe Photoshop Express, and VSCO. These apps offer a wide range of editing tools, including selective editing, advanced filters, and creative effects.
One technique for improving image quality is to straighten your photos. This can help correct any tilt or imbalance in your composition and make your photos more visually pleasing. The straighten tool in the Photos app allows you to easily align your photo with a straight reference line.
In addition to straightening, you can also use the Photos app to adjust the perspective of your photos. This is especially useful when photographing buildings or landscapes, as it can help correct any distortions or converging lines.
Don’t be afraid to experiment with different editing techniques and effects to find your own unique style. Remember, the goal is to enhance your photos and make them stand out.
By utilizing the built-in editing tools in the Photos app and exploring third-party photo editing apps, you can take your iPhone 7 Plus photos to the next level and create stunning images that you’ll be proud to share.
Point 5: Advanced Camera Features and Techniques
When it comes to capturing stunning and creative compositions with your iPhone 7 Plus, the telephoto lens is your secret weapon. This secondary lens allows you to get closer to your subject without sacrificing image quality. Whether you’re photographing a beautiful landscape or a distant object, the telephoto lens enables you to capture unique and compelling shots.
Exploring depth-of-field is another powerful technique to take your photography to the next level. By adjusting the aperture settings in the Portrait mode, you can create a beautiful background blur while keeping the subject sharp and in focus. This creates a professional-looking portrait with a stunning bokeh effect, making your subject really stand out.
To make the most out of the Portrait mode, find a well-lit area and position your subject at a moderate distance. The camera will guide you to adjust the distance between yourself and the subject to achieve the best results. Experiment with different backgrounds and compositions to create visually striking portraits that capture the essence of your subject.
When it comes to action shots, the iPhone 7 Plus comes equipped with features that ensure you don’t miss a single moment. The Burst mode allows you to capture a series of rapid-fire photos by holding down the shutter button. This is perfect for capturing fast-moving subjects, such as sports events or playful pets. Afterward, you can select the best shot from the series.
For panoramic shots, the built-in Panorama mode on the iPhone 7 Plus allows you to capture wide-angle sweeping landscapes. Simply swipe the camera interface to the Panorama option, follow the on-screen instructions, and move your phone steadily to capture the scene. The result is a stunning, wide-angle photograph that showcases the grandeur of your surroundings.
If you’re looking to capture the passage of time, the Time-Lapse feature is your go-to tool. With this feature, you can capture a series of photos over an extended period and combine them into a seamless video. It’s perfect for capturing the transformation of a city skyline at sunset or the movement of clouds in the sky. Simply set up your shot, start the Time-Lapse mode, and let the camera do the rest.
By mastering these advanced camera features and techniques on your iPhone 7 Plus, you’ll be able to take your photography skills to new heights. Whether it’s capturing breathtaking portraits, freezing action moments, or showcasing the beauty of panoramic landscapes, your iPhone 7 Plus camera offers a world of creative possibilities.
Conclusion
In conclusion, the iPhone 7 Plus camera is an exceptional tool for capturing stunning photos and videos. With its dual-lens setup, advanced image processing capabilities, and user-friendly interface, it offers a seamless photography experience for both beginners and professionals alike. Whether you’re looking to capture breathtaking landscapes, snap memorable moments with friends and family, or document your creative journey, the iPhone 7 Plus camera has got you covered.
By mastering the various camera modes and settings, utilizing third-party editing apps, and exploring different photography techniques, you can unlock the full potential of the iPhone 7 Plus camera and take your mobile photography to the next level. So, grab your iPhone 7 Plus, head out into the world, and let your creativity shine through the lens.
FAQs
Q: What are the key features of the iPhone 7 Plus camera?
The iPhone 7 Plus boasts a dual-camera system, consisting of a wide-angle lens and a telephoto lens. This allows for 2x optical zoom and up to 10x digital zoom. Additionally, it has optical image stabilization, a wide color capture for vibrant photos, and a 12-megapixel sensor for detailed and high-quality images.
Q: How do I switch between the wide-angle and telephoto lenses on the iPhone 7 Plus camera?
To switch between the wide-angle and telephoto lenses, simply open the Camera app and tap on the “1x” or “2x” button located at the bottom of the screen. Tapping on “1x” will activate the wide-angle lens, while tapping on “2x” will switch to the telephoto lens.
Q: Can I take portrait mode photos with the iPhone 7 Plus camera?
Yes, the iPhone 7 Plus introduced the Portrait mode feature, which adds a depth-of-field effect to your photos, blurring the background while keeping the subject in sharp focus. This feature utilizes the telephoto lens to create professional-looking portraits with stunning bokeh.
Q: How do I access the camera settings on the iPhone 7 Plus?
To access the camera settings on the iPhone 7 Plus, open the Camera app and tap on the small arrow icon located at the top of the screen. This will reveal additional options such as flash, timer, and Live Photos. You can also adjust other camera settings, such as resolution and gridlines, by going into the Settings app and selecting Camera.
Q: Can I shoot videos in 4K resolution using the iPhone 7 Plus camera?
Yes, the iPhone 7 Plus is capable of recording videos in 4K resolution at 30 frames per second. To capture stunning videos, open the Camera app, swipe to the “Video” mode, and select the desired resolution from the settings. Keep in mind that shooting in 4K resolution will require more storage space on your device.