
In today’s digital age, smartphones have become an indispensable tool for capturing life’s precious moments. With the advancements in mobile phone technology, the photography capabilities of smartphones have skyrocketed, especially with the new iPhone camera settings.
The latest iPhone models offer an array of incredible camera features and settings that enable users to unleash their creativity and capture stunning photos like never before. Whether you’re a professional photographer or an amateur enthusiast, understanding how to utilize these camera settings can elevate your photography skills and produce incredible results.
In this article, we will explore the different photographic styles that can be achieved using the new iPhone camera settings. From capturing portrait shots with stunning depth-of-field to experimenting with long exposure for mesmerizing night shots, get ready to discover the full potential of your iPhone’s camera and take your photography to the next level.
Inside This Article
- Understanding the New iPhone Camera Settings
- Mastering the Portrait Mode
- Exploring the Night Mode Feature
- Enhancing Your Photography with ProRAW Mode
- Conclusion
- FAQs
Understanding the New iPhone Camera Settings
As technology continues to evolve, smartphones like the iPhone have become powerful tools for capturing stunning photographs. With each new model, Apple introduces advanced camera settings that allow users to take their photography skills to the next level. Understanding these settings is crucial for maximizing the potential of your iPhone camera and capturing breathtaking images. Let’s dive into the key camera settings you need to know.
1. Auto Mode: The default setting on your iPhone camera is Auto mode. In this mode, the camera automatically adjusts settings such as exposure, white balance, and focus to capture well-balanced and properly exposed shots. While Auto mode is convenient for quick snapshots, it may not always produce the desired creative effects.
2. HDR (High Dynamic Range): HDR mode enhances the dynamic range of your photos by combining multiple exposures. When enabled, your iPhone will capture several images at different exposures and blend them together to create a more detailed and balanced photo, especially in high-contrast scenes. This results in better highlight and shadow detail, making your photos appear more vivid and natural.
3. AE/AF Lock: Auto Exposure/Auto Focus (AE/AF) Lock allows you to lock the exposure and focus settings while you compose your shot. To use this feature, simply tap and hold on the screen where you want to set the exposure and focus. A yellow square will appear, indicating that the AE/AF Lock is active. This is particularly useful in situations where the lighting conditions may change or when you want to maintain a specific focus point.
4. Live Photos: Live Photos adds a touch of magic to your pictures by capturing brief moments right before and after you take a photo. When enabled, the camera will record a short video clip along with the still image, bringing your photos to life with movement and sound. To view a Live Photo, simply press and hold on the image in the Photos app. You can even edit the key photo, apply effects, and choose a new representative frame.
5. Burst Mode: Burst Mode allows you to capture a series of photos in rapid succession by pressing and holding the shutter button. This is especially useful for capturing fast-moving subjects or moments where timing is critical. Afterward, you can select the best shots from the burst sequence or create animations using the “Bursts” album in the Photos app.
6. Gridlines: Gridlines are a helpful tool for composing visually appealing photos. They divide the screen into a 3×3 grid, following the rule of thirds to guide your composition. By placing points of interest or aligning elements along these gridlines, you can create a more balanced and visually pleasing image.
7. Exposure Compensation: Exposure compensation allows you to manually adjust the brightness of your photos. By moving the exposure slider, you can make your images brighter or darker to achieve the desired look. Use this setting to compensate for challenging lighting conditions or to add creative effects to your photos.
8. Self-Timer: The self-timer feature gives you the flexibility to set a delay before the camera captures a photo. This is particularly useful when taking selfies or group photos, as it gives you time to position yourself or join the shot before the photo is taken. You can choose between a 3-second or 10-second delay.
By understanding and utilizing the various camera settings on your iPhone, you can unleash your creativity and capture stunning photographs that stand out. Experiment with these settings, practice, and don’t be afraid to push the boundaries of your photography skills. The more you explore and experiment, the more you’ll discover the true capabilities of your iPhone camera.
Content:
Mastering the Portrait Mode
The Portrait Mode is a powerful feature available on the new iPhone camera that allows you to capture stunning portraits with a professional-looking background blur. This mode is perfect for capturing the beauty and essence of the subject, whether it’s a person, an object, or even a pet.
To master the Portrait Mode, start by selecting “Portrait” from the camera modes. Once you’ve chosen this mode, you’ll notice a depth effect preview on the screen. This preview helps you gauge the intensity of the background blur before taking the shot.
When framing your shot, make sure the subject is well-lit and properly positioned. The Portrait Mode works best when there is a clear distinction between the foreground subject and the background. This distinction helps the camera accurately separate the subject from its surroundings, resulting in a more natural-looking blur.
Experiment with different distances and angles to find the perfect composition. You can move closer to the subject to emphasize its features or step back for a wider shot. Additionally, try to create a sense of depth by including objects in the foreground or background.
Another essential aspect of mastering the Portrait Mode is adjusting the lighting. You can tap on the screen to control the focus and exposure of the image. By adjusting the exposure, you can ensure that the subject is properly exposed without any overexposed or underexposed areas.
Take advantage of the Portrait Lighting options available in the camera settings. These options allow you to add studio-quality lighting effects to your portraits. From Natural Light to Studio Light, experiment with different lighting styles to enhance the mood and drama of your photos.
After taking the shot, you can further enhance the portrait using editing tools available in the Photos app. Adjust the depth effect intensity, crop the image, or apply filters to achieve the desired look.
With practice and experimentation, you can become a master of using the Portrait Mode on your new iPhone camera. Capture beautiful portraits that showcase the emotions and personality of your subjects.
Exploring the Night Mode Feature
One of the most impressive features of the new iPhone camera settings is Night Mode. This feature allows you to capture stunning low-light photos with enhanced clarity and detail. Night Mode automatically activates when the camera senses a dimly lit environment, ensuring that you can take beautiful photos even in challenging lighting conditions.
When using Night Mode, your iPhone combines multiple exposures to capture the perfect shot. It intelligently adjusts the exposure time and ISO settings to ensure optimal brightness while minimizing noise. The result is a well-balanced image with rich colors and sharpness.
To make the most out of Night Mode, keep the camera steady or use a tripod to avoid any blurriness caused by movement. When you tap the shutter button, the camera will indicate the recommended exposure time for the shot. You can also adjust the exposure manually by sliding the Night Mode icon up or down.
Experiment with different scenes and subjects to understand the capabilities of Night Mode. Whether you’re capturing a cityscape, a dimly lit restaurant, or a starry night sky, Night Mode will help you achieve incredible results. It’s a game-changer for capturing stunning photos in low-light conditions.
Furthermore, Night Mode isn’t just limited to the rear camera. With the new iPhone camera settings, you can also use Night Mode with the front-facing camera, perfect for capturing well-lit selfies or group shots in dimly lit environments.
Remember, practice makes perfect. Take the time to familiarize yourself with Night Mode and its settings. Experimentation is key to understanding how to leverage this feature effectively and capture breathtaking low-light images that were once impossible on a smartphone.
Enhancing Your Photography with ProRAW Mode
With the release of the newest iPhones, Apple introduced a groundbreaking feature called ProRAW mode. This feature allows users to capture images in an uncompressed RAW format, giving them more control and flexibility in post-processing.
ProRAW mode combines the benefits of shooting in RAW with the computational photography capabilities of the iPhone camera. It captures all the data from the camera sensor, including details in shadows and highlights, while still leveraging the iPhone’s image processing algorithms.
By using ProRAW mode, photographers can have greater control over parameters like exposure, white balance, and noise reduction during the editing process. This level of control can result in stunningly detailed and dynamic images that truly showcase the capabilities of the iPhone camera.
When shooting in ProRAW mode, it’s important to note that the file sizes are significantly larger compared to standard JPEG or HEIC formats. This means you’ll need ample storage space on your device or cloud storage options to accommodate the larger files.
ProRAW images have a wider dynamic range, which means they capture more details in both the highlights and shadows. This can be particularly useful in challenging lighting conditions, such as capturing landscapes with bright skies or dimly lit subjects. With ProRAW, you can recover more details without sacrificing image quality.
Another advantage of ProRAW mode is the ability to apply non-destructive edits. Since ProRAW files retain all the sensor data, you can make adjustments to exposure, contrast, colors, and more without degrading the image quality. This gives photographers the flexibility to experiment and fine-tune their photographs, ensuring they achieve their desired vision.
One thing to keep in mind when using ProRAW mode is that it does require some post-processing to fully harness its potential. While the iPhone’s default camera app does apply some initial processing, photographers who want to make the most of ProRAW should consider using professional editing apps like Adobe Lightroom or Capture One Pro to take their images to the next level.
Overall, ProRAW mode unlocks a new level of creative freedom and control for iPhone photographers. It allows you to capture images with incredibly detailed information and provides the flexibility to enhance and fine-tune every aspect of your photographs. So, if you’re looking to elevate your photography game, don’t hesitate to explore the power of ProRAW mode on your iPhone.
In conclusion, the new iPhone camera settings offer a wide range of options to enhance your photography and elevate your images to a whole new level. Whether you’re a professional photographer or a novice with a passion for capturing unforgettable moments, these features are designed to enable you to unleash your creativity and achieve stunning results.
From portrait mode to night mode, HDR, and proRAW capabilities, the iPhone camera settings provide you with the tools to experiment and push the boundaries of your photography. With intuitive controls and advanced technology, you can capture breathtaking landscapes, striking portraits, and vibrant close-ups with ease.
Remember to explore the various shooting modes, adjust settings to suit your subject and lighting conditions, and utilize editing tools to fine-tune your photos. With the new iPhone camera settings, the possibilities are endless. So grab your iPhone, go out, and start capturing incredible moments that will be cherished forever.
FAQs
1. Can I adjust the camera settings on my iPhone?
Yes, you can adjust camera settings on your iPhone. With the introduction of iOS 14, Apple has expanded the camera settings available on newer iPhone models. From adjusting exposure levels to choosing different photographic styles, you now have more control over your iPhone camera settings.
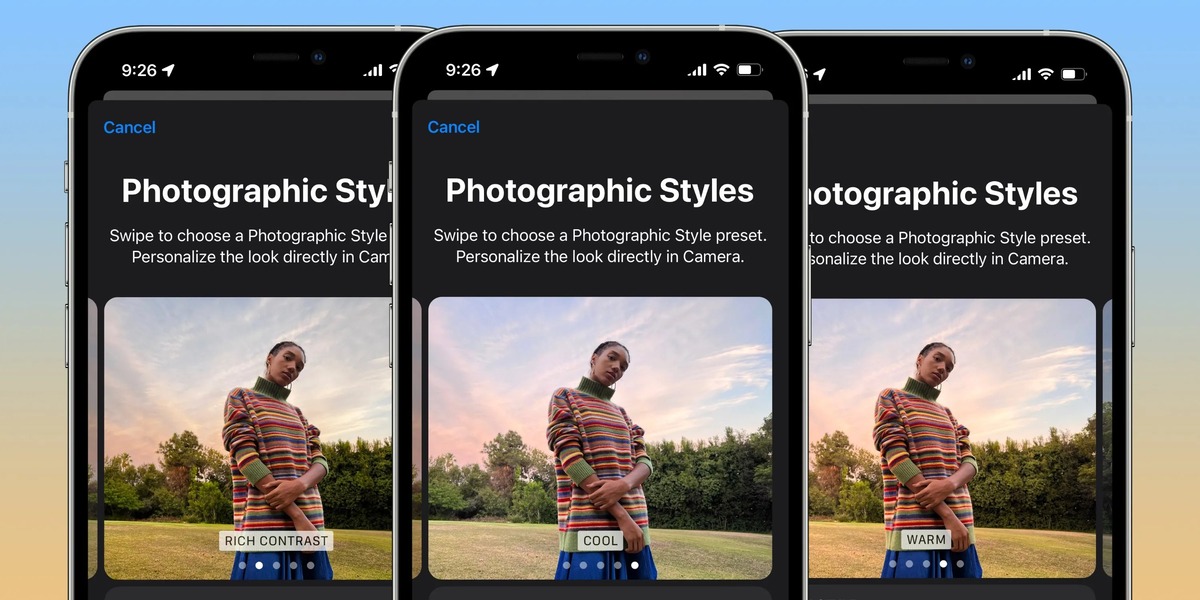
2. What are the photographic styles on the new iPhone camera?
The photographic styles on the new iPhone camera are a set of customizable presets that allow you to apply specific looks and effects to your photos. These styles include Standard, Vivid, Natural, and more. They enhance the colors, contrast, and tone of your images, giving them a unique and professional appearance.
3. How do I access the photographic styles on my iPhone?
To access the photographic styles on your iPhone, open the Camera app, tap on the arrow icon at the top of the screen to reveal the additional camera settings, and then tap on “Preserve Settings.” Here, you can enable or disable the photographic styles and customize their behavior according to your preference.
4. Can I create my own custom photographic style on the iPhone?
Yes, you can create your own custom photographic style on the iPhone. By going to the “Edit” menu in the Camera app, you can adjust various settings such as exposure, contrast, saturation, and more. Once you have achieved the desired look, you can save it as a custom style and apply it to future photos.
5. Do different iPhone models have different camera settings?
Yes, different iPhone models may have varying camera settings available. While the newer iPhone models tend to have more advanced camera features and settings, the older ones may have a more limited range of options. To fully utilize the camera settings and features, it’s recommended to use the latest iPhone model with the most up-to-date iOS version.