
The iPhone 13 is a powerhouse when it comes to photography, and one of the key features that sets it apart is the ability to use various photographic styles within its camera app. This innovative feature allows users to enhance the look and feel of their photos by applying different styles or filters. Whether you want to add a vintage vibe, give your images a dramatic effect, or simply bring out the colors in a natural way, the iPhone 13 camera app has got you covered. In this article, we will explore how to make the most of photographic styles in the iPhone 13 camera app, providing you with the know-how to elevate your mobile photography game to the next level.
Inside This Article
- Choosing a Photographic Style
- Adjusting Exposure and Focus
- Using Portrait Lighting
- Applying Filters and Editing Tools
- Conclusion
- FAQs
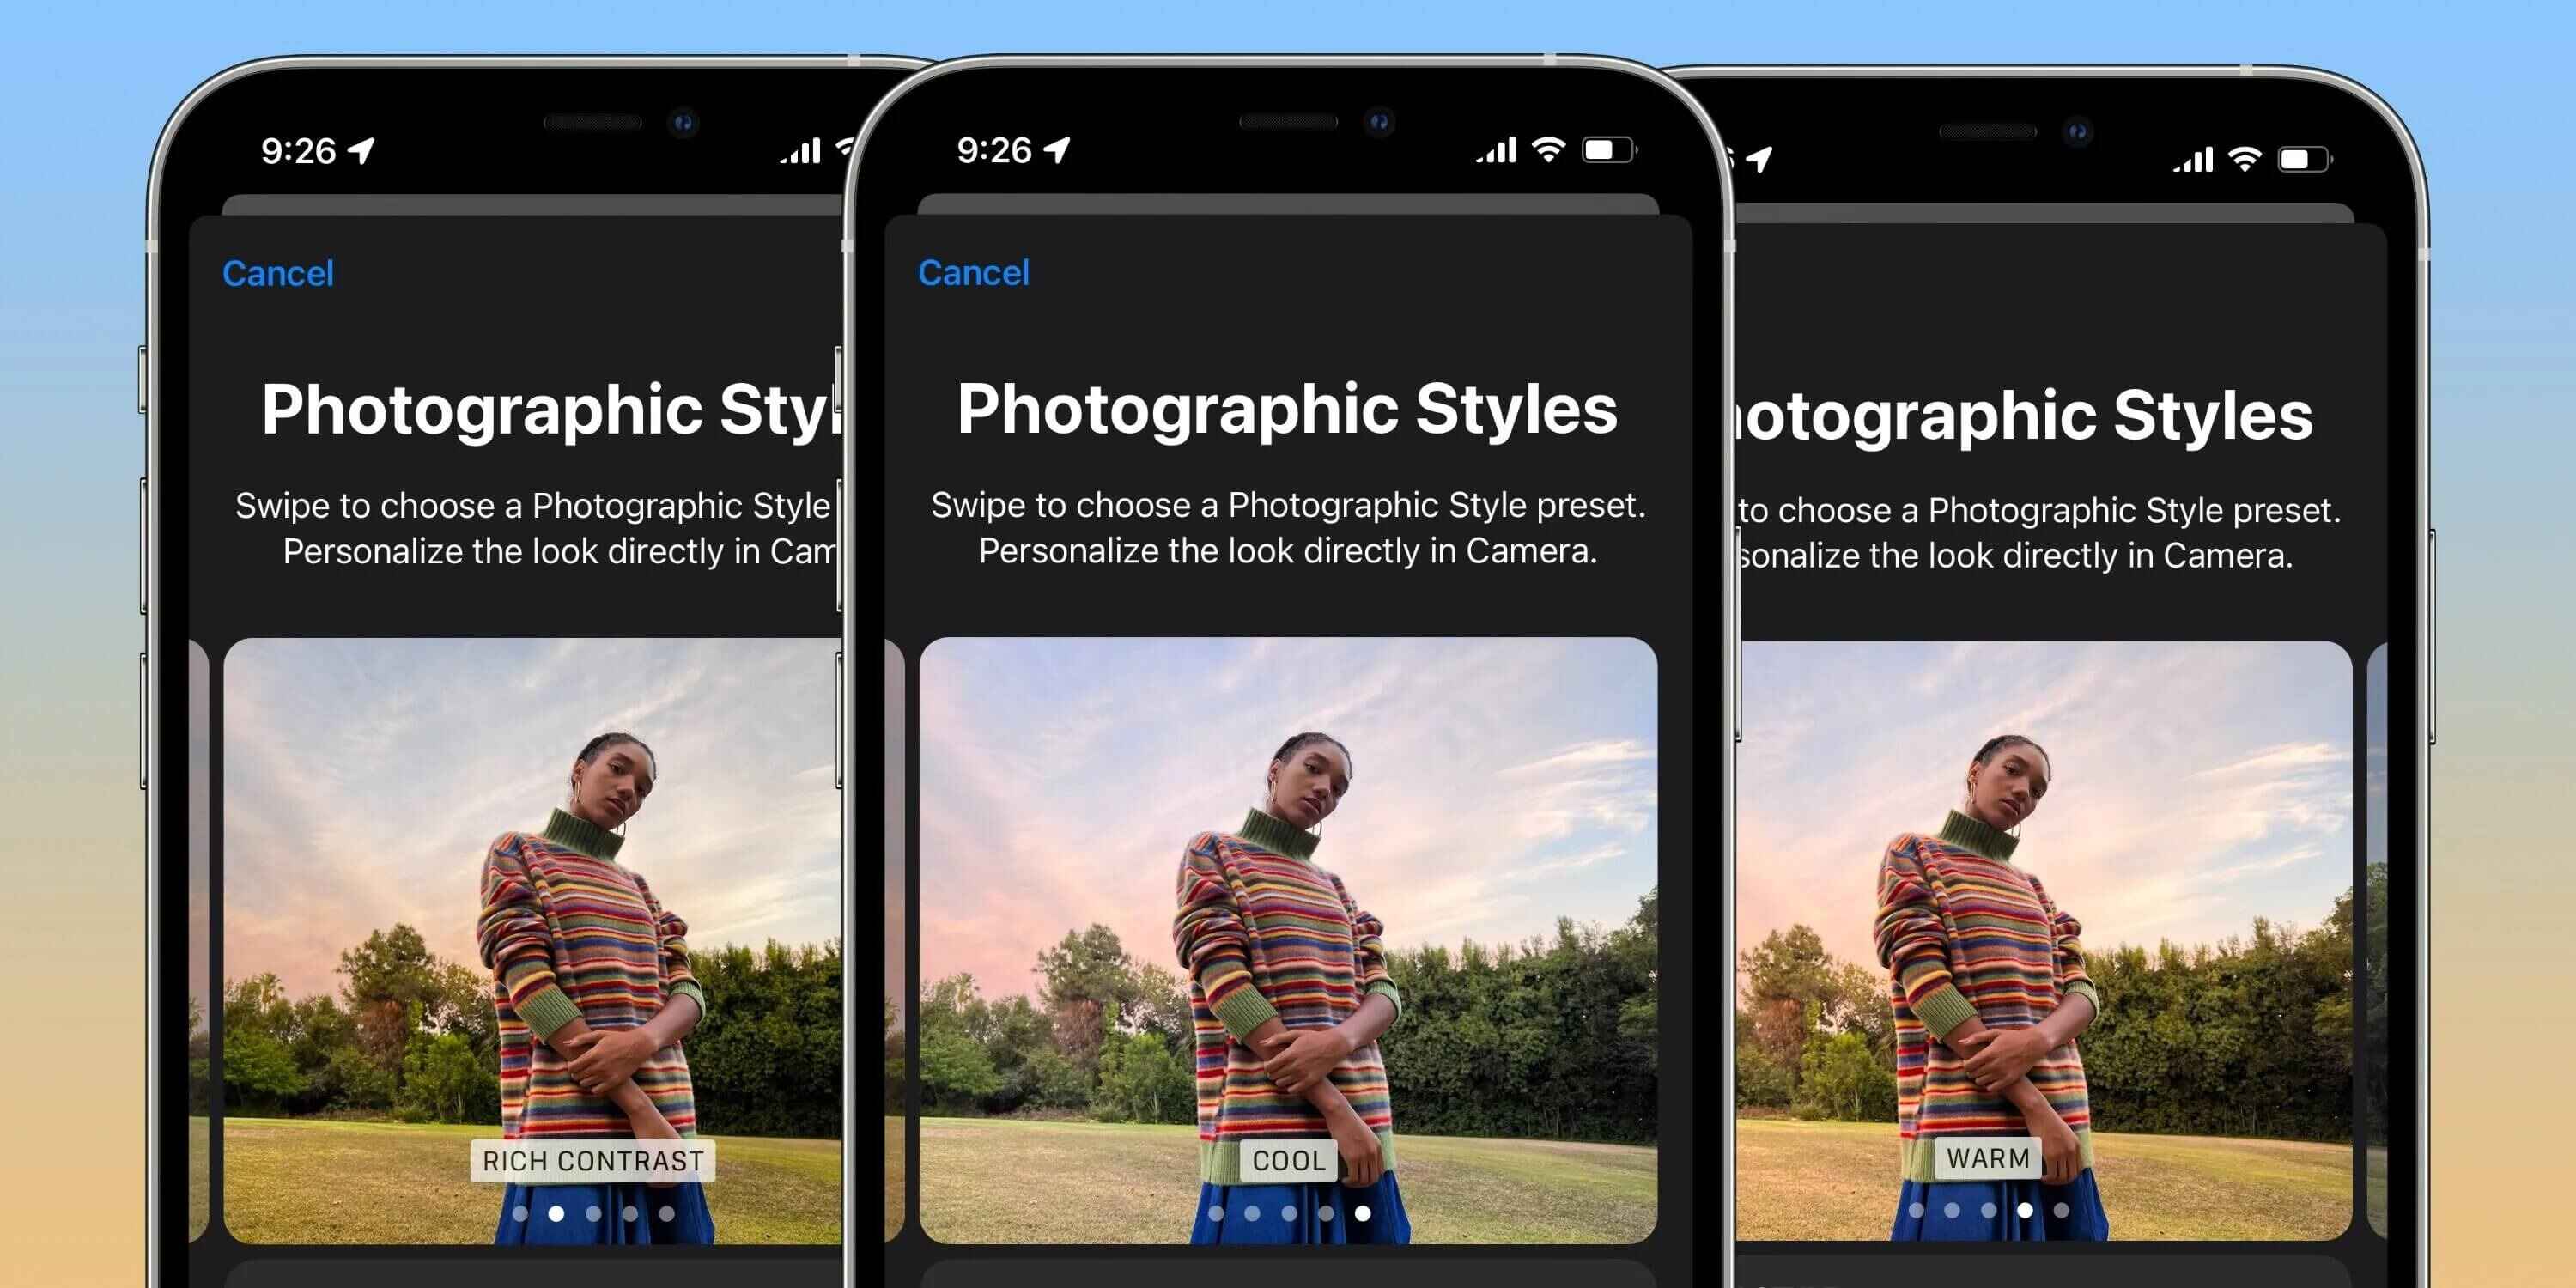
Choosing a Photographic Style
The iPhone 13 camera app offers a range of photographic styles that help you capture stunning and unique photos. Each style has its own distinct look and feel, allowing you to convey different moods and emotions in your images. Here are some tips on how to choose the right photographic style for your photos.
1. Consider the Subject: Think about the subject of your photo and the story you want to tell. Is it a landscape, a portrait, or a close-up shot? Different styles can enhance the mood and impact of your subject. For example, the Vivid style can make colors pop and add vibrancy to landscapes, while the Noir style can create dramatic and moody black and white portraits.
2. Experiment with Different Styles: Don’t be afraid to experiment with different styles to see which one works best for your photo. The iPhone 13 camera app allows you to preview each style in real-time, so you can see how it affects your image before you take the shot. Take multiple photos with different styles and compare the results to find the one that captures your vision.
3. Match the Style to the Scene: Consider the lighting conditions and the overall ambiance of the scene. Some styles work better in bright and sunny environments, while others are more suited for low-light or indoor settings. The iPhone 13 camera app intelligently adjusts the style based on the scene, but you can also manually choose the style that complements the mood of your photo.
4. Personal Preference: Ultimately, the choice of the photographic style comes down to your personal preference and the aesthetic you want to achieve. Some styles may align more with your artistic vision or the overall theme of your photography. Trust your instincts and select the style that resonates with you.
By choosing the right photographic style in the iPhone 13 camera app, you can add a creative touch to your photos and make them stand out. So go ahead, explore the different styles, and unleash your artistic side to capture stunning images that tell your unique story.
Adjusting Exposure and Focus
When it comes to taking great photos, getting the right exposure and focus is essential. The iPhone 13 Camera App offers a variety of tools to help you achieve the perfect balance of light and clarity in your shots.
To adjust the exposure, simply tap on the area of your photo that you want to prioritize. The camera app will automatically adjust the exposure settings to ensure that area is properly exposed. You can also use the exposure slider that appears after tapping to manually adjust the brightness of your photo. Move the slider to the right to make the photo brighter or to the left to make it darker.
In addition to adjusting exposure, you can also control the focus of your photos. The iPhone 13 Camera App utilizes a sophisticated autofocus system that intelligently detects the subject in your frame. By default, it will automatically focus on the subject closest to the camera. However, you can tap anywhere on the screen to change the focus point. This is particularly useful when you want to emphasize a specific object or person in your shot.
If you want more control over the focus, you can switch to manual focus mode by tapping on the small AF (Auto Focus) square that appears on the screen. In manual focus mode, you can drag the focus square to any area of your photo to adjust the focus manually. This can be handy for situations where you want to achieve a specific depth-of-field effect or when shooting subjects in motion.
Remember, finding the right balance of exposure and focus is crucial for capturing stunning photos with your iPhone 13 Camera App. Experiment with different settings and techniques to unleash your creativity and bring your photographs to life.
Using Portrait Lighting
Portrait Lighting is a powerful feature in the iPhone 13 camera app that allows you to add artistic lighting effects to your portraits. With this feature, you can create stunning and professional-looking photos without the need for expensive lighting equipment or editing software.
To use Portrait Lighting, simply open the camera app on your iPhone 13 and tap on the portrait mode. Once you have framed your subject, you will find the Portrait Lighting icon at the top of the screen. Tap on it to access a variety of lighting options to enhance your portraits.
The iPhone 13 offers several Portrait Lighting effects, including Natural Light, Studio Light, Contour Light, Stage Light, and Stage Light Mono. Each effect creates a different lighting scenario, allowing you to experiment and find the perfect ambiance for your portraits.
Once you have selected a Portrait Lighting effect, the camera app will analyze the scene and intelligently adjust the lighting to create a visually appealing result. You can preview the effect in real-time as you compose your shot, making it easy to find the ideal setting.
If you’re not satisfied with the default intensity of the Portrait Lighting effect, you can adjust it to your liking. Simply slide your finger along the control at the bottom of the screen to increase or decrease the intensity. This gives you full control over the lighting effect and allows you to achieve the desired mood in your portraits.
Portrait Lighting is not just limited to the rear camera of the iPhone 13. You can also use it with the front-facing TrueDepth camera, enabling you to capture stunning selfies with professional-looking lighting effects. This makes it easier than ever to take high-quality self-portraits that stand out on social media.
Furthermore, after capturing your portrait, you can further enhance the lighting effect by using the built-in editing tools in the Photos app. This allows you to fine-tune the lighting, adjust the exposure, and make other edits to perfect your portrait.
Whether you’re a professional photographer or just enjoy taking portraits of your friends and loved ones, the Portrait Lighting feature in the iPhone 13 camera app is a game-changer. It offers a wide range of lighting effects and gives you the flexibility to create stunning portraits with ease.
Applying Filters and Editing Tools
One of the great features of the iPhone 13 Camera App is the ability to apply filters and use various editing tools to enhance your photos. Whether you want to add a vintage look, adjust the brightness, or apply a black and white filter, the Camera App provides you with a wide range of options.
To apply a filter, simply swipe left or right on the screen to browse through the available filters. As you swipe, you’ll see a live preview of how the filter will look on your photo. Once you find a filter you like, tap on it to apply it to your photo.
But filters aren’t the only editing tools available in the Camera App. You can also fine-tune your photos using tools like brightness, contrast, saturation, and more. To access the editing tools, tap on the “Edit” button at the top right corner of the screen.
Within the editing interface, you’ll find a range of sliders and adjustment options that allow you to customize your photo to your liking. For example, you can increase the brightness to make a dark photo look brighter, or decrease the saturation to create a more muted color palette.
In addition to the basic editing tools, the Camera App also offers advanced features like cropping, straightening, and adding vignettes. These tools allow you to refine the composition of your photo and add artistic touches.
Once you’re satisfied with the changes you’ve made, tap on the “Done” button to save your edited photo. The original photo will remain untouched, so you can always revert back to the original if needed.
Applying filters and using editing tools in the iPhone 13 Camera App is a simple and intuitive process. It allows you to unleash your creativity and transform your photos into stunning works of art.
Conclusion
The iPhone 13 Camera App is a powerful tool that allows users to unleash their creativity and capture stunning photographs. With the introduction of Photographic Styles, users have even more control over the look and feel of their images. Whether you’re a photography enthusiast or a casual smartphone user, the iPhone 13 Camera App provides ease of use and professional-level results.
By familiarizing yourself with the different photographic styles and experimenting with their settings, you can elevate your photography game and create images that truly stand out. Whether you prefer vibrant and bold colors, a classic and timeless look, or a moody and dramatic atmosphere, the iPhone 13 Camera App has a style to suit your taste.
So, grab your iPhone 13, open up the Camera App, and explore the world of Photographic Styles. Unleash your creativity, capture unforgettable moments, and create stunning photographs that reflect your unique vision!
FAQs
1. How do I access the Photographic Styles feature in the iPhone 13 Camera App?
2. Can I customize the Photographic Styles on my iPhone 13?
3. Will using Photographic Styles affect the performance of my iPhone 13 camera?
4. Are Photographic Styles available on older iPhone models?
5. Can I use third-party camera apps with Photographic Styles on my iPhone 13?