
Are you looking to protect your brand new iPhone 13 with a reliable screen protector? Look no further than the Zagg Invisible Shield. The Zagg Invisible Shield is a top-of-the-line screen protector that offers maximum protection against scratches, smudges, and other potential damage. In this article, we will guide you on how to install the Zagg Invisible Shield on your iPhone 13, ensuring a seamless and bubble-free application. Whether you’re a newcomer to installing screen protectors or have had previous experience, our step-by-step instructions will make the process effortless. Say goodbye to unsightly scratches and hello to a crystal-clear and pristine screen with the Zagg Invisible Shield!
Inside This Article
- Materials Needed
- Step 1: Clean Your iPhone 13
- Step 2: Prepare the Invisible Shield
- Step 3: Apply the Invisible Shield to your iPhone 13
- Step 4: Smooth out any Air Bubbles
- Step 5: Let it Settle
- Step 6: Reinstall your iPhone 13 Accessories
- Conclusion
- FAQs
Materials Needed
Before you begin installing the Zagg Invisible Shield on your iPhone 13, make sure you have the following materials ready:
- Zagg Invisible Shield: Ensure that you have the correct Invisible Shield specifically designed for the iPhone 13 model.
- Clean Microfiber Cloth: This cloth is essential for removing any dust, fingerprints, or smudges from your iPhone 13 screen before applying the Invisible Shield.
- Cleaning Solution: Some Invisible Shield kits come with a cleaning solution. If not, you can use isopropyl alcohol or a mild soap and water mixture to clean the screen.
- Installation Card/Smoothing Tool: This is typically included in the Invisible Shield kit and is used to remove any air bubbles and smooth out the Invisible Shield during the installation process.
- Clear Tape: Having clear tape handy can help lift any dust particles off the screen or the Invisible Shield during installation.
- Patience: Installing the Invisible Shield requires a steady hand and patience. Take your time to ensure a perfect installation.
Having these materials prepared beforehand will make the installation process smoother and ensure the best results for protecting your iPhone 13 with the Zagg Invisible Shield.
Step 1: Clean Your iPhone 13
Before applying the Zagg Invisible Shield to your iPhone 13, it is crucial to ensure that the surface of your device is clean and free from any dust, fingerprints, or smudges. Cleaning your iPhone 13 properly will help the adhesive on the Invisible Shield to adhere securely and provide optimal protection for your device.
To clean your iPhone 13, you will need a microfiber cloth and isopropyl alcohol solution. Start by powering off your device and disconnecting it from any charging cables or accessories.
Take the microfiber cloth and gently wipe the front and back of your iPhone 13 to remove any surface dirt or dust. Make sure to pay extra attention to the edges and corners of the device.
To remove any fingerprints or smudges, dampen a corner of the microfiber cloth with isopropyl alcohol solution. Gently wipe the affected areas in a circular motion, applying minimal pressure to avoid damaging the screen or any other components of your iPhone 13.
After cleaning, allow your iPhone 13 to air dry for a few minutes to ensure that no moisture is left on the surface. Inspect your device thoroughly to make sure it is completely clean and ready for the application of the Zagg Invisible Shield.
Remember, a clean surface is essential for a successful installation of the Invisible Shield. Taking the time to properly clean your iPhone 13 will ensure that the shield adheres securely, providing maximum protection for your device.
Step 2: Prepare the Invisible Shield
Before applying the Zagg Invisible Shield to your iPhone 13, it’s crucial to properly prepare the shield for a seamless installation. Follow these steps to ensure a clean and precise application:
- Clean your hands and work area: Start by washing your hands thoroughly to remove any oils or dirt. This will prevent any impurities from transferring onto the shield. Additionally, make sure your work area is clean and free from dust particles that may interfere with the installation.
- Gather the necessary tools: To prepare the shield, you will need a microfiber cloth, an alcohol-based cleaning solution (preferably provided by Zagg), and a dust removal sticker. These tools will help you achieve a clean and smooth surface for the shield to adhere to.
- Clean your iPhone 13: Use the microfiber cloth and the alcohol-based cleaning solution to gently wipe down your iPhone 13. Be thorough in your cleaning, ensuring that all fingerprints, smudges, and dust particles are removed from the surface. This step is crucial in ensuring a good bond between the shield and your device.
- Use the dust removal sticker: Before removing the shield from its packaging, use the dust removal sticker to remove any remaining dust or lint from the surface of the shield. This will prevent any particles from getting trapped between the shield and your iPhone 13 during the installation process.
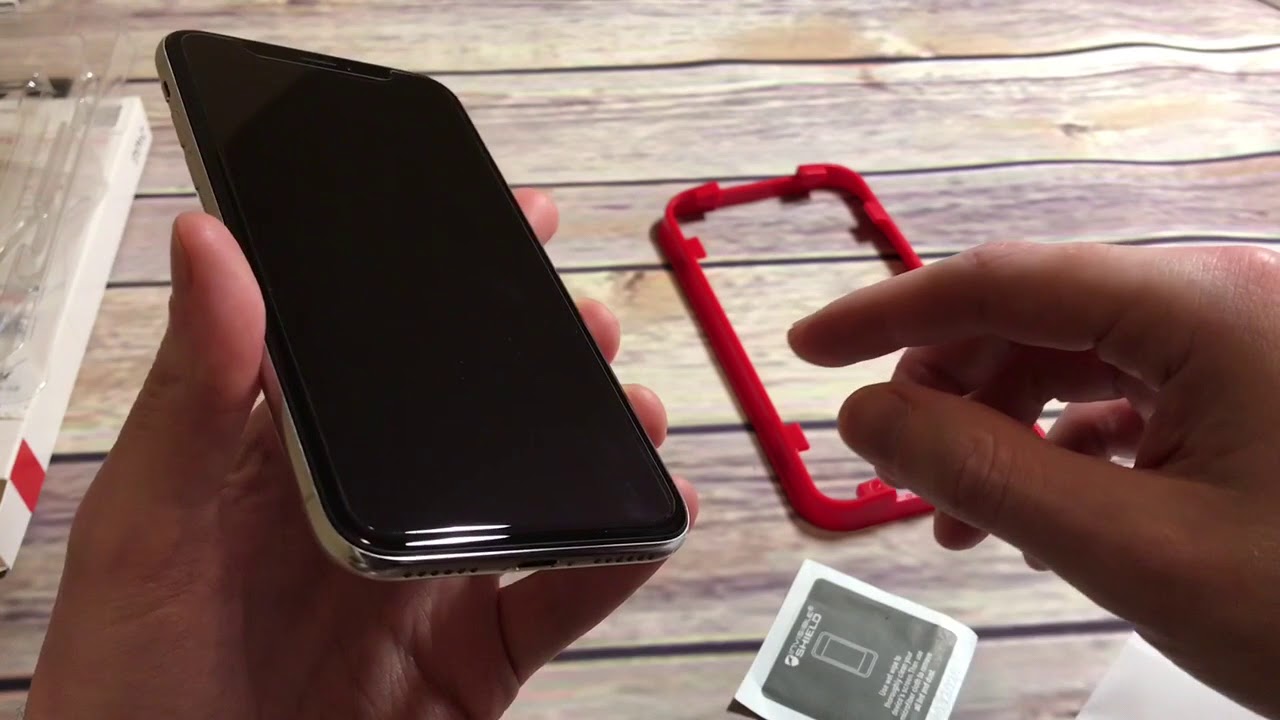
- Align the shield: Carefully align the shield with the front of your iPhone 13, making sure it fits perfectly within the screen area. Take your time to ensure proper alignment, as this will impact the final appearance and functionality of the shield.
- Remove the backing: Once aligned, gently remove the backing from the shield, exposing the adhesive side. Be careful not to touch the adhesive with your fingers, as it may affect the quality of the installation.
By following these steps and properly preparing the Zagg Invisible Shield, you will have a clean and ready-to-install shield for your iPhone 13. This preparation process ensures a smooth and bubble-free application, providing optimal protection for your device.
Step 3: Apply the Invisible Shield to your iPhone 13
Now that you have cleaned your iPhone 13 and prepared the Invisible Shield, it’s time to apply it to your device. Follow these simple steps to ensure a smooth and bubble-free installation:
1. Start by carefully peeling off the backing of the Invisible Shield. Be sure to hold it by the edges to avoid touching the adhesive side.
2. Align the Invisible Shield with the edges and openings of your iPhone 13. Pay attention to the camera, speaker, and home button area to ensure a precise fit.
3. Gently press the Invisible Shield onto your iPhone 13, starting from one side and working your way to the other. Use your fingers to smooth out any creases or air bubbles.
4. If you encounter any stubborn bubbles, you can use a microfiber cloth or the edge of a credit card to gently push them towards the edges. Be careful not to apply too much pressure to avoid damaging the Invisible Shield or your iPhone’s screen.
5. Once the Invisible Shield is applied, give it a final inspection to make sure it is properly aligned and adhered to your iPhone 13. Check for any remaining bubbles or imperfections that need to be addressed.
6. Allow the Invisible Shield to settle for a few minutes. This will give the adhesive time to bond securely with your iPhone 13’s screen, ensuring long-lasting protection.
7. After the settling period, gently wipe the screen with a clean cloth to remove any smudges or fingerprints that may have occurred during the installation process.
And there you have it! Your iPhone 13 is now protected with the Zagg Invisible Shield. Enjoy using your device with the peace of mind that it is safeguarded against scratches and everyday wear and tear.
If you have any further questions or require assistance, refer to the FAQs section below or reach out to Zagg customer support for additional guidance.
Step 4: Smooth out any Air Bubbles
After applying the Zagg Invisible Shield to your iPhone 13, it is common to have some air bubbles trapped underneath. Don’t worry, though, as they can be easily removed by following these simple steps.
1. Start by gently pressing down on the Invisible Shield, starting from the center and moving towards the edges. Use your fingers to smooth out any visible air bubbles. Applying firm and even pressure will gradually push the bubbles towards the edges of the screen.
2. If the bubbles are persistent and refuse to move, you can use a microfiber cloth or a credit card to push them out. Place the cloth or card on top of the bubble and gently press it towards the edge of the screen. The smooth, flat surface of the cloth or card will help to push out the trapped air pockets.
3. Work your way around the screen, focusing on one section at a time. Pay extra attention to the corners and edges where bubbles are more likely to form. Be patient and take your time to ensure that all the air bubbles are smoothed out before moving on to the next section.
4. If you encounter stubborn bubbles that still refuse to budge, you may need to lift the Invisible Shield slightly and reapply it. Use your fingers or the edge of the cloth or card to lift the shield gently without fully removing it. Once lifted, press down on the area with the bubble and smooth it out as before.
5. Continue this process until all the air bubbles are completely eliminated. Take a moment to inspect the screen from different angles to make sure that no bubbles are visible. Remember, bubbles can affect the touch sensitivity and clarity of your screen, so it is important to remove them for optimal performance and visual appeal.
6. Once all the air bubbles have been smoothed out, give your iPhone 13 a final gentle wipe with a microfiber cloth to remove any fingerprints or smudges that may have accumulated during the process. This will leave your screen looking clean, clear, and bubble-free.
By following these steps, you can easily smooth out any air bubbles that may have appeared after applying the Zagg Invisible Shield to your iPhone 13. Remember to be patient and take your time to ensure a perfect result. Now, you can enjoy the added protection without any visual distractions on your screen.
Step 5: Let it Settle
After successfully applying the Zagg Invisible Shield to your iPhone 13, it’s important to allow it to settle and bond with your device. The settling process ensures a secure and long-lasting protection for your precious iPhone.
During this time, it’s best to avoid handling or using your iPhone as much as possible. The Invisible Shield needs time to adhere to the surface of your device without any disruption. This means refraining from placing it in your pocket, bag, or using it excessively for a couple of hours.
By allowing the Invisible Shield to settle undisturbed, you enable optimal bonding between the shield and your iPhone’s screen or back. This process ensures that the shield adheres seamlessly and provides maximum protection, avoiding any potential peeling or lifting later on.
It is important to note that the settling time may vary depending on the specific Zagg Invisible Shield model you have chosen. However, a general rule of thumb is to wait at least 24 hours before subjecting your iPhone to regular use or exposing it to moisture.
During the settling period, you can take this opportunity to clean and organize your iPhone’s accessories, such as earphones, chargers, and cases. This will not only keep your accessories in good condition but also minimize any potential contact that may disturb the Invisible Shield’s adhesion.
While waiting for the Invisible Shield to settle, it’s important to resist the temptation to touch or tamper with it. Removing or adjusting the shield during this time can compromise its adhesion, resulting in a suboptimal fit and reduced protection for your iPhone.
In the unlikely event that you notice any air bubbles or imperfections during the settling process, avoid the urge to peel or lift the Invisible Shield to fix them. Most air bubbles will disappear on their own as the shield continues to settle. If any persist, you can gently smooth them out with your fingers or a microfiber cloth once the settling period is complete.
Remember, patience is key when it comes to letting the Invisible Shield settle. By giving it the necessary time to bond with your iPhone, you ensure the best possible protection for your device’s screen or back. So sit back, relax, and let the shield work its magic.
Step 6: Reinstall your iPhone 13 Accessories
After successfully applying the Zagg Invisible Shield to your iPhone 13, it’s time to reconnect with your beloved accessories. Whether it’s your favorite phone case, wireless charging pad, or any other add-ons, this step will ensure that you can enjoy the full functionality and style of your iPhone 13. Here’s a simple guide to help you reinstall your accessories with ease.
1. Begin by carefully removing the protective cover from your iPhone 13, taking extra care not to disturb the Invisible Shield that you’ve just installed. Slowly peel off the cover, making sure it doesn’t pull on the shield or leave any residue behind.
2. Once the cover is removed, take a moment to inspect the surface of your iPhone 13. Ensure that it is clean and free from any dust or debris that might have accumulated during the installation process. Use a microfiber cloth or a gentle cleaning solution to wipe away any smudges or fingerprints.
3. Now, it’s time to reintroduce your favorite phone case. Carefully align the case with the iPhone 13, starting from the top and gently pressing it down until it snaps into place. Ensure that the case securely fits around the edges and corners of your device, providing the necessary protection without obstructing any buttons or ports.
4. If you’re using a wireless charging pad, this is the perfect time to position it correctly. Locate the charging pad on a stable surface and plug it into a power source. Once it’s powered up, place your iPhone 13 on the pad, ensuring that both devices are properly aligned for efficient charging.
5. Depending on your personal preferences, you may want to attach other accessories to enhance your iPhone 13 experience. This could include screen protectors, camera lens attachments, or even a pop socket for added convenience. Make sure to follow the respective installation instructions for each accessory to ensure a perfect fit.
6. Finally, give your iPhone 13 a quick check to ensure that all accessories are securely in place. Double-check that the phone case fits snugly, the charging pad is connected and functioning properly, and any additional accessories are firmly attached. This way, you can rest assured that your iPhone 13 is ready to be fully enjoyed.
By reattaching your iPhone 13 accessories carefully and securely, you can optimize the capabilities and protection of your device. Enjoy the seamless integration of your favorite add-ons while preserving the pristine condition of your iPhone 13, thanks to the Zagg Invisible Shield that safeguards it from scratches and impacts.
Conclusion
In conclusion, installing a Zagg Invisible Shield on your iPhone 13 is a wise decision to protect your device from scratches, smudges, and other daily wear and tear. The process may seem daunting at first, but with the right tools, patience, and our helpful guide, you can easily achieve a flawless installation. The Zagg Invisible Shield offers superior clarity, touch sensitivity, and a lifetime warranty, making it a reliable choice for safeguarding your precious iPhone. Remember to follow the step-by-step instructions, clean the device thoroughly, and apply the shield with precision to ensure optimal results. With the Zagg Invisible Shield, you can enjoy peace of mind knowing that your iPhone 13 is well-protected without compromising its sleek design and functionality.
FAQs
Q: Can I install the Zagg Invisible Shield on my iPhone 13 myself?
A: Absolutely! The Zagg Invisible Shield is designed to be easy to install on your iPhone 13. The package comes with clear instructions that guide you through the process step-by-step. With a little patience and care, you’ll have your iPhone 13 protected in no time!
Q: Will the Zagg Invisible Shield affect the touch sensitivity of my iPhone 13?
A: Not at all. Zagg Invisible Shield is engineered to preserve the touch sensitivity of your iPhone 13. The shield is ultra-thin and transparent, allowing for a smooth and responsive touch screen experience. You’ll hardly notice it’s there!
Q: Does the Zagg Invisible Shield protect against scratches and smudges?
A: Absolutely. Zagg Invisible Shield is designed to offer top-notch protection against scratches and smudges. The shield is made from a durable material that can withstand everyday wear and tear, keeping your iPhone 13’s screen looking pristine for years to come.
Q: Can I still use a phone case with the Zagg Invisible Shield installed on my iPhone 13?
A: Yes, you can. The Zagg Invisible Shield is designed to be compatible with most phone cases. It provides full coverage for your iPhone 13’s screen, while still allowing you to use your favorite phone case to protect the rest of your device.
Q: How long does the Zagg Invisible Shield last?
A: The Zagg Invisible Shield is engineered to be long-lasting. It comes with a lifetime guarantee, so you can be confident that your investment is protected. If your shield gets damaged or worn down over time, simply contact Zagg’s customer support, and they will provide you with a replacement.