
If you are a proud owner of a Ryobi power tool, you know how crucial it is to have a fully charged battery. Whether you are tackling a DIY project or working on a professional job, a reliable and efficient charging time is essential. So, you might be wondering: How long does a Ryobi battery take to charge? Well, you’ve come to the right place! In this article, we will dive into the world of Ryobi batteries and explore the factors that influence their charging time. From battery capacity to charger specifications, we will provide you with all the necessary insights to ensure that your Ryobi batteries are always ready to power your tools. So let’s get started and discover the secrets behind Ryobi’s charging process.
Inside This Article
- Charging time of Ryobi batteries
- Factors Affecting Ryobi Battery Charging Time
- Tips for minimizing Ryobi battery charging time
- Understanding Ryobi Battery Charging Indicators
- Conclusion
- FAQs
Charging time of Ryobi batteries
When it comes to using Ryobi power tools, having a reliable battery is essential. After all, a dead battery can bring your projects to a screeching halt. To ensure uninterrupted operation, it is important to understand the charging time of Ryobi batteries.
The charging time of Ryobi batteries can vary depending on several factors such as the battery capacity, charger model, and battery condition. Generally, the charging time for Ryobi batteries ranges from 30 minutes to 3 hours.
Ryobi offers a range of batteries with different capacities, from 1.5Ah to 9.0Ah. The higher the capacity, the longer it will take to fully charge the battery. For example, a 1.5Ah battery may take around 30 minutes to charge, while a 9.0Ah battery can take up to 3 hours.
The charger model also plays a role in determining the charging time. Ryobi has different chargers available, including standard chargers and fast chargers. Fast chargers can significantly reduce the charging time compared to standard chargers. For instance, a fast charger may charge a 4.0Ah battery in just 60 minutes, whereas a standard charger may take around 2 hours.
It is important to note that the charging time can also be influenced by the condition of the battery. If the battery is old or heavily used, it may take longer to charge compared to a new battery. Additionally, extreme temperatures can affect the charging time, with very high or low temperatures slowing down the charging process.
To get the most out of your Ryobi batteries and minimize charging time, it is recommended to keep them clean and properly maintained. Make sure the battery contacts are free from dirt and debris, as this can hinder the charging efficiency. Regularly check the battery for any signs of damage, and if needed, replace it with a new one.
Factors Affecting Ryobi Battery Charging Time
When it comes to charging your Ryobi battery, several factors can influence the overall charging time. While most Ryobi batteries have an average charging time of 60 minutes, these factors can either speed up or extend the charging process. Understanding these factors will help you optimize your charging experience and get the most out of your Ryobi batteries.
1. Battery Capacity: The capacity of your Ryobi battery plays a crucial role in determining the charging time. Batteries with higher capacity will require more time to charge fully compared to batteries with lower capacity.
2. Charger Type: The type of charger you use can affect the charging time. Ryobi offers various chargers, including standard chargers and fast chargers. Fast chargers can significantly reduce the charging time compared to standard chargers.
3. Battery Temperature: The temperature of your Ryobi battery can impact the charging time. Extreme temperatures, either very hot or very cold, can slow down the charging process. It is recommended to charge your battery in a moderate temperature environment for optimal charging speed.
4. Battery Age and Condition: The age and condition of your Ryobi battery can affect how quickly it charges. Over time, batteries may lose their efficiency, leading to longer charging times. Regular maintenance and care can help preserve the battery’s performance and reduce charging time.
5. Usage History: The usage history of your Ryobi battery can also have an impact on the charging time. If the battery has been subjected to frequent deep discharges or heavy usage, it may take longer to charge compared to a battery that has been well-maintained and used within recommended parameters.
6. Power Source: The power source you use to charge your Ryobi battery can influence the charging time. Charging through a direct power outlet will generally provide faster charging compared to charging through a power strip or extension cord.
7. Battery Compatibility: Using the correct charger and ensuring battery compatibility with your Ryobi tool is essential for optimal charging time. Using the wrong charger or a non-compatible battery can lead to longer charging times or may not charge at all.
It is worth noting that these factors are not independent of each other. They can collectively influence the overall charging time of your Ryobi battery. To ensure faster charging and prolong battery life, it is advisable to follow the manufacturer’s guidelines, maintain your batteries properly, and use compatible chargers.
Tips for minimizing Ryobi battery charging time
When it comes to using your Ryobi battery-powered devices, minimizing the charging time of your Ryobi battery is essential for getting the most out of your tools. Here are some expert tips to help you maximize the efficiency and reduce the charging time of your Ryobi battery:
1. Use a high-quality charger: Investing in a reliable and efficient charger specifically designed for Ryobi batteries can significantly reduce charging time. Generic chargers may not provide the same level of performance and can take longer to fully charge your battery.
2. Keep your battery cool: Heat can have a negative impact on the charging efficiency of your Ryobi battery. Avoid charging the battery in hot environments or storing it in direct sunlight. Keeping the battery cool during the charging process can help reduce charging time.
3. Charge at the right voltage: Ensure that you are charging your Ryobi battery at the correct voltage. Using a charger with the wrong voltage can damage the battery and cause it to charge slower. Refer to the manufacturer’s instructions or consult a professional to ensure you are using the appropriate charger.
4. Avoid overcharging: Overcharging your Ryobi battery can reduce its overall lifespan and increase charging time. Once your battery is fully charged, remove it from the charger promptly to prevent overcharging.
5. Optimize battery usage: Consistently draining your Ryobi battery to near-empty before recharging can actually prolong the charging time. Instead, try to recharge your battery when it still has around 20-30% capacity remaining. This practice can help reduce the time it takes to fully charge the battery.
6. Store your battery properly: Proper storage of your Ryobi battery when not in use is crucial for maintaining its overall performance. Keep the battery in a cool and dry place to prevent it from losing charge over time. A properly stored battery will have more charge available and will require less time to charge when needed.
7. Use a higher amperage charger: If available, use a charger with a higher amperage rating. A higher amperage charger can deliver more power to the battery, resulting in faster charging times. However, make sure to check the compatibility and voltage requirements of your Ryobi battery before using a higher amperage charger.
8. Avoid multitasking with the charger: While it may be tempting to charge multiple batteries simultaneously, doing so can increase the overall charging time for each battery. Instead, charge one battery at a time to optimize the charging efficiency and minimize the overall charging time.
9. Regularly clean the battery terminals: Over time, dirt and debris can accumulate on the battery terminals, hindering the charging process. Clean the battery terminals using a dry cloth or a soft brush to ensure proper connectivity and maximize charging efficiency.
10. Replace aging or damaged batteries: If you notice that your Ryobi battery is taking significantly longer to charge, it may be a sign of an aging or damaged battery. Consider replacing old or damaged batteries to ensure optimal charging performance and reduce charging time.
Following these tips can help you minimize the charging time of your Ryobi battery, allowing you to complete your projects more efficiently and get the most out of your battery-powered devices.
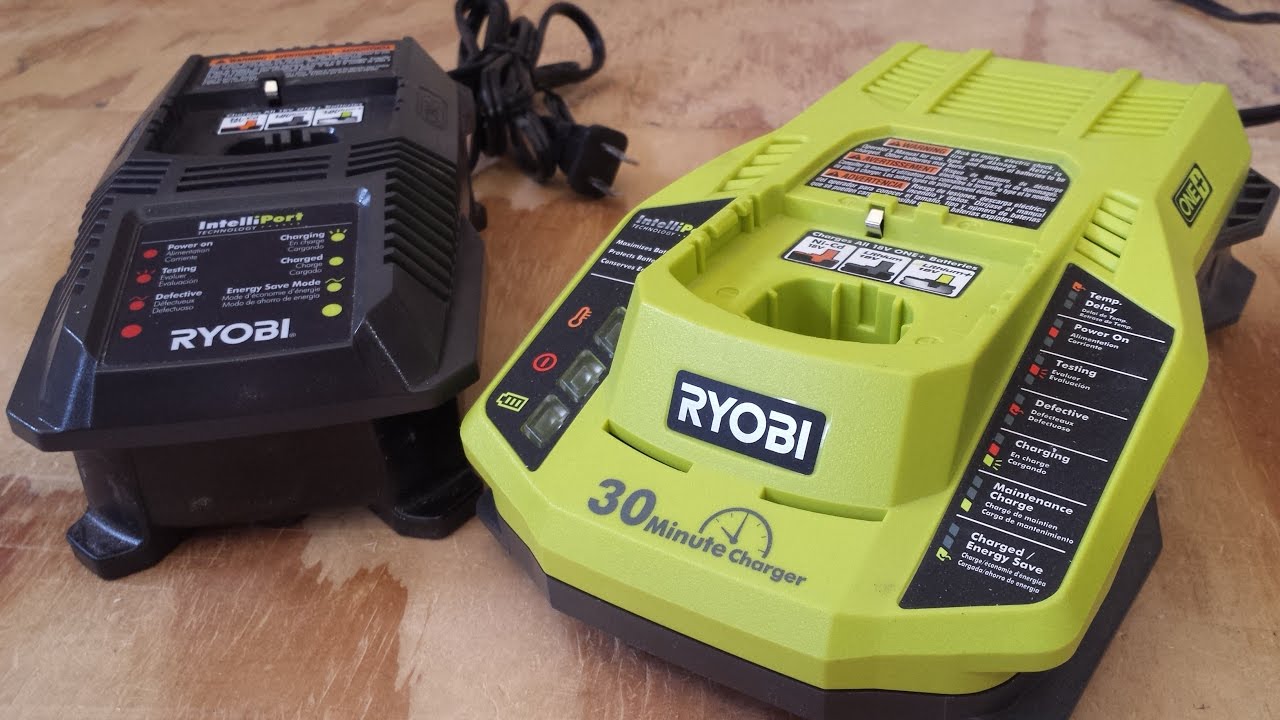
Understanding Ryobi Battery Charging Indicators
When it comes to charging your Ryobi battery, understanding the charging indicators can help you have better control over your device’s power supply. Ryobi batteries are equipped with intuitive charging indicators that provide vital information about the battery’s charging status. Let’s delve into the details of these indicators and what they mean.
1. Green Light:
The green light on your Ryobi battery indicates that the battery is fully charged and ready to use. This light is a reassuring sign that your battery is at its maximum capacity and can provide optimal performance.
2. Flashing Green Light:
If you notice a flashing green light on your Ryobi battery, it means that the battery is in maintenance mode. This mode is designed to keep the battery in good condition by providing a trickle charge and preventing overcharging.
3. Red Light:
When the red light appears on your Ryobi battery, it signifies that the battery is currently being charged. This is a helpful indicator that lets you know the charging process is underway.
4. Flashing Red Light:
A flashing red light on your Ryobi battery indicates that there is an issue with the battery or the charger. It could mean that the battery is not making proper contact with the charger or that there is a fault in the charging system. In such cases, you may need to troubleshoot the problem or seek professional assistance.
5. No Light:
If there is no light displayed on your Ryobi battery when connected to the charger, it can signify that there is no power connection or that the battery is not positioned correctly in the charger. Double-check the power source and ensure that the battery is securely attached to the charger.
Understanding these charging indicators is essential for efficiently using and maintaining your Ryobi batteries. It allows you to gauge the battery’s charging status and troubleshoot any issues that may arise during the charging process. By taking heed of these indicators, you can ensure optimum charging and prolong the lifespan of your Ryobi batteries.
Conclusion
In conclusion, the charging time for a Ryobi battery can vary depending on the specific model and its capacity. Generally, it can take anywhere from 30 minutes to several hours to fully charge a Ryobi battery. It is important to refer to the manufacturer’s instructions and guidelines for the exact charging time for your specific battery.
Remember to use the appropriate charger that is designed for your Ryobi battery to ensure safe and efficient charging. Additionally, it is recommended to use genuine Ryobi batteries and chargers to prolong the lifespan of your battery and maintain optimal performance.
Proper charging of your Ryobi battery is essential for maximizing its usage and efficiency. Whether you are a professional tradesperson or a DIY enthusiast, understanding the charging time and following the recommended charging practices will help you get the most out of your Ryobi battery and ensure uninterrupted power for your tools and equipment.
FAQs
1. How long does a Ryobi battery take to charge?
A standard Ryobi battery typically takes around 60 to 90 minutes to fully charge, depending on the specific model and capacity. It is recommended to refer to the user manual or product specifications for precise charging times.
2. Can I leave a Ryobi battery charging overnight?
While it is generally safe to leave a Ryobi battery charging overnight, it is not recommended. Overcharging can potentially damage the battery and decrease its overall lifespan. It is best to monitor the charging process and unplug the battery once it reaches its full capacity.
3. How can I know when a Ryobi battery is fully charged?
Most Ryobi chargers have indicators that show the charging status of the battery. Typically, a solid green light indicates that the battery is fully charged. Some chargers may also have a blinking or flashing green light to signify the charging process is complete.
4. Can I use a Ryobi battery immediately after charging?
Yes, once the Ryobi battery is fully charged, it is ready for immediate use. However, keep in mind that some batteries may perform better after a brief cool-down period. It is advised to allow the battery to cool for a few minutes before using it to optimize its performance.
5. How long can a charged Ryobi battery last?
The runtime of a fully charged Ryobi battery depends on several factors, including the tool being used and the workload. Generally, a Ryobi battery can provide anywhere from 30 minutes to several hours of runtime. Higher capacity batteries can last longer than standard ones. It is advisable to have spare batteries on hand for uninterrupted usage.