
Popsockets have become a popular accessory for smartphones, providing a convenient grip and stand for the device. But did you know that you can also attach a Popsocket to your computer screen? It might seem like an unconventional use, but it can actually offer some practical benefits. Whether you want to prop up your laptop for better viewing angles or have quick access to your phone while working, attaching a Popsocket to your computer screen can be a game-changer.
In this article, we will guide you on how to attach a Popsocket to a computer screen effectively. We will explore different methods, discuss the pros and cons, and provide step-by-step instructions. Whether you’re a student, professional, or someone who spends hours on their computer, adding a Popsocket to your screen can enhance your productivity and convenience. Read on to discover how you can make the most of this innovative accessory and revolutionize your computer experience.
Inside This Article
- Materials Needed
- Step 1: Cleaning the Surface
- Step 2: Preparing the Popsocket
- Step 3: Applying the Adhesive
- Step 4: Attaching the Popsocket
- Step 5: Ensuring Proper Attachment
- Step 6: Adjusting and Positioning the Popsocket
- Step 7: Testing Stability and Functionality
- Step 8: Removing the Popsocket if needed
- Tips and Precautions
- How To Attach Your Popsocket To A Computer Screen
- Materials Needed
- Step 1: Cleaning the Surface
- Step 2: Preparing the Popsocket
- Step 3: Applying the Adhesive
- Step 4: Attaching the Popsocket
- Step 5: Ensuring Proper Attachment
- Step 6: Adjusting and Positioning the Popsocket
- Step 7: Testing Stability and Functionality
- Step 8: Removing the Popsocket if needed
- Tips and Precautions
- Conclusion
- FAQs
So you want to know how to attach your Popsocket to a computer screen? Well, you’re in luck! This simple guide will walk you through the steps to ensure a secure and stable attachment for your Popsocket on your computer screen. Let’s get started!
Materials Needed
Before you begin, make sure you have the following materials:
- Clean cloth or microfiber cloth
- Isopropyl alcohol or screen cleaning solution
- Popsocket
- Adhesive disc (usually included with the Popsocket)
Step 1: Cleaning the Surface
First things first, you need to clean the surface of your computer screen. Use a clean cloth or microfiber cloth and some isopropyl alcohol or screen cleaning solution to gently wipe away any dust, fingerprints, or smudges. This will ensure a clean and smooth surface for the adhesive to adhere to.
Step 2: Preparing the Popsocket
Remove the adhesive backing from the Popsocket. Take a moment to familiarize yourself with the placement of the adhesive on the Popsocket. The adhesive disc is usually circular and fits perfectly on the back of the Popsocket.
Step 3: Applying the Adhesive
Take the adhesive disc and firmly press it onto the back of the Popsocket, aligning it with the designated area. Ensure that it is securely attached and centered on the Popsocket.
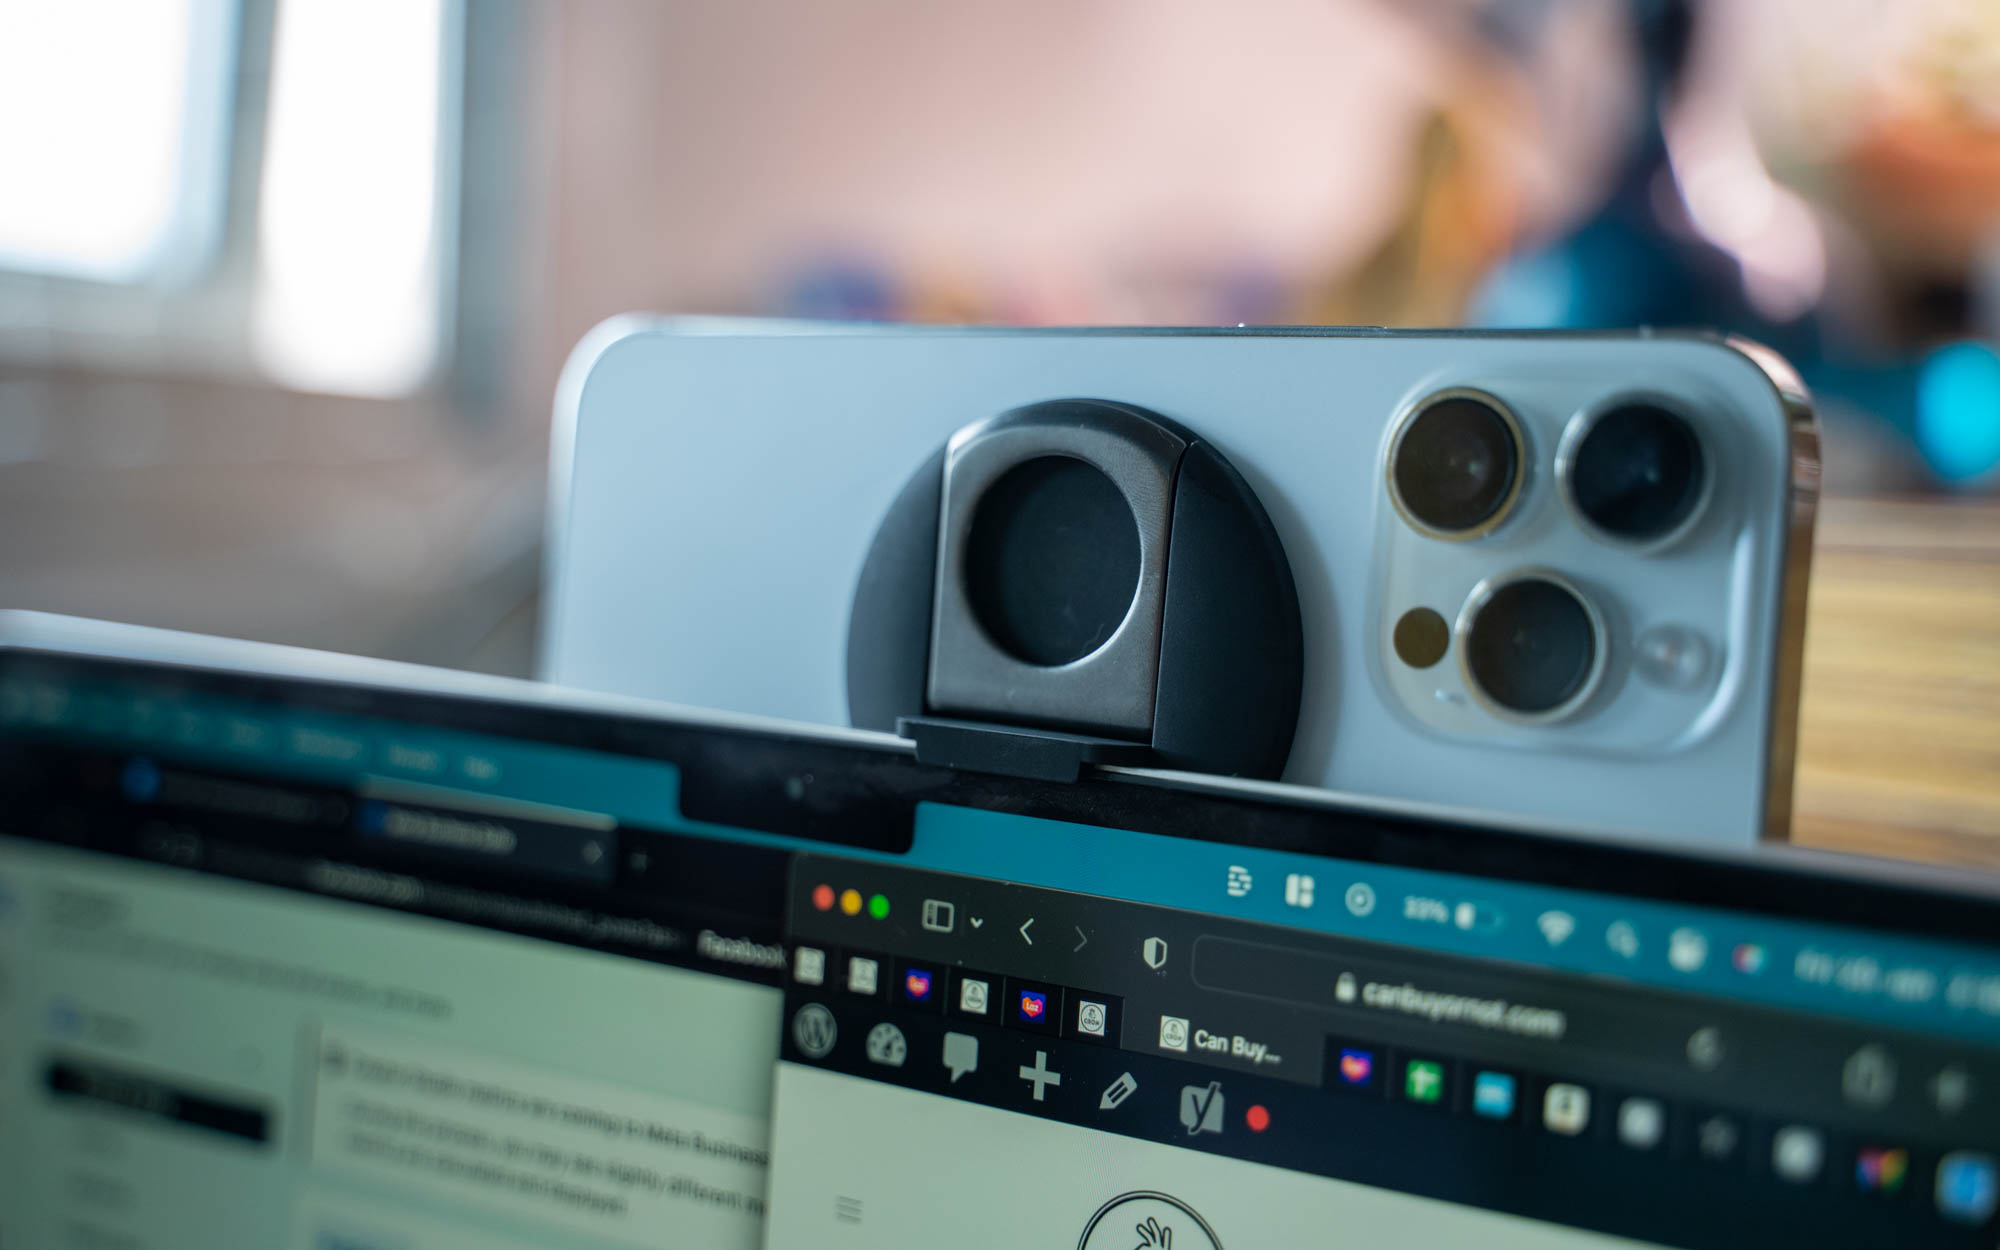
Step 4: Attaching the Popsocket
Take your computer screen and position the Popsocket in the desired location. Press the adhesive side of the Popsocket onto the cleaned surface of the computer screen. Apply gentle and even pressure for about 30 seconds to ensure a strong bond.
Step 5: Ensuring Proper Attachment
After attaching the Popsocket, give it a gentle tug to ensure that it is securely attached to the computer screen. If it feels loose or comes off easily, you may need to reattach it using a fresh adhesive disc.
Step 6: Adjusting and Positioning the Popsocket
Once the Popsocket is attached, you can adjust and position it according to your preference. The Popsocket is designed to rotate and expand, allowing you to find the most comfortable and convenient position for your needs.
Step 7: Testing Stability and Functionality
Test the stability and functionality of the attached Popsocket by gently pulling on it from different angles and applying pressure. It should remain securely attached and not come off easily. Make sure it can support the weight of your device without any issues.
Step 8: Removing the Popsocket if needed
If you need to remove the Popsocket from your computer screen, gently lift one edge of the adhesive disc and slowly peel it off. Clean the surface of the computer screen again to remove any residue left behind.
Tips and Precautions
- Ensure that your computer screen is clean and free of dirt or debris before attaching the Popsocket.
- Follow the instructions provided with your specific Popsocket model for the best results.
- Do not attach the Popsocket to a cracked or damaged computer screen, as it may further damage the screen.
- If the adhesive on the Popsocket becomes dirty or loses its stickiness, you can clean it with a small amount of rubbing alcohol and apply a new adhesive disc.
- Be cautious when adjusting the position of the Popsocket to avoid causing any damage to your computer screen.
And there you have it! Follow these steps to attach your Popsocket to a computer screen and enjoy the convenience and functionality it brings. Happy Popsocketing!
How To Attach Your Popsocket To A Computer Screen
Using a Popsocket on your computer screen can be a convenient way to keep your phone easily accessible while working or watching videos. With a few simple steps, you can securely attach your Popsocket to your computer screen and enjoy the benefits it offers. Let’s walk through the process step-by-step.
Materials Needed
– Popsocket
– Cleaning cloth
– Adhesive
– Computer screen
Step 1: Cleaning the Surface
Before attaching your Popsocket, it’s essential to clean the surface of your computer screen. Use a cleaning cloth to wipe away any dust, fingerprints, or oily residue. A clean surface will ensure a better adhesion for your Popsocket.
Step 2: Preparing the Popsocket
Check the back of your Popsocket for any dust or debris. Gently clean it with a cloth if needed. Make sure the Popsocket is fully extended and ready for attachment.
Step 3: Applying the Adhesive
Most Popsockets come with adhesive pads that ensure a strong bond. Carefully peel off the protective backing from the adhesive pad, being cautious not to touch the adhesive side with your fingers. Align the adhesive pad with the center of the back of the Popsocket and firmly press it down.
Step 4: Attaching the Popsocket
Choose the desired location on your computer screen to attach the Popsocket. Place the Popsocket against the screen, aligning it as desired. Press it firmly against the screen to ensure good adhesion.
Step 5: Ensuring Proper Attachment
After attaching the Popsocket, gently tug on it to check if it is securely attached to the screen. It should not come off easily. If necessary, press it down again to ensure a tight grip.
Step 6: Adjusting and Positioning the Popsocket
If you find that the position of the Popsocket needs adjustment, carefully peel it off and reposition it as desired. Remember to clean the surface again before reattaching it to maintain a strong bond.
Step 7: Testing Stability and Functionality
Once the Popsocket is attached, test its stability by rotating it and applying gentle pressure. It should stay securely in place. Check if it is providing the desired functionality, such as acting as a phone grip or a stand.
Step 8: Removing the Popsocket if needed
If you need to remove the Popsocket from your computer screen, start by peeling it off gently from one side. Apply slow and steady pressure until it is completely removed. Clean the surface afterward to remove any residue left behind.
Tips and Precautions
- Ensure that your computer screen is smooth and clean to promote better adhesion.
- Avoid attaching the Popsocket to areas with ventilation or where heat may be generated.
- Do not forcefully pull or twist the Popsocket as it may damage your computer screen.
- Regularly check the adhesion of the Popsocket and reattach if necessary.
- Be mindful of the weight and size of your phone or device when choosing a Popsocket.
Follow these simple steps and precautions to confidently attach your Popsocket to your computer screen. Enjoy the convenience and functionality it offers while keeping your phone within easy reach.
Conclusion
In conclusion, attaching a PopSocket to a computer screen can be a convenient way to enhance your productivity and comfort while using your computer. PopSockets provide a secure grip, making it easier to hold and handle your device. They also act as a stand, allowing you to position your computer screen at a comfortable viewing angle.
By following the steps outlined in this article, you can confidently attach your PopSocket to your computer screen without causing any damage. Remember to clean the surface of your computer screen before attaching the PopSocket to ensure a strong bond.
Whether you are working or streaming your favorite shows, having a PopSocket on your computer screen can greatly improve your overall experience. So go ahead, try it out and enjoy the added convenience and functionality that a PopSocket brings to your computer setup.
Now that you know how to attach your PopSocket to a computer screen, why not give it a try? Bring a touch of personalization and functionality to your computer with this simple accessory. Happy computing!
FAQs
Q: Can I attach a Popsocket to a computer screen?
A: No, Popsockets are not designed to adhere to computer screens. They are primarily intended for use on the back of smartphones and tablets.
Q: What is a Popsocket?
A: A Popsocket is a small device that attaches to the back of a smartphone or tablet. It expands and contracts, allowing users to grip their devices more securely and prop them up for hands-free viewing.
Q: Are there any alternatives to using a Popsocket on a computer screen?
A: Yes, there are alternative accessories available for computer screens that can provide a similar functionality. One popular option is a monitor stand or mount with adjustable angles and heights, which can help create a comfortable viewing experience.
Q: Can I use a Popsocket on other surfaces?
A: While Popsockets are primarily designed for use on the back of smartphones and tablets, they can also be attached to other smooth surfaces, such as walls, mirrors, and car dashboards. However, it’s important to note that the adhesive backing may not adhere as strongly to these surfaces compared to the original intended use.
Q: How do I attach a Popsocket to a smartphone or tablet?
A: Attaching a Popsocket is simple. You peel off the protective backing of the adhesive and firmly press it onto the back of your device, preferably near the center. Make sure to clean the surface before attaching to ensure maximum adhesion.