
Are you the proud owner of a Logitech G230 headset? This high-performance gaming headset is renowned for its exceptional audio quality and comfortable fit. Whether you use it for gaming, listening to music, or making calls, it’s important to keep your headset clean to ensure optimal performance and longevity.
In this article, we will guide you through the step-by-step process of cleaning your Logitech G230 headset to maintain its pristine condition. From removing dirt and debris to disinfecting the earpads, we’ve got you covered. So, grab your cleaning supplies and let’s get started on giving your Logitech G230 headset the TLC it deserves!
Inside This Article
- Overview of the Logitech G230 Headset
- Step 1: Removing Excess Dirt and Debris
- Step 2: Cleaning the Ear Cups and Ear Pads
- Step 3: Cleaning the Headband
- Step 4: Cleaning the Microphone
- Step 5: Cleaning the Audio Controls and Connectors
- Step 6: Drying and Reassembling the Headset
- Conclusion
- FAQs
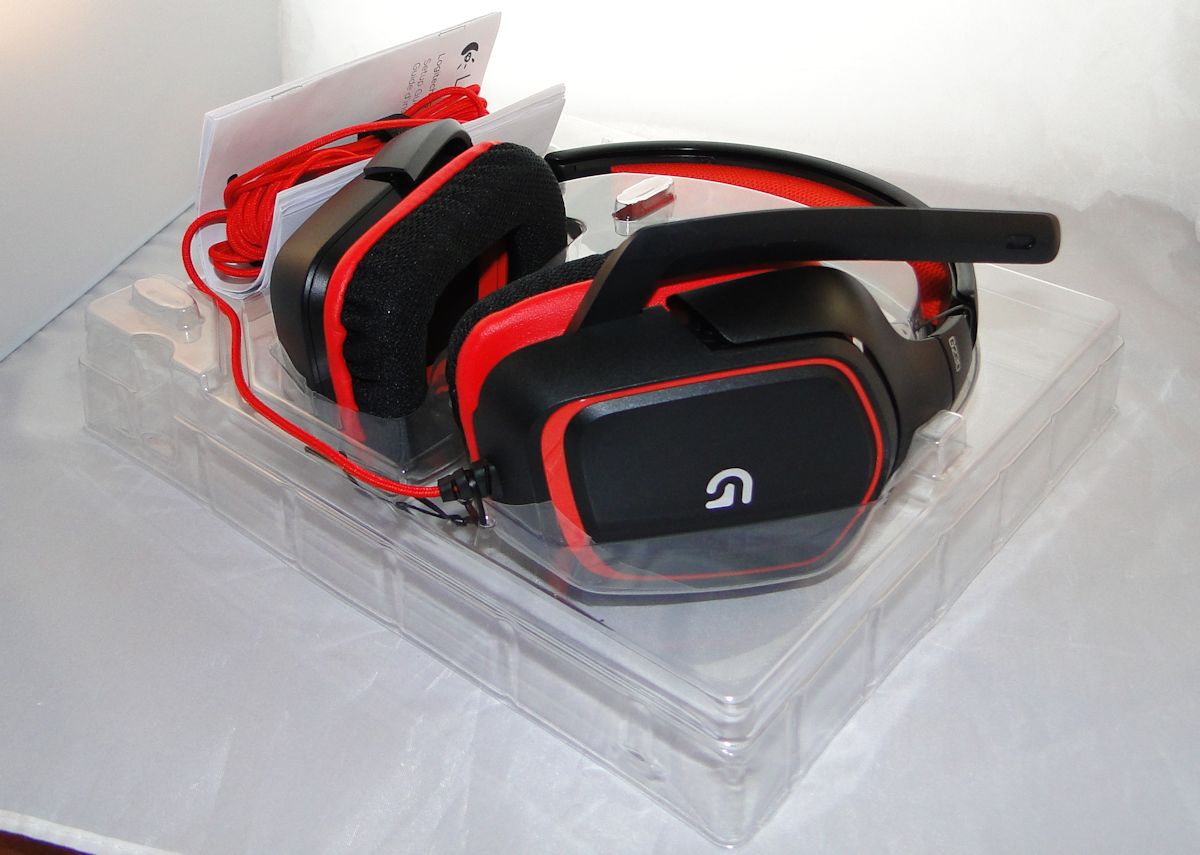
Overview of the Logitech G230 Headset
The Logitech G230 headset is a popular choice among gamers and audio enthusiasts. With its sleek design, comfortable fit, and superior audio quality, this headset is perfect for long gaming sessions or enjoying your favorite music and movies.
Featuring a lightweight construction, the Logitech G230 is designed for maximum comfort, allowing you to wear it for hours without experiencing discomfort or fatigue. The adjustable headband and ear cups ensure a perfect fit for any head size, and the soft, breathable ear pads provide optimal cushioning and noise isolation.
When it comes to audio performance, the Logitech G230 delivers exceptional sound quality. With its 40mm neodymium drivers, this headset offers clear and immersive audio, allowing you to hear every detail and experience a truly immersive gaming or entertainment experience.
Whether you’re communicating with your teammates during gameplay or engaging in voice chats with friends, the Logitech G230’s built-in boom microphone is designed to capture clear and crisp voice recordings. The noise-canceling feature helps to eliminate background noise, ensuring that your voice comes through loud and clear.
For added convenience, the Logitech G230 features an easy-to-use in-line audio control module. With the integrated volume control and microphone mute switch, you can quickly adjust the volume or mute your microphone without having to navigate through software or pause your game.
In terms of compatibility, the Logitech G230 is designed to work seamlessly with a variety of devices. Whether you’re using a PC, gaming console, or mobile device, this headset is equipped with a standard 3.5mm audio jack, making it easy to connect and enjoy your favorite content.
Step 1: Removing Excess Dirt and Debris
The first step in cleaning your Logitech G230 headset is to remove any excess dirt and debris that may have accumulated on the surface. This will ensure that the cleaning process is more effective and efficient.
Start by gently shaking the headset to dislodge any loose particles. You can also use a soft brush or a dry microfiber cloth to brush off any visible dirt or dust. Be careful not to apply too much pressure as this may damage the delicate components of the headset.
If there are stubborn dirt or debris, you can use a can of compressed air to blow them away. Holding the can a few inches away from the headset, direct short bursts of air into the crevices and openings. This will help remove any hard-to-reach particles that may be stuck in the headset.
For more stubborn dirt or sticky residues, you can dampen a soft cloth with mild soap and water. Gently wipe the affected areas, making sure not to soak the headset with excessive moisture. Remember to squeeze out any excess liquid from the cloth before cleaning.
Once you have removed the excess dirt and debris, proceed to the next step to ensure a thorough cleaning of your Logitech G230 headset.
Step 2: Cleaning the Ear Cups and Ear Pads
After removing the excess dirt and debris from your Logitech G230 headset, it’s time to focus on cleaning the ear cups and ear pads. These are the parts that come into contact with your ears and can accumulate oils, sweat, and dirt over time. Here’s how you can clean them effectively:
1. Start by gently wiping the surface of the ear cups and ear pads with a soft, lint-free cloth. This will help remove any superficial dirt or dust particles. Be sure to avoid using abrasive materials or harsh chemicals, as these can damage the delicate materials.
2. If the ear cups and ear pads are removable, remove them from the headset. Consult the manufacturer’s instructions for guidance on how to detach them properly. This will allow you to clean them more thoroughly.
3. Fill a small bowl with warm water and add a mild detergent or gentle soap. Dip a clean cloth or sponge into the soapy water, wringing out any excess moisture. Gently wipe the ear cups and ear pads with the damp cloth, focusing on any areas with visible stains or buildup.
4. For tougher stains or grime, you can use a soft toothbrush or a small brush with soft bristles. Dip the brush into the soapy water and gently scrub the affected areas in circular motions. Be careful not to apply too much pressure, as this can damage the material.
5. Once you have cleaned the ear cups and ear pads thoroughly, rinse them under running water to remove any soap residue. Make sure to squeeze out any excess water gently. Avoid submerging the ear cups and ear pads completely, as this can cause damage to the internal components.
6. Finally, place the ear cups and ear pads on a clean towel and allow them to air dry completely. Avoid using heat sources like hairdryers, as this can cause the material to warp or shrink. Once they are dry, reattach the ear cups and ear pads to the headset.
By regularly cleaning your Logitech G230 headset’s ear cups and ear pads, you can ensure a comfortable and hygienic listening experience. Not only will this extend the lifespan of your headset, but it will also help maintain audio quality and prevent any potential skin irritations. Remember, proper maintenance is key to enjoying your gaming sessions to the fullest!
Step 3: Cleaning the Headband
The headband of the Logitech G230 headset can accumulate dirt, sweat, and oils over time, making it essential to regularly clean it to ensure hygiene and maintain its appearance. Follow these steps to clean the headband effectively:
1. Start by removing the headset from your head and disconnecting it from any devices. This will make it easier to clean the headband without any obstructions.
2. Use a soft, lint-free cloth or microfiber cloth to wipe the surface of the headband. Dampen the cloth slightly with warm water or a mild cleaning solution, such as a mixture of water and gentle soap.
3. Gently wipe the headband in a back and forth motion, applying light pressure to remove any dirt or residue. Be careful not to saturate the headband with too much liquid, as this can damage the material.
4. For stubborn stains or dirt buildup, you can use a mild cleaning solution specifically designed for the material of the headband. Make sure to follow the instructions provided on the cleaning solution and test it on a small, inconspicuous area first to ensure it does not cause any discoloration or damage.
5. Pay attention to the creases and edges of the headband, as these areas can accumulate more dirt. Use a soft toothbrush or a small brush with gentle bristles to clean these hard-to-reach spots.
6. Once you have thoroughly cleaned the headband, use a clean, damp cloth to remove any remaining cleaning solution or soap residue. Ensure that the headband is completely dry before reattaching it to the headset.
7. Finally, inspect the headband for any signs of wear or damage. If you notice any cracks or fraying, it may be time to consider replacing the headband or contacting Logitech customer support for further assistance.
By regularly cleaning the headband of your Logitech G230 headset, you can prolong its lifespan and maintain optimal comfort and functionality. Remember to clean the headband as part of your overall headset maintenance routine to ensure a fantastic audio experience every time.
Step 4: Cleaning the Microphone
The microphone is an essential component of your Logitech G230 headset. Keeping it clean is important to ensure the best audio quality during your gaming sessions or online calls. Here are the steps to clean the microphone:
1. Begin by gently removing the microphone from the headset. Take care not to pull too forcefully, as this could damage the delicate wiring or connectors.
2. Inspect the microphone for any visible dirt, debris, or smudges. If you notice any, you can use a soft, lint-free cloth or a cotton swab slightly dampened with water or a mild cleaning solution to gently wipe away the dirt. Avoid using harsh chemicals or excessive moisture, as this may damage the microphone.
3. Pay extra attention to the microphone mesh or foam cover. This is the part that captures your voice and helps filter out background noise. If it appears dirty or clogged, you can remove it carefully using tweezers or a small brush. Gently brush away any debris, and if necessary, rinse the cover with water and allow it to air dry completely before reattaching it to the microphone.
4. Once you have cleaned the microphone and any removable parts, it’s time to clean the connector. Use a dry cloth or a cotton swab to gently wipe away any dirt or residue from the microphone’s connector and the corresponding headset jack.
5. Finally, carefully reattach the microphone to the headset, ensuring that it is securely in place. Ensure that the microphone is positioned correctly, facing your mouth, for optimal performance.
Cleaning the microphone regularly will help maintain its functionality and ensure clear and crisp audio for your gaming and communication needs. Remember to handle the microphone with care, as it is a sensitive component of your Logitech G230 headset.
Step 5: Cleaning the Audio Controls and Connectors
When it comes to cleaning your Logitech G230 headset, don’t forget about the audio controls and connectors. Over time, dirt and grime can accumulate on these areas, affecting their performance and functionality. To ensure that your headset continues to deliver the best audio experience, follow these simple steps to clean the audio controls and connectors.
1. Start by unplugging the headset from any devices it may be connected to. This will ensure that you can clean the audio controls and connectors without causing any damage to your devices.
2. Take a clean, dry cloth or cotton swab and gently wipe the surface of the audio controls. Pay close attention to the areas around the volume control wheel and any buttons or switches. Use gentle, circular motions to remove any dirt or grime that may have accumulated.
3. Next, examine the connectors on both the headset and the audio source device. These connectors can collect dust and debris over time, which can interfere with the quality of the audio signal. Use a can of compressed air or a soft brush to remove any dirt or debris from the connectors.
4. If you notice any stubborn dirt or residue on the connectors, you can use a small amount of rubbing alcohol on a cloth or cotton swab to clean them. Be sure to use a small amount and avoid getting any liquid inside the connectors, as this can cause damage to the internal components.
5. Once you have cleaned the audio controls and connectors, allow them to air dry for a few minutes. Do not reassemble the headset until they are completely dry to avoid any moisture damage.
By regularly cleaning the audio controls and connectors of your Logitech G230 headset, you can ensure that you are getting the best audio experience possible. Not only will this help to maintain the functionality of your headset, but it will also extend its lifespan, allowing you to enjoy your favorite games, music, and movies for years to come.
Step 6: Drying and Reassembling the Headset
After completing the cleaning process, the next step is to allow the Logitech G230 headset to dry thoroughly before reassembling it. This ensures that all the moisture has evaporated and prevents any potential damage to the headset.
First, carefully pat dry all the components using a clean, absorbent cloth. Gently wipe away any excess moisture, taking care not to apply excessive pressure or use rough materials that could scratch the surface of the headset.
Next, place the headset and its components in a well-ventilated area, away from direct sunlight. This will help expedite the drying process. It is important to allow sufficient time for all the parts to dry completely, as any residual moisture may affect the performance or longevity of the headset.
A good practice is to leave the headset disassembled overnight, allowing ample time for the moisture to evaporate. This will ensure that all components are thoroughly dry before reassembling the headset.
Once the headset and its components are completely dry, it’s time to reassemble them. Start by attaching the ear cups securely to the headband. Ensure that the ear cups fit properly and are aligned correctly with the corresponding sides.
Next, reconnect the audio cables and connectors, ensuring a snug and secure fit. Take care to match the correct plugs with their corresponding jacks to ensure optimal performance. Make sure all connections are properly seated to prevent any audio issues.
Finally, it’s time to test your Logitech G230 headset. Plug it into your device, put it on, and check if everything is functioning as expected. Adjust the volume, test the microphone, and verify that the audio quality is clear and balanced.
If you notice any issues or abnormalities, double-check that all connections are secure and that you have correctly reassembled the headset. If problems persist, refer to the Logitech G230 user manual or seek support from Logitech customer service.
By following these steps to dry and reassemble your Logitech G230 headset, you can ensure that it remains in optimal condition and delivers an exceptional audio experience every time you use it.
Conclusion
Keeping your Logitech G230 headset clean is essential for maintaining its performance and longevity. By following the simple steps outlined in this guide, you can ensure that your headset remains in optimal condition and delivers top-notch audio quality for your gaming and communication needs.
Regularly cleaning the headset, including the ear cups, mic boom, and audio drivers, will help prevent the accumulation of dirt, dust, and debris, which can affect the overall sound quality and comfort. Remember to use gentle cleaning solutions and avoid harsh chemicals that could damage the components.
Additionally, don’t forget to regularly check the cables and connectors for any signs of wear or damage. Taking proactive measures to prevent issues will extend the lifespan of your Logitech G230 headset and provide you with a seamless audio experience.
By incorporating these cleaning techniques into your routine, you can ensure that your Logitech G230 headset remains in top-notch condition, delivering immersive sound and optimal comfort every time you put it on.
FAQs
1. How often should I clean my Logitech G230 headset?
It is generally recommended to clean your Logitech G230 headset at least once every two weeks. This will help maintain its performance and extend its lifespan. However, if you use it extensively or notice a buildup of dirt or debris, more frequent cleaning may be necessary.
2. Can I use water to clean the Logitech G230 headset?
No, water should not be used to clean the Logitech G230 headset. Liquid can damage the internal components of the headset and compromise its functionality. Instead, use a soft, dry cloth or a cleaner specifically designed for electronic devices to gently wipe away dirt and grime.
3. How do I clean the ear cushions of my Logitech G230 headset?
To clean the ear cushions of your Logitech G230 headset, gently remove them from the headset. Use a cloth or sponge dampened with a small amount of mild soap and water to wipe away any dirt or sweat. Be sure to rinse off any soap residue and allow the cushions to fully air dry before reattaching them to the headset.
4. Can I remove the microphone for cleaning?
Yes, the Logitech G230 headset features a removable microphone. To clean it, simply detach the microphone from the headset and wipe it down with a soft, dry cloth. Avoid using any liquid or abrasive cleaners, as these can damage the microphone’s sensitive components.
5. How can I prevent odor buildup in my Logitech G230 headset?
To prevent odor buildup in your Logitech G230 headset, it’s important to maintain good hygiene habits. Avoid wearing the headset for extended periods of time while sweating excessively, and always keep your ears clean. Additionally, regularly cleaning the ear cushions and microphone can help prevent the buildup of unpleasant odors.