
The Samsung Galaxy S7 is a popular and powerful flagship smartphone that offers incredible features and capabilities. One crucial component of the device is the SIM card, which enables users to make calls, send messages, and connect to mobile networks. However, some new users may be unsure of how to properly insert the SIM card into their Samsung Galaxy S7.
In this article, we will guide you through the step-by-step process of inserting a SIM card into your Samsung Galaxy S7. Whether you’re a first-time smartphone owner or simply need a refresher, we’ve got you covered. So, let’s dive in and learn how to insert a SIM card into your Samsung Galaxy S7 with ease!
Inside This Article
- Step 1: Locate the SIM card tray
- Step 2: Insert the SIM card into the tray
- Step 3: Insert the SIM card tray back into the device
- Step 4: Power on the Samsung Galaxy S7 and activate the SIM card
- Conclusion
- FAQs
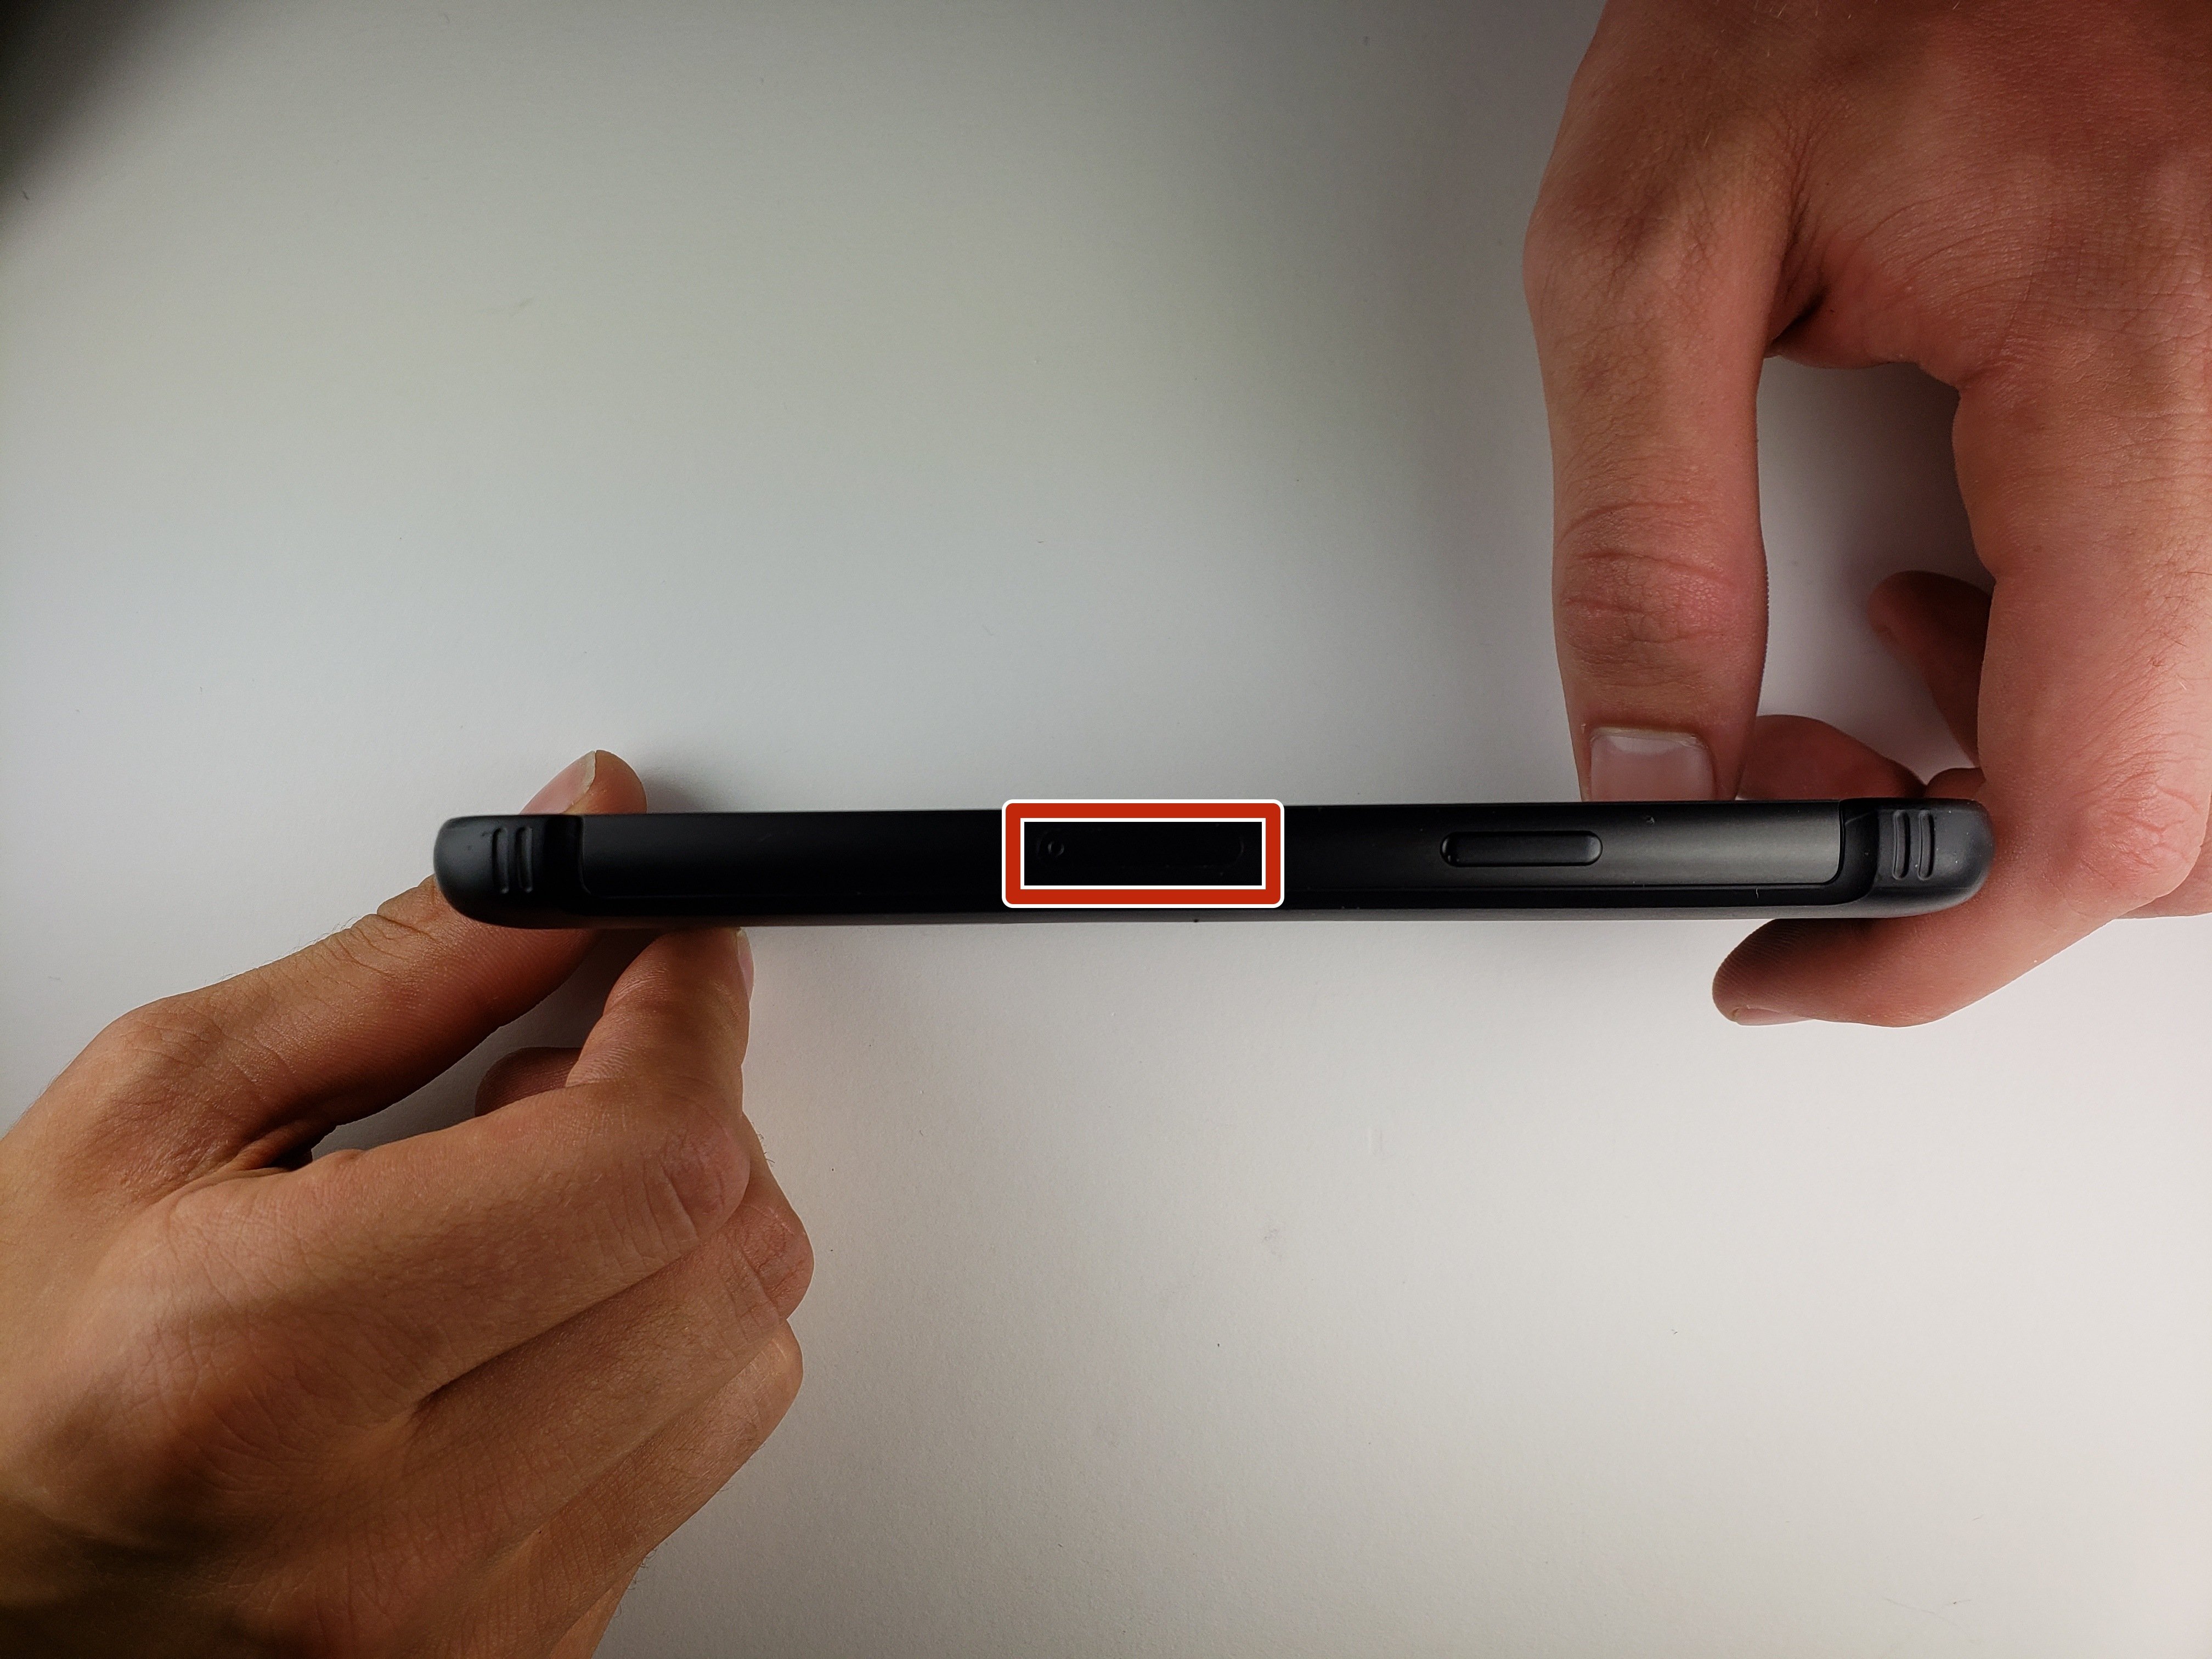
Step 1: Locate the SIM card tray
In order to insert a SIM card into your Samsung Galaxy S7, you need to locate the SIM card tray. The SIM card tray is a small compartment on the side of the device that houses the SIM card. Follow these simple steps to find the SIM card tray:
- Turn off your Samsung Galaxy S7 by pressing and holding the power button until the shutdown menu appears.
- Once the device is turned off, hold it firmly in your hand and locate the SIM card tray. On the top or side of the device, you will find a small pinhole. This pinhole is the access point to the SIM card tray.
- Take the SIM card ejection tool that came with your Samsung Galaxy S7 or use a small paperclip. Insert the tool into the pinhole and apply a small amount of pressure.
- As you push the tool into the pinhole, the SIM card tray will pop out from the side of the device. Gently pull the tray out until it is fully extended.
Now that you have located the SIM card tray, you are ready to insert the SIM card. Proceed to the next step to learn how.
Step 2: Insert the SIM card into the tray
Now that you have located the SIM card tray in your Samsung Galaxy S7, it is time to insert the SIM card into the tray. Follow these steps to ensure a smooth and secure installation:
- Take the SIM card out of its packaging and hold it with the gold contacts facing downwards.
- Align the notched corner of the SIM card with the notch in the SIM card tray. This ensures that the SIM card is inserted in the correct orientation.
- Gently slide the SIM card into the tray, making sure it fits securely into place. You should not force the SIM card; it should slide in smoothly.
- Double-check that the SIM card is properly seated in the tray and aligned with the notch. This will prevent any issues with connectivity or functionality.
It is important to handle the SIM card with care and avoid touching the gold contacts as these can be sensitive to dirt and debris. If you accidentally touch the contacts, clean them with a soft cloth before inserting the SIM card into the tray.
Once you have successfully inserted the SIM card, you can proceed to the next step of reassembling the SIM card tray back into your Samsung Galaxy S7.
Step 3: Insert the SIM card tray back into the device
After inserting the SIM card into the tray, the next step is to carefully insert the SIM card tray back into your Samsung Galaxy S7.
First, ensure that you have aligned the tray properly with the slot on your device. The tray has a small notch on one side that matches a corresponding slot on the device. Make sure these align perfectly before proceeding.
With the SIM card tray in the correct orientation, gently push it back into the device. Use moderate pressure to ensure that it is snugly in place, but be careful not to force it, as this could damage the tray or the device.
Once you have inserted the tray, you may feel a slight clicking or snapping sensation. This is completely normal and indicates that the tray has been securely inserted into the device.
Take a moment to double-check that the tray is fully inserted and flush with the device. It should sit evenly without any portion protruding or feeling loose.
Once you are confident that the tray is properly inserted, you can proceed to the next step of powering on your Samsung Galaxy S7 and activating the SIM card.
Remember, it is essential to handle the SIM card tray and device with care. Avoid excessive force or rough handling to prevent any damage.
Step 4: Power on the Samsung Galaxy S7 and activate the SIM card
Once you have successfully inserted the SIM card into your Samsung Galaxy S7, the next step is to power on the device and activate the SIM card. Follow the steps below to complete this process:
1. Press and hold the power button located on the side of the device. It may take a few seconds for the Samsung logo to appear on the screen.
2. Once the device powers on, you will be prompted to select your language and region. Use the on-screen instructions to make your selections.
3. After choosing your language and region, you will reach the activation screen. At this point, you will need to follow the instructions provided by your network carrier to activate your SIM card. This typically involves entering your account information and confirming your identity.
4. If you have a new SIM card or are switching to a different network carrier, you may need to wait for the device to connect to the network and download any necessary updates. This process can take a few minutes, so it’s important to be patient.
5. Once the activation process is complete, you will see a confirmation message on the screen. You can now start using your Samsung Galaxy S7 with your activated SIM card.
It’s worth noting that if you are activating a SIM card from a different network carrier, your Samsung Galaxy S7 may need to be unlocked. This can be done by contacting your previous network carrier or using third-party services that specialize in unlocking devices. Unlocking your device will allow you to use it with any network carrier’s SIM card.
Additionally, if you are experiencing any issues with activating your SIM card or connecting to the network, it’s recommended to contact your network carrier’s customer support for further assistance. They will be able to guide you through the necessary steps to resolve any issues.
Now that you have successfully powered on your Samsung Galaxy S7 and activated the SIM card, you can enjoy all the features and functionalities that your device has to offer. Whether it’s making calls, sending texts, or accessing the internet, your Samsung Galaxy S7 is now ready for use.
Conclusion
Inserting a SIM card into your Samsung Galaxy S7 is a simple process that allows you to enjoy the full functionality of your device. By following the step-by-step instructions provided in this article, you can easily insert your SIM card and start using your smartphone for calls, texts, and accessing mobile data. It is important to handle the SIM card with care and make sure it is properly aligned before inserting it into the SIM card tray.
Remember, if you encounter any difficulties during the process, refer to the user manual or consult with a professional. By properly inserting your SIM card, you can ensure a seamless and uninterrupted communication experience with your Samsung Galaxy S7.
Now that you have successfully inserted your SIM card, you can enjoy all the amazing features and capabilities of your smartphone. Whether you are making calls, sending messages, or browsing the internet, having a properly inserted SIM card will ensure that your Samsung Galaxy S7 operates at its best.
So go ahead, insert that SIM card and start exploring all the possibilities that your Samsung Galaxy S7 has to offer!
FAQs
1. How do I insert a SIM card into Samsung Galaxy S7?
To insert a SIM card into your Samsung Galaxy S7, follow these steps:
- Find the SIM card tray on the top edge of the phone.
- Use the ejection pin or a small paper clip to pop out the SIM card tray.
- Place the SIM card into the tray, ensuring that the gold contacts are facing downwards.
- Gently push the tray back into the phone until it clicks into place.
2. What type of SIM card does Samsung Galaxy S7 use?
The Samsung Galaxy S7 uses a nano-SIM card. Make sure you have the right size SIM card before inserting it into your phone.
3. Can I use a SIM card from any carrier in Samsung Galaxy S7?
The Samsung Galaxy S7 is usually carrier-locked, meaning it can only be used with a SIM card from the specific carrier it is locked to. If you want to use a SIM card from a different carrier, you may need to get the phone unlocked or purchase an unlocked version of the device.
4. What should I do if my SIM card is not being detected by Samsung Galaxy S7?
If your SIM card is not being detected by your Samsung Galaxy S7, you can try the following troubleshooting steps:
- Ensure that the SIM card is properly inserted into the phone.
- Restart your phone and check if the SIM card is recognized.
- If the issue persists, try removing the SIM card and inserting it into a different phone to confirm if the problem is with the card itself.
- If the SIM card works fine in another phone, you may need to contact your carrier for further assistance.
5. Can I use a SIM card from a different country in Samsung Galaxy S7?
Yes, you can use a SIM card from a different country in your Samsung Galaxy S7, as long as the phone is not carrier-locked. However, keep in mind that you may incur additional charges for international roaming or may need to purchase a local plan from a carrier in the country you are visiting.