
Are you looking to add some style and functionality to your accessories collection? Look no further than a lanyard necklace! This versatile piece of jewelry not only keeps your important items like keys or ID cards within easy reach but also adds a trendy touch to your outfit. Whether you’re attending a music festival, going for a hike, or simply running errands, a lanyard necklace is the perfect accessory to keep your hands free and your style on point. In this article, we will guide you on how to make your own lanyard necklace. With just a few materials and a little bit of creativity, you’ll have a unique accessory that reflects your personal style. So grab your craft supplies and let’s get started on this fun DIY project!
Inside This Article
- Materials Needed
- Step 1: Choosing the Right Cord
- Step 2: Measuring and Cutting the Cord
- Step 3: Attaching the Clasp
- Step 4: Creating the Lanyard Stitch Pattern
- Conclusion
- FAQs
Materials Needed
Before you embark on making a lanyard necklace, it’s important to gather all the necessary materials. Here’s a list of items you’ll need:
- A sturdy cord: Choose a cord that is made of durable material such as nylon, polyester, or paracord. Make sure it’s long enough to create the desired length of your lanyard necklace.
- A clasp: Look for a clasp that is suitable for jewelry making. You can opt for a lobster clasp, hook clasp, or magnetic clasp depending on your preference.
- Beads or charms: These are optional, but if you want to add some decorative elements to your lanyard necklace, you can choose beads or charms that complement your cord and personal style.
- Scissors: A good pair of scissors will be essential for cutting the cord to the desired length and trimming any excess.
- Measuring tape or ruler: To ensure accuracy when cutting the cord, a measuring tape or ruler will come in handy.
- Super glue or jewelry glue: This will be used to secure the ends of the cord and attach the clasp.
- Pliers: Pliers will be useful if you need to manipulate any small components, such as attaching jump rings or opening and closing the clasp.
With these materials readily available, you’ll be ready to start creating your own unique lanyard necklace. Let’s move on to the next steps!
Step 1: Choosing the Right Cord
When it comes to making a lanyard necklace, selecting the right cord is crucial. The cord you choose should be strong, durable, and suitable for the design you have in mind. There are various options available in the market, and each has its own unique characteristics. Here are some factors to consider when choosing the right cord for your lanyard necklace:
1. Material: The material of the cord determines its strength and flexibility. Common options include nylon, satin, leather, paracord, and cotton. Consider the look and feel you want for your lanyard necklace and choose a cord material that matches your desired aesthetic.
2. Thickness: The thickness of the cord affects the overall appearance and durability of the necklace. Thicker cords provide more stability and can handle heavy pendants, while thinner cords create a delicate and minimalist look. Keep in mind the size and weight of the pendant or charms you plan to add.
3. Color: The color of the cord plays a significant role in the overall design. Opt for a color that complements your pendant or charms, or choose a contrasting color for a bold and vibrant look. Consider the visual impact you want to create and select a cord color accordingly.
4. Texture: The texture of the cord adds visual interest and can enhance the overall feel of the necklace. Smooth cords may be suitable for a sleek and refined design, while cords with a woven or braided texture can add a touch of complexity and uniqueness.
5. Durability: Since a lanyard necklace is meant to be worn regularly, it’s important to choose a cord that is durable and will withstand everyday use. Look for cords that are resistant to fraying, tearing, or stretching to ensure the longevity of your necklace.
By considering these factors and choosing the right cord, you can create a lanyard necklace that not only looks stylish but also stands the test of time.
Step 2: Measuring and Cutting the Cord
Once you have chosen the right cord for your lanyard necklace, the next step is to measure and cut the cord to the desired length. This step is crucial to ensure that your necklace fits perfectly and sits comfortably around your neck.
Start by deciding how long you want your necklace to be. You can go for a shorter length for a choker-style necklace or a longer length for a more relaxed and casual look. Consider your personal style and the occasion for which you are creating the necklace.
Next, use a measuring tape or a ruler to measure the desired length of the cord. Be sure to take into account any additional length needed for the attachment of the clasp and any desired drop length for any charms or pendants you plan to add.
Once you have determined the length, carefully cut the cord using a sharp pair of scissors. It’s important to make a clean and even cut to ensure a professional-looking necklace.
Remember to double-check the length after cutting to ensure it matches your desired measurement. If needed, you can always trim a little bit more off, but it’s difficult to add length once the cord is cut.
After cutting the cord to the desired length, you can proceed to the next step, which involves attaching the clasp to your lanyard necklace.
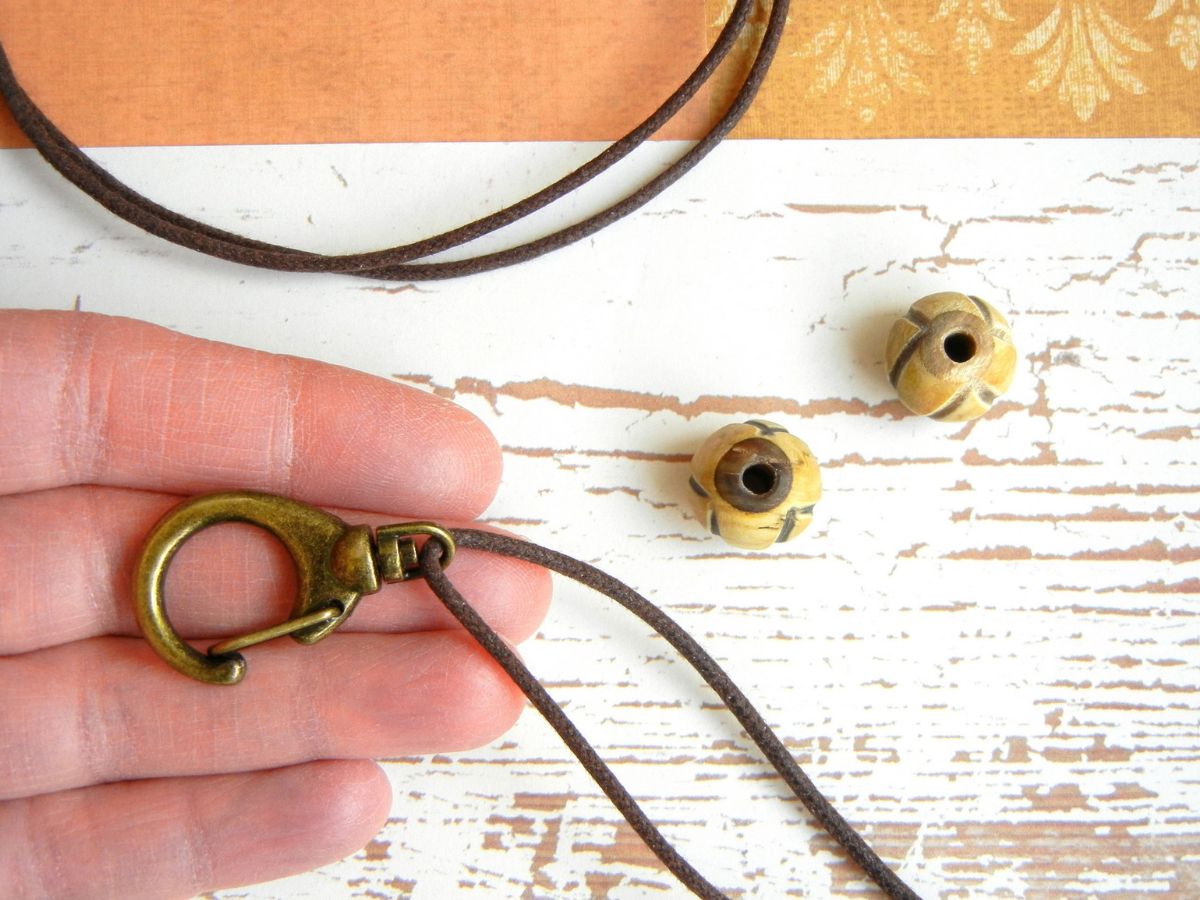
Step 3: Attaching the Clasp
Attaching the clasp is a crucial step in making a lanyard necklace. The clasp not only adds functionality but also serves as a decorative element. Here’s how you can easily attach the clasp:
1. Begin by folding one end of the cord in half to create a loop.
2. Thread the loop through one side of the clasp. Ensure that the loop is large enough to accommodate the clasp’s attachment point.
3. Pull the loose ends of the cord through the loop, creating a secure knot around the clasp. Make sure to tighten the knot gently to avoid any damage to the cord.
4. Repeat the same steps on the other end of the cord, attaching it to the opposite side of the clasp.
It’s important to double-check the attachment to ensure that the clasp is securely fastened to the lanyard necklace. Give it a gentle tug to make sure it withstands any movement or weight.
By following these simple steps, you can easily attach the clasp to your lanyard necklace. Now, your necklace is ready to be worn or gifted to someone special!
Step 4: Creating the Lanyard Stitch Pattern
Once you have attached the clasp to your lanyard cord, it’s time to start creating the lanyard stitch pattern. This step is where you can get creative and add your personal touch to your lanyard necklace.
There are several different stitch patterns you can use to create your lanyard necklace. One of the most popular stitch patterns is the square stitch. To create the square stitch, follow these steps:
- Start by crossing the left cord over the right cord, forming an “X” shape.
- Take the left cord and thread it over and under the right cord, pulling it through the gap in the “X”.
- Repeat this process with the right cord, threading it over and under the left cord.
- Continue alternately crossing the cords and threading them through the gaps until you reach your desired length.
- Finish off the stitch by tying a knot at the end.
Another popular stitch pattern is the spiral stitch. To create the spiral stitch, follow these steps:
- Start by crossing the left cord over the right cord, just like in the square stitch.
- Instead of threading the cords through the gaps, twist the cords around each other in a clockwise direction.
- Continue twisting the cords around each other, making sure to maintain a tight and even tension.
- As you twist the cords, they will naturally form a spiral pattern.
- Continue twisting until you reach your desired length, and then finish off the stitch with a knot.
These are just a couple of examples, but feel free to experiment with different stitch patterns and combinations to create unique and eye-catching lanyard necklaces. Remember, practice makes perfect, so don’t be discouraged if your first few attempts don’t turn out exactly as you envisioned. Keep practicing and refining your technique, and soon you will be creating beautiful lanyard necklaces with ease.
Conclusion
In conclusion, creating a lanyard necklace is a fun and creative way to accessorize your outfits and express your personal style. Whether you prefer a minimalist design or a bold statement piece, you can easily make a lanyard necklace that suits your taste. With the right materials and a few simple techniques, you can craft a unique accessory that showcases your individuality.
Remember to choose high-quality materials and experiment with different colors, patterns, and embellishments to make your lanyard necklace truly stand out. Additionally, don’t forget to consider the length and adjust it according to your preferences. Whether you’re making one for yourself or as a gift for someone else, a lanyard necklace is a trendy and versatile accessory that adds a touch of style to any outfit.
So, why wait? Start exploring your creativity and make your own lanyard necklace today!
FAQs
1. What is a lanyard necklace?
A lanyard necklace is a versatile accessory that combines the functionality of a lanyard with the aesthetics of a necklace. It typically consists of a cord or chain that is worn around the neck, with attachments such as a badge holder or keychain. It is commonly used for holding items like ID cards, keys, or small electronic devices, providing both practicality and style.
2. How do I make a lanyard necklace?
Making a lanyard necklace is relatively simple and can be done using various materials such as paracord, beads, or chains. You can start by measuring the desired length of the necklace and cutting the cord or chain accordingly. Next, attach the desired accessories or attachments to the cord, such as a badge holder or keychain. Finally, fasten the ends of the cord or chain together securely, and your lanyard necklace is ready to wear!
3. What are the benefits of using a lanyard necklace?
Using a lanyard necklace has several advantages. Firstly, it provides a convenient way to carry important items such as ID cards or keys, ensuring they are easily accessible at all times. Secondly, it adds a stylish and personalized touch to your outfit, allowing you to express your individuality. Additionally, a lanyard necklace can help prevent misplacing or losing essential items, thanks to its secure attachment system.
4. Can I customize a lanyard necklace?
Yes, you can definitely customize a lanyard necklace to your liking. There are various ways to personalize your lanyard necklace, such as choosing different colors or patterns for the cord or adding decorative beads or charms. You can also incorporate your favorite symbols or motifs into the design. By customizing your lanyard necklace, you can make it truly unique and reflective of your personal style.
5. Where can I purchase lanyard necklaces?
Lanyard necklaces are widely available and can be found in various stores, both online and offline. Online marketplaces and accessories retailers often have a wide selection of lanyard necklaces to choose from. You can also check out specialty stores that focus on ID accessories or crafting supplies. Lastly, consider attending local craft fairs or art markets where you may find handmade lanyard necklaces crafted by independent artisans.