
Are you looking for a stylish and functional way to hold your keys or ID card? Look no further than the snake knot lanyard! This trendy accessory not only serves as a practical holder, but it also adds a touch of personality to your everyday carry. Whether you’re a seasoned knot enthusiast or a beginner looking to try something new, this step-by-step guide will teach you how to make a snake knot lanyard. With just a few simple materials and a little bit of patience, you’ll have a unique lanyard that you can proudly show off. So, let’s dive into the world of knots and create a stunning accessory that’s sure to turn heads!
Inside This Article
- Materials Needed
- Step 1: Starting the Snake Knot Lanyard
- Step 2: Creating the Knot Pattern
- Step 3: Finishing the Snake Knot Lanyard
- Tips and Tricks
- Variations of the Snake Knot Lanyard
- Conclusion
- FAQs
Materials Needed
Before diving into creating a snake knot lanyard, it’s important to gather all the necessary materials. Here’s a list of what you’ll need:
- Paracord: Choose a color that you like, typically around 8-10 feet in length is sufficient for a lanyard.
- Scissors: You’ll need a good pair of scissors to cut the paracord.
- Lighter: A lighter is needed to heat the ends of the paracord, preventing them from fraying.
- Lanyard clip: This is the attachment that will allow you to secure the lanyard to your keys, ID badge, or any other item you’d like to carry.
Once you have gathered these materials, you’re ready to start creating your very own snake knot lanyard. The process is fun and satisfying, and you’ll have a unique accessory to show off to your friends and colleagues.
Step 1: Starting the Snake Knot Lanyard
To begin creating your snake knot lanyard, follow these steps:
1. Gather the necessary materials: You will need a length of paracord, approximately 2 feet long, a lanyard clip or key ring, and a pair of scissors.
2. Fold the paracord in half: Take one end of the paracord and fold it in half, so that the two ends are aligned.
3. Attach the lanyard clip: Take the folded end of the paracord and pass it through the lanyard clip or key ring. Pull the folded end through, creating a loop with the clip at the bottom.
4. Secure the loop: Take the loose ends of the paracord and pass them through the loop created by the folded end. Pull them tight, ensuring that the loop is securely attached to the lanyard clip or key ring.
5. Adjust the length: Determine the desired length of your snake knot lanyard and make any necessary adjustments by sliding the loop up or down the paracord.
6. Prepare for knotting: Orient the paracord so that the two loose ends are on the left and the loop is on the right. This will be the starting position for the snake knot pattern.
Now that you have successfully started your snake knot lanyard, you can move on to creating the knot pattern in the next step.
Step 2: Creating the Knot Pattern
Now that you’ve successfully started your snake knot lanyard, it’s time to move on to the fun part: creating the knot pattern. This step is where you’ll bring the lanyard to life and make it visually appealing. With a few simple techniques, you can create a beautiful and intricate knot pattern that will impress anyone who sees it.
Here’s how to create the knot pattern for your snake knot lanyard:
1. Take the left strand and bring it over the center strands, then pass it under the right strand.
2. Take the right strand and pass it under the center strands and through the loop created by the left strand in step 1.
3. Pull both strands to tighten the knot. Make sure to adjust the tension so that it is consistent throughout the lanyard.
4. Repeat steps 1-3, alternating between the left and right strands, until you reach your desired length. Remember to keep the tension consistent and to adjust it as needed.
By repeating these steps, you will create a beautiful snake knot pattern that wraps around the lanyard. The alternating movements of the left and right strands create a visually appealing design that gives the lanyard its distinct look.
It’s important to note that practicing the knot pattern may take some time and patience. Don’t worry if your first few attempts aren’t perfect. With practice, you’ll become more comfortable with the technique and be able to create stunning snake knot patterns effortlessly.
Once you’ve completed the knot pattern for your snake knot lanyard, you’re ready to move on to the final step of finishing the lanyard. But before we do that, let’s explore some tips and tricks that can help you along the way.
Step 3: Finishing the Snake Knot Lanyard
After completing the knot pattern, it’s time to finish your snake knot lanyard and give it a clean and polished look. Follow these simple steps to complete the lanyard.
1. Trim the excess cord:
Once you have reached your desired length for the lanyard, use a pair of scissors to carefully trim the remaining cord. Make sure to leave enough slack for the finishing touches.
2. Melting the ends:
To prevent the ends of the cord from fraying and unraveling, use a lighter or a heat source to carefully melt the ends of the cord. Be cautious not to burn the cord or yourself. Quickly run the melted end on a surface to smooth it out.
3. Attach the clasp:
To secure your lanyard and make it functional, you’ll need to attach a clasp or a keyring to one end. Simply loop the end of the lanyard through the clasp and then thread it through the loop itself. Pull it tight to ensure a secure attachment.
4. Test the lanyard:
Before considering the lanyard as complete, give it a gentle tug to ensure that the knots are tightly secured. You don’t want your lanyard to come undone when you’re using it to hold an important item.
5. Optional: Add embellishments:
If you want to personalize your snake knot lanyard, you can add embellishments such as beads, charms, or even other knots. Get creative and make it unique to your style.
That’s it! You’ve successfully finished your snake knot lanyard. Now you can proudly wear it or use it to hold your keys, ID cards, or other small items. Not only is it practical, but it’s also a great way to showcase your creativity.
Tips and Tricks
Creating a snake knot lanyard requires a bit of practice and attention to detail. To make the process easier and ensure a successful outcome, here are some helpful tips and tricks to keep in mind:
1. Choose the right cord: Select a cord that is durable and easy to work with. Nylon paracord and leather cord are popular choices for making snake knot lanyards.
2. Measure and cut the cord accurately: Take precise measurements for your desired lanyard length before cutting the cord. Using a ruler or tape measure can help ensure accuracy.
3. Practice the knot on a small scale: If you’re new to making snake knot lanyards, it’s a good idea to practice the knot on a smaller scale before attempting a full-length lanyard. This will help you familiarize yourself with the steps and gain confidence in your technique.
4. Keep the cord taut: Throughout the knotting process, it’s important to keep the cord taut. This will create tighter and cleaner knots, resulting in a more professional-looking lanyard.
5. Use a clip or pin to hold the cords in place: To prevent the cords from unraveling while you work, use a clip or pin to hold them in place. This will make it easier to maintain tension and prevent any accidental slip-ups.
6. Take breaks if needed: If you find yourself getting fatigued or losing focus, don’t hesitate to take breaks. It’s important to maintain concentration while creating the snake knot pattern, and taking short breaks can help you reset and refocus.
7. Experiment with color combinations: Get creative with your snake knot lanyard by experimenting with different color combinations. Mixing and matching cords of different hues can result in a visually striking finished product.
8. Trim excess cord carefully: After completing the snake knot pattern and finishing the lanyard, you may need to trim any excess cord. Use sharp scissors and exercise caution to ensure clean and precise cuts.
9. Seal the ends: To prevent fraying and extend the lifespan of your snake knot lanyard, consider sealing the ends of the cord. You can use heat, such as a lighter or heat gun, to carefully melt the ends or apply a clear adhesive for a more secure seal.
10. Have fun and be patient: Remember that creating a snake knot lanyard is a craft that requires patience and practice. Enjoy the process and embrace any imperfections as part of the unique charm of your handmade accessory.
By keeping these tips and tricks in mind, you’ll be well-equipped to tackle the creation of a snake knot lanyard with confidence and achieve a professional-looking result.
Variations of the Snake Knot Lanyard
The snake knot lanyard is a versatile and popular knot that can be used in a variety of ways. Here are some variations of the snake knot lanyard that you can try:
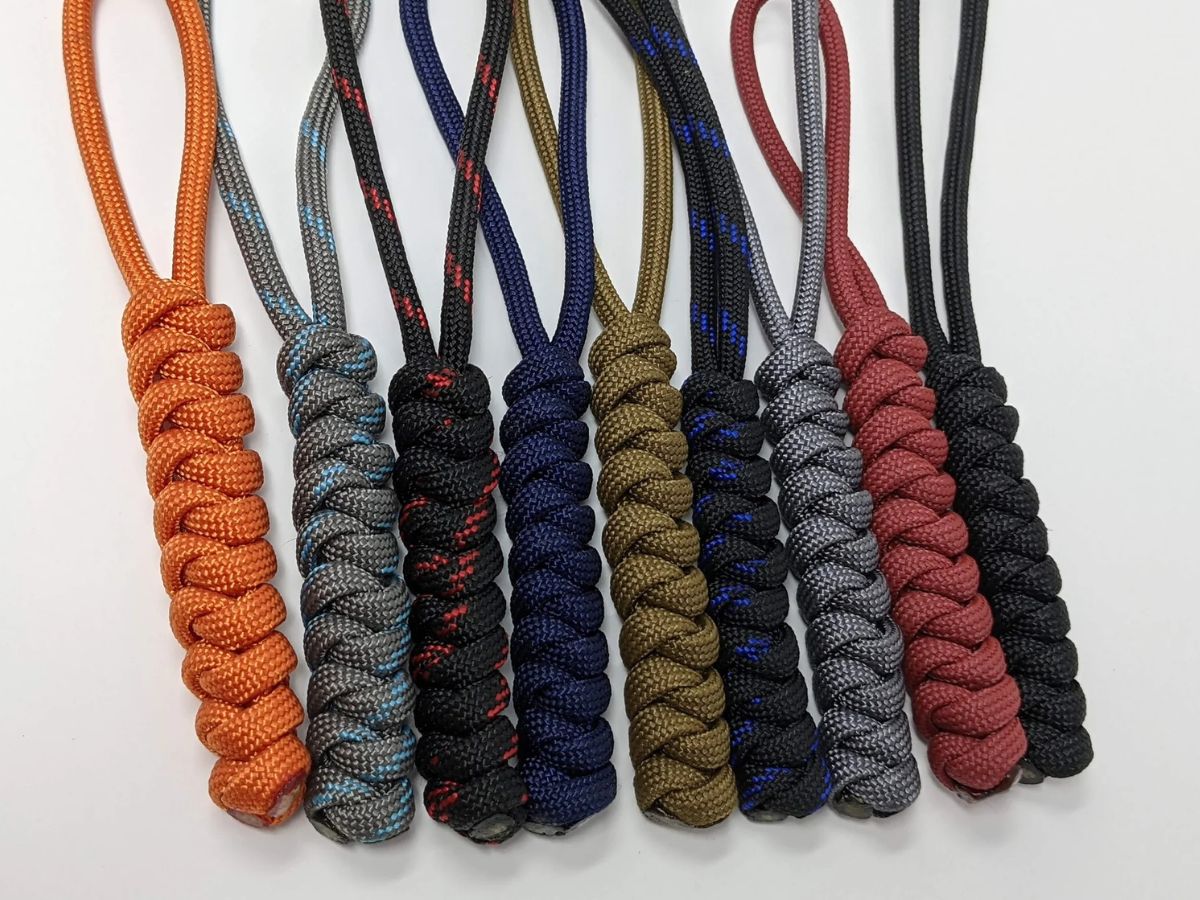
1. Two-tone Snake Knot Lanyard: Instead of using a single color for the cord, you can mix two different colors to create a visually appealing two-tone effect. This adds an extra level of complexity to the lanyard and makes it stand out.
2. Beaded Snake Knot Lanyard: Incorporating beads into the snake knot lanyard can add a touch of elegance and style. You can choose beads in various sizes, shapes, and colors to customize the lanyard according to your preferences.
3. Micro Snake Knot Lanyard: If you are looking for a smaller and more delicate version of the snake knot lanyard, the micro snake knot lanyard is perfect. Using thinner cord and tighter knots, you can create a lanyard that is more compact and suitable for keychains or smaller accessories.
4. Wide Snake Knot Lanyard: By using wider and thicker cord, you can create a bolder and more substantial snake knot lanyard. This variation is great for creating lanyards for larger items like cameras or binoculars.
5. Braided Snake Knot Lanyard: Combining the snake knot with a braiding technique can result in a unique and visually stunning lanyard. You can experiment with different braiding patterns and incorporate them into the snake knot for a more intricate design.
6. Embellished Snake Knot Lanyard: Get creative and add embellishments like charms, pendants, or feathers to your snake knot lanyard. This allows you to personalize your lanyard and make it truly unique.
7. Colorful Snake Knot Lanyard: Don’t be afraid to play with colors! Use different colored cords to create a vibrant and eye-catching snake knot lanyard. You can even create patterns or gradients with the colors to enhance the visual appeal.
8. Multi-strand Snake Knot Lanyard: Instead of using a single strand of cord, you can use multiple strands to create a thicker and more substantial snake knot lanyard. This variation adds depth and dimension to the lanyard, making it more visually interesting.
Remember, the possibilities are endless when it comes to the snake knot lanyard. Feel free to experiment with different variations and customize it to suit your personal style and preferences. Happy knotting!
Conclusion
In conclusion, learning how to make a snake knot lanyard can be a fun and rewarding activity for anyone looking to add a unique touch to their accessories. Whether you’re a beginner or an experienced crafter, following the step-by-step instructions provided in this article will help you create a stylish and functional lanyard that you can use for various purposes. From securing your keys and ID badge to adding a decorative touch to your backpack or purse, the snake knot lanyard is a versatile accessory that combines usefulness with aesthetics.
By using high-quality materials and experimenting with different color combinations and knot variations, you can personalize your lanyard to suit your style and preferences. So, why not give it a try? Explore the world of knotting and create your own snake knot lanyard today!
FAQs
1. What is a Snake Knot Lanyard?
A Snake Knot Lanyard is a type of decorative knot typically used to create keychains or lanyards. It is named after its resemblance to the scales of a snake, which gives it a unique and visually appealing design.
2. How do I make a Snake Knot Lanyard?
To make a Snake Knot Lanyard, follow these steps:
– Start by folding a piece of cord in half and attaching it to a keychain ring or hook.
– Take the left cord and cross it over the right cord, creating a loop.
– Pass the left cord under the right cord and through the loop, pulling it tight.
– Repeat the process, alternating sides, until you have achieved the desired length.
– Finish off the lanyard by tying a knot at the end and trimming any excess cord.
3. What materials do I need to make a Snake Knot Lanyard?
To make a Snake Knot Lanyard, you will need the following materials:
– Paracord or any durable cord of your choice.
– A keychain ring or hook to attach the lanyard to.
– Scissors to cut the cord to the desired length.
4. Can I customize the design of a Snake Knot Lanyard?
Absolutely! The beauty of making a Snake Knot Lanyard is that you can easily customize the design to suit your preferences. You can experiment with different cord colors, patterns, and lengths to create a unique and personalized lanyard that reflects your style.
5. What are the practical uses of a Snake Knot Lanyard?
While a Snake Knot Lanyard is often used as a decorative keychain or lanyard, it can also serve various practical purposes. You can use it to secure small tools, gadgets, or accessories to your bag or belt loop, making them easily accessible. Additionally, it can be used as a zipper pull on backpacks or jackets, adding a touch of personal flair.