
In today’s digital age, where smartphones have become an essential part of our lives, personalizing our devices has become a trend. While phone cases are widely available in stores, creating a unique phone case adds a touch of personality and creativity. One popular way to achieve this is by making a pressed flower phone case. This innovative DIY project allows you to preserve the beauty of nature and showcase it on your mobile device, turning it into a stunning work of art. Not only does a pressed flower phone case look beautiful, but it also serves as a reminder of the natural world in the midst of our busy lives. In this article, we will guide you through the process of making a pressed flower phone case, providing step-by-step instructions and helpful tips along the way. So, let’s dive in and create a one-of-a-kind accessory for your beloved smartphone!
Inside This Article
- Materials Needed:
- Step 1: Gathering Fresh Flowers
- Step 2: Pressing the Flowers
- Step 3: Preparing the Phone Case
- Step 4: Arranging and Securing the Pressed Flowers on the Phone Case
- Conclusion
- FAQs
Materials Needed:
Before you can create your own pressed flower phone case, you will need to gather a few essential materials. Here is a list of what you will need:
- A selection of fresh flowers – Choose a variety of flowers with different colors and shapes. Opt for small to medium-sized flowers that will fit nicely on your phone case.
- Heavy books or a flower press – These will be used to press and dry the flowers. If you don’t have a flower press, you can use heavy books and some paper towels or tissue paper.
- Phone case – Select a clear or transparent phone case, preferably made of a hard plastic material. This will allow the beauty of the pressed flowers to shine through.
- Parchment paper – This will be used to protect the flowers when pressing them.
- Tweezers – Tweezers will come in handy for handling the delicate pressed flowers without damaging them.
- Clear epoxy resin – Epoxy resin will provide a protective seal and give your phone case a glossy finish. Make sure to choose a non-toxic resin suitable for crafts.
- Mixing cups and stir sticks – These will be used to mix the epoxy resin.
- Disposable gloves – Wearing gloves will protect your hands from the epoxy resin and ensure a clean and safe crafting experience.
Make sure to have all these materials on hand before you start the pressing process. It’s important to gather everything you need to ensure a smooth and enjoyable crafting experience.
Step 1: Gathering Fresh Flowers
Gathering fresh flowers is an important step in creating a beautiful and vibrant pressed flower phone case. Here are some tips on how to gather the best flowers for your project:
- Choose the right flowers: Look for flowers with flat petals and vibrant colors. Roses, daisies, pansies, and lavender are great options. Avoid flowers with thick, fleshy petals as they don’t press as well.
- Pick flowers in the morning: Flowers are freshest in the morning when they are fully hydrated. This is the best time to pick them for pressing.
- Harvest flowers with long stems: It’s important to have enough stem length to work with when arranging the pressed flowers on the phone case. Make sure to leave a few inches of stem when cutting the flowers.
- Gather a variety of colors and sizes: To create an eye-catching design, gather flowers of different colors and sizes. This will add dimension and visual interest to your pressed flower phone case.
- Handle flowers delicately: When collecting flowers, handle them gently to avoid damaging the petals. Place them in a padded container or wrap them in tissue paper to protect them during transportation.
- Consider the season: Different flowers bloom in different seasons, so consider the time of year when gathering flowers. This will allow you to create a pressed flower phone case that reflects the beauty of the current season.
By following these tips, you’ll be well-prepared to gather the perfect fresh flowers for your pressed flower phone case project. Once you have gathered the flowers, it’s time to move on to the next step: pressing them.
Step 2: Pressing the Flowers
Now that you have gathered your fresh flowers, it’s time to press them to preserve their beauty. Pressing flowers is a simple yet effective way to dry them out while maintaining their shape and color. Here’s how you can press the flowers for your DIY pressed flower phone case:
- Prepare your materials: You will need a flower press, which can be purchased online or made at home using layers of cardboard and heavy books. Additionally, gather some absorbent paper, such as blotting paper or parchment paper, to place between the flowers.
- Prepare the flowers: Before pressing, trim the stems of the flowers to a manageable length. Remove any excess leaves or petals that could get in the way while pressing. If the flowers have a thick center, consider giving them a gentle squeeze to flatten them slightly.
- Arrange the flowers: Lay a sheet of absorbent paper on the bottom of the flower press. Place the flowers on top, making sure they are not overlapping. Leave some space between each flower to ensure proper airflow and drying.
- Press the flowers: Add another layer of absorbent paper on top of the flowers. Close the flower press tightly and secure it with the straps or clamps. If you are using the homemade option, place heavy books on top of the cardboard layers to apply pressure evenly.
- Wait for the flowers to dry: The drying process can take anywhere from one to two weeks. Make sure to keep the flower press in a dry and well-ventilated area. Avoid moving or opening the press during this time to prevent any shifting of the flowers.
- Check for dryness: After the designated time has passed, carefully open the flower press and check if the flowers are completely dry. They should feel crisp to the touch. If some residual moisture remains, reposition the flowers, replace the absorbent paper, and continue pressing for a few more days.
Remember that delicate flowers may dry faster than thicker or more fleshy ones. It’s important to monitor the progress and adjust the pressing time accordingly. Once your flowers are fully dried and ready, you can proceed to the next step of creating your pressed flower phone case.
Step 3: Preparing the Phone Case
Now that you have your pressed flowers ready, it’s time to prepare your phone case for their beautiful display. Follow these steps to ensure a seamless and long-lasting attachment:
- Clean your phone case: Start by removing any dirt, dust, or debris from your phone case. Use a gentle cleaning solution or wipe to ensure that the surface is clean and ready for the flower application.
- Choose the right case: Consider the type of material your phone case is made of and whether it is compatible with glue or adhesive. Some phone cases have a textured surface that may not adhere well to the flowers. Opt for a smooth and flat case for best results.
- Decide on the flower arrangement: Before attaching the pressed flowers, plan out your desired design. You can lay out the flowers on the case without any adhesive to experiment with different arrangements and find the perfect look.
- Apply the adhesive: Once you have finalized the flower arrangement, it’s time to attach them to the phone case. Depending on the type of adhesive you choose, apply a small amount to the back of each flower or petal. Alternatively, you can use a clear-drying glue or a strong adhesive like epoxy resin for a more secure attachment.
- Attach the flowers: Carefully place each flower or petal on the desired spot on the phone case. Press it gently to ensure a strong bond with the adhesive. Repeat this step for each flower until you have completed your desired design.
- Allow the adhesive to dry: Once all the flowers are attached, set the phone case aside in a flat and safe area. Follow the drying time specified by the adhesive you used. It is important to let the flowers fully adhere to the phone case before handling it or placing it on your phone.
- Protect the design: To make your pressed flower phone case last longer, consider applying a protective layer. You can use a clear sealant or a transparent phone case cover to safeguard the flowers from moisture, dust, and UV damage.
Now, your phone case should be ready to showcase your beautiful pressed flower design. Remember to handle it with care and avoid excessive bending or pressure on the flowers to keep them intact for a long time.
Step 4: Arranging and Securing the Pressed Flowers on the Phone Case
Now that you have your pressed flowers ready and your phone case prepared, it’s time to arrange and secure the flowers onto the case. Follow these steps to create a beautiful and unique pressed flower phone case:
- Plan your design: Before you start attaching the flowers, take a moment to plan out your design. You can create a pattern, arrange the flowers randomly, or even spell out a word with the petals. This is your chance to get creative and make your phone case truly one-of-a-kind.
- Apply adhesive: Using a small brush or a toothpick, gently apply a thin layer of clear adhesive to the back of a pressed flower. Make sure to cover the entire surface of the flower to ensure it sticks securely to the case.
- Place the flower onto the case: Carefully place the adhesive-coated side of the pressed flower onto the desired spot on your phone case. Press down gently to secure it in place. If you’re following a specific design, make sure to align the flower correctly.
- Repeat the process: Continue applying adhesive to each pressed flower and placing them onto the phone case until you achieve the desired arrangement. Take your time and be patient, as this can be a delicate process.
- Allow the adhesive to dry: Once you’ve arranged all the pressed flowers, set the phone case aside and allow the adhesive to dry completely. This usually takes a few hours, but it’s best to follow the drying instructions provided by the adhesive manufacturer to ensure a strong bond.
- Protect the flowers: To protect the pressed flowers and ensure they last as long as possible, you can apply a clear sealant or a thin layer of clear nail polish over each flower. This will help preserve their colors and prevent them from fading or deteriorating with time.
- Attach the phone case: After the adhesive has dried and the pressed flowers are protected, it’s time to attach the phone case to your cell phone. Simply slide the case onto your phone, making sure it fits properly and securely.
- Show off your creation: Congratulations, you’ve successfully made a pressed flower phone case! Now it’s time to show it off to the world. Take pride in your unique creation and enjoy the beauty of nature captured on your mobile device.
Remember, while a pressed flower phone case is a beautiful accessory, it may be more prone to damage than traditional cases. Handle it with care and avoid excessive bending or dropping to ensure the longevity of your design.
Conclusion
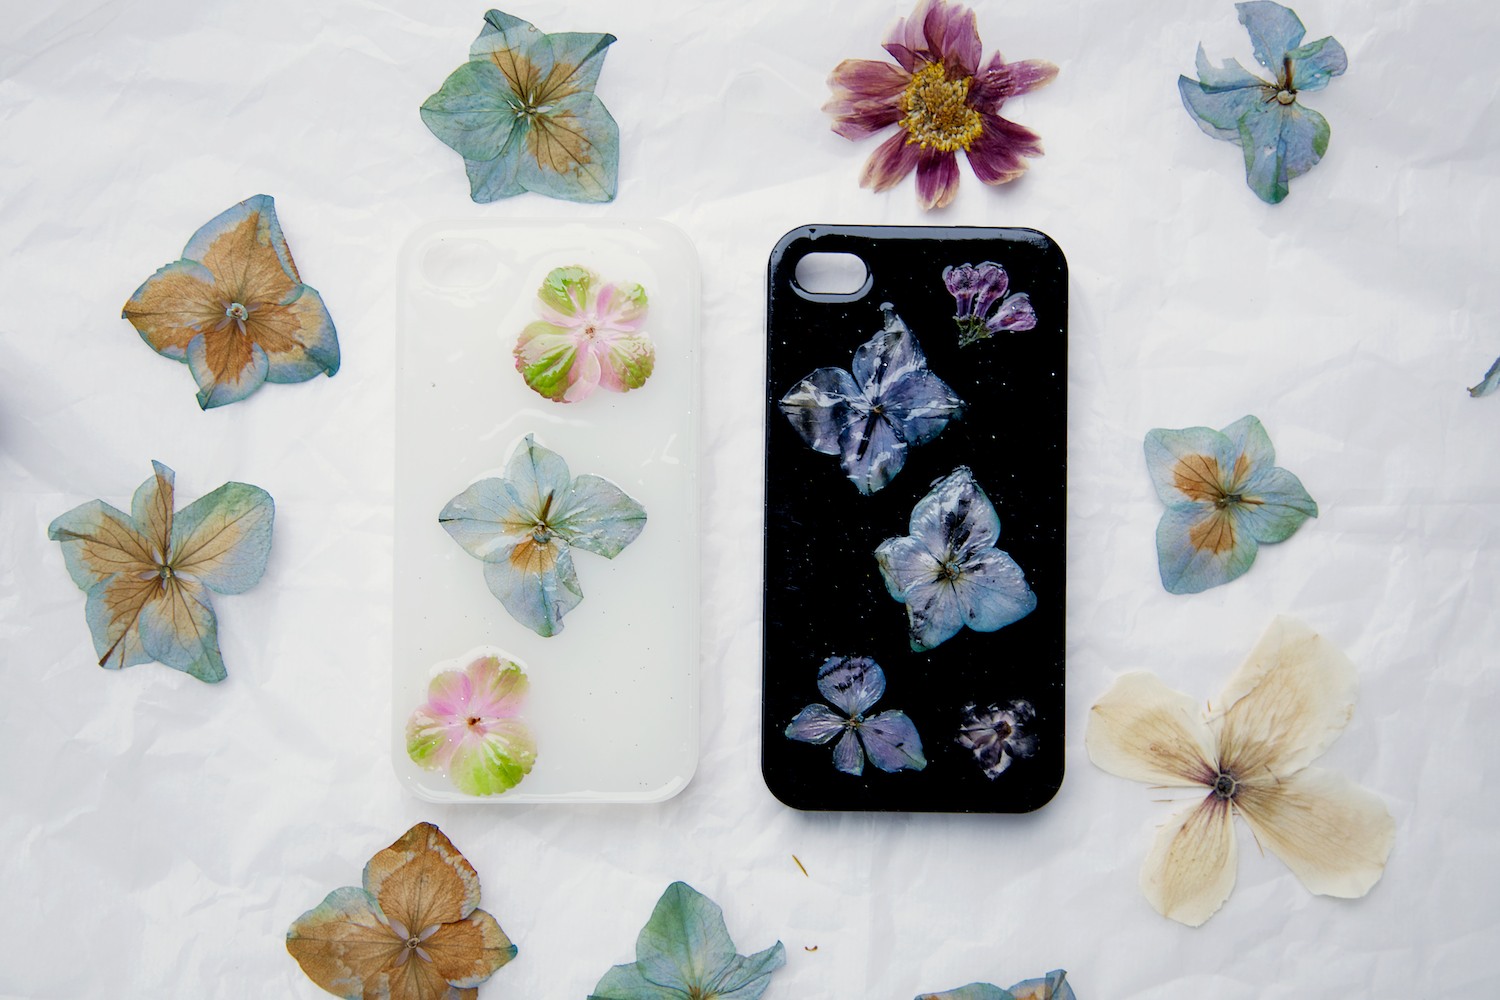
In conclusion, creating a pressed flower phone case is a unique and creative way to add a personal touch to your device. Not only does it allow you to showcase your creativity, but it also allows you to bring a little piece of nature with you wherever you go.
By following the steps outlined in this article, you can easily make your own pressed flower phone case that is both beautiful and functional. Whether you choose to use fresh flowers or dried ones, the result is sure to be a stunning accessory that will catch everyone’s eye.
Additionally, designing and creating your own pressed flower phone case is a great way to relax and de-stress. It provides an opportunity to connect with nature and engage in a mindful activity that can be both therapeutic and enjoyable.
So, why settle for a generic phone case when you can personalize your own with beautiful pressed flowers? Let your creativity bloom and create a phone case that truly reflects your unique style and personality.
FAQs
1. Can I use any type of flowers to make a pressed flower phone case?
2. How do I properly dry the flowers for the phone case?
3. What type of phone cases are suitable for a pressed flower design?
4. Can I preserve the color of the flowers on the phone case?
5. How do I ensure that the flowers are securely attached to the phone case?