
Honey bottles and honeycombs are two of the most useful items in Minecraft. You can use them as food, as cure for poison, and as crafting ingredients. However, it can be quite tedious to have to hunt for bees in the overworld and wait for their honey to be harvested. Luckily, you can easily mass produce honey bottles and honeycombs with the help of an automatic Minecraft bee farm. There are a ton of ways to design your bee farm, but in this tutorial, we’ll go over how to make a basic structure for your farm to help you get started.
Also read: How to Get Honeycomb in Minecraft without Being Attacked
Inside This Article
- What Is a Bee Farm Used For?
- What You Need to Build a Bee Farm
- How to Make a Minecraft Bee Farm
- Can You Make Your Bee Farm in Minecraft Expand Automatically?
- FAQs
What Is a Minecraft Bee Farm Used For?
If you want to mass produce honey and honeycomb in Minecraft, then a bee farm is what you need. With the honey and honeycomb you harvest from your Minecraft bee farm, you can create lots of useful items. For one, bottles of honey can be processed into honey blocks and sugar. Plus, you can also consume it to restore 6 hunger and 1.2 hunger saturation points as well as to remove any poison effects.
With honeycomb, you can create beehives, candles, and honeycomb blocks. On top of that, you can use it to wax copper blocks. This prevents the oxidation of the said blocks.
You can also use a bee farm to breed more bees. That way, you can expand your Minecraft bee farm, allowing you to produce even more honey.
What You Need to Make a Minecraft Bee Farm
To make a simple, automatic bee farm in Minecraft, you’ll need quite a lot of materials. Luckily, most of them are easy to find or craft.
- 1 beehive or bee nest
- At least 1 bee
- 1 flower or flowering azalea
- 1 grass or dirt block (if using a flower)
- 5 building blocks of any kind
- 2 slabs of any kind
- 1 dispenser
- 1 hopper
- 1 chest
- 1 redstone comparator
- 5 redstone dust
- 9 bottles or 9 shears
How to Make a Minecraft Bee Farm
Once you have all of the materials, it’s time to make your Minecraft bee farm. The great thing about this farm is that it’s completely automatic (thanks to the redstone dust and redstone comparator). Thus, once you’ve built it, all the honey and honeycomb will just be flowing in, and you won’t have to manually harvest them. Below, we break down each step to building a bee farm in Minecraft, whether you’re playing the Java or Bedrock edition.
1. Scout for a Bee Farm Location
Bees thrive anywhere in the overworld, just as long as they have flowers to get pollen from and a beehive or bee nest to take shelter. But since you’ll be providing those in your bee farm anyway, you can set up your farm practically anywhere you wish. If you want, you can build it right next to where you’ve set up base so that it’s easier to access.
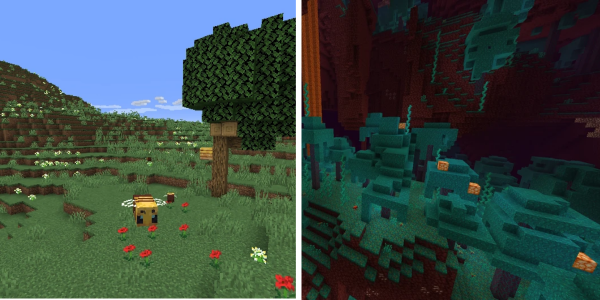
Take note, though, that bees’ productivity depends on the day-night cycle and the weather in Minecraft. They only collect pollen and work during the day, but they head home during nighttime or when it’s raining. As such, if you want to double the efficiency of your bees and harvest a lot more honey, you can consider building your bee farm in either the End or the Nether. That’s because both rain and the day-night cycle don’t exist in those dimensions. To access either of those dimensions, you will need to make an End Portal or a Nether Portal.
If you’re thinking of building your Minecraft bee farm in the Nether, the safest spot would be in the Warped Forest biome. That’s because hostile mobs don’t naturally spawn there.
2. Get Bees
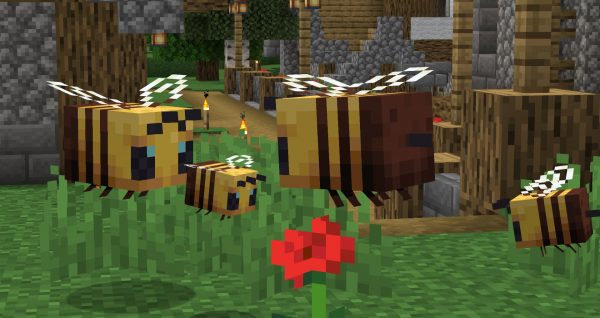
Once you’ve decided where you’ll make your Minecraft bee farm, you’ll of course need at least one bee. Bees mostly spawn in the meadows, although you’ll also find them in plains, sunflower plains, mangrove swamps, and flower forests, among other biomes. You’ll find bee nests hanging from naturally-generated birch and oak trees. If it’s daytime, though, you’ll usually find them roaming near flower patches.
You have two options for acquiring bees for your bee farm. The first is to lure them out of their bee nest and relocate them to where you’re planning to build your bee farm. If you opt for this method, though, be sure that you already have a beehive (or beehives) ready for the bees to stay in. To make a beehive, you’ll need three honeycombs and six planks (any variant). Once you have all of those materials, place three honeycombs in the middle row of the crafting grid and the six slabs in the first and second rows.
To transport the bees, you can hold up a flower to them and allow them to follow you to the beehive you’ve built. You can also attach a lead to each one of them.
The second method is to simply take the whole nest with you. This is the easier option if the bee nest is far from where you plan to build your Minecraft bee farm. However, keep in mind that you can only use a tool with Silk Touch to break a bee nest; otherwise, the bee nest won’t drop anything when broken, and you’ll anger and thus kill the bees inside it. It’s also best to take the bee nest when it’s nighttime or while it’s raining. That’s because that’s when the bees return to their nest.
3. Set Up Storage and Bee Food
Now, we’re going to move on to building the actual bee farm. To start, position a chest on the ground, and place a hopper directly above it. The chest is what will store the honey bottles and/or honeycombs, and the hopper is what will lead those products into the chest.
Then, put a flowering azalea right in front of the hopper. Or, if you’re using a flower, place a grass or dirt block in front of the hopper. After that, place the flower on top of that grass or dirt block. That will be the food source of the bees.
4. Make the Bee Chamber

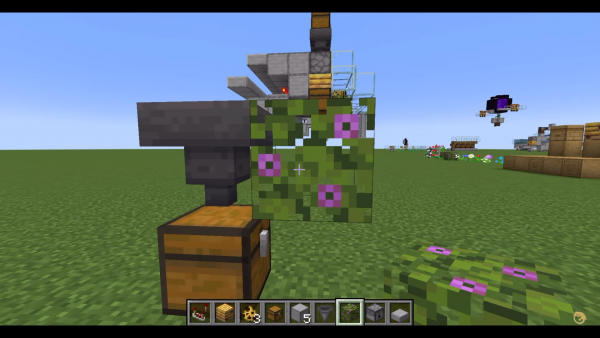
Next, use the four glass blocks to build a chamber around the flower. Start by putting down a temporary block on top of the flowering azalea or the flower. Then, place a glass block on the front, top, and both sides of the temporary block.
After that, break the temporary block, and put the bee nest in its place. Before placing it, though, make sure that it already has at least a bee in it since it would be tricky to add a bee after you’ve already placed the bee nest.
5. Add the Dispenser
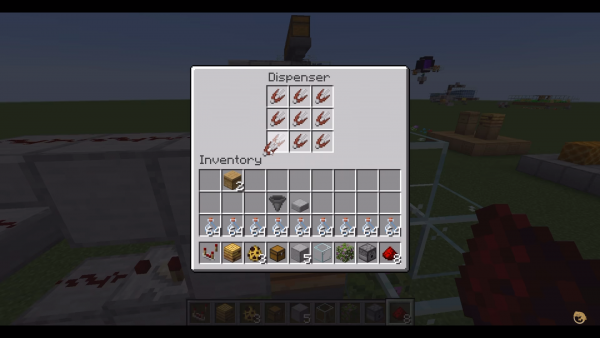
Now, you need to add a tool to the bee farm that will allow it to collect the honey and/or honeycomb for you. That’s where the dispenser comes in.
Position the dispenser right above the bee nest. When you do, make sure that it’s facing down towards the bee nest. Then, tap on it, and fill the grid with either nine shears (for collecting honeycombs) or nine glass bottles (for collecting honey).
6. Add a Redstone Mechanism
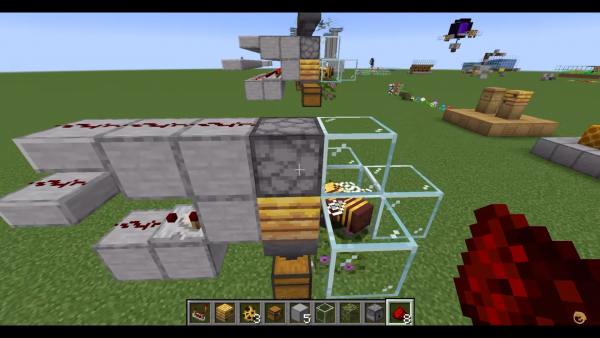
This is the step that’s going to power your Minecraft bee farm and make it automatic. To begin, place a solid block at the bee nest’s back. Then, place two solid blocks behind the dispenser.
Place a temporary block under the first solid block you put down. Next to the temporary block, place another solid block. Then, remove the temporary block. Now, select the redstone comparator, and put it on the block you just placed.
Next, place the last solid block behind the one with the redstone comparator. Put a temporary block on top of the last one you placed, and place a slab next to it. Remove the temporary block, and place another slab next to the block above the comparator, as pictured above. Now, place one unit of redstone dust on each of the blocks and slabs connecting the comparator to the dispenser.
And that’s your automatic Minecraft bee farm done!
7. Collect Honey Bottles and/or Honeycombs
Now that you’re done building your Minecraft bee farm, all that’s left to do is wait for the bees to make enough honey and honeycombs for you to collect. You’ll know it’s time to harvest when all five redstone dust light up. When that happens, simply open the chest, and get all the honey bottles and/or honeycombs from it.
Can You Make Your Bee Farm in Minecraft Expand Automatically?
Once you have enough materials, you’ll probably want to expand your farm. Sadly, there’s no way to make your Minecraft bee farm expand automatically. However, it is easy to do so manually. All you need to do is add more bees and bee nests or beehives. Of course, with every bee you add to your farm, you’ll have to replicate the structure that we showed you above. Also, note that you don’t need to transport bees from their nest to your farm every time you want to add a bee to the system. You can breed the bees you already have by feeding them a flower.
You’re free to redesign the bee farm when you expand it. Just make sure that you have the basic components — food and shelter for the bee, storage space for the bee products, and the redstone mechanism to automatically harvest the products.
FAQs
Enjoy Honey from Your New Bee Farm Today
Just like bees in a real bee farm, Minecraft bees yield honey that is useful for creating many other products. Making a bee farm for automatic honey collection might be easier in the game, though. You only need to place some blocks here and there, as you now know. With this bee farm guide, you can enjoy fast production of honey products today!