
Using a screen protector is a fantastic way to keep your smartphone’s display safe from scratches, smudges, and fingerprints. However, there might come a time when you need to reapply a screen protector. Whether you’re looking to replace a damaged one or simply upgrade to a better option, knowing how to properly reapply a screen protector is crucial.
In this article, we will guide you step by step on how to reapply a screen protector with ease. We will provide you with tried and tested tips, techniques, and recommendations to ensure a seamless installation process. By the end of this article, you’ll be equipped with the knowledge and confidence needed to successfully reapply your screen protector without any hassle.
Inside This Article
- Choosing the Right Screen Protector
- Removing the old screen protector
- Preparing the screen for reapplication
- Choosing the right screen protector
- Conclusion
- FAQs
Choosing the Right Screen Protector
When it comes to protecting your valuable smartphone screen, a screen protector is an essential accessory. However, with so many options available in the market, it can be overwhelming to choose the right one. In this article, we will guide you on how to choose the right screen protector for your device.
1. Material: The first thing to consider is the material of the screen protector. The two most common options are tempered glass and plastic film. Tempered glass protectors provide better impact resistance and a smoother touch experience. On the other hand, plastic film protectors are more flexible and offer better compatibility with curved screens. Consider your specific needs to decide which material is best for you.
2. Thickness: The thickness of the screen protector can affect the touch sensitivity and visibility of your device. Thicker protectors provide more protection against scratches and cracks, but they may impact the sensitivity of the touchscreen. Thinner protectors offer a smoother touch experience but may not provide the same level of durability. Strike a balance between protection and functionality based on your preferences.
3. Clarity: Look for a screen protector that offers high transparency and clarity. A good screen protector should not blur or dim the screen, ensuring that you can enjoy the vibrant colors and sharpness of your display. Anti-glare and matte options are also available for those who prefer reduced screen reflections and improved visibility under bright conditions.
4. Edge Coverage: Consider the level of edge coverage offered by the screen protector. Full coverage protectors provide protection for the entire screen, including the curved edges, while partial coverage protectors leave the edges exposed. Full coverage protectors offer better protection against accidental drops and impacts, but they may be slightly more challenging to install.
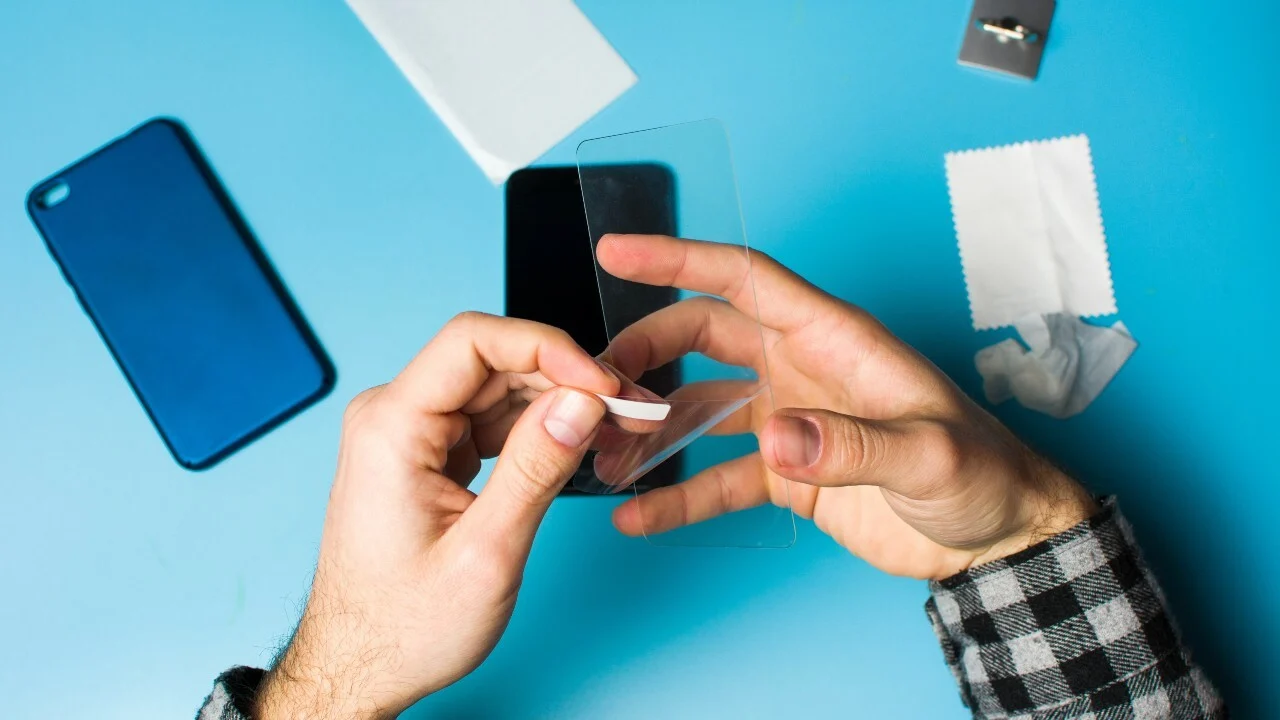
5. Installation: Look for a screen protector that is easy to install without air bubbles or dust. Some protectors come with installation kits or guides to ensure a perfect fit. Additionally, consider if the screen protector is reusable and can be easily removed without leaving any residue on the screen.
6. Compatibility: Check if the screen protector is specifically designed for your device model. While some protectors offer universal compatibility, others are designed to fit specific smartphone models perfectly. Make sure to choose one that is compatible with your device to ensure a proper fit and functionality.
7. Brand and Reviews: Consider purchasing a screen protector from a reputable brand known for producing high-quality accessories. Read reviews and ratings from other customers to get insights into the performance and durability of the screen protector. This information can help you make an informed decision.
By considering these factors, you can choose the right screen protector that meets your needs and provides optimal protection for your smartphone display. Remember, investing in a high-quality screen protector is a small price to pay compared to the cost of replacing a damaged phone screen.
Removing the old screen protector
Over time, screen protectors can get scratched, worn out, or may start to bubble, affecting the clarity of your device’s display. In such cases, it is necessary to remove the old screen protector before applying a new one. Here are some steps to help you effectively remove your old screen protector:
- Prepare a clean, well-lit workspace: Find a clean and well-lit area where you can comfortably work on removing the old protector. Make sure you have a microfiber cloth and some adhesive tape handy.
- Power off your device: To avoid accidental actions on your device while removing the screen protector, it’s best to power it off completely. This also helps you see the screen more clearly without any distractions.
- Use the adhesive tape: Take a piece of adhesive tape and gently press it against one corner of the screen protector. Ensure that the tape covers the entire corner and has a good grip on it.
- Peel off the screen protector: Slowly lift the tape, taking the corner of the screen protector along with it. Be patient and gentle while peeling off the protector to prevent any damage to your device’s screen. If the protector doesn’t come off easily, try applying more tape to another corner and repeat the process.
- Clean the screen: Once the old screen protector is completely removed, use a microfiber cloth to carefully wipe away any adhesive residue or dust particles that may have accumulated. Make sure the screen is clean and free from any debris before proceeding.
- Inspect for any damage: Take a close look at your device’s screen to ensure that there are no scratches or cracks. If you notice any damage, you may need to consider getting your screen repaired before applying a new protector.
By following these steps, you can safely and effectively remove your old screen protector and prepare your device for the application of a new one.
Preparing the screen for reapplication
Before applying a new screen protector, it is crucial to properly prepare the screen to ensure optimal adherence and a bubble-free installation. Here are the steps to follow:
- Remove any residue: Start by gently wiping the screen with a microfiber cloth to remove any dust, fingerprints, or residue from the previous screen protector. Make sure to clean the corners and edges of the screen thoroughly.
- Use a cleaning solution: If there are stubborn marks or smudges on the screen, you can dampen the microfiber cloth with a small amount of screen cleaning solution or isopropyl alcohol. Avoid spraying the solution directly onto the screen to prevent any liquid damage. Instead, apply it to the cloth and wipe the screen gently.
- Dry the screen: After cleaning, allow the screen to air dry for a few seconds. You can also use a dry microfiber cloth to pat the screen gently and ensure it is completely dry before proceeding.
- Remove any leftover adhesive: If the previous screen protector had adhesive residue, you can use a piece of clear tape to gently lift and remove it. Press the tape against the residue and lift it off the screen. Repeat this process until all the residue is removed.
- Inspect for scratches or cracks: Take a close look at the screen to check for any scratches or cracks. If there are any, it’s important to address them before applying the new screen protector. Consider getting the screen repaired or replacing it if necessary.
By following these steps, you will ensure that your screen is clean, smooth, and ready for the reapplication of a new screen protector. This preparation process plays a vital role in ensuring a seamless and long-lasting installation.
Choosing the right screen protector
When it comes to protecting your valuable device, a screen protector is an essential accessory. But with so many options available, how do you choose the right one? Here are a few factors to consider:
- Type of screen protector: There are various types of screen protectors, such as tempered glass, plastic film, and liquid. Each has its own set of advantages and disadvantages. Tempered glass offers excellent protection against scratches and impact, while plastic film protectors are more affordable and easier to apply. Liquid screen protectors provide an invisible layer of protection.
- Compatibility: Make sure the screen protector you choose is compatible with your specific device model. Some protectors are designed specifically for popular smartphones or tablets, while others offer universal compatibility.
- Thickness and clarity: Consider the thickness of the screen protector and how it will affect touch sensitivity and display clarity. Thicker protectors provide more protection but may impact touchscreen functionality, while thinner ones offer a more responsive experience.
- Additional features: Some screen protectors come with additional features like anti-glare coating, anti-fingerprint technology, or blue light filtering. These can enhance the usability and functionality of your device.
- User reviews and ratings: Before making a purchase, check out reviews and ratings of different screen protectors. This will give you insights into the experiences of other users and help you make an informed decision.
By considering these factors, you can choose a screen protector that suits your needs and provides the best possible protection for your mobile device.
Conclusion
In conclusion, knowing how to properly reapply a screen protector is essential for maintaining the clarity and protection of your device’s screen. By following the steps outlined in this article, you can ensure a smooth and bubble-free application every time. Remember to thoroughly clean your screen, align the protector carefully, and apply it with gentle pressure to avoid any air pockets or debris getting trapped. Additionally, consider investing in high-quality screen protectors that offer advanced features such as anti-glare and fingerprint resistance for an enhanced user experience. By regularly replacing your screen protector and keeping your device’s screen in optimal condition, you can enjoy a crystal-clear display and increased durability, ultimately prolonging the lifespan of your beloved mobile device. So, don’t hesitate to take the time and effort to reapply that screen protector, as it can make a world of difference in preserving the beauty and functionality of your phone or tablet.
FAQs
1. Why should I reapply a screen protector?
Reapplying a screen protector is important to maintain the clarity and protection of your device’s screen. Over time, screen protectors can become scratched, smudged, or worn out, compromising their effectiveness in shielding your screen from daily wear and tear. By reapplying a fresh screen protector, you can ensure optimal visibility and protection for your device.
2. How often should I reapply a screen protector?
The frequency of reapplying a screen protector depends on several factors, including the quality of the screen protector, your usage patterns, and the level of protection you desire. As a general guideline, it is recommended to replace the screen protector every 6 to 12 months or whenever you notice significant damage or decrease in clarity.
3. What tools do I need to reapply a screen protector?
To reapply a screen protector, you will typically need a microfiber cloth, screen cleaning solution, and a card or squeegee for smoothing out any air bubbles. Some screen protectors may come with additional tools or accessories specific to their installation process. It’s always a good idea to refer to the manufacturer’s instructions for the specific screen protector you are using.
4. How do I prepare the screen before reapplying a protector?
Before reapplying a screen protector, it’s important to ensure that the screen is clean and free from any dust, fingerprints, or debris. Use a microfiber cloth and screen cleaning solution to gently wipe away any smudges or marks. Make sure to clean the edges and corners of the screen as well. A clean and dry screen will help the new screen protector adhere properly.
5. What is the process of reapplying a screen protector?
The process of reapplying a screen protector may vary depending on the type of screen protector and the device you are using. However, in general, it involves the following steps:
– Clean the screen thoroughly with a microfiber cloth and screen cleaning solution.
– Peel off the backing from the new screen protector.
– Align the screen protector with the screen and carefully apply it, starting from one edge and gradually smoothing it down.
– Use a card or squeegee to remove any air bubbles and ensure a smooth, bubble-free application.
– Finally, gently press down on the edges of the screen protector to ensure it is securely adhered to the device’s screen.
Remember to follow the specific instructions provided by the manufacturer of your screen protector for the best results.