
If you own a Lenovo laptop and are facing power-related issues or want to replace the battery, knowing how to remove the battery can be extremely helpful. Lenovo laptops are known for their durability and performance, and being able to remove the battery properly ensures smooth operations and maintenance. In this guide, we will walk you through the step-by-step process of removing the battery from your Lenovo laptop. Whether you are a tech-savvy individual or a beginner, our instructions are easy to follow and will enable you to safely remove the battery without causing any damage to your laptop. So, let’s get started and learn how to remove the battery from your Lenovo laptop.
Inside This Article
- Overview
- Step 1: Powering off the laptop
- Step 2: Locating the battery compartment
- Step 3: Removing the battery latch
- Step 4: Removing the battery
- Conclusion
- FAQs
Overview
Removing the battery from a Lenovo laptop may become necessary for a variety of reasons. Whether you need to replace a faulty battery or perform maintenance on your device, knowing how to safely remove the battery is essential. In this article, we will guide you through the step-by-step process of removing the battery from a Lenovo laptop.
Lenovo laptops are known for their high-quality build and durability, and their battery removal process is designed to be simple and straightforward. By following the instructions outlined in this guide, you can safely remove the battery from your Lenovo laptop without causing any damage to the device.
Before we dive into the detailed steps, it’s essential to note that if your laptop is still under warranty, it is recommended to reach out to Lenovo’s customer support or consult the manufacturer’s guidelines. This will ensure that you are following the proper procedure and not voiding any warranty coverage.
Now, let’s proceed with the step-by-step instructions on how to remove the battery from your Lenovo laptop.
Step 1: Powering off the laptop
Before you can remove the battery from your Lenovo laptop, it is important to ensure that the device is completely powered off. This step is crucial to avoid any risk of damage to the system or potential data loss. Follow the instructions below to safely power off your laptop:
1. Save your work: Make sure you save any open files or documents that you are currently working on. This will prevent any unsaved changes from being lost.
2. Close all applications: Close any open programs or applications running on your laptop. This will ensure that there are no active processes that could be interrupted during the shutdown process.
3. Disconnect peripherals: If you have any external devices connected to your laptop, such as a mouse, keyboard, or external hard drive, safely disconnect them before proceeding with the shutdown process.
4. Click on the “Start” menu: In the bottom-left corner of your screen, you will find the “Start” menu icon. Click on it to access the shutdown options.
5. Select “Power” or “Shutdown”: Once you have clicked on the “Start” menu, you will see a list of options. Select either “Power” or “Shutdown” to initiate the shutdown process.
6. Wait for the laptop to shut down: After selecting the shutdown option, wait for your laptop to fully power off. You may see a screen with a message indicating that the laptop is shutting down.
7. Ensure the laptop is no longer running: To confirm that your laptop is completely powered off, check that the screen is blank, there are no lights indicating activity, and there is no fan or drive noise.
By following these steps, you can safely power off your Lenovo laptop before proceeding to remove the battery. It is important to take your time and ensure that the shutdown process is completed properly to avoid any potential issues.
Step 2: Locating the battery compartment
Once you’ve powered off your Lenovo laptop, the next step is to locate the battery compartment. Depending on the model and design of your laptop, the battery compartment can be located in different areas.
The most common placement for the battery compartment is on the bottom of the laptop. To find it, flip your laptop over and examine the underside. Look for a latched door or a panel that can be easily removed.
If you don’t see the battery compartment on the bottom, check the sides or the back of your laptop. Sometimes, manufacturers incorporate the battery compartment into the side or back of the laptop for a sleeker design.
Another way to locate the battery compartment is by referring to the user manual that came with your laptop. The manual will provide detailed instructions on how to access the battery compartment specific to your laptop model.
It’s important to note that the battery compartment may vary in appearance across different Lenovo laptop models. Some laptops may have a removable battery that can be easily accessed, while others may have a built-in battery that requires additional dismantling.
Once you have located the battery compartment, you are ready to proceed to the next step of removing the battery. Make sure to follow the instructions carefully to avoid damaging your laptop or voiding the warranty.
Step 3: Removing the battery latch
Once you have located the battery compartment on your Lenovo laptop, the next step is to remove the battery latch. The battery latch is a small mechanism that holds the battery in place and prevents it from sliding out unintentionally.
To remove the battery latch, you will need to look for a small release switch or lever. This switch can usually be found near the bottom of the laptop, close to the edge of the battery compartment. It may be labeled with a battery symbol, making it easier to identify.
Before pressing or sliding the release switch, ensure that you have powered off your laptop and disconnected any external power sources. This is crucial for safety reasons and to prevent any potential damage to your laptop or the battery itself.
Once you have confirmed that your laptop is powered off and unplugged, gently press or slide the release switch. You may need to apply a bit of force, but be careful not to use excessive pressure as it may cause damage to the latch or surrounding components.
As you activate the release switch, you will feel or hear a click. This indicates that the latch has been disengaged and is ready to be lifted. Take your time in this step and ensure that the latch is fully released before attempting to remove the battery.
With the latch disengaged, you can proceed to the next step of removing the battery from your Lenovo laptop. Keep the laptop in a stable position, with one hand supporting the laptop and the other hand positioned to safely lift the battery out of the compartment.
Remember to handle the battery with care, as it can be fragile and sensitive to static electricity. It is recommended to grip the battery from the sides, near the middle, to ensure a secure hold while removing it.
Slide the battery out gently and steadily, making sure to keep it level throughout the process. Avoid any sudden movements or tilting that could cause the battery to slip out of your grasp or potentially damage any connectors.
Once the battery is fully removed, set it aside in a safe and dry location. If you plan to replace the battery, make sure to store it properly, following the manufacturer’s instructions. If you are not replacing the battery, be sure to dispose of it responsibly, in accordance with local regulations.
With the battery latch successfully removed and the battery safely out of the compartment, you are now ready to proceed to the next step: removing the battery from your Lenovo laptop.
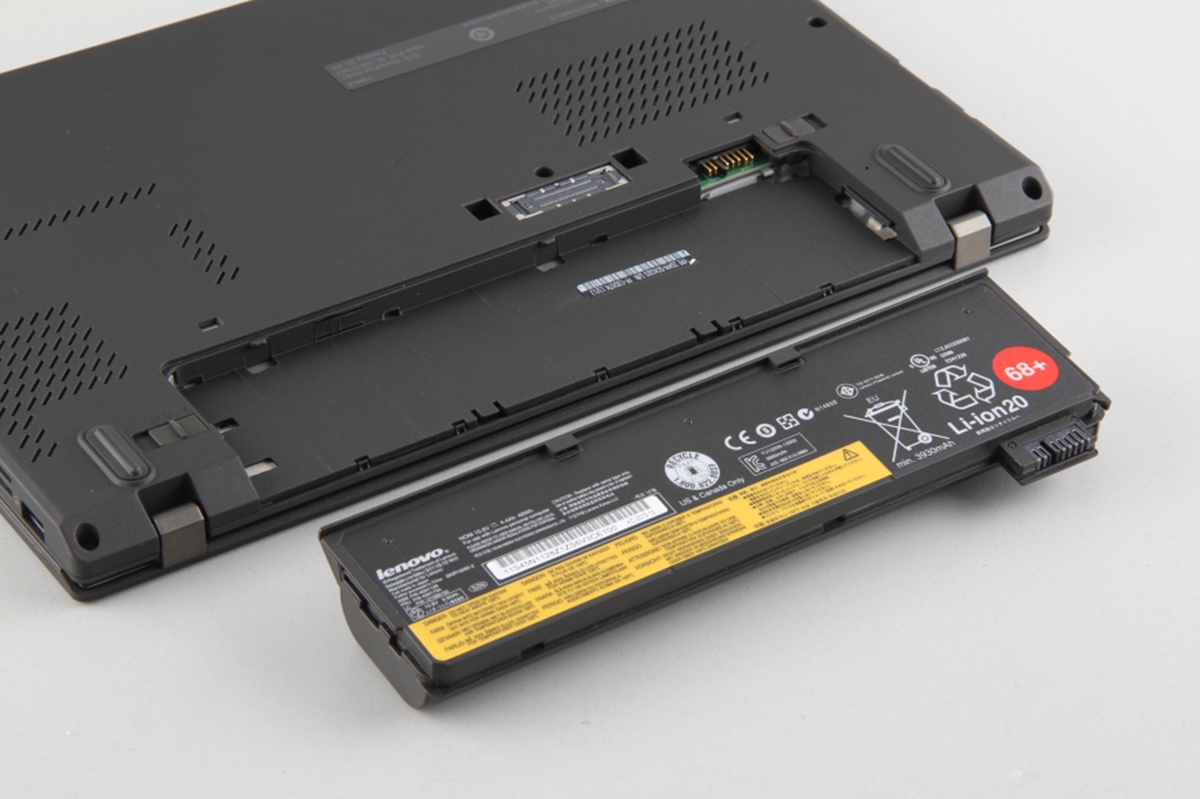
Step 4: Removing the battery
Now that you have successfully located the battery compartment and removed the battery latch, it’s time to remove the battery itself. Here’s how to do it:
1. Before you begin, make sure that the laptop is powered off and disconnected from any external power source.
2. Take a look at the battery compartment and locate the release mechanism. This can vary depending on the model of your Lenovo laptop. It may be a simple sliding mechanism, a latch, or even a button that needs to be pressed.
3. Once you have identified the release mechanism, gently press or slide it in the designated direction. You may need to use a small tool like a flat-head screwdriver or a paperclip to assist you in releasing the battery.
4. As you press or slide the release mechanism, you will feel the battery becoming partially detached from its slot. Now, it’s time to remove the battery completely.
5. Carefully lift the battery out of its slot using your fingers or the small tool you used to release it. Be cautious not to apply excessive force or damage any components inside the laptop.
6. Once the battery is completely out, inspect it for any signs of damage or defects. If you notice any issues, it’s advisable to contact Lenovo support or a professional technician for further assistance.
7. If the battery appears to be in good condition, you can either replace it with a new one or leave it out if you plan to use the laptop while connected to a power source.
8. If you are replacing the battery, make sure to align it properly with the battery slot. Gently push the battery into place until you hear a click or feel it secure in the slot.
9. Finally, close the battery compartment cover and ensure that it is properly secured. You can now reconnect the laptop to its power source and power it on.
Removing the battery from your Lenovo laptop can be a simple task if you follow these steps carefully. Remember to exercise caution and take your time to avoid any damage to the laptop or the battery itself.
Now that you have successfully removed the battery, you can either replace it with a new one or continue using the laptop while connected to a power source.
Conclusion
In conclusion, learning how to remove the battery from your Lenovo laptop is an important skill that can come in handy in various situations. Whether you need to replace a faulty battery, clean your laptop’s internals, or perform a hard reset, knowing the proper way to remove the battery is crucial.
Throughout this article, we have discussed the step-by-step process of removing the battery from different Lenovo laptop models. We have also addressed common concerns and provided helpful tips to ensure a safe and successful battery removal.
Remember, always follow the manufacturer’s instructions and take necessary precautions when handling electronic components. Removing the battery incorrectly can lead to damage to your laptop or even injury. If you are unsure or uncomfortable about removing the battery on your own, it is best to consult a professional technician.
By following the guidelines outlined in this article, you can confidently remove the battery from your Lenovo laptop whenever the need arises. Properly maintaining and taking care of your laptop’s battery will not only extend its lifespan but also optimize your overall computing experience.
FAQs
Q: How do I remove the battery from my Lenovo laptop?
A: To remove the battery from your Lenovo laptop, follow these steps:
- Flip the laptop over so that the bottom is facing up.
- Locate the battery release latches or buttons on either side of the battery.
- Press and hold the latch or button while simultaneously pulling the battery outwards.
- The battery should slide out of its compartment easily.
Q: Why would I need to remove the battery from my Lenovo laptop?
A: There are several reasons why you may need to remove the battery from your Lenovo laptop. Some common scenarios include:
- Performing a hardware reset.
- Replacing a faulty or worn-out battery.
- Resolving issues related to power management or charging.
- Transporting the laptop without the battery to reduce weight.
Q: Can I remove the battery while my Lenovo laptop is turned on?
A: It is generally recommended to shut down your Lenovo laptop before removing the battery. Removing the battery while the laptop is still powered on can lead to unexpected shutdowns and potential data loss. To avoid any risks, it is best to power off your laptop before removing or inserting the battery.
Q: How can I check the health of the battery in my Lenovo laptop?
A: To check the health of the battery in your Lenovo laptop, you can use the built-in utility called “Lenovo Vantage” (previously known as “Lenovo Settings”). This utility provides information about the battery’s current charge level, cycle count, and health status. Simply launch the Lenovo Vantage application, go to the “Hardware Settings” or “Power” section, and look for the battery information.
Q: Can I use my Lenovo laptop without the battery?
A: Yes, you can use your Lenovo laptop without the battery by directly connecting it to a power source using the AC adapter. However, keep in mind that if the power source is interrupted or disconnected, your laptop will instantly turn off as there won’t be any backup power supply from the battery. Additionally, using the laptop without a battery may limit your mobility and flexibility as you’ll always need to be near a power outlet.