
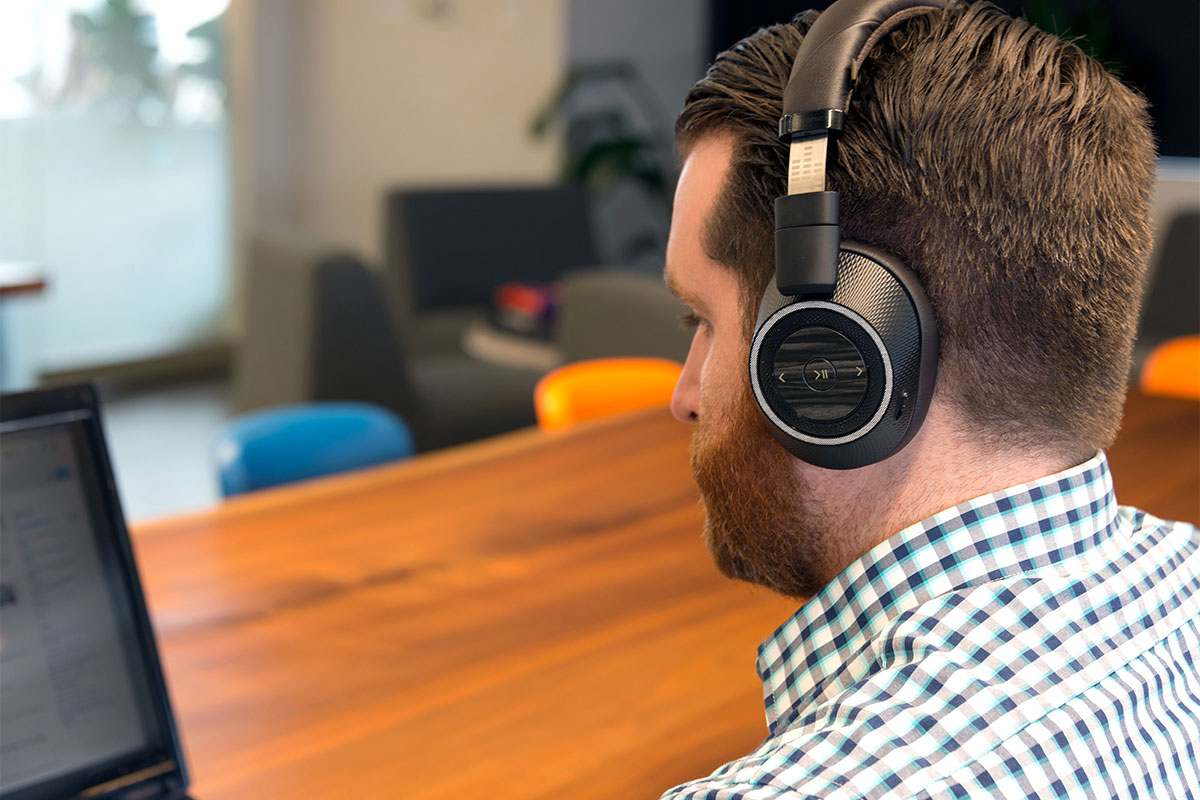
The Plantronics headset is one of the top choices for professionals and individuals looking for high-quality audio and convenience. Whether you’re using it for business or personal purposes, setting up your Plantronics headset to your computer is essential to fully enjoy its features. By following a few simple steps, you can ensure a seamless connection between your headset and computer, allowing you to make calls, listen to music, or participate in online meetings with ease. In this article, we will guide you through the process of setting up your Plantronics headset to your computer, providing you with step-by-step instructions and troubleshooting tips along the way. Get ready to experience crystal-clear sound and hassle-free communication by following our comprehensive guide on how to set up your Plantronics headset to your computer.
Inside This Article
- Overview
- Step 1: Gathering the necessary equipment
- Step 2: Connecting the Plantronics headset to your computer
- Step 3: Adjusting audio settings on your computer
- Step 4: Testing the Plantronics headset
- Troubleshooting common issues
- Conclusion
- FAQs
Overview
Setting up a Plantronics headset to your computer not only allows for convenient and hands-free communication but also enhances your audio experience. Whether you’re using it for work, gaming, or simply making calls, configuring your Plantronics headset correctly is essential for optimal performance. In this article, we’ll guide you through the process step-by-step to ensure a seamless setup. Let’s get started!
Before we dive into the setup process, it’s important to gather the necessary equipment. Firstly, make sure you have your Plantronics headset and its corresponding USB adapter or Bluetooth dongle, depending on the model you own. Additionally, ensure that your computer is powered on and has an available USB port or supports Bluetooth connectivity.
Once you have all the equipment ready, the next step is to connect your Plantronics headset to your computer. If your headset uses a USB interface, simply plug the USB adapter into an available USB port on your computer. Windows or macOS will automatically detect the device and install any necessary drivers. If your headset is Bluetooth-enabled, make sure your computer’s Bluetooth functionality is turned on, then pair the headset with your computer by following the manufacturer’s instructions.
After connecting your Plantronics headset to your computer, you’ll need to adjust the audio settings to ensure proper functionality. On Windows, right-click the speaker icon in the system tray, then select “Open Sound Settings.” Under the “Output” section, select your Plantronics headset as the default audio device. On macOS, click the Apple menu, then go to “System Preferences” and select “Sound.” Choose your Plantronics headset as the output device under the “Output” tab.
With the audio settings correctly adjusted, it’s time to test your Plantronics headset. Open any media player or communication application, such as Skype or Zoom, and make a test call or play a song. Ensure that the audio output is routed through your headset and that the microphone is picking up your voice accurately. If you encounter any issues, refer to the troubleshooting section below for potential solutions.
Now that you’ve successfully set up your Plantronics headset to your computer, you can enjoy crystal-clear audio and seamless communication. Whether you’re attending virtual meetings, gaming with friends, or simply listening to music, your Plantronics headset will enhance your overall experience. Remember to adjust the volume and microphone settings to your preference and enjoy your newfound hands-free communication freedom!
If you’re experiencing any issues during the setup process or encountering problems with your Plantronics headset, refer to the troubleshooting section to resolve common issues. If the problem persists, reach out to Plantronics customer support for further assistance.
With the setup process completed, you can now fully utilize the capabilities of your Plantronics headset on your computer. Enjoy the convenience, comfort, and enhanced audio experience it brings to your daily tasks!
Step 1: Gathering the necessary equipment
In order to set up your Plantronics headset with your computer, you will need to gather a few essential pieces of equipment. These items will ensure a smooth and hassle-free connection between your headset and computer. Here are the items you will need:
- Plantronics headset: Choose a Plantronics headset model that suits your needs. Whether it’s a wired or wireless headset, make sure it is compatible with your computer.
- Computer: Make sure you have a functioning computer that supports audio input and output. This can be a desktop, laptop, or any device with a USB or audio jack.
- USB adapter (if required): Some Plantronics headsets require a USB adapter to connect to the computer. Check the documentation that comes with your headset to see if you need an adapter.
- Audio cables (if required): Depending on the model of your Plantronics headset, you may need audio cables to connect it to your computer. These could be standard 3.5mm audio cables or specialized cables included with your headset.
- Software or drivers (if required): Certain Plantronics headsets may require specific software or drivers to be installed on your computer. Check the documentation to see if you need to download any additional software.
Gathering these necessary items beforehand will save you time and make the setup process much easier. Once you have everything ready, you can move on to the next step of connecting your Plantronics headset to your computer.
Step 2: Connecting the Plantronics headset to your computer
Now that you have gathered all the necessary equipment, it’s time to connect your Plantronics headset to your computer. Follow these simple steps to ensure a seamless setup:
1. Locate the USB port or audio jack on your computer. Depending on the model of your Plantronics headset, you will either connect it via USB or through the audio jack. USB is the most common method, and it provides a digital connection for better audio quality.
2. If your Plantronics headset has a USB connector, simply plug it into an available USB port on your computer. Make sure to insert it firmly for a secure connection. If your headset uses an audio jack, locate the audio input/output port on your computer. It is usually color-coded as green or has a headphone icon.
3. Connect the audio connector on the Plantronics headset to the corresponding audio input/output port on your computer. Again, ensure a secure connection by gently pushing in the connector until you feel it click into place.
4. Some Plantronics headsets have an inline control module that provides additional functionality like volume control, microphone mute, and call answer/end. If your headset has this feature, plug the control module into the USB port or audio jack on your computer, depending on the headset’s connection method.
5. Once the headset is connected, your computer should recognize it. It may prompt you to install the necessary drivers, so make sure you follow any on-screen instructions for driver installation. This step is crucial for the proper functioning of your Plantronics headset.
6. Finally, adjust the position of the headset’s microphone to ensure optimal sound quality during calls or recordings. The microphone should be positioned close to your mouth, but not touching it, to capture your voice clearly.
That’s it! You have successfully connected your Plantronics headset to your computer. Take a moment to test the audio by playing a sound or making a call to ensure everything is working as expected. If you encounter any issues, don’t worry, we will address common troubleshooting steps later in this article.
Step 3: Adjusting audio settings on your computer
After connecting your Plantronics headset to your computer, the next important step is to adjust the audio settings to ensure optimal sound quality. Follow these steps to adjust the audio settings on your computer:
1. Open the sound settings: Go to the Control Panel on your computer and click on “Sound” or “Audio Devices and Sound” to access the sound settings.
2. Select the Plantronics headset as the default playback device: In the sound settings window, navigate to the “Playback” tab. Look for the Plantronics headset from the list of available audio devices and right-click on it. Choose “Set as Default Device” from the context menu.
3. Adjust the volume levels: Once the Plantronics headset is set as the default playback device, you can adjust the volume levels. Click on the Plantronics headset in the list of playback devices and click on the “Properties” button. In the properties window, go to the “Levels” tab. Here, you can adjust the volume slider to your desired level. It is recommended to keep it at a moderate level to prevent any damage to your hearing.
4. Enable noise cancellation (if available): Some Plantronics headsets come with built-in noise cancellation features. To enable this, go to the “Enhancements” tab in the properties window. Look for options like “Noise Cancellation” or “Acoustic Echo Cancellation” and check the box to enable them. These features can significantly improve the audio quality during calls or while listening to music.
5. Test the audio: To ensure that the audio settings are properly adjusted, it is advisable to test the Plantronics headset. Play some audio or make a test call to check if the sound is clear and if you can hear and be heard without any issues. If there are any problems, go back to the sound settings and make any necessary adjustments.
Remember, the audio settings may vary depending on the operating system and computer model you are using. It’s always a good idea to consult the user manual or visit the manufacturer’s website for specific instructions tailored to your device.
By following these steps and adjusting the audio settings on your computer, you can ensure that your Plantronics headset delivers an immersive and high-quality audio experience.
Step 4: Testing the Plantronics headset
After completing the setup process for your Plantronics headset on your computer, it’s time to test its functionality. Testing the headset will ensure that everything is properly connected and configured, allowing you to make and receive calls with clear audio quality.
Here are a few steps you can follow to test your Plantronics headset:
- Make a test call: Begin by making a test call using a communication application or software such as Skype or Zoom. Dial a friend or family member’s number to ensure you can hear their voice clearly through the headset. You can also ask them to provide feedback on the audio quality.
- Adjust the headset volume: During the test call, pay attention to the volume level of the headset. Use the volume controls on the headset itself or adjust the volume settings on your computer to achieve a comfortable sound level.
- Test the microphone: To check if your microphone is working correctly, speak into it and ask the person on the other end of the call if they can hear you clearly. Adjust the microphone sensitivity or boost settings if necessary, ensuring it picks up your voice without any distortion or background noise.
- Check for any audio issues: During the test call, listen for any audio issues like crackling sounds, static, or distortion. These issues can be indicative of a connectivity problem or improper audio settings. Troubleshoot by reconnecting the headset or adjusting the audio settings on your computer.
- Test different features: If your Plantronics headset has additional features such as mute or call answering buttons, test them to ensure they are functioning properly. Try muting and unmuting the microphone or answering an incoming call using the headset features.
By following these steps, you can ensure that your Plantronics headset is working as expected and provides you with a seamless communication experience. If you encounter any issues during the testing process, refer to the troubleshooting section or contact Plantronics customer support for assistance.
Troubleshooting common issues
Despite your best efforts, there may be times when you encounter issues while setting up your Plantronics headset with your computer. Don’t worry, as these issues can usually be resolved with a few simple troubleshooting steps. Here are some common issues that you may come across and how to troubleshoot them:
1. No sound from the headset:
If you’re not hearing any sound from your Plantronics headset, the first thing to check is the audio settings on your computer. Ensure that the correct playback device is selected and that the volume is turned up. You may also want to check if the headset is properly connected to the computer’s audio port.
2. Poor audio quality:
If you’re experiencing poor audio quality, such as crackling or distorted sound, try adjusting the audio settings on your computer. Make sure that the audio drivers are up to date and that there are no conflicting audio settings. Additionally, check for any physical obstructions or damage to the headset that could affect the audio quality.
3. Bluetooth connectivity issues:
If you’re using a wireless Plantronics headset and experiencing Bluetooth connectivity issues, ensure that the headset is paired correctly with your computer. Delete any previous pairings and try pairing the headset again. Also, make sure that there are no other devices interfering with the Bluetooth signal, such as other nearby devices or wireless routers.
4. Microphone not working:
If the microphone on your Plantronics headset is not working, check the microphone settings on your computer. Ensure that the correct input device is selected and that the microphone is not muted. You may also want to inspect the microphone for any physical damage or debris that could be blocking the sound input.
5. Compatibility issues:
In some cases, compatibility issues may arise between your Plantronics headset and your computer. Make sure that the headset is compatible with your computer’s operating system and that you have the necessary drivers installed. Check the Plantronics website for any firmware updates or compatibility information that may be available.
If you’ve tried troubleshooting these common issues and are still unable to resolve the problem, it may be necessary to contact Plantronics customer support for further assistance. They will be able to provide you with specific troubleshooting steps based on your headset model and computer setup.
Conclusion
Setting up a Plantronics headset to your computer is a relatively simple process that can greatly enhance your audio experience. Whether you use it for work, gaming, or simply to enjoy your favorite music, a Plantronics headset provides excellent sound quality and comfort.
By following the step-by-step guide provided in this article, you can easily connect your Plantronics headset to your computer and start optimizing your audio settings. Remember to ensure that your headset is properly connected, that you have the correct drivers installed, and that you configure the audio settings to match your preferences.
With a Plantronics headset, you can enjoy crystal-clear audio, enhanced communication, and immersive gaming experiences. Take the time to personalize your settings and explore the various features offered by your headset to truly get the most out of your experience.
So go ahead, connect your Plantronics headset to your computer, and enter a world of superior audio quality and unparalleled comfort. Elevate your multimedia experience and enjoy every sound with precision and clarity!
FAQs
1. How do I set up a Plantronics headset to my computer?
To set up a Plantronics headset to your computer, follow these steps:
- First, ensure that your Plantronics headset is properly charged.
- Connect the USB adapter to an available USB port on your computer.
- Turn on your headset by pressing and holding the power button until the LED light starts flashing.
- On your computer, go to the Bluetooth settings and select “Add Device” or “Pairing”.
- Wait for your computer to detect the Plantronics headset and follow the on-screen instructions to complete the pairing process.
- Once the pairing is successful, you can start using your Plantronics headset with your computer.
2. Can I connect my Plantronics headset to multiple devices?
It depends on the model of your Plantronics headset. Some models support multipoint connectivity, which allows you to connect the headset to multiple devices simultaneously, such as your computer, smartphone, and tablet. However, not all Plantronics headsets have this feature, so it’s important to check the specifications of your headset before attempting to connect it to multiple devices.
3. How do I adjust the volume on my Plantronics headset?
To adjust the volume on your Plantronics headset, you can use the volume control buttons located on the headset itself. Typically, there are dedicated buttons labeled with “+” and “-” symbols that allow you to increase or decrease the volume. Alternatively, you can also adjust the volume from your computer’s audio settings by clicking on the volume icon in the system tray and adjusting the volume slider.
4. Can I use a Plantronics headset with my mobile phone?
Yes, most Plantronics headsets are compatible with mobile phones. You can connect your Plantronics headset to your mobile phone via Bluetooth. Simply put your Plantronics headset in pairing mode, enable Bluetooth on your phone, and search for the headset. Once the headset is detected, follow the on-screen instructions to complete the pairing process. Once paired, you can use your Plantronics headset to make and receive calls on your mobile phone.
5. How do I clean and maintain my Plantronics headset?
To clean and maintain your Plantronics headset, follow these tips:
- Regularly wipe the surface of the headset with a soft cloth or tissue to remove dirt and oil smudges.
- Avoid using harsh cleaning agents or solvents as they may damage the headset.
- If the ear cushions or ear tips are removable, clean them with a mild soap solution and rinse them thoroughly. Allow them to air dry before reattaching them to the headset.
- Store your Plantronics headset in a clean and dry place when not in use, preferably in a protective case or pouch.
By following these maintenance tips, you can ensure the longevity and performance of your Plantronics headset.