
Are you looking to up your photography game? One essential tool that can greatly enhance your photos is a ring light. A ring light is a circular-shaped light that provides soft, even illumination, making your subject look more vibrant and professional. Whether you’re a professional photographer or just someone who enjoys capturing moments, learning how to take pictures with a ring light can make a significant difference in the quality of your images.
In this article, we will guide you through the process of using a ring light to capture stunning photos. We’ll cover everything from choosing the right ring light for your needs to positioning it correctly for the desired effect. By the end, you’ll have the knowledge and skills to make the most out of your ring light and take your photography to new heights.
Inside This Article
- How To Take Pictures With Ring Light
- Choosing the Right Ring Light
- Setting up Your Ring Light
- Adjusting the Light for the Perfect Shot
- Tips and Techniques for Great Pictures
- Conclusion
- FAQs
How To Take Pictures With Ring Light
Ring lights have become increasingly popular among photographers and content creators for their ability to provide even and flattering lighting. Whether you’re a professional photographer or an aspiring selfie enthusiast, using a ring light can greatly enhance the quality of your pictures. In this article, we will discuss some key tips and techniques to help you take stunning pictures with a ring light.
Choosing the Right Ring Light
When it comes to choosing a ring light, there are a few factors to consider. First, decide whether you want a portable or a stationary ring light. Portable ones are compact and easy to carry around, making them great for on-the-go photography. Stationary ring lights, on the other hand, are larger and often come with adjustable stands, providing more stability and flexibility.
Next, consider the size and power of the ring light. Smaller ring lights are suitable for close-up shots or selfies, while larger ring lights are better for full-body shots or group photos. Additionally, choose a ring light with adjustable brightness and color temperature settings to customize the lighting according to your needs.
Setting up Your Ring Light
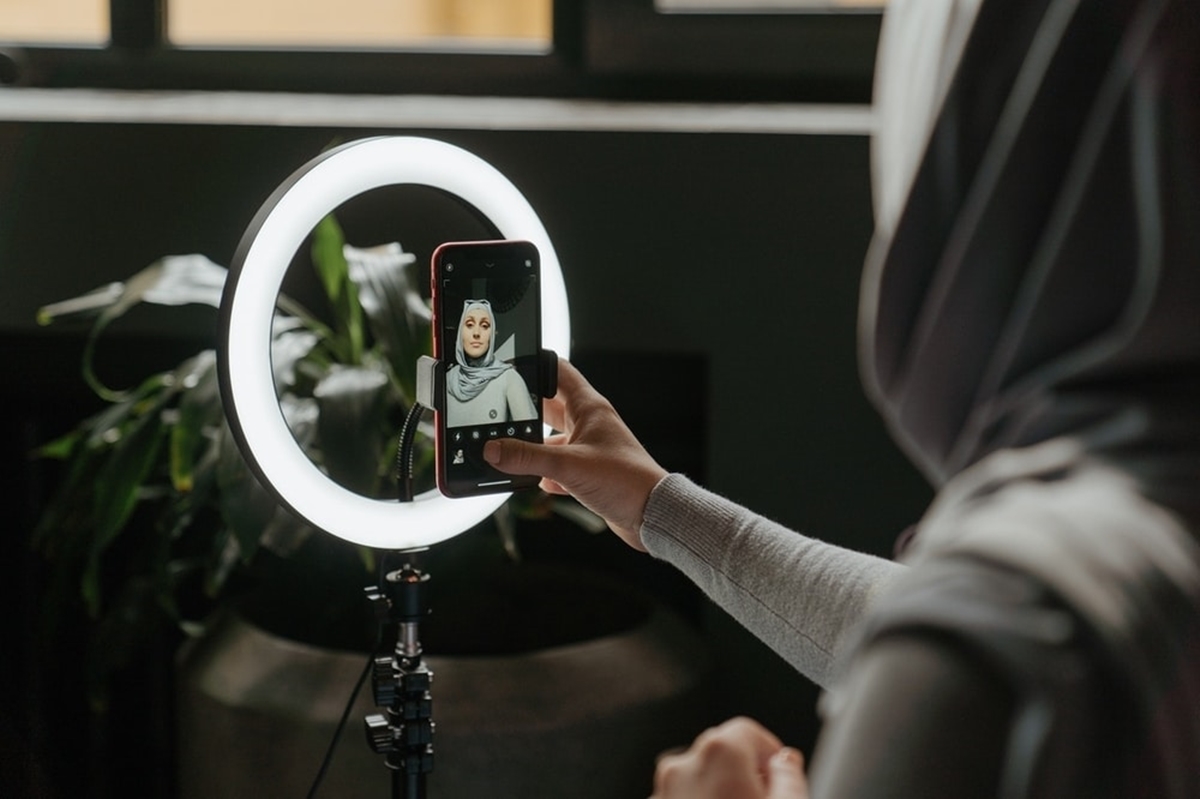
Before you start taking pictures, you need to properly set up your ring light. Begin by attaching the ring light to a tripod or a stable surface. Make sure it’s securely positioned to prevent any accidental slips or falls. Adjust the height and angle of the ring light to achieve the desired lighting effect.
Position yourself or your subject in front of the ring light, ensuring that the light is evenly distributed around the face. Remember to look into the camera lens, not directly at the ring light, to avoid any harsh reflections or squinting.
Adjusting the Light for the Perfect Shot
One of the great advantages of using a ring light is the ability to control the lighting easily. Start by adjusting the brightness level to find the right amount of light for your shot. If you’re in a dimly lit environment, increase the brightness to illuminate your subject. Conversely, if the surroundings are already well-lit, you can reduce the brightness to create the desired soft and flattering effect.
Furthermore, you can play around with the color temperature settings of the ring light. Cooler temperatures (around 5000K-6500K) provide a natural daylight effect, while warmer temperatures (around 3200K-4500K) give a more warm and cozy feel. Experiment with different color temperatures to find the one that best suits your desired mood and ambiance.
Tips and Techniques for Great Pictures
Here are a few additional tips and techniques to help you capture stunning pictures with a ring light:
- Experiment with different angles to achieve interesting and unique lighting effects.
- Use a diffuser or a softbox attachment to soften the light and minimize harsh shadows.
- Consider using a reflector to bounce light onto shadows and create a more balanced exposure.
- Mix and match your ring light with natural or ambient lighting to add depth and dimension to your photos.
- Don’t be afraid to get creative and try out various poses, expressions, and compositions.
Remember, practice makes perfect, so don’t hesitate to try different techniques and experiment with your ring light setup. With time and experience, you’ll develop your unique photography style and capture stunning pictures with ease.
So go ahead, grab your ring light, and start capturing breathtaking photos that showcase your talent and creativity.
Choosing the Right Ring Light
When it comes to taking pictures with a ring light, it’s important to choose the right one for your needs. There are several factors to consider when selecting a ring light:
- Size and Shape: Ring lights come in different sizes and shapes. Consider the space you have available for shooting and the type of subjects you plan to photograph. A larger ring light may be more suitable for capturing full-body shots, while a smaller one can work well for close-ups and portraits.
- Brightness and Color Temperature: Look for a ring light that offers adjustable brightness levels and color temperature settings. This will allow you to achieve the desired lighting effects and adapt to different shooting conditions.
- Power Source: Decide whether you need a plug-in or battery-powered ring light. If you plan to use it in a studio or fixed location, a plug-in option may be more convenient. However, if you need portability, a battery-powered ring light will be more suitable.
- Additional Features: Some ring lights come with additional features like smartphone holders, adjustable stands, or even Bluetooth remote control. Consider your specific needs and preferences when choosing a ring light.
Setting up Your Ring Light
Once you have selected the right ring light, it’s time to set it up for your photo shoot. Follow these steps:
- Mount the ring light on a stable stand or tripod. Make sure it is secure and positioned at the desired height and angle.
- Attach any necessary accessories, such as a smartphone holder or diffuser, if included with your ring light.
- Connect the ring light to a power source if it requires a plug-in connection, or insert the batteries if it is battery-powered.
- Position yourself or your subject in front of the ring light, ensuring that the light is evenly distributed around the face or the desired area.
Adjusting the Light for the Perfect Shot
Now that your ring light is set up, it’s time to adjust the lighting for the perfect shot:
- Experiment with different brightness levels to achieve the desired level of illumination. You may need to increase or decrease the brightness based on the ambient lighting conditions and the effect you want to achieve.
- Adjust the color temperature settings to create the desired mood or tone. Warmer temperatures can create a cozy and intimate atmosphere, while cooler temperatures can give a crisp and vibrant look.
- Consider the position of the ring light and experiment with different angles to achieve the desired lighting effect. For example, positioning the ring light directly in front of the subject can create a flattering and even illumination.
- Don’t be afraid to play around and experiment with different settings and positions to find the perfect lighting setup for your photos.
Tips and Techniques for Great Pictures
To make the most out of your ring light and take stunning pictures, consider the following tips and techniques:
- Use a tripod or stabilize your camera to avoid any blurriness or shaky shots.
- Try different poses and expressions to capture a variety of shots.
- Experiment with different backgrounds and props to enhance the overall composition of your pictures.
- If using a smartphone, make sure to clean the camera lens for clear and sharp images.
- Use the ring light’s diffuser or softbox to create a softer and more flattering lighting effect.
- Experiment with different distances between your subject and the ring light to achieve different lighting effects, such as highlighting specific features or creating a more dramatic look.
With these tips and techniques in mind, you’ll be well on your way to capturing stunning pictures with a ring light. So, grab your camera, set up your ring light, and let your creativity shine!
Conclusion
In today’s age of social media and online presence, taking captivating pictures has become more important than ever. Using a ring light is an excellent way to enhance your photography skills and add a professional touch to your images. With its ability to provide even and flattering lighting, a ring light can make a significant difference in the quality of your photographs.
Whether you are a photographer, content creator, or simply someone who enjoys capturing moments, incorporating a ring light into your setup can greatly improve your results. By following the tips and techniques mentioned in this article, you can maximize the potential of your ring light and elevate your photography to new heights.
Remember to experiment with different angles, distances, and settings to find your personal style. Practice makes perfect, so don’t be afraid to take plenty of pictures and learn from each one. With dedication and a creative eye, you’ll be well on your way to taking stunning pictures with your ring light.
So grab your ring light, get creative, and start capturing memorable moments like a pro!
FAQs
1. What is a ring light?
A ring light is a type of lighting accessory that is shaped like a ring. It consists of multiple LED bulbs or fluorescent tubes arranged in a circle. It is commonly used in photography and videography to provide even and flattering lighting on the subject’s face.
2. How does a ring light improve picture quality?
Using a ring light helps to eliminate harsh shadows and reduce the appearance of blemishes or imperfections on the subject’s face. The circular design of the ring light produces an even, soft, and diffused light that enhances the overall quality of the pictures, resulting in well-lit and professional-looking images.
3. Can I use a ring light with my smartphone?
Absolutely! Most modern ring lights come with universal smartphone mounts that allow you to attach your phone directly to the ring light. This makes it easy to capture high-quality selfies, make video calls, or record videos with optimal lighting using just your smartphone and a ring light.
4. How do I take pictures with a ring light?
To take pictures with a ring light, mount your camera or smartphone onto the tripod that is compatible with the ring light. Position yourself or your subject in front of the ring light, ensuring that the light is evenly distributed around the face. Adjust the brightness and color temperature according to your preference, and capture stunning pictures with the perfect lighting that the ring light provides.
5. Are there different types of ring lights available?
Yes, there are various types of ring lights available to suit different photography and videography needs. Some ring lights offer adjustable brightness levels, color temperature controls, and even special effects like color filters and dimming options. Additionally, there are portable and rechargeable ring lights that are ideal for on-the-go photography or for content creators who often shoot outdoors.