
In this digital age, having the right mobile accessories is essential for maximizing the functionality and convenience of our cell phones. Whether it’s a protective case, a high-quality charger, or a pair of wireless earbuds, the right accessories can greatly enhance our mobile experience. One crucial accessory that often goes overlooked is the SIM card. The SIM card is what allows us to connect to mobile networks, but sometimes it needs to be trimmed to fit certain devices. Trimming a SIM card may seem like a daunting task, but with the right technique and the proper tools, it can be a simple and effective process. In this article, we will guide you step-by-step on how to trim your SIM card, ensuring that it fits perfectly into your smartphone or tablet.
Inside This Article
- Overview
- Tools and Materials Needed
- Step 1: Measure and Mark
- Step 2: Cut the SIM Card
- Step 3: Sand and Smooth Edges
- Step 4: Test the Trimmed SIM Card
- Additional Tips and Precautions
- Conclusion
- FAQs
Overview
Trimming a SIM card can be a useful skill to have, especially if you need to switch to a smaller SIM card size or if you want to use your SIM card in a different device that requires a different size. Instead of purchasing a new SIM card, you can save time and money by trimming your existing one.
The process of trimming a SIM card involves carefully cutting it to the desired size, usually from a larger size to a smaller one. This can be done by following a few simple steps, using basic tools and materials that are easily accessible. However, it’s important to note that trimming a SIM card can be risky, and there is a possibility of damaging the card or rendering it unusable if not done correctly.
In this article, we will guide you through the process of trimming a SIM card step by step. We will also provide you with some additional tips and precautions to ensure that you have the best possible outcome.
Tools and Materials Needed
Before you start trimming your SIM card, it is important to gather all the necessary tools and materials. Here are the items you will need:
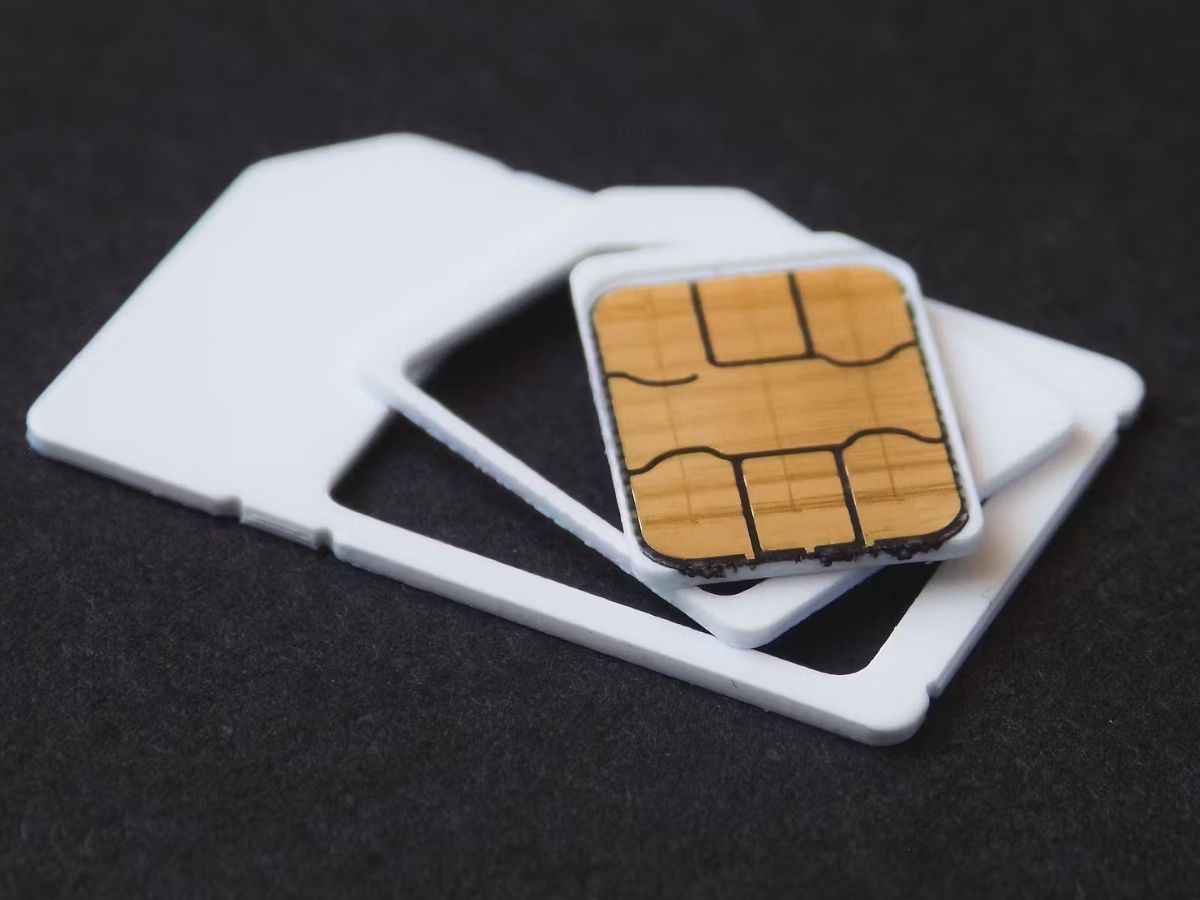
- A SIM card adapter kit: This includes different-sized SIM card trays that allow you to convert your trimmed SIM card to fit various devices.
- Sharp scissors or a SIM card cutter: These will be used to trim the SIM card to the desired size.
- Sandpaper or a nail file: These will help you smooth out the edges of the trimmed SIM card.
- A ruler or measuring tape: This will ensure precise measurements when marking the SIM card.
- A magnifying glass: This optional tool can be useful for those who need assistance in reading small SIM card markings.
- Clean cloth or tissue: This is helpful for wiping off any dirt or debris that may be on the SIM card.
Having these tools and materials readily available will make the process of trimming your SIM card much easier and ensure that you achieve the desired results. Now that you have everything you need, let’s move on to the step-by-step guide on SIM card trimming.
Step 1: Measure and Mark
Before you embark on trimming your SIM card, it’s crucial to take precise measurements and mark the areas that need to be cut. This step ensures that your trimmed SIM card will fit perfectly into your device.
To begin, gather the necessary tools – a ruler, a fine-tip permanent marker, and the SIM card you wish to trim. Find a clean, well-lit workspace where you can comfortably measure and mark without any distractions.
Place your SIM card on a flat surface and take accurate measurements using the ruler. Most SIM cards have standardized dimensions, with the standard SIM size measuring 25mm x 15mm, the micro-SIM size measuring 15mm x 12mm, and the nano-SIM size measuring 12.3mm x 8.8mm.
Take note of the required dimensions for your specific device. If you’re unsure, consult the user manual or do a quick online search for your phone’s SIM card size. Alternatively, you can use a SIM card adapter as a reference if you have one available.
Once you have determined the dimensions, it’s time to mark the cutting lines on your SIM card. Using the fine-tip permanent marker, carefully draw the outline of the desired size on the surface of the SIM card. Take your time to ensure accuracy, as any mistakes could render the SIM card unusable.
Pay attention to the notch or cutout on the SIM card, which indicates the correct orientation and position. Ensure that your cutting lines are aligned with the notch, as this will ensure proper insertion and functioning of the trimmed SIM card in your device.
Double-check your measurements and markings before proceeding to the next step. Make any adjustments if necessary. Once you are confident that everything is accurate, you can move on to the next step, which involves cutting the SIM card along the marked lines.
Step 2: Cut the SIM Card
Once you have measured and marked the correct dimensions on your SIM card, it’s time to move on to the next step: cutting the SIM card. This can be a delicate process, so it’s important to proceed with caution and precision.
First, ensure that you have the necessary tools ready. You will need a sharp pair of scissors, a fine-grit sandpaper, and a magnifying glass or a ruler with precise measurements. These tools will help you achieve accurate cuts and smooth edges.
With your tools in hand, carefully position the SIM card on a flat surface. Make sure to align your markings with the edge of the SIM card to ensure a precise cut. Keep in mind that once you start cutting, there is no going back, so double-check your measurements before proceeding.
Using the sharp scissors, gently and slowly trim along the marked lines. Apply even pressure to ensure a clean cut. It’s important to maintain a steady hand and follow the markings closely. Take your time and be patient throughout this process.
Once you have cut the SIM card, use the fine-grit sandpaper to smooth out any rough edges. Gently rub the sandpaper against the cut edges in a circular motion. This will help prevent any potential damage to your device’s SIM card slot when inserting the trimmed SIM card.
After you have sanded the edges, use a magnifying glass or a ruler to carefully inspect the SIM card. Check for any uneven edges or remnants of the original card. If you notice any imperfections, retrim the card until you achieve a smooth and precise result.
It’s worth noting that cutting a SIM card carries some risks, so it’s always recommended to consult with your mobile service provider or a professional if you’re unsure or uncomfortable performing this task yourself. They can provide guidance or even offer SIM cards that are already trimmed for your specific device.
With the cutting and sanding complete, your trimmed SIM card is now ready for testing. Insert it into your device’s SIM card slot and ensure that it fits securely. Power on your device and check for a proper connection to the mobile network. If everything is working as expected, congratulations – you have successfully trimmed your SIM card!
Remember, trimming a SIM card should only be done if necessary and with caution. Always follow the recommended guidelines and consult professionals if needed. It’s better to be safe than sorry when it comes to handling delicate mobile accessories like SIM cards.
Step 3: Sand and Smooth Edges
After successfully trimming your SIM card to the desired size, the next step is to sand and smooth out the edges. This is an essential process to ensure that the trimmed SIM card fits snugly into the SIM card slot of your mobile device without any issues.
To get started, you’ll need a fine-grit sandpaper or an emery board. This will allow you to carefully sand down the rough edges of the trimmed SIM card, ensuring a clean and professional-looking finish.
Begin by gently running the sandpaper or emery board along the edges of the trimmed SIM card. Be sure to apply even pressure and move in a back-and-forth motion. This will help to smooth out any jagged edges or rough spots that may have been created during the trimming process.
Take your time during this step and pay close attention to the edges of the SIM card. You want to remove any excess material and create a smooth and seamless transition from the trimmed area to the original SIM card surface. This will not only improve the appearance of the SIM card but also prevent any potential damage to the SIM card slot of your mobile device.
Once you are satisfied with the smoothness of the edges, use a clean cloth or cotton swab to remove any dust or residue that may have accumulated during the sanding process. This will ensure that no debris interferes with the proper functioning of the trimmed SIM card.
After sanding and cleaning the edges, visually inspect the trimmed SIM card to ensure that there are no sharp or uneven areas. If you notice any rough spots, carefully repeat the sanding process until you achieve the desired smoothness.
It’s important to note that while sanding and smoothing the edges, you need to be cautious not to sand down the actual chip on the SIM card. The chip contains critical data and damaging it may render the SIM card useless.
By following this step, you will have successfully prepared your trimmed SIM card with smooth edges that will seamlessly fit into your mobile device’s SIM card slot. This will ensure a hassle-free experience when using your device with the newly trimmed SIM card.
Step 4: Test the Trimmed SIM Card
Now that you have successfully trimmed your SIM card to the correct size, it’s time to test it and ensure that it works in your device. This step is crucial to confirm whether the trimming process was done accurately and the SIM card is functioning properly. Here’s how you can test your trimmed SIM card:
1. Insert the trimmed SIM card into your device’s SIM card tray. Make sure it is properly aligned with the SIM card slot.
2. Power on your device and wait for it to initialize. If your device requires a PIN code to unlock the SIM card, enter it when prompted. This step is important to activate the SIM card and establish a connection with your network provider.
3. Check the signal strength indicator on your device. It should indicate that you have a strong signal and are connected to your network. If you see a weak signal or no signal at all, remove the SIM card and repeat the trimming process, making sure to be more precise in cutting the edges.
4. Test making calls, sending texts, and using mobile data. Use your device as you normally would to ensure that all functionality is working correctly. Place a test call, send a test message, and browse the internet to validate that the trimmed SIM card is functioning without any issues.
5. If you encounter any problems, such as a weak signal, inability to make calls, or difficulties connecting to the internet, remove the trimmed SIM card and consult with your network provider or a professional technician. They can address any compatibility issues or provide further assistance.
6. If everything is working fine, congratulations! You have successfully trimmed and tested your SIM card to fit into your device. Now you can enjoy your mobile services without any inconvenience.
Remember, it’s essential to test your trimmed SIM card before fully relying on it in your device. This will ensure that you avoid any potential issues and have a seamless and reliable mobile experience.
Additional Tips and Precautions
Here are some additional tips and precautions to keep in mind when trimming your SIM card:
-
Double-check the instructions: Before you start trimming your SIM card, carefully read through the instructions provided by your phone manufacturer or SIM card trimmer. Different devices may have slightly different requirements, so make sure you are following the correct procedure.
-
Work in a well-lit and clean area: Trimming a SIM card requires precision and attention to detail. Make sure you are working in a well-lit area, preferably with a clean and clutter-free workspace. This will help you avoid any accidental damage or misalignment.
-
Use the right tools: It is important to use the appropriate tools for trimming your SIM card. A SIM card trimmer or a sharp pair of scissors will work best. Avoid using regular household scissors, as they may not provide a clean and precise cut.
-
Take your time: Trimming a SIM card is not a task to rush through. Take your time and proceed with caution. Remember, it is always better to be patient and get it right the first time than to rush and risk damaging your SIM card.
-
Keep the trimmed edges smooth: After cutting your SIM card, make sure to sand down any rough or uneven edges. This will prevent the trimmed card from getting stuck or causing damage to your phone’s SIM card slot.
-
Test the trimmed SIM card before inserting: Before inserting the trimmed SIM card into your phone, it is important to test it. Place the trimmed SIM card into an adapter or another device that accepts SIM cards to ensure it fits properly and functions correctly.
-
Have a backup plan: It’s always a good idea to have a backup SIM card in case anything goes wrong during the trimming process. If you accidentally damage your SIM card beyond repair, having a backup will ensure that you can still use your phone without any interruptions.
By following these additional tips and taking the necessary precautions, you can successfully trim your SIM card without any issues. However, if you are not confident in your DIY skills, it’s always best to seek professional assistance to avoid damaging your SIM card or phone.
Conclusion
In conclusion, knowing how to trim a SIM card can be a valuable skill for anyone who wants to switch to a new phone or use a different SIM card size. By following the step-by-step guide outlined in this article, you can safely and accurately trim your SIM card to fit into your desired device.
Remember to exercise caution and patience during the process, as improper trimming can damage your SIM card or render it unusable. If you feel unsure or uncomfortable performing the task yourself, it’s always a good idea to seek assistance from a professional or contact your network provider for guidance.
With the information provided in this article, you now have the knowledge and confidence to trim your own SIM card and enjoy the flexibility of using various mobile devices without restrictions. So go ahead, grab your SIM card and a pair of sharp scissors, and embark on the journey of customizing your mobile experience!
FAQs
1. Why would I need to trim my SIM card?
There are several reasons why you might need to trim your SIM card. One common scenario is when you switch to a new phone that requires a smaller SIM card size. Instead of purchasing a new SIM card, you can trim your existing one to fit the new device. Trimming your SIM card allows you to save money and avoid the hassle of transferring your contacts and data to a new SIM card.
2. Is it safe to trim a SIM card?
Trimming a SIM card can be safe if done correctly. However, it’s important to note that once you trim a SIM card, you cannot reverse the process. If you make a mistake, the SIM card may become unusable. It’s crucial to follow the proper guidelines and use the right tools to ensure a successful trim. If you’re unsure about trimming your SIM card, it’s best to consult with a professional or contact your mobile carrier for assistance.
3. What tools do I need to trim my SIM card?
To trim your SIM card, you’ll need a SIM card cutter or a sharp pair of scissors. A SIM card cutter is specifically designed to cut SIM cards to the appropriate size without damaging them. If you opt for using scissors, make sure they are sharp and clean to achieve a precise cut. Additionally, you may need a sandpaper or file to smoothen the edges of the trimmed SIM card.
4. What are the different SIM card sizes?
SIM cards come in different sizes, including standard SIM (also known as Mini SIM), micro SIM, and nano SIM. The standard SIM card measures 25mm x 15mm, the micro SIM measures 15mm x 12mm, and the nano SIM measures 12.3mm x 8.8mm. The size of the SIM card you need depends on the requirements of your mobile device. Most newer smartphones use nano SIM cards, while older phones may require a micro SIM or even a standard SIM.
5. Are there any risks or drawbacks to trimming a SIM card?
Although trimming a SIM card is generally safe if done correctly, there are some risks and drawbacks to consider. One risk is damaging the SIM card if the trimming process is not done meticulously. Another drawback is that once you trim the card, you may no longer be able to use it in devices that require a larger SIM card size. It’s important to evaluate your future needs before deciding to trim your SIM card to ensure it will work with all your devices.