
Dropping your AirPod in water can be a heart-stopping moment. As these wireless earbuds have become an integral part of our lives, losing or damaging them can be a major inconvenience. Whether you accidentally dropped them in the sink, toilet, or even a pool, the key is to act quickly. In this article, we will explore the steps you can take to salvage your AirPods after they have been submerged in water, and provide some tips on how to prevent water damage in the future. So, don’t panic if your AirPod takes an unexpected dip; instead, follow our expert advice and increase your chances of saving your beloved wireless earbuds.
Inside This Article
- What To Do When You Drop Your AirPods in Water – Introduction
- Assess the Damage
- Remove AirPods from Water Immediately
- Dry the AirPods
- Use Silica Gel or Rice
- Let AirPods Sit in a Dry Environment
- Test the AirPods
- Contact Apple Support if Necessary- Conclusion
- Conclusion
- FAQs
What To Do When You Drop Your AirPods in Water – Introduction
Accidents happen, and one of the most distressing scenarios for AirPod owners is accidentally dropping their precious earbuds in water. Whether it’s a sink, toilet, pool, or any other body of water, the panic sets in when we realize the potential damage that can be inflicted on our beloved AirPods.
In this article, we will guide you through the steps you should take if you find yourself in this unfortunate situation. By following these instructions carefully, you may be able to salvage your submerged AirPods and prevent any long-term damage.
Note: It’s important to act quickly to maximize the chances of saving your AirPods. The longer they stay in water, the greater the likelihood of irreversible damage.
Now, let’s dive into the steps you should take when you drop your AirPods in water.
Assess the Damage
After retrieving your AirPod from the water, the next step is to assess the damage. Water damage can potentially affect the internal components of your device, so it’s crucial to determine the extent of the problem before proceeding with any further steps.
Start by examining the exterior of the AirPod. Look for any visible signs of water, such as moisture on the surface or water droplets inside the charging case or on the earbuds themselves. Take note of any areas that appear wet or damaged.
Next, carefully open the charging case and inspect the inside for any signs of water damage. Check the charging ports, the charging pins on the AirPods, and the connections inside the case. Look for any corrosion, discoloration, or unusual marks that may indicate water has come into contact with these areas.
If the water damage is minimal and there are no visible signs of corrosion or damage, there’s a good chance that your AirPods may still be functional. However, if there are significant signs of water damage or if the device was submerged for an extended period, the chances of permanent damage are higher.
Keep in mind that water damage can sometimes be deceptive, and even if there are no immediate issues, problems may arise later. It’s always best to err on the side of caution and follow the necessary steps to ensure the longevity and functionality of your AirPods.
Remove AirPods from Water Immediately
Accidents happen, and dropping your AirPods in water can be a heart-stopping moment. But the most crucial step in salvaging your AirPods is to remove them from the water as quickly as possible. Time is of the essence, as prolonged exposure to water increases the risk of irreversible damage.
The first instinct may be to panic, but it’s important to stay calm and act swiftly. Follow these steps to remove your AirPods from the water:
- Retrieve your AirPods: If you dropped your AirPods in a sink or a shallow body of water, reach in and carefully pick them up. If they fell into a deeper body of water, like a pool or a toilet, use a skimmer or any long utensil to fish them out. Avoid touching the water with your hands to minimize the risk of electrical damage.
- Power off your AirPods: As soon as you retrieve your AirPods, it’s crucial to power them off immediately. Wet electronics are prone to short-circuiting, so turning off your AirPods can help prevent further damage. To power off, simply press and hold the control button on the back of the AirPods case until the LED light turns off.
- Remove excess water: Gently shake your AirPods to remove any visible water droplets. Be careful not to shake them too vigorously, as it can cause water to seep deeper into the device. Use a soft, absorbent cloth or paper towel to blot away any remaining moisture on the exterior of the AirPods and the case.
- Dry your AirPods: Next, you’ll want to dry your AirPods as thoroughly as possible. Start by wiping the outside surfaces with a clean, lint-free cloth. Pay extra attention to the charging contacts on the bottom of the AirPods and the inside of the case. Make sure to remove any visible moisture.
- Let your AirPods air dry: After the initial drying, it’s best to let your AirPods air dry for a few hours before attempting to use them again. Find a well-ventilated area away from direct sunlight or heat sources. Placing your AirPods near a fan or using a hairdryer on a low, cool setting can help expedite the drying process.
It’s crucial to resist the temptation to use any external heat sources like ovens or microwaves to dry your AirPods. High temperatures can cause further damage to the delicate internal components.
Note: While the above steps are helpful in maximizing the chances of saving your water-damaged AirPods, it is important to acknowledge that water damage may lead to permanent issues that cannot be resolved through DIY methods. If these steps don’t restore your AirPods to full functionality, it is advisable to seek professional assistance from an authorized Apple service center.
Dry the AirPods
After removing the AirPods from the water, the next step is to dry them thoroughly. This is crucial in order to prevent any potential damage and restore functionality to the devices. Here are the steps to follow to effectively dry your AirPods:
- Use a soft, absorbent cloth: Start by gently wiping the exterior of the AirPods with a soft, lint-free cloth. Absorb as much water as possible from the surface of the devices. Be careful not to press too hard or use any abrasive materials that may scratch the surface.
- Air dry: After wiping the surface, let the AirPods air dry for a few minutes. This will help remove any remaining moisture from inside the devices. Avoid using a hairdryer or any other heated devices, as excessive heat can damage the internal components of the AirPods.
- Open the charging case: If your AirPods were submerged while inside the charging case, open the case and remove the AirPods. Then, carefully shake the case to remove any excess water. Use a clean, dry cloth to wipe the interior of the case.
- Place in a dry area: Find a dry area with proper air circulation to place your AirPods and the charging case. Avoid exposing them to direct sunlight or excessive humidity, as these conditions can impede the drying process.
- Use desiccant or rice: If you want to expedite the drying process, you can place your AirPods and the charging case inside a bag or container with desiccant packets or uncooked rice. The desiccant or rice will absorb the moisture, helping to dry the devices faster. Keep in mind that this method may not be as effective as air drying, but it can be useful in certain situations.
It’s important to note that patience is key when drying your AirPods. Rushing the process or attempting to use them before they are completely dry can lead to further damage. Allow ample time for the AirPods to dry thoroughly before proceeding to the next step.
Use Silica Gel or Rice
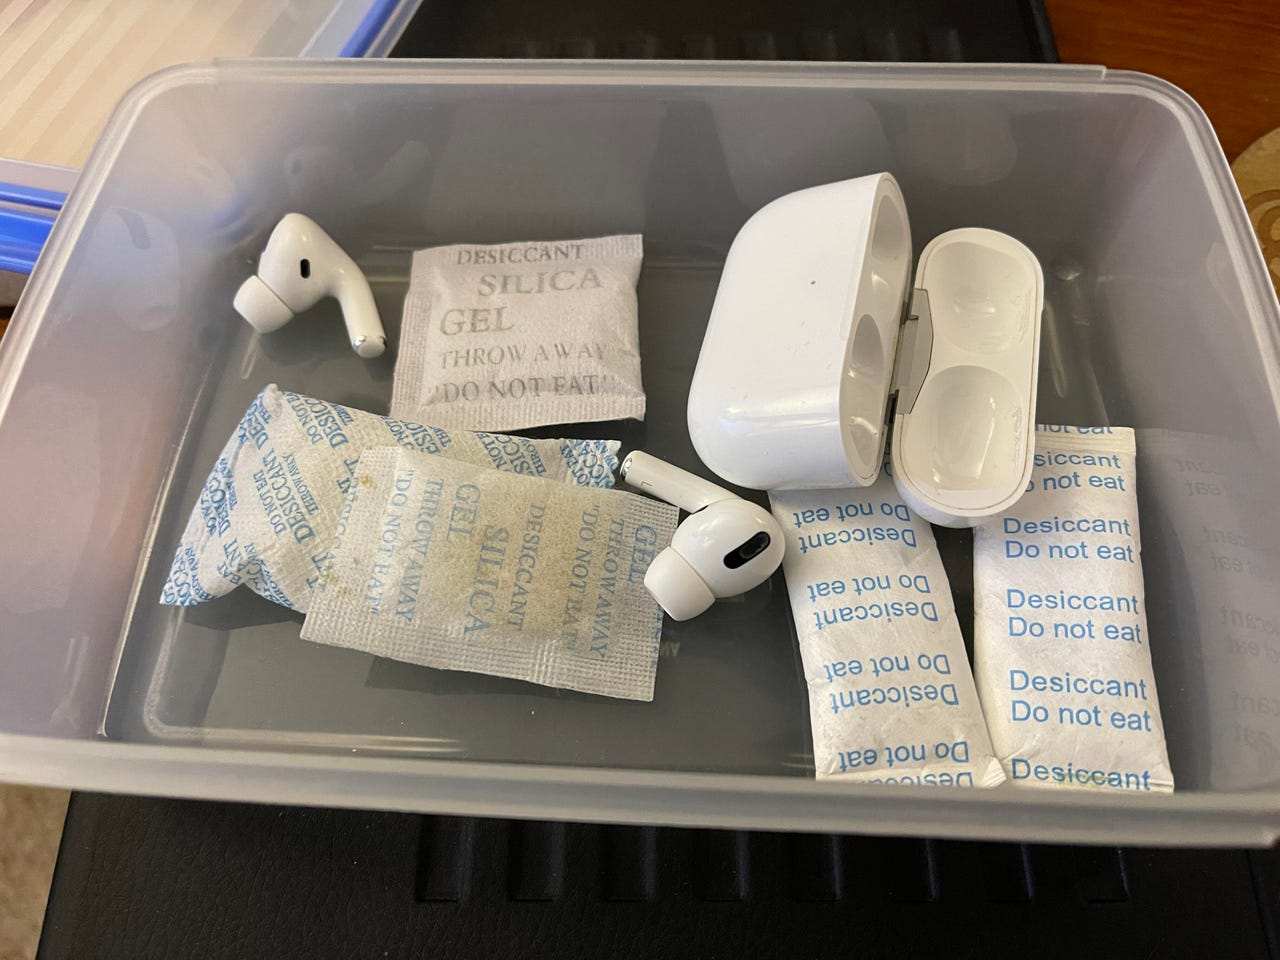
After removing your AirPods from water and drying them with a cloth, it’s time to take further steps to absorb any remaining moisture. One effective method is to use silica gel or rice. These materials can help draw out the moisture and prevent damage to your AirPods.
Silica gel packets are commonly found in product packaging, such as shoeboxes, electronics, or even some food items. These packets are filled with moisture-absorbing silica beads, which can be highly effective in drying out your AirPods. If you have a few silica gel packets lying around, here’s how you can use them:
- Place your AirPods in a small container or plastic bag.
- Add a handful of silica gel packets to the container.
- Seal the container or bag and leave it undisturbed for at least 24 hours.
If you don’t have silica gel packets on hand, you can also use rice as a makeshift alternative. Rice acts as a natural desiccant and can help absorb moisture. Here’s what you need to do:
- Fill a sealable container or plastic bag with uncooked rice.
- Place your AirPods inside the container, making sure they are fully submerged in the rice.
- Seal the container or bag and leave it in a dry place for about 48 hours.
Both silica gel and rice can help remove moisture from your AirPods. However, it’s important to note that rice may not be as effective as silica gel, so you may need to leave your AirPods in rice for a longer period.
During this drying process, it’s best to avoid checking the status of your AirPods too frequently. Opening the container or bag too often can disrupt the drying process and introduce more moisture. Patience is key in allowing the silica gel or rice to properly absorb the moisture from your AirPods.
Once the recommended time has passed, remove your AirPods from the container or bag. Carefully inspect them for any remaining signs of moisture. If they feel dry to the touch and no moisture is visible, you can proceed to the next step to test their functionality.
Let AirPods Sit in a Dry Environment
After removing excess water and using a moisture-absorbing material like silica gel or rice, the next step is to let your AirPods sit in a dry environment. This is important to ensure all moisture is fully evaporated and the electronic components are completely dry.
Find a clean and dry area where you can place your AirPods. Avoid areas with high humidity, such as bathrooms or kitchens. The ideal location would be a cool and well-ventilated room.
You can use a soft cloth or towel to gently wipe any remaining moisture from the surfaces of the AirPods. Be careful not to apply too much pressure or to scratch the casing.
It is important to note that patience is key during this step. The drying process may take several hours or even days, depending on the extent of water exposure and the surrounding humidity levels.
Avoid using heat sources like hair dryers, ovens, or microwaves to speed up the drying process. The high temperature could damage the delicate components of the AirPods.
Instead, let the natural air circulation in the room do its work. Placing the AirPods on a clean and dry surface will allow the moisture to gradually evaporate.
Some users prefer using a bowl of uncooked rice or silica gel packets to absorb moisture. While these methods can be effective, they are not foolproof. Rice grains can get stuck in the crevices of the AirPods, and silica gel packets may not have enough absorbency to completely remove all moisture.
It is worth noting that Apple does not recommend using rice to dry electronic devices. Instead, they advise using a lint-free cloth and allowing the device to air dry.
Remember, the goal is to allow the AirPods to dry naturally in a controlled environment. Avoid exposing them to extreme temperatures or direct sunlight as this can further damage the delicate internal components.
Once you are confident that your AirPods are completely dry, it is time to move on to the next step.
Test the AirPods
After allowing your AirPods to thoroughly dry, it is important to test them to ensure they are functioning properly. Here are a few steps to follow:
- Charge the AirPods: Connect your AirPods to the charging case and plug it into a power source. Let them charge for a while to ensure they have enough battery power for testing.
- Attempt to connect: Open the Bluetooth settings on your device and check if your AirPods are being recognized and can be connected. If they do not appear or have connectivity issues, try the following:
- Reset the AirPods: Press and hold the setup button on the back of the charging case until the LED light starts flashing amber. Then, reconnect your AirPods to your device.
- Restart your device: Sometimes, the issue may not be with the AirPods but with your device. Restart it and try connecting the AirPods again.
- Test the audio: Play a song or audio clip on your device and listen carefully through both AirPods. Pay attention to any issues such as distorted sound, low volume, or only one AirPod playing. If there are issues with the audio quality, try the following:
- Clean the AirPods: Sometimes, dirt or debris may have gotten into the AirPods, affecting the sound quality. Use a clean, dry cloth or a soft-bristled brush to gently clean the AirPods and remove any debris.
- Adjust the settings: Check the audio settings on your device and make sure they are properly configured for your AirPods. Adjust the equalizer settings if needed.
- Test the microphone: Make a phone call or use a voice recording app to test the microphone on your AirPods. Speak into both AirPods and listen for any issues, such as muffled sound or no sound at all.
If you encounter any persistent issues with your AirPods, even after trying the troubleshooting steps mentioned above, it is advisable to contact Apple Support or visit an authorized service center for further assistance. They will be able to assess the damage and provide necessary repairs or replacements if needed.
Remember, it is crucial to let your AirPods air dry completely before testing them. Trying to use them while they are still wet may cause further damage and decrease the chances of successful recovery. Take your time to ensure they are fully dry and follow the testing steps to determine the functionality of your AirPods.
Contact Apple Support if Necessary- Conclusion
In most cases, following the steps mentioned above should help revive your water-damaged AirPods. However, if you still experience issues with your AirPods after thorough drying and testing, it may be time to contact Apple Support for further assistance.
Apple Support has trained professionals who can provide guidance specific to your situation. They will be able to advise you on the best course of action and whether your AirPods need repair or replacement. Remember, Apple Support is there to help you resolve any issues you may encounter with your AirPods.
It is important to note that water damage to your AirPods may void any warranty or guarantee provided by Apple. Therefore, it’s crucial to take immediate action and follow the steps outlined above as soon as you drop your AirPods in water.
In conclusion, dropping your AirPods in water can be a stressful situation, but there are steps you can take to mitigate the damage. By retrieving them quickly, powering off, removing excess water, drying them thoroughly, and testing their functionality, you can increase the chances of restoring your AirPods to working condition.
Remember, prevention is key in avoiding water damage to your AirPods. Be cautious when using them near water, and consider investing in a protective case that offers some level of water resistance. Taking these precautions can help you avoid the inconvenience and cost of dealing with water-damaged AirPods.
Lastly, if all else fails, don’t hesitate to reach out to Apple Support for professional assistance. They are well-equipped to handle any issues you may face with your AirPods and can provide the necessary guidance to get them back in working order.
Conclusion
In conclusion, dropping your AirPods in water can be a stressful situation, but with the right steps, you can minimize the damage and potentially save your beloved wireless earbuds. Remember, the key is to act quickly and follow the necessary precautions.
First, make sure to remove the AirPods from the water immediately and dry them thoroughly with a soft cloth or tissue. Avoid using heat sources or harsh chemicals as they can further damage the delicate components.
Next, place the AirPods in a dry environment and allow them to air dry for at least 24-48 hours. It’s important to resist the temptation to use them during this time, as moisture can cause electrical shorts and permanent damage.
If you notice any lingering issues, such as muffled sound or connectivity problems, it may be necessary to contact Apple Support or bring them to an authorized service provider for further assistance. They have the expertise and resources to diagnose and repair the damage.
Remember, prevention is always better than a cure. Consider investing in protective cases or covers for your AirPods to minimize the risk of accidental water damage in the future.
By following these steps and taking the necessary precautions, you can increase the chances of saving your AirPods and continuing to enjoy your wireless listening experience for years to come.
FAQs
Q: What should I do if I drop my AirPod in water?
A: If you accidentally drop your AirPods in water, the first thing you should do is remove them from the water as quickly as possible. Wipe them gently with a soft, lint-free cloth to remove any excess moisture. Do not use any heat sources to dry them, as this can damage the internal components. Instead, place them in a dry area and let them air-dry for at least 24 hours before attempting to use them again. It’s important to avoid using them until they are completely dry to prevent any potential damage.
Q: Can I use a hairdryer or put my AirPod in rice to dry them faster?
A: No, it’s not recommended to use a hairdryer or rice to dry your wet AirPods. The hot air from a hairdryer can cause the water to evaporate too quickly, potentially damaging the internal components. Rice is not effective in removing moisture and can also leave dust and debris inside the AirPods. The best method is to let them air-dry naturally in a dry area for at least 24 hours.
Q: Should I clean my AirPods after they have been submerged in water?
A: Yes, it’s a good idea to clean your AirPods after they have been submerged in water. Use a soft, slightly damp cloth to remove any dirt or residue that may have accumulated during the incident. Be careful not to get any moisture in the openings of the AirPods, as this can cause further damage. It’s essential to ensure that your AirPods are completely dry before using them again.
Q: Will my AirPods still work properly after being dropped in water?
A: There is no guarantee that your AirPods will work properly after being dropped in water. The severity of the water damage and the length of time they were submerged can significantly impact their functionality. In some cases, the water damage may be irreversible, and the AirPods may need to be replaced. However, by following the correct drying methods and allowing them to completely dry before use, you increase the chances of them functioning normally again.
Q: Can I prevent my AirPods from getting damaged by water?
A: While AirPods are not waterproof, you can take precautions to prevent water damage. Avoid exposing your AirPods to excessive moisture, such as wearing them in heavy rain or submerging them in water intentionally. Additionally, consider using a protective case that provides some level of water resistance. However, it’s important to note that no case can guarantee complete protection against water damage, so it’s always best to be cautious and avoid exposing your AirPods to water whenever possible.