
Welcome to our comprehensive guide on how to create a Contact Poster on your iPhone using iOS 17. In this article, we’ll walk you through the step-by-step process of creating a personalized Contact Poster that displays all the important details about the contacts in your iPhone’s address book. With the latest update in iOS 17, Apple has introduced this exciting feature to help you conveniently share contact information with others in a visually appealing way.
Whether you want to share your business contact information, create a digital business card, or simply have a fun and interactive way of sharing your contact details with friends and family, the Contact Poster feature is a great addition to the already impressive array of functions in iOS 17. So, let’s dive in and learn how to create your own Contact Poster on your iPhone.
Inside This Article
- Step 1: Accessing the Contacts app
- Step 2: Choosing a contact to create a Contact Poster
- Step 3: Customizing the Contact Poster
- Step 4: Sharing the Contact Poster
- Conclusion
- FAQs
Step 1: Accessing the Contacts app
Before you can create a Contact Poster on your iPhone, you’ll need to access the Contacts app. The Contacts app is built into iOS and provides a convenient way to organize and manage all your contacts in one place.
To access the Contacts app, simply locate and tap on the green phone icon labeled “Phone” on your home screen. This will open the Phone app, which includes the Contacts tab at the bottom of the screen.
Once you are on the Contacts tab, you will see a list of your contacts displayed in alphabetical order. If you have a large number of contacts, you can use the search bar at the top of the screen to quickly find a specific contact.
Alternatively, if you have enabled the Siri suggestions feature on your iPhone, you can also swipe right on your home screen to access the Siri Suggestions widget, which may display relevant contacts based on your usage patterns.
By accessing the Contacts app, you are one step closer to creating a Contact Poster on your iPhone. Now let’s move on to the next step and choose a contact to create a poster for!
Step 2: Choosing a contact to create a Contact Poster
Now that you have accessed the Contacts app on your iPhone, it’s time to choose the contact you want to create a Contact Poster for. Follow these simple steps to select the right contact:
- Scroll through your contacts: Use your finger to scroll up and down the list of contacts. You can also use the search bar at the top to quickly find a specific contact by typing their name.
- Tap on the desired contact: Once you’ve found the contact you want to create a Contact Poster for, tap on their name to open their contact details.
- Verify the contact information: Take a moment to review the contact’s information to ensure it’s accurate and up to date.
Choosing the right contact is crucial as the Contact Poster will display their name, phone number, and photo. Make sure you select the contact that you want to share with others in a visually appealing and informative way.
Next, let’s move on to customizing the Contact Poster to make it truly unique and personalized.
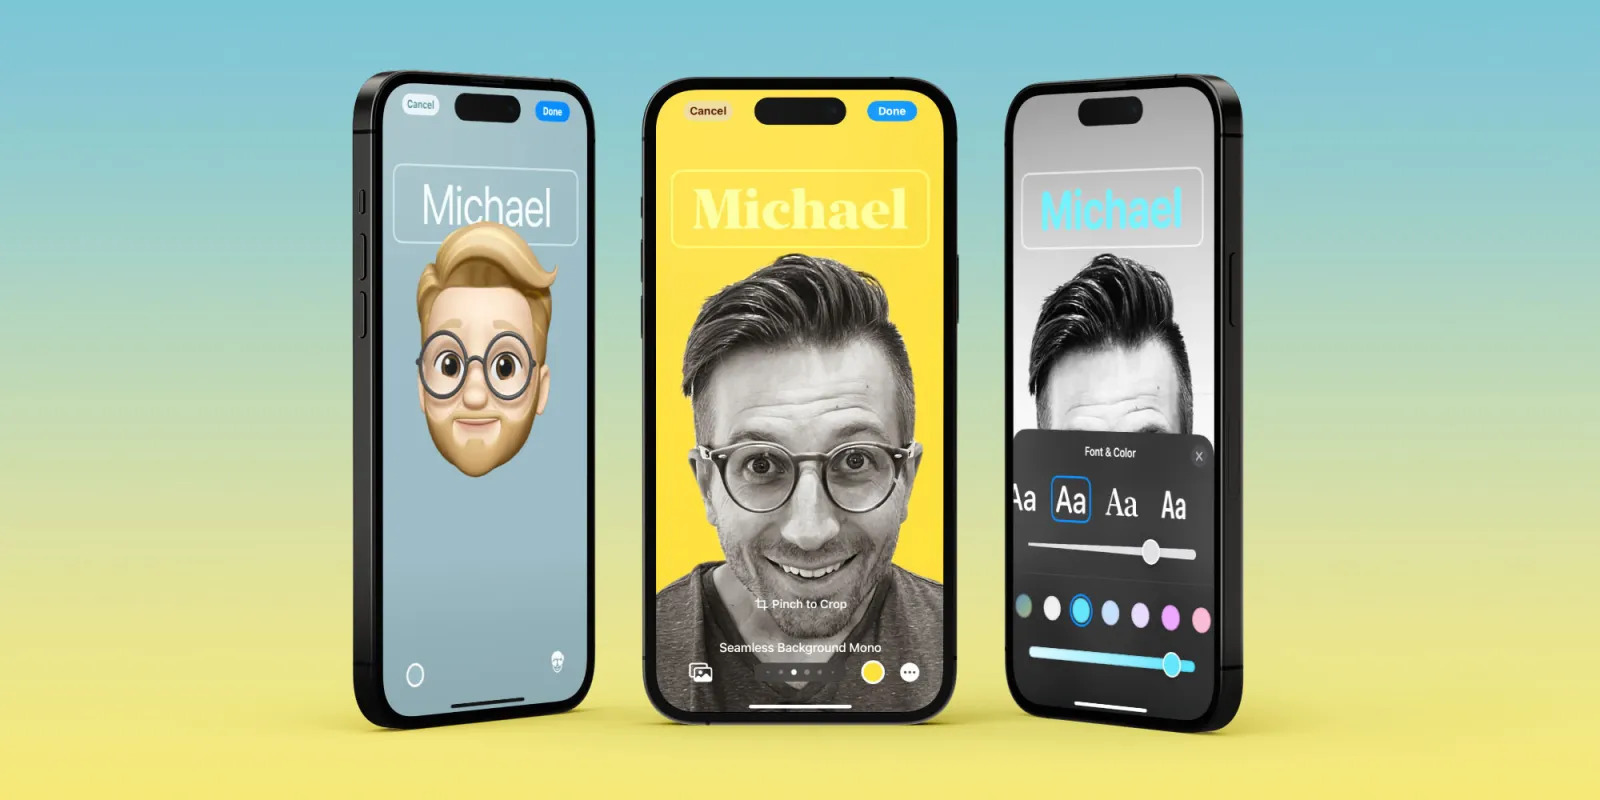
Step 3: Customizing the Contact Poster
Once you have selected the contact you want to create a Contact Poster for, iOS 17 provides you with various customization options to make your Contact Poster unique and personalized. Here are some ways you can customize the Contact Poster:
- Choose a background: iOS 17 allows you to select a background image for your Contact Poster. You can choose from a variety of preloaded images or use one from your own photo library. This allows you to add a personal touch to the poster and make it visually appealing.
- Add contact details: You can choose which contact details you want to include in the Contact Poster. This can include the contact’s name, phone number, email address, social media handles, and more. Customizing the contact details ensures that the Contact Poster provides all the necessary information about the contact.
- Change the font and colors: iOS 17 provides options to change the font style, size, and color of the text on the Contact Poster. This allows you to match the poster’s appearance with your personal preferences or the overall design theme.
- Apply filters and effects: To add a touch of creativity and uniqueness, iOS 17 offers a range of filters and effects that you can apply to the Contact Poster. These effects can enhance the overall look and feel of the poster and make it stand out.
- Add stickers and emojis: If you want to make your Contact Poster more fun and expressive, you can include stickers and emojis. iOS 17 provides a vast collection of stickers and emojis that you can easily add to the poster, allowing you to convey emotions and add a playful element.
Once you have customized the Contact Poster to your liking, you can proceed to the next step of sharing it with others.
Step 4: Sharing the Contact Poster
Once you have customized and created your Contact Poster on your iPhone using iOS 17, the next step is to share it with others. Sharing the Contact Poster is a simple and straightforward process, allowing you to quickly distribute important contact information to family, friends, or colleagues.
To share the Contact Poster, follow these easy steps:
- After creating the Contact Poster, tap on the “Share” button located at the top right corner of the screen. This will open the sharing options.
- From the sharing options, you can choose various methods to share the Contact Poster, such as sending it via Messages, Mail, or other messaging apps installed on your iPhone.
- Select the desired method of sharing and continue with the process. For example, if you choose to share via Messages, a new message window will open with the Contact Poster attached.
- Enter the recipient’s contact information or select a contact from your address book to send the Contact Poster to.
- Add a personalized message, if desired, to accompany the Contact Poster.
- Once you have reviewed the message and recipient information, tap the send button to share the Contact Poster.
By following these steps, you can easily share the Contact Poster created on your iPhone running iOS 17. This feature is incredibly useful for sharing important contact details, such as your business card or a friend’s contact information, in a visually appealing and convenient format.
Whether you are networking at an event, staying connected with loved ones, or sharing professional contact information, the Contact Poster feature in iOS 17 simplifies the process, saving you time and effort.
So go ahead and unleash the power of the Contact Poster on your iPhone running iOS 17 – easily create, customize, and share contact information with just a few taps!
Overall, creating a Contact Poster on your iPhone with the new iOS 17 update is a fantastic addition for those looking for an easy way to share contact information in a unique and visually appealing manner. With just a few simple steps, you can transform a regular contact card into a dynamic and eye-catching poster that is sure to impress.
The iOS 17 update introduces several customizable options, allowing you to personalize your Contact Poster to suit your style and preferences. Whether you’re a small business owner looking to promote your services or an individual wanting to share your contact details in a memorable way, the Contact Poster feature offers a creative solution.
With the increased emphasis on digital communication, having a visually striking and easily shareable contact poster can make a lasting impression on potential clients, friends, or colleagues. iOS 17 continues to innovate and enhance the user experience, and the Contact Poster feature is yet another example of Apple’s commitment to making everyday tasks more convenient and engaging.
Frequently Asked Questions (FAQs)
Q: How can I create a Contact Poster on my iPhone with iOS 17?
Creating a Contact Poster on your iPhone with iOS 17 is simple and convenient. Follow these steps:
- Open the Contacts app on your iPhone.
- Choose the contact you want to create a poster for.
- Tap on the share icon, typically represented by a square with an upward arrow.
- Select the “Create Poster” option from the sharing options.
- Customize the poster by choosing a layout, color scheme, and including additional contact details.
- When you are satisfied with the design, tap on the “Save” button to save the Contact Poster to your device.
Q: Can I share the Contact Poster with other iPhone users?
Yes, you can easily share the Contact Poster with other iPhone users. Simply follow these steps:
- Open the Contacts app and select the desired contact.
- Tap on the share icon and choose the “Share” option.
- Select the sharing method you prefer, such as AirDrop, Messages, Mail, or other compatible apps.
- Choose the recipient and send the Contact Poster.
Q: Is it possible to print the Contact Poster?
Absolutely! You can print the Contact Poster by following these steps:
- Open the Contacts app and select the desired contact.
- Tap on the share icon and choose the “Print” option.
- Select the printer you want to use, adjust any print settings if necessary, and then tap on “Print.”
Q: Can I edit the Contact Poster after it has been created?
Unfortunately, iOS 17 does not currently provide the option to edit Contact Posters after they have been created. However, you can delete the existing poster and create a new one with the updated information if needed.
Q: Will the Contact Poster be automatically updated if the contact’s information changes?
No, the Contact Poster will not be automatically updated if the contact’s information changes. If any changes occur, you will need to manually delete the existing poster and create a new one to reflect the updated information.