“This password appeared in a data leak.” It is terrifying when you get this message, so we’ll discuss how to go about this situation.
Not many know but Apple has a feature that alerts a user that his or her account is vulnerable to data breaches. Apple’s “Security Recommendations” is a password monitoring feature constantly on the lookout for possible data breaches. With this feature introduced when iOS 14 rolled out, iOS device users can now change their passwords upon receiving a message indicating “This password appeared in a data leak.”
If you have recently got a message stating “This password appeared in a data leak”, the chances of your account being exposed to hackers are high. Do not leave yourself and your mobile device vulnerable. Know how this feature works, how to turn it on, and what to do after getting the prompt.
Related: 9 Best LastPass Alternatives to Keep Your Passwords in 2022
Inside This Article
What Does “This Password Appeared in a Data Leak” Mean?
Apple’s Security Recommendation feature monitors the passwords you use on apps and websites for potential leaks. As you may be well aware of, these passwords are what internet hackers are after. So when your passwords have potentially been exposed, Apple will notify you that “This Password Appeared in a Data Leak” to indicate that your account is at risk. The Apple Security Recommendation feature will also you get a chance to change your password before the data leak can even happen.
However, we can’t erase the possibility of your account being already exposed to hackers. This is why it is advisable to:
- Use a combination of alphanumeric characters as passwords.
- Make sure the password contains no personal details.
- Change your password regularly.
Furthermore, it is important to understand that hackers are always on the move; they are actively trying to breach your account.
How Does Apple’s Security Recommendation Work?
It is possible that you are getting notifications about a data leak on your iPhone or iPad because your password is part of a security breach. Apple’s Security Recommendation is part of the iOS 14 release back in September 2020 and has been an integral part of Apple’s security protocol.
To turn on Security Recommendation, follow these steps:
- Open Settings then scroll down to Passwords.
- Once Face ID or Touch ID detects your biometrics, you’ll see a list of accounts whose passwords are stored on your device.
- Tap on Security Recommendations.
- Toggle Detect Compromised Passwords on by tapping the switch green.
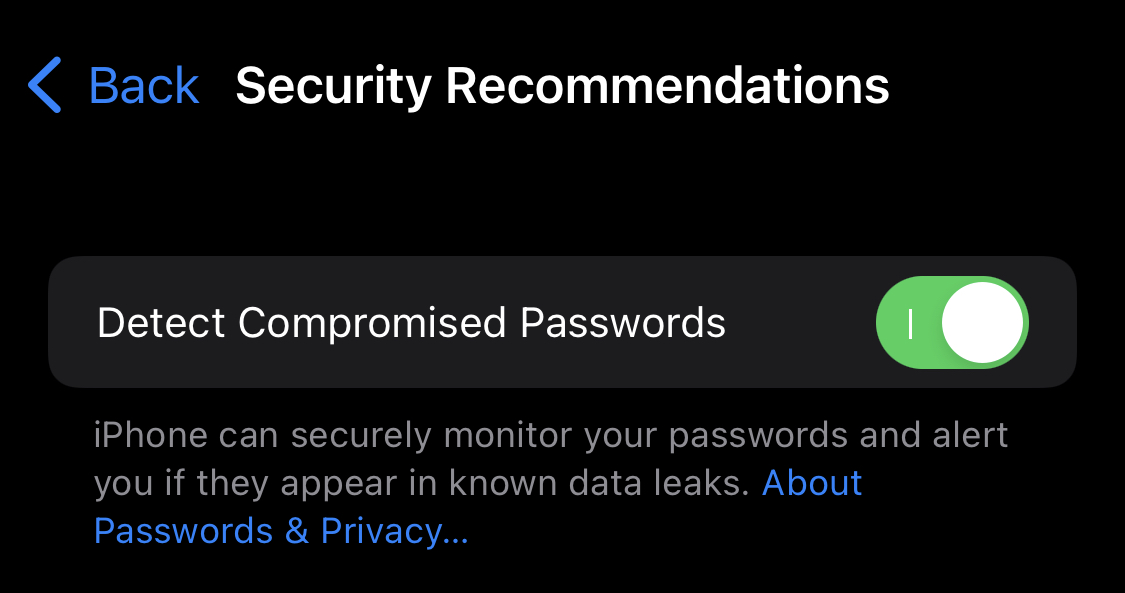
Once on, Apple will match the information against the lists of leaked passwords on the internet. Furthermore, it will cross-reference and produce a list of “pwned accounts” that includes yours. When this is on, you will also see what accounts need urgent password changes.
What to Do When Getting Data Leak Error on iPhone?
When you chose to elect a password that is weak by any standards, and you have these passwords on your iPhone or iPad memory, Apple’s Security Recommendation feature identifies them for you. More importantly — we can’t stress this enough — weak passwords can easily be part of a data leak. And this usually results in your iPhone or iPad displaying the “This password appeared in a data leak” error message. If you do, here’s what you need to do:
1. Change Your Password Regularly
Changing your passwords regularly make it almost impossible to have your account hacked by cybercriminals. If your iPhone detects your password is due for a change because it is weak, heed its warning. Here’s how to know which accounts need changing passwords:
- Open the Settings app then scroll down to Passwords.
- Once in, your Apple device will automatically generate a list of accounts that need password changing.
- To change a password for an account, tap Change Password on Website corresponding to an account.
- A new screen will pop. When prompted, log in to your account.
- Enter your current password if prompted. Then enter the new password.
- Tap on Save Changes to confirm the change.
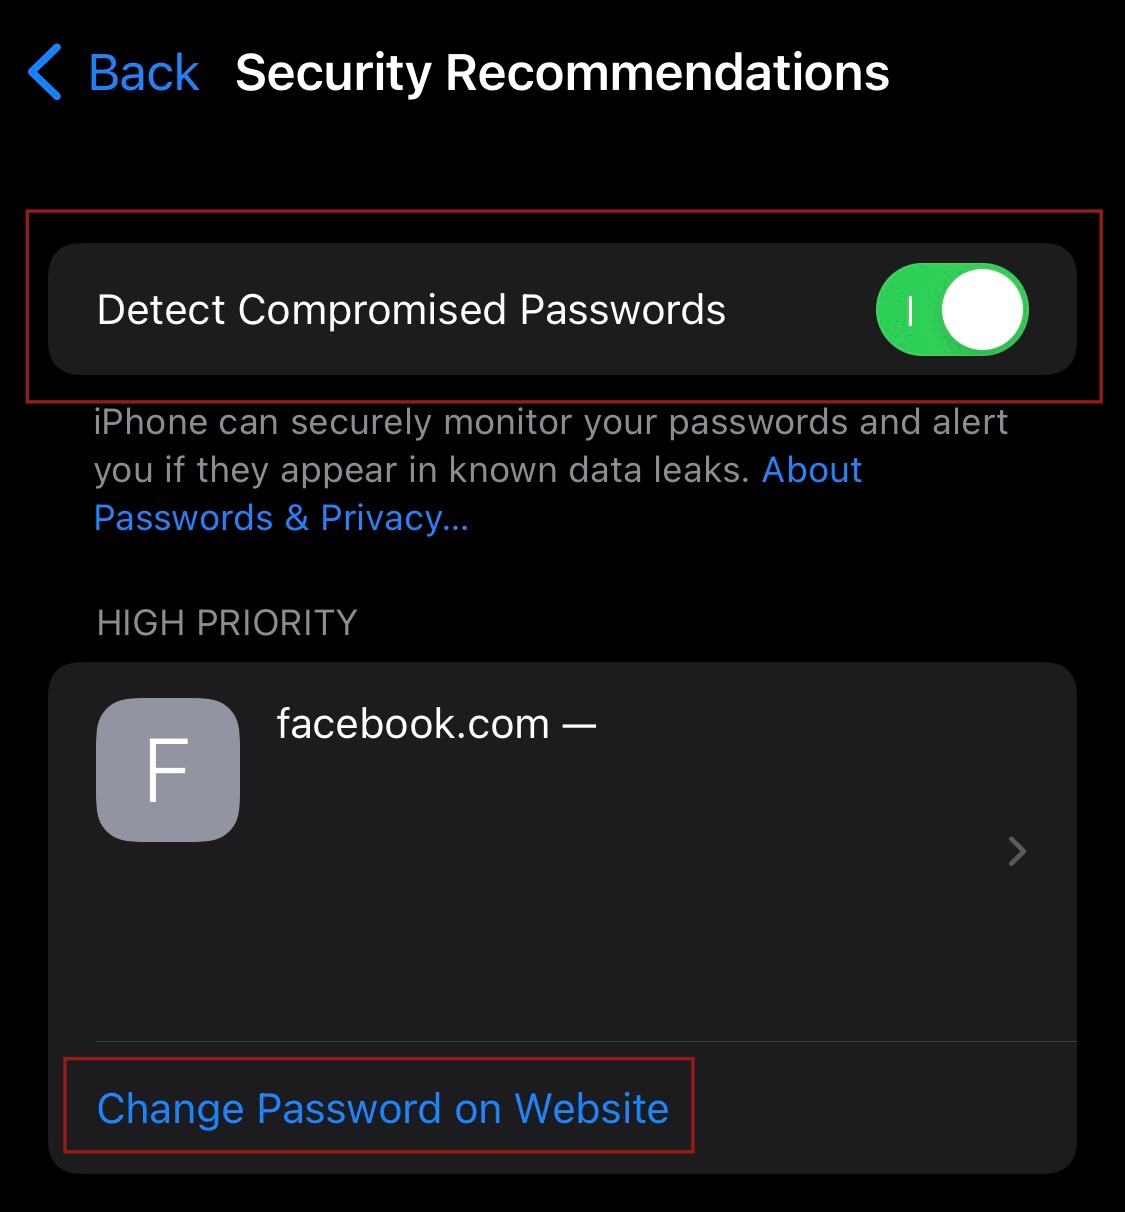
Some apps will even ask you to log out of every device where the account is logged in after saving the changes. This will ensure maximum security for your account.
2. Make Sure to Have Apple Security Recommendation On
iPhone can monitor your passwords and alert you if they appear in known data leaks. This is a revolutionary step for Apple because it means it puts user security at the forefront in an age where hackers can easily breach security and firewalls. One way to keep your accounts secured is by having this feature on and visiting it every once in a while. It’s a good tool and is native to your Apple device. Plus, if you don’t know it already, Apple provides security patches every time it rolls out an update. These updates provide a bump for the Security Recommendation feature to boost its efficiency and effectiveness.
Read More About Apple Security Recommendation Here
3. Turn Off Share My Location Feature
While sharing your location is necessary for some apps like ride-sharing services and the Find My iPhone app, other apps simply don’t need to track your whereabouts and, by extension, your personal details.
Having your Share My Location feature on all the time may not be the catalyst to having your accounts hacked but it can be used as a way to get through. Modern technology can map your digital behaviors and with hackers getting more clever, it only takes a few mapping and taps before you become a victim of data leaks among iPhone users.
To turn off your Share My Location feature, follow this guide:
- Open the Settings app then scroll down to Privacy.
- Tap on Location Services then select Share My Location.
- Toggle off Share My Location until the button turns grey.
Alternatively, you can also modify how each app uses the location feature. On the Location Services page, you’ll see a list of apps that use the Location service. You can modify how each app uses the feature by electing access status for each. You can elect to set:
- Never
- Ask Next Time Or When I Share
- While Using the App
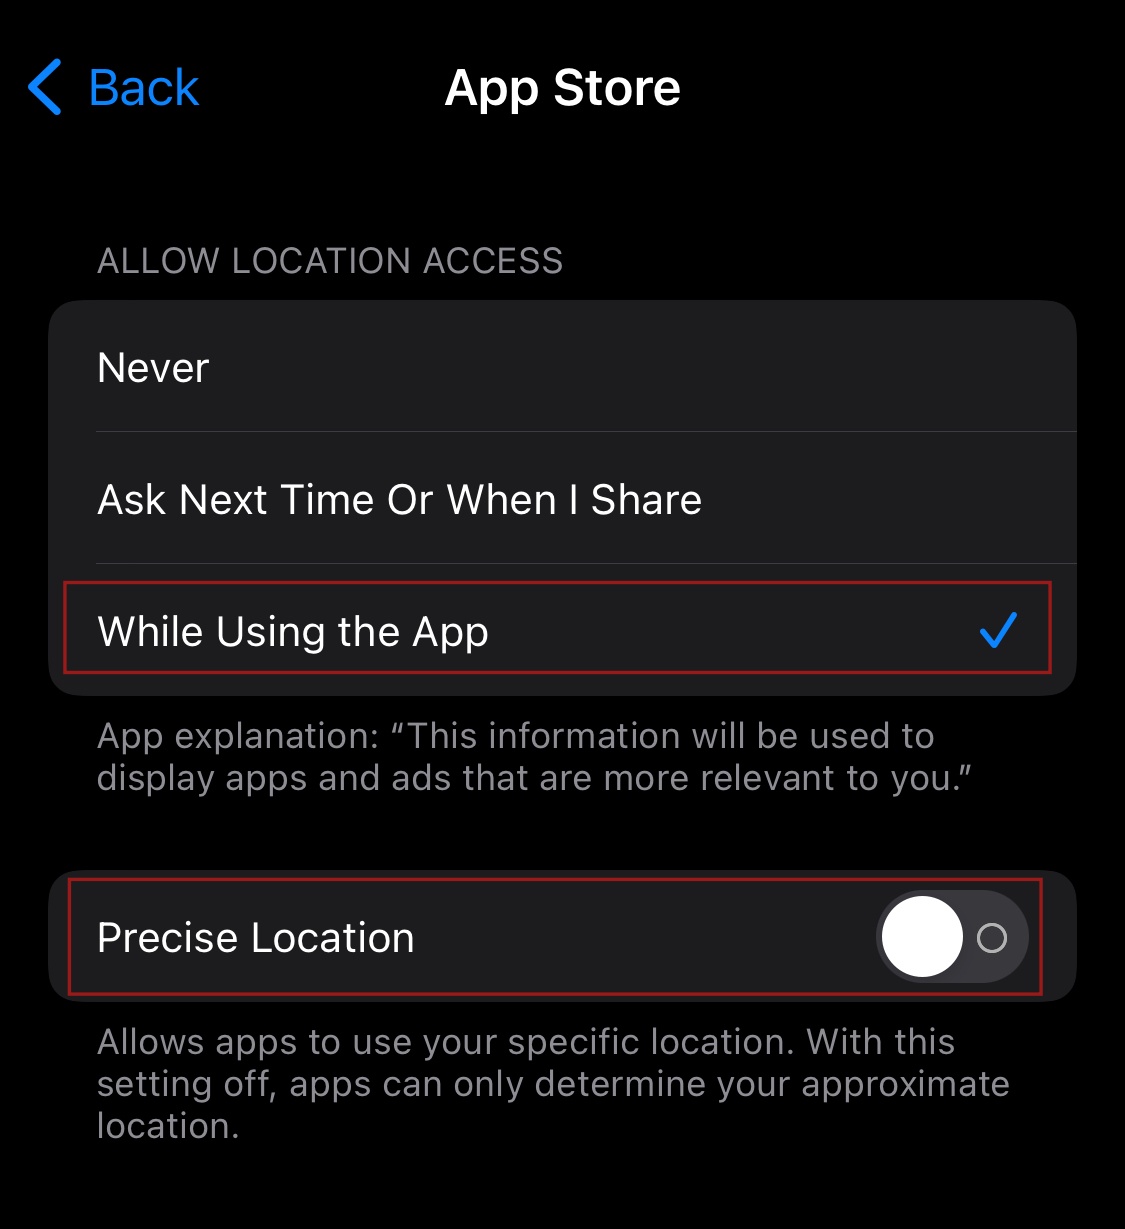
Finally, you can also choose whether or not to grant precise location reading for that app. Otherwise, the app will simply get an approximate location.
Related: Find My iPhone Not Working? Here are 9 Easy Solutions
4. Turn Off App Tracking
Ever wonder how Facebook, for example, displays ads for an item you just browsed over Amazon? This is because mobile applications can track your activities while using the app and even after you closed the app. This has spooked many users and gave rise to speculations that this can be used by hackers when you download an app.
Apple’s response? iOS 14.5 security patch that introduced App Tracking. However, iOS 14.5 and later differs from previous versions because the App Tracking feature allows users to be specific in revoking app access to track a user’s activity. If you want to check which apps have your permission to track or change the settings, here’s what you need to do:
- Open the Settings app then scroll down to Privacy.
- Tap on Tracking.
From here, it would simply be good to turn off the feature completely. However, if you have this feature turned on for a while, it will display a list of apps whose access settings you can modify. To revoke tracking access of an app from the list, simply toggle off the option for the app.
5. Have Two-Factor Authentication On
Two-factor authentication is a digital feature designed to prevent others from having easy access to your accounts. Some platforms using this include Facebook, Gmail, and Apple among others. Essentially, when this feature is on, you can only log in successfully into your account after you successfully entered a code which will be sent either to your phone or email. Without the code, you will be locked out and will not be able to use the platform.
It would be an extra safety net to turn on two-factor authentication on your iPhone to keep your accounts safe. Here’s how to turn it on:
- Go to Settings then tap on your name found on the upper band. Then select Password & Security.
- Tap Turn On Two-Factor Authentication, then tap Continue.
- Enter a trusted phone number where you will receive verification codes for two-factor authentication.
- Tap Next then enter the verification code sent to your trusted phone number.
The only other time you will be asked to enter your code is when sign out completely, erase your iPhone, sign in to your Apple ID account page in a web browser, or need to change your Apple ID password for security reasons.
6. Be Careful When Joining Public WiFi Networks
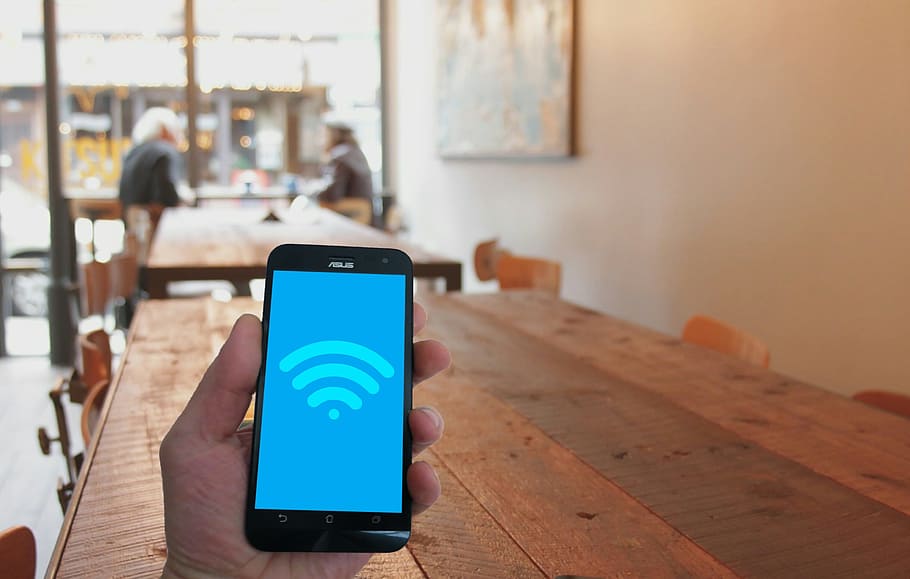
Free public WiFi networks are okay especially if you are outside. However, they are only good when you take safety precautions. This is because public WiFi networks are now weaponized by hackers to gain access to users’ confidential and sensitive data. Not only that, but you also risk infecting your device with malware, which, by the way, is another way for hackers to breach your personal data. And before you know it, you might be asking yourself — “Have I been pwned?”
So, before joining any free public WiFi network to go online, simply make sure you follow the steps we outlined before raising the possible harm of public internet networks.
Mark Yourself Safe From Data Leak on iPhone
Apple’s Security Recommendation feature can only do so much but it is a bump to securing your iPhone, iPad, and personal data. We still highly recommend changing passwords regularly; elect a password that can’t easily be traced to your personal data. Moreover, use random characters, uppercases, and a mix of alphanumeric characters to ensure maximum protection. But do not forget to write it down so you won’t forget.
Stay safe, dear Readers!
