
Welcome to the world of iPhone VR headsets! These revolutionary devices have transformed the way we experience virtual reality, immersing us in captivating digital worlds and enhancing our entertainment and gaming experiences. If you’re new to the world of iPhone VR headsets or looking to upgrade your current device, there are a few key things you need to know. In this article, we’ll explore six important factors to consider when using iPhone VR headsets, providing you with all the information you need to make the most of this cutting-edge technology. Whether you’re a seasoned VR enthusiast or just starting your virtual reality journey, we’ve got you covered. So, let’s dive in and discover the exciting world of iPhone VR headsets!
Inside This Article
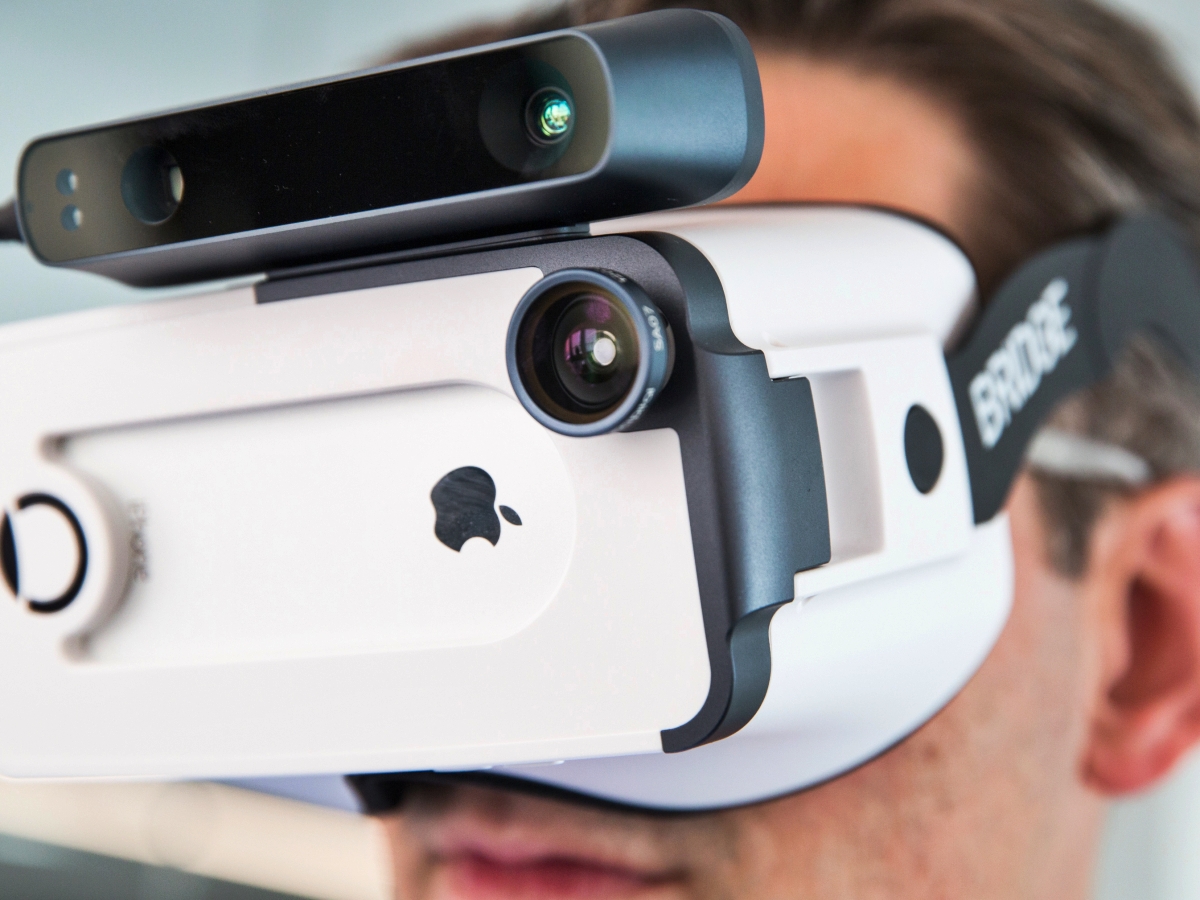
- 6 Things to Know about How to Use iPhone VR Headsets (UPDATED FOR 2018)
- Compatibility with iPhone Models
- Adjusting the Headset for Optimal Fit
- Selecting and Installing VR Apps
- Navigating and Interacting with VR Content
- Conclusion
- FAQs
6 Things to Know about How to Use iPhone VR Headsets (UPDATED FOR 2018)
Virtual Reality (VR) has revolutionized the way we experience digital content by creating immersive and interactive environments. If you’re an iPhone user who wants to dive into the exciting world of VR, using an iPhone VR headset is a fantastic option. But before you jump into the virtual world, here are 6 things you should know about how to use iPhone VR headsets.
Compatibility with iPhone Models
First and foremost, it’s crucial to ensure that your iPhone model is compatible with the VR headset you’re using. Different iPhone models have different dimensions and specifications, which may affect the fit and functionality of the VR headset. Be sure to check the compatibility information provided by the headset manufacturer to avoid any complications.
Adjusting the Headset for Optimal Fit
Getting the perfect fit is essential for a comfortable and immersive VR experience. Most iPhone VR headsets come with adjustable straps and lenses that can be tailored to your preferences. Start by adjusting the head strap so that the headset sits securely on your head without causing discomfort. Then, use the lens adjustment sliders to ensure a clear and sharp image.
Selecting and Installing VR Apps
Once you have your iPhone VR headset set up, it’s time to explore the wide array of VR apps available. Visit the App Store and search for VR apps that pique your interest. From virtual tours and games to educational experiences and productivity tools, there’s something for everyone. Download and install the apps onto your iPhone, ensuring that they are compatible with your headset.
Navigating and Interacting with VR Content
Using an iPhone VR headset involves navigating and interacting with virtual environments. Most headsets come with built-in controls or companion apps that allow you to navigate through menus and select options. Whether it’s using a touchpad, buttons, or motion sensors, familiarize yourself with the controls before diving into any VR experience. Experiment with different interactions to fully immerse yourself in the virtual world.
Maintaining a Comfortable Experience
Extended VR sessions can sometimes lead to discomfort or eye strain. To ensure a comfortable experience, take regular breaks and rest your eyes. If you wear glasses, consider using VR headset models that can accommodate them. Additionally, make sure to clean and sanitize the headset regularly to maintain hygiene.
Staying Updated with the Latest Technology
Finally, as with any technology, VR headsets and apps are continually evolving. Stay updated with the latest trends and developments in the VR industry. Keep an eye out for software updates for your apps and firmware updates for your headset, as they often come with performance improvements and new features.
With these 6 essential tips, you’re now equipped to dive into the mesmerizing world of iPhone VR headsets. Harness the power of virtual reality and explore fantastic experiences right from your iPhone.
Compatibility with iPhone Models
When it comes to using VR headsets with your iPhone, it’s crucial to ensure compatibility between your device and the headset you choose. Not all VR headsets are designed to work with every iPhone model, so it’s important to do your research before making a purchase.
The good news is that most modern VR headsets are compatible with a wide range of iPhone models, including the latest ones. However, it’s important to check the specifications and requirements of the VR headset to ensure that it supports your specific iPhone model.
Typically, VR headsets that are designed to work with iPhones will specify the compatible models on their packaging or product description. These headsets often use a universal or adjustable mechanism to accommodate various iPhone sizes, ensuring a secure fit. This means that whether you have an iPhone 6, iPhone 7, iPhone 8, or even the latest iPhone X, there should be a VR headset available for you.
Additionally, it’s worth noting that some VR headsets also offer compatibility with older iPhone models, allowing you to enjoy virtual reality experiences even if you don’t have the latest device. However, be sure to confirm compatibility before purchasing to avoid any disappointments.
Adjusting the Headset for Optimal Fit
When it comes to using an iPhone VR headset, achieving a comfortable and secure fit is essential for an immersive virtual reality experience. Here are some key tips for adjusting the headset to ensure an optimal fit:
1. Strap Adjustment: Start by placing the headset on your head and adjusting the straps to fit securely. The straps should be snug but not too tight, as excessive pressure can cause discomfort during prolonged use.
2. Interpupillary Distance (IPD) Adjustment: The IPD adjustment allows you to align the lenses with your eyes’ natural spacing, maximizing the clarity and depth perception of the VR content. Look for the IPD dial or slider on the headset and adjust it until you achieve a clear and sharp image.
3. Lens Distance Adjustment: Many iPhone VR headsets feature adjustable lens distance to accommodate individuals with varying eye distances. Locate the lens distance adjustment mechanism on the headset and adjust it until the content appears clear and focused.
4. Foam Padding: Check if the headset has removable foam padding. If so, experiment with different thicknesses or replace the padding to find the one that provides the most comfortable fit for your face shape and size. The padding should evenly distribute the pressure and prevent any discomfort.
5. Headphone Placement: If the iPhone VR headset does not have integrated headphones, make sure your headphones are positioned properly and securely. The sound quality is an essential part of the immersive experience, so ensure that the headphones are placed correctly over your ears.
6. Test and Adjust: Once you have made the initial adjustments, it’s important to test the headset by using a VR app or game. Pay attention to any discomfort, blurriness, or distortion. If any issues are encountered, make small adjustments to the straps, IPD, lens distance, or foam padding to fine-tune the fit.
By following these tips and taking the time to adjust the headset to your specific needs, you can enhance your iPhone VR experience and ensure a comfortable and immersive journey into virtual reality.
Selecting and Installing VR Apps
When it comes to enjoying virtual reality experiences on your iPhone using a VR headset, selecting and installing the right VR apps is crucial. Here are a few key points to keep in mind:
1. Research and Explore: Start by researching the available VR apps on the App Store. There is a wide range of options, from games and simulations to educational and entertainment apps. Take the time to read reviews, check ratings, and explore the features offered by each app.
2. Consider Your Interests: Choose VR apps that align with your interests and preferences. Whether you are a fan of thrill rides, virtual tours, or immersive storytelling, there is an app out there for you. Selecting apps that appeal to your personal preferences will enhance your overall VR experience.
3. Check for Device Compatibility: Before downloading any VR app, make sure it is compatible with your iPhone model and iOS version. Some apps may require the latest iPhone models with more advanced hardware capabilities, while others can work on older devices. Confirming compatibility ensures that the app will run smoothly on your device.
4. User Ratings and Reviews: Pay attention to the ratings and reviews of VR apps. The opinions and experiences of other users can provide valuable insights. Look for apps that have high ratings and positive reviews, as these are usually indicators of a well-designed and enjoyable VR experience.
5. Free vs. Paid Apps: Consider whether you are willing to pay for VR apps or prefer to stick with free options. There are numerous free apps available that provide excellent VR experiences, while some premium apps offer more advanced features and content. Determine your budget and choose accordingly.
6. Installation and Updates: Once you have selected the VR apps you want to try, simply click on the “Get” or “Install” button to download and install them on your iPhone. Keep in mind that some VR apps may require a large amount of storage space, so ensure your device has enough available space. Additionally, periodically check for updates to ensure that you have the latest version of the app for improved functionality and bug fixes.
By following these steps, you can select and install VR apps that cater to your interests and enhance your virtual reality experience on your iPhone.
Navigating and Interacting with VR Content
Once you have your iPhone VR headset set up and adjusted for the optimal fit, it’s time to delve into the exciting world of virtual reality! But how do you navigate and interact with the immersive VR content? Let’s explore some key tips and tricks:
1. Controller-Based Navigation: Many VR headsets come with a handheld controller that allows you to navigate through menus, select options, and interact with objects in the virtual world. Familiarize yourself with the buttons and functions of the controller to efficiently navigate through VR experiences.
2. Gaze-Based Interaction: Some VR apps and games utilize gaze-based interaction, where you can select and interact with objects simply by looking at them for a certain period of time. This method is commonly used in VR experiences that are optimized for mobile devices, offering a simplified and intuitive way of interacting with the virtual environment.
3. Gesture-Based Interaction: In certain VR apps, you may have the option to interact with the virtual world using gestures. This typically involves using hand movements or gestures to manipulate objects, grab and throw items, or perform specific actions. Gesture-based interaction adds a layer of immersion and control to the VR experience.
4. Voice Commands: Some advanced VR applications and assistants allow you to navigate and interact with VR content using voice commands. This hands-free method facilitates a seamless and natural interaction, enabling you to control the virtual environment and execute tasks simply by speaking out commands.
5. Menu Selection: Virtual reality experiences often have menus or user interfaces that allow you to access various options, customize settings, or switch between different modes. Pay attention to the UI design and follow the on-screen instructions to make selections, adjust visual settings, or switch between different VR environments.
6. Explore and Experiment: VR content is continuously evolving, and developers are constantly innovating to provide new and exciting ways to navigate and interact with virtual environments. Don’t be afraid to explore different VR apps and games, try out new interaction methods, and experiment with various controls to discover the full potential of iPhone VR headsets.
By mastering the art of navigating and interacting with VR content, you can fully immerse yourself in a virtual world of limitless possibilities. Whether it’s exploring fantastical landscapes, engaging in heart-pounding adventures, or learning through educational simulations, iPhone VR headsets open up a whole new dimension of entertainment and interactivity.
Conclusion
In conclusion, iPhone VR headsets offer an incredible opportunity to immerse yourself in virtual reality experiences right from your smartphone. By following the steps outlined in this article, you can easily set up and use your iPhone VR headset to enjoy a wide range of virtual reality content.
From gaming and entertainment to education and exploration, iPhone VR headsets provide a gateway to a whole new world of experiences. With their user-friendly design and compatibility with iPhones, they have become a popular choice among VR enthusiasts.
Whether you are a seasoned VR user or a newbie, investing in an iPhone VR headset can take your virtual reality experiences to the next level. So, grab your iPhone, strap on your VR headset, and get ready to step into a world of immersive wonders!
FAQs
Here are some frequently asked questions about using iPhone VR headsets:
1. Can I use any VR headset with my iPhone?
Yes, you can use any VR headset that is compatible with your iPhone. However, it is recommended to use a VR headset specifically designed for iPhones to ensure optimal performance and compatibility.
2. How do I connect my iPhone to a VR headset?
To connect your iPhone to a VR headset, you’ll need to follow these steps:
- Make sure your iPhone is fully charged.
- Open the App Store and search for a VR app.
- Download and install the VR app on your iPhone.
- Insert your iPhone into the VR headset.
- Adjust the straps and lenses for a comfortable fit.
- Launch the VR app and follow the on-screen instructions to start using your iPhone with the VR headset.
3. What types of content can I experience with an iPhone VR headset?
With an iPhone VR headset, you can experience a wide range of content, including virtual reality games, immersive videos, 360-degree photos, and virtual tours. Many VR apps offer different experiences, allowing you to explore virtual worlds, visit famous landmarks, and even attend virtual concerts or events.
4. Do I need additional accessories to use an iPhone VR headset?
In most cases, an iPhone VR headset comes with everything you need to start experiencing virtual reality. However, some VR apps may recommend or require additional accessories, such as a Bluetooth controller or headphones, to enhance the immersive experience. It’s always a good idea to check the app’s instructions or description for any recommended accessories.
5. How can I ensure the best VR experience on my iPhone?
To ensure the best VR experience on your iPhone, consider the following tips:
- Choose a high-quality VR headset designed for iPhones.
- Make sure your iPhone is running the latest version of iOS.
- Close any unnecessary apps running in the background to free up system resources.
- Use a clean and microfiber cloth to wipe the lenses of the VR headset before each use.
- Adjust the straps and lenses for a comfortable fit.
- Ensure proper lighting conditions in the room to avoid interference.
- Follow the instructions provided by the VR app for the best setup and experience.