
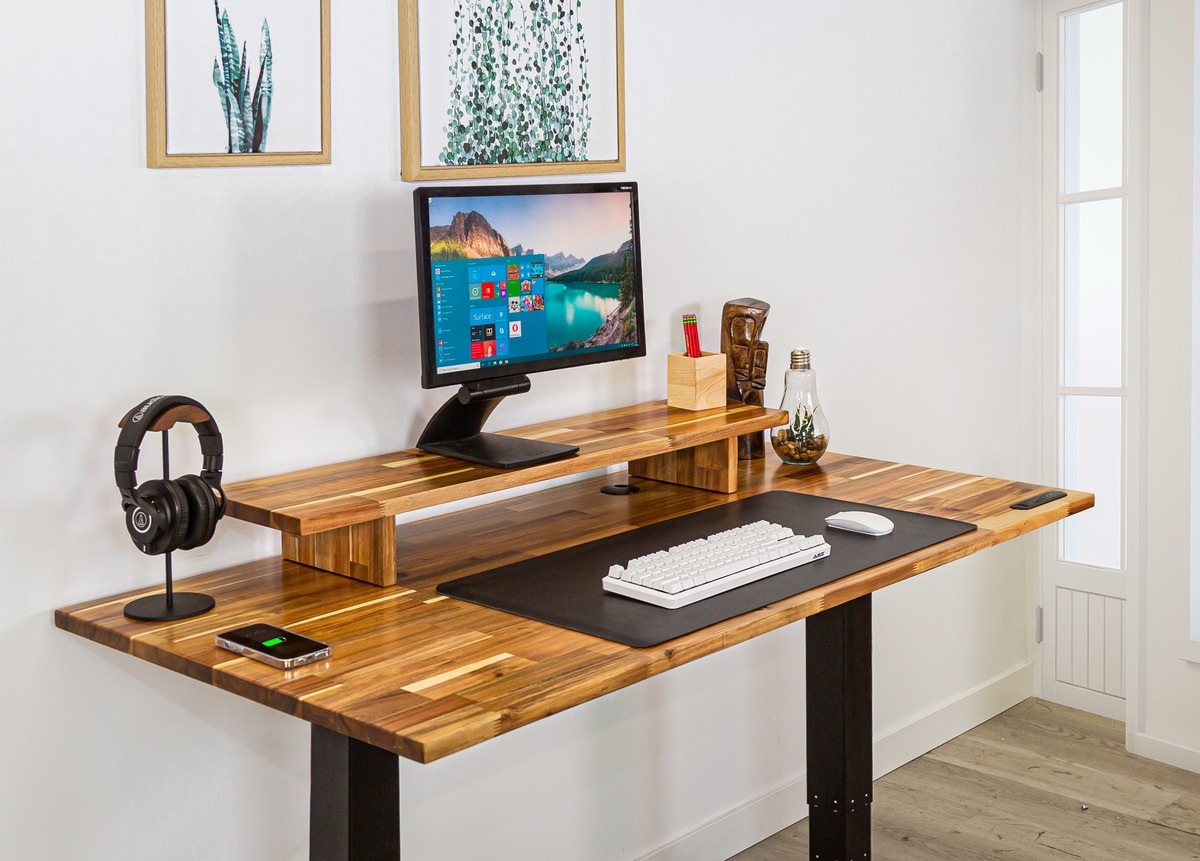
Are you tired of dealing with messy charging cables for your iPhone? Do you wish there was a more convenient way to keep your phone charged while also decluttering your space? Look no further than DIY wireless charging furniture! In this article, we will show you how to create your own iPhone charging station without breaking the bank. Say goodbye to tangled cords and hello to a sleek and efficient charging solution. With just a few simple materials and a little bit of creativity, you can transform an ordinary piece of furniture into a stylish and functional charging station for your iPhone. Let’s get started on this fun and practical project that will make your life so much easier!
Inside This Article
- Materials Needed
- Step 1: Preparing the Furniture
- Step 2: Installing the Wireless Charging Pad
- Step 3: Concealing the Wires
- Step 4: Testing the Charging Functionality
- Conclusion
- FAQs
Materials Needed
To create your own DIY wireless charging furniture, you will need the following materials:
- Wooden furniture piece (table, nightstand, or shelf)
- Wireless charging pad
- Drill
- Drill bits
- Sandpaper
- Wood stain or paint
- Paintbrush
- Power strip
- Power adapter
- Cable management clips
These materials can be easily found at your local hardware store or online. It’s worth mentioning that the size of the wireless charging pad should be compatible with your furniture piece. Make sure to measure the dimensions of your furniture and choose a wireless charging pad that will fit perfectly into the designated area.
The power strip and power adapter are necessary for providing electricity to the wireless charging pad. This will allow you to charge your phone wirelessly by simply placing it on the furniture. The cable management clips will help keep the wires organized and concealed for a neat and tidy finish.
Additionally, if you plan on refinishing the furniture piece, you may want to gather some sandpaper, wood stain or paint, and a paintbrush. These materials will help you transform the appearance of the furniture and give it a fresh new look.
Once you have all the necessary materials, you’ll be ready to start creating your very own DIY wireless charging furniture. Follow the step-by-step instructions to turn an ordinary piece of furniture into a convenient and stylish charging station for your iPhone or other compatible devices.
Step 1: Preparing the Furniture
Before you can transform your furniture into a wireless charging station, it’s essential to prepare it properly. Follow these steps to ensure a successful DIY project:
1. Choose the Right Piece of Furniture: Select a piece of furniture that is suitable for your needs and has a flat surface. Ideally, a nightstand, coffee table, or side table will work best.
2. Measure and Mark: Measure the surface area where you plan to install the wireless charging pad. Use a pencil to mark the dimensions and ensure accuracy.
3. Clear the Surface: Remove any items or clutter from the furniture’s surface. This will not only make it easier to work on but also prevent any damage to your belongings during the installation process.
4. Sand and Clean: It’s important to prepare the surface by sanding it lightly. This will help the adhesive stick better and create a smoother finish. After sanding, clean the surface thoroughly to remove any dust or debris.
5. Apply Adhesive: Apply a thin layer of adhesive to the back of the wireless charging pad. Ensure that the adhesive covers the entire surface to provide a strong bond.
6. Position the Charging Pad: Carefully place the wireless charging pad on the marked area of the furniture. Use gentle pressure to press it down and make sure it adheres securely.
7. Allow Time to Dry: Allow the adhesive to dry according to the manufacturer’s instructions. This will ensure the charging pad stays in place and won’t be dislodged during use.
By following these steps, you will have successfully prepared your furniture for the next stage of creating your DIY wireless charging station. Now, you’re ready to move on to the installation of the wireless charging pad.
Step 2: Installing the Wireless Charging Pad
Now that you have prepared your furniture, it’s time to move on to the next step: installing the wireless charging pad. This is the heart of your DIY project, as it enables your furniture to wirelessly charge your mobile devices.
The first thing you need to do is choose a suitable wireless charging pad. There are various options available in the market, but make sure to select one that is compatible with your mobile phone’s wireless charging feature. It is always a good idea to check the specifications of the charging pad and ensure that it supports the Qi wireless charging standard, which is the most commonly used.
Once you have your wireless charging pad, find a suitable spot in your furniture where you want to install it. It is recommended to select a flat and stable surface that is easily accessible. Before proceeding, make sure to clean the surface to remove any dust or debris that may interfere with the adhesive.
Next, remove the protective backing from the adhesive side of the charging pad. Carefully align the charging pad with the spot you have chosen and press it firmly onto the surface. Make sure to hold it in place for a few seconds to ensure proper adhesion.
Once the charging pad is securely attached to your furniture, you need to connect it to a power source. Depending on the specific model of the charging pad, there may be different ways to connect it. Some pads come with a USB cable that needs to be plugged into a power adapter, while others may have built-in power cords that can be directly plugged into an outlet.
Take the necessary steps to conceal the power cord and ensure it is secured and hidden within the furniture. You can use cable management solutions, such as cord clips or adhesive cable holders, to keep the cord organized and out of sight.
After connecting the charging pad to the power source, double-check that everything is properly installed and securely in place. You can do a quick test by placing your mobile device on the charging pad to see if it starts charging. If it does, congratulations! You have successfully installed the wireless charging pad in your furniture.
It’s essential to note that different wireless charging pads may have specific instructions provided by the manufacturer. Always refer to the instruction manual and follow the guidelines accordingly to ensure optimal performance and safety.
Now that you have completed the installation process, you can move on to the next step: concealing the wires to achieve a clean and seamless look for your DIY wireless charging furniture.
Step 3: Concealing the Wires
Now that you have successfully installed the wireless charging pad in your furniture, it’s time to take care of those unsightly wires. Concealing the wires not only improves the aesthetics of your charging station but also ensures a safer and more organized setup. Here are some simple steps to help you get started:
1. Start by gathering the necessary supplies. You will need electrical tape, cable clips, a utility knife, and a power drill.
2. Determine the most convenient and inconspicuous path for the wires to follow. Look for gaps or openings in your furniture that can accommodate the cables without causing any damage or obstruction.
3. Use the utility knife to create small grooves or channels along the path you have chosen. These grooves should be deep enough to hold the wires securely in place.
4. Carefully feed the charging cables through the grooves, making sure they are properly positioned and not strained or bent. Use cable clips to secure the wires to the furniture’s surface, keeping them neat and tangle-free.
5. If needed, use electrical tape to bundle any excess cable length and keep it out of sight. Make sure to leave enough slack for easy movement and access to the charging area.
6. Once you have aligned and secured all the wires along the chosen path, use a power drill to create small holes where the wires will exit the furniture. This will allow easy access for connecting the charging cables to a power source.
7. Lastly, double-check the positioning of the wires and ensure they are well concealed. Adjust any clips or tape if necessary, and make sure everything looks clean and tidy.
By concealing the wires, you can maintain the sleek appearance of your DIY wireless charging furniture while enjoying the convenience of having a clutter-free charging station. Take your time during this step to ensure a professional-looking finish.
Once you have completed this step, you are ready to move on to the final step of testing the charging functionality of your newly created iPhone charging station on a budget.
Step 4: Testing the Charging Functionality
After completing the installation of the wireless charging pad and concealing the wires, it’s time to test the charging functionality of your DIY wireless charging furniture. This step is crucial to ensure that everything is working correctly before you start using it to charge your mobile phone.
The first thing you need to do is to place your mobile phone on the charging pad. Make sure that the phone is centered and aligned with the charging coil on the pad. It’s essential to position the phone correctly to establish a good connection and efficient charging.
Once your phone is on the charging pad, look for the charging indicator on your phone’s screen. Most modern smartphones show a small charging icon or battery percentage when placed on a wireless charging pad. If you see that the charging indicator appears, congratulations! Your DIY wireless charging furniture is working correctly.
Leave your phone on the charging pad for some time to ensure that it charges properly. Keep an eye on the charging indicator to see if the battery percentage increases. Ideally, the charging speed should be similar to when your phone is connected to a regular charging cable.
If your phone is charging, it’s a good sign that the installation of the wireless charging pad was successful. However, if you don’t see any charging indicators on your phone or the battery percentage remains unchanged, there might be an issue with the installation or the compatibility between the charging pad and your phone.
In such cases, try repositioning your phone on the charging pad to find the optimal placement. If that doesn’t work, double-check the connection of the charging pad to the power source and make sure all the wires are securely connected.
If you’ve followed all the steps correctly and your phone still doesn’t charge, it’s possible that your phone is not compatible with the wireless charging pad. Some older phone models or devices with metal backs might not support wireless charging. In such cases, you might need to consider using a wireless charging receiver or upgrading your phone to one that supports wireless charging.
It’s important to note that the charging speed of wireless charging pads can vary depending on the pad’s power output and the capabilities of your mobile phone. Some wireless charging pads offer fast charging capabilities, while others provide standard charging speeds. Make sure to check the specifications of both your phone and the charging pad to understand the charging speed you can expect.
By following this testing step, you can ensure that your DIY wireless charging furniture is functioning properly and that you can enjoy the convenience of wire-free charging. Congratulations on successfully creating your own wireless charging station!
Conclusion
In conclusion, creating your own DIY wireless charging furniture, such as an iPhone charging station, can be a cost-effective and creative solution for keeping your devices powered up and organized. With the increasing popularity of wireless charging technology, it’s easier than ever to incorporate wireless charging capabilities into everyday items.
By following the steps outlined in this article, you can transform ordinary furniture into functional and stylish charging stations. Not only will you have a convenient place to charge your iPhone, but you’ll also add a unique touch to your home decor.
Remember to ensure that you have the necessary tools and resources before starting your DIY project. Additionally, be cautious and follow safety protocols when working with electrical components.
So why wait? Get started on your DIY wireless charging furniture project today and enjoy the convenience and simplicity of wireless charging in your home.
FAQs
1. How does wireless charging work?
Wireless charging, also known as inductive charging, uses electromagnetic fields to transfer energy from a charging pad or station to a compatible device. The charging pad contains a coil that generates the electromagnetic field, which induces a current in the receiving coil within the device, allowing it to charge without the need for physical connections.
2. Can wireless charging work with any phone?
Not all phones are compatible with wireless charging. Generally, newer smartphones such as iPhone X and Samsung Galaxy S10 support wireless charging, while older models may not have this feature. However, some older phones can be made compatible by using an external wireless charging receiver or case.
3. What is the advantage of DIY wireless charging furniture?
DIY wireless charging furniture offers the convenience of wirelessly charging your phone without the need for additional cables or adapters. It provides a stylish and clutter-free charging solution, seamlessly integrating charging pads into commonly used furniture like nightstands, coffee tables, and desks.
4. Is DIY wireless charging furniture cost-effective?
Yes, DIY wireless charging furniture is an affordable alternative to purchasing pre-made wireless charging furniture. By repurposing existing furniture and adding wireless charging components, you can create functional and stylish charging stations on a budget. The cost will depend on the type and number of charging pads you install, but it is generally much cheaper than buying specialized furniture.
5. Is it difficult to make DIY wireless charging furniture?
The difficulty level of making DIY wireless charging furniture can vary depending on your skill level and experience with DIY projects. However, with the right tools and resources, it is a manageable project for most individuals. There are plenty of online tutorials and guides available that provide step-by-step instructions, making it easier to follow along and create your own wireless charging furniture.