
In the world of smartphones, iPhones have always stood out as a symbol of innovation and cutting-edge technology. With every new model, Apple introduces a plethora of features to enhance the user experience. One such feature that iPhone users often find helpful is the “Level” tool. The Level tool, available on various iPhone models, utilizes the device’s built-in sensors to measure and indicate the levelness of a surface.
Whether you’re hanging a picture frame, assembling furniture, or simply ensuring the even placement of objects, the Level tool comes in handy. In this article, we will explore how to use the Level tool on your iPhone, step by step. We’ll also discuss the compatibility of the Level tool with different iPhone models and answer some frequently asked questions. So, let’s dive into the world of iPhone’s Level tool and unlock its full potential!
Inside This Article
- Setting Up Level
- Using Level to Measure Surfaces
- Using Level as a Digital Inclinometer
- Other Tips and Tricks
- Conclusion
- FAQs
Setting Up Level
Setting up the Level feature on your iPhone is a simple process that can be done in just a few steps. Let’s get started:
- Open the “Measure” app on your iPhone. This app comes pre-installed on most iPhones and can be found in the Utilities folder.
- Once you have opened the app, swipe left on the options at the bottom of the screen until you come to the “Level” feature. Tap on it to select it.
- Now, place your iPhone on a flat surface such as a table or desk. Ensure that the surface is level before proceeding.
- Once your iPhone is on the surface, you will notice a white circle in the middle of the screen with a bubble inside. The bubble should be centered in the circle if the surface is level.
- If the bubble is not centered, you can use the arrows on the screen to level the surface. Simply tilt your iPhone in the opposite direction of the bubble until it is centered.
- Once the bubble is centered, your iPhone is now set up and calibrated as a level. You can use it to measure surfaces or as a digital inclinometer.
Setting up the Level feature on your iPhone is quick and easy, allowing you to make accurate measurements and ensure that surfaces are level. Now that you have set up the Level, let’s move on to how to use it.
Using Level to Measure Surfaces
One of the most handy features of the level on your iPhone is the ability to measure surfaces accurately. Whether you’re hanging a picture frame, installing shelves, or building a piece of furniture, the level can be your trusty companion.
To begin, open the level app on your iPhone. Once opened, you’ll notice a horizontal line with a green bubble in the center. This bubble indicates whether a surface is perfectly level or not.
To measure a surface, simply place your iPhone on the desired area. As you move the iPhone, the bubble will move accordingly. Keep adjusting the position until the bubble is centered within the horizontal line.
For example, let’s say you’re hanging a picture frame. Place your iPhone on top of the frame, making sure it is level. Adjust the position until the bubble is centered and the line is green. This indicates that the frame is perfectly level.
Additionally, the level app also works in portrait orientation. This means you can use it to measure vertical surfaces as well. Whether you’re aligning a bookshelf or verifying the straightness of a wall, the level app has you covered.
Remember to avoid any unnecessary movements while measuring a surface. Any tilts or shakes can affect the accuracy of the measurement. Hold your iPhone steady and allow the level app to do its job.
The level app on your iPhone can be a valuable tool for any DIY enthusiast or professional. It not only saves you from the hassle of using a physical level but also provides accurate measurements with ease.
Next time you have a home improvement project or need to ensure that everything is perfectly level, reach for your iPhone and let the level app guide you.
Using Level as a Digital Inclinometer
Did you know that your iPhone’s built-in level feature can also function as a digital inclinometer? This means you can use your phone to measure the angle of slopes, ramps, or even the incline of a ladder. It’s a handy tool to have when you need to ensure surfaces are level or when you want to measure the tilt of objects.
To use your iPhone as a digital inclinometer, follow these simple steps:
- Launch the “Measure” app on your iPhone. It is represented by a yellow icon with a ruler inside.
- Swipe right to access the “Level” feature. This will change the function of your phone’s built-in level to an inclinometer.
- Place your iPhone on the surface or object you want to measure. Ensure that the side with the screen is facing upwards.
- Observe the digital readout on your screen. It will display the angle of inclination in degrees.
The digital inclinometer feature on your iPhone can come in handy in various scenarios. For example, if you are a DIY enthusiast and want to ensure the correct angle while installing shelves or hanging frames, the digital inclinometer can help you achieve precise measurements.
Additionally, professionals in fields such as construction or engineering can use the digital inclinometer feature to measure slopes, angles, and inclines accurately. It provides a quick and convenient way to gather critical data on the spot.
Furthermore, if you enjoy outdoor activities such as hiking or camping, the digital inclinometer on your iPhone can assist you in determining the steepness of trails or the tilt of your camping setup. It adds a level of convenience and accuracy to your outdoor adventures.
Keep in mind that the accuracy of the digital inclinometer feature may depend on various factors, including the position and stability of your iPhone. It is advisable to ensure that your phone is placed on a stable surface before taking measurements. Additionally, calibrating your iPhone’s sensors regularly can also help maintain accurate readings.
Overall, the digital inclinometer feature on your iPhone provides a practical and easy-to-use tool for measuring angles and inclines. Whether you are a DIY enthusiast, a professional in a relevant field, or simply someone who enjoys outdoor activities, this feature can make your life easier and more precise.
Other Tips and Tricks
Now that you’ve mastered the basics of using the Level app on your iPhone, let’s dive into some additional tips and tricks that can further enhance your experience.
1. Calibration: It’s important to periodically calibrate the Level app to ensure accurate measurements. To do this, go to the Settings menu within the app and select the Calibration option. Follow the on-screen instructions to calibrate the app using a known level surface.
2. Lock Orientation: If you find it inconvenient to hold your iPhone in a specific orientation while using the Level app, you can enable the Lock Orientation feature. By doing so, the app will maintain the level display regardless of how you hold your phone. To do this, swipe up from the bottom of your screen to access the Control Center, then tap on the Lock Orientation icon.
3. Snapshots: The Level app allows you to capture and save snapshots of your measurements. This feature can be handy if you need to refer back to your measurements later or share them with others. Simply tap on the Camera icon within the app, and a snapshot of your current level measurement will be saved to your Photos app.
4. Remote Leveling: Did you know that you can use the Level app on one iPhone to remotely measure the levelness of another iPhone? This can be useful if you’re working on a project with a friend or colleague. Simply open the Level app on both devices, and one device can be used as a reference level while the other is held against the surface you want to measure.
5. Accessibility Options: The Level app also offers accessibility options for users with visual impairments. You can enable VoiceOver in the Settings menu to have the app read out the level measurements aloud. This can be immensely helpful for individuals who may have difficulty seeing the visual display.
6. Customized Units: By default, the Level app displays measurements in degrees. However, you can change the units to percentage, pitch, or roof pitch if you prefer. Simply go to the Settings menu in the app and select the Units option to choose your desired unit of measurement.
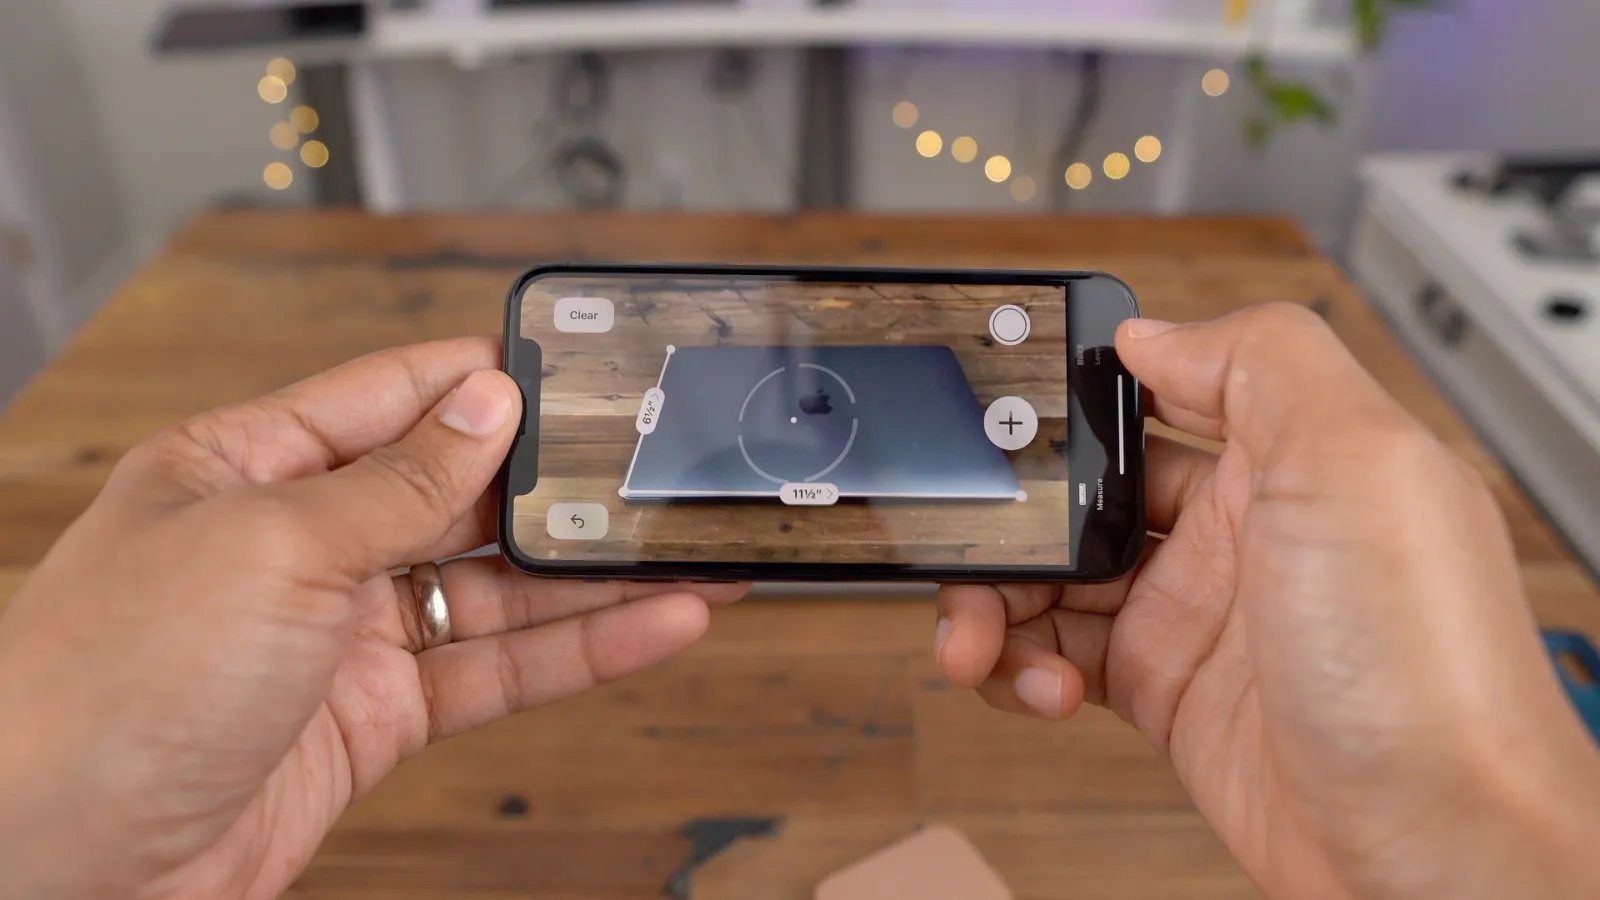
7. Augmented Reality: Some iPhone models support augmented reality (AR) capabilities, which can make using the Level app even more immersive. Depending on your iPhone model, you may be able to switch to AR mode and see level measurements overlaid onto the real world through your iPhone’s camera.
8. Undo and Clear: If you make a mistake or want to start fresh with your measurements, the Level app provides options to undo the last measurement or clear all measurements. Simply tap on the Undo or Clear button in the app’s interface to remove or reset your measurements.
With these additional tips and tricks, you can take full advantage of the Level app on your iPhone and elevate your leveling experience. Whether you’re working on DIY projects, hanging artwork, or simply checking the level of a surface, the Level app is an invaluable tool that can save you time and effort.
Using the Level feature on your iPhone can be incredibly useful when you need to measure the alignment of various objects or surfaces. Whether you’re hanging a picture frame, installing shelves, or simply want to ensure that your furniture is on an even surface, the Level tool can come in handy.
With just a few taps on your iPhone screen, you can access the built-in Level feature and utilize its accurate measurements to ensure precision and balance in your tasks. The Level tool is intuitive and user-friendly, making it accessible to both beginners and experienced users.
By leveraging the Level feature on your iPhone, you can save time and effort by eliminating the need for separate tools and equipment. The convenience of having a digital level right at your fingertips allows you to take on various DIY projects without any hassle.
So next time you find yourself needing to check the levelness of an object or surface, don’t forget to utilize the Level feature on your iPhone. It’s a handy tool that can make your tasks easier and more efficient.
FAQs
1. How do I use the Level feature on iPhone?
To use the Level feature on iPhone, follow these steps:
- Open the Compass app on your iPhone.
- Swipe left to access the Level feature.
- Place your iPhone on a flat surface.
- Adjust the position until the bubble is centered between the two lines.
- You can now use the Level feature to check if surfaces and objects are level.
2. Can I use the Level feature to check if a picture frame is straight?
Yes, you can use the Level feature on iPhone to check if a picture frame is straight. Simply open the Compass app, swipe left to access the Level feature, and place your iPhone on top of the picture frame. Adjust the frame until the bubble in the Level feature is centered between the two lines. This will ensure that your picture frame is straight and properly aligned.
3. Is the Level feature on iPhone accurate?
The Level feature on iPhone is generally accurate for everyday use. However, it is important to note that it may not be as precise as dedicated leveling tools. For most casual tasks, such as checking if surfaces are level or ensuring picture frames are straight, the Level feature on iPhone should suffice.
4. Can I use the Level feature on iPhone to measure angles?
No, the Level feature on iPhone is specifically designed to check if surfaces are level or objects are straight. It does not have the capability to measure angles. If you need to measure angles, you may consider using a dedicated angle measuring tool or a specialized app available on the App Store.
5. Is the Level feature available on all iPhone models?
The Level feature is available on iPhone models that have a built-in compass, which includes iPhone 3GS and later models. To access the Level feature, simply open the Compass app on your iPhone and swipe left. If your iPhone does not have the Compass app or the Level feature, it may not have the necessary hardware to support it.