
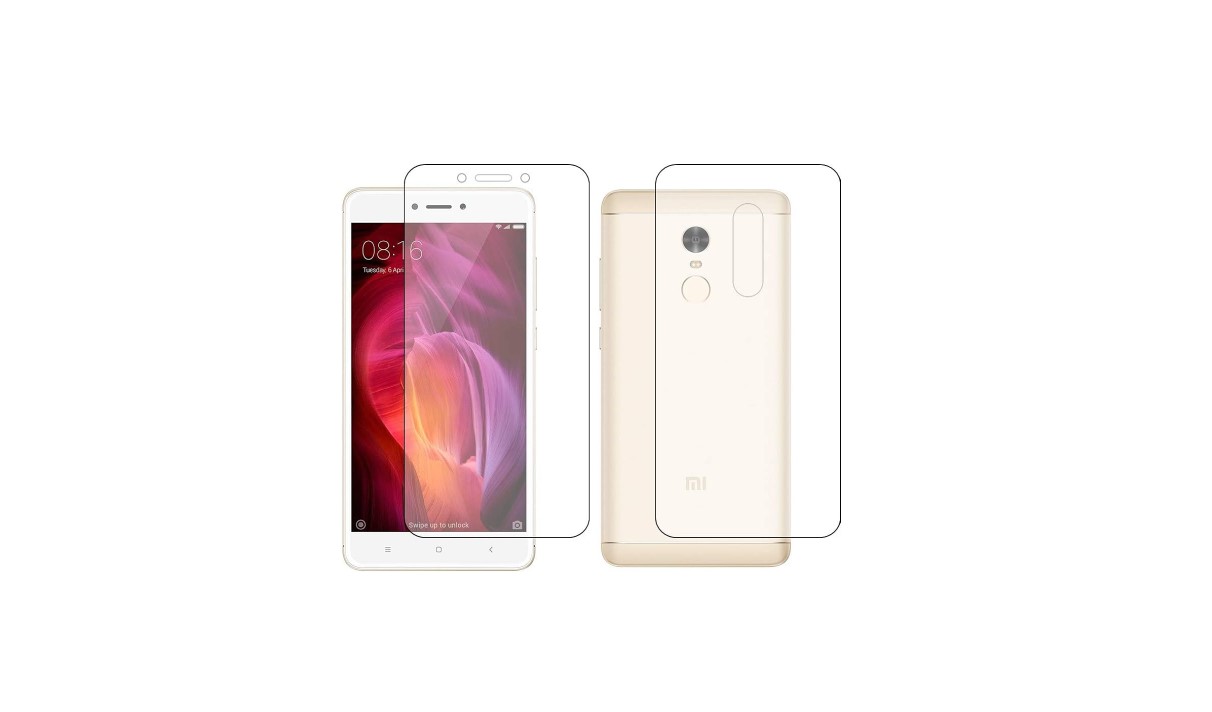
The Redmi Note 4 is a popular and powerful Android smartphone by Xiaomi. One of the essential accessories that every Redmi Note 4 user should have is tempered glass. Tempered glass protects the phone’s display from scratches, cracks, and other damage, offering an extra layer of security. Applying tempered glass to your Redmi Note 4 is a simple process that anyone can do at home. In this article, we will guide you through the step-by-step process of properly applying tempered glass to your Redmi Note 4, ensuring a bubble-free installation and optimal protection for your device. So, let’s get started and learn how to apply tempered glass on the Redmi Note 4.
Inside This Article
- Materials Needed
- Step 1: Clean the Screen
- Step 2: Remove Dust and Debris
- Step 3: Align the Tempered Glass
- Step 4: Apply the Tempered Glass
- Conclusion
- FAQs
Materials Needed
When it comes to applying a tempered glass screen protector on your Redmi Note 4, you’ll need a few essential materials to ensure a smooth and successful installation process. Here are the items you’ll need:
- Tempered glass screen protector: This is the main component that will provide the necessary protection for your Redmi Note 4’s screen. Make sure to choose a high-quality tempered glass protector that is specifically designed for your phone model.
- Cleaning cloth: A soft, lint-free cloth is essential for preparing the screen before applying the tempered glass. This will help remove any fingerprints, dust, and smudges, ensuring a clean surface for the protector.
- Dust removal sticker: To further ensure a dust-free application, a dust removal sticker is included in most tempered glass screen protector packages. This handy adhesive strip can easily lift any tiny particles that may be present on the screen.
- Microfiber cloth: Once the tempered glass is applied, a microfiber cloth will come in handy for removing any remaining bubbles or smudges. This soft cloth will not scratch or damage the tempered glass, allowing for a clear and pristine screen.
Having these materials ready before you start will make the process much easier and minimize the risk of any unwanted particles interfering with the installation. Now that you have everything you need, let’s move on to the step-by-step guide on how to apply the tempered glass on your Redmi Note 4.
Step 1: Clean the Screen
Before applying a tempered glass screen protector on your Redmi Note 4, it’s essential to ensure that the screen is clean and free from any dust or smudges. A clean screen will not only provide a better surface for the tempered glass to adhere to but also prevent any unwanted particles from getting trapped underneath.
Start by turning off your Redmi Note 4 and disconnecting any charging cables or accessories. This will prevent any interference during the cleaning process.
Next, take a microfiber cloth or a lint-free cloth and gently remove any dust or fingerprints from the screen. Make sure to wipe in a circular motion to effectively clean the entire surface.
If there are stubborn smudges or oily residue, dampen the cloth slightly with distilled water or screen-cleaning solution. Avoid using any harsh chemicals or abrasive materials as they can damage the screen.
Once you have thoroughly cleaned the screen, take a dry cloth and wipe away any excess moisture or streaks. Ensure that the screen is completely dry before proceeding to apply the tempered glass.
Step 2: Remove Dust and Debris
Before applying the tempered glass, it is crucial to ensure that there is no dust or debris on the screen. Even the tiniest speck of dust can create bubbles or hinder the adhesion of the tempered glass. Follow these steps to remove any dust or debris:
1. Start by using a microfiber cloth to gently wipe the screen. This will help remove any loose particles and smudges that may be present.
2. Next, use a piece of transparent tape to remove any stubborn dust or lint. Simply wrap the tape around your finger with the sticky side facing outwards and lightly press it onto the screen. Lift the tape off the screen, and you will notice that the dust and lint stick to it.
3. If there are still visible particles on the screen, you can use a dust removal sticker that usually comes with the tempered glass. Gently place the sticker on the screen and peel it off slowly to pick up any remaining dust or debris.
4. For any hard-to-reach corners or edges, you can use a soft-bristled brush or a clean, dry toothbrush to gently sweep away any particles.
5. Once you have thoroughly cleaned the screen and removed all the dust and debris, give it a final wipe with the microfiber cloth to ensure it is completely clean and ready for the tempered glass application.
By taking the time to properly clean the screen and remove any dust or debris, you can ensure a smooth and bubble-free application of the tempered glass on your Redmi Note 4.
Step 3: Align the Tempered Glass
Once you’ve ensured that your Redmi Note 4 screen is clean and dust-free, it’s time to align the tempered glass. Proper alignment is crucial to ensure a bubble-free application and maximum screen coverage.
To begin, carefully peel off the protective film from the back of the tempered glass. Be sure to hold the edges of the glass to prevent fingerprints or smudges.
Next, line up the tempered glass with the edges of your Redmi Note 4 screen. Pay attention to the alignment of the front camera, earpiece, and home button. It’s important to position the glass correctly to avoid covering any important sensors or obstructing the functionality of the phone.
Once aligned, gently press down on the middle of the tempered glass. This will allow it to adhere to the screen without creating any air bubbles. Use your fingertips to smooth out any small bubbles that may appear.
If you notice any misalignment or air bubbles, don’t worry! Simply lift the tempered glass slightly and reposition it. If there are stubborn air bubbles, use a credit card or a clean, soft cloth to gently push them towards the edges until they disappear.
Once the tempered glass is aligned and all bubbles are removed, press firmly on the entire surface of the glass to ensure maximum adhesion. Start from the center and move outwards towards the edges. Apply even pressure to avoid creating new bubbles or causing the glass to lift.
Finally, take a closer look at the edges of the tempered glass. Make sure it is properly aligned with the curved edges of the Redmi Note 4 screen. If necessary, use a credit card or your finger to push the edges down and secure them.
Now that you’ve successfully aligned the tempered glass, you can enjoy enhanced protection for your Redmi Note 4 screen. The tempered glass will shield your device from scratches, cracks, and everyday wear and tear, while maintaining the clarity and touch sensitivity of the display.
Step 4: Apply the Tempered Glass
Now that you have cleaned the screen and aligned the tempered glass, it’s time to apply it on your Redmi Note 4. Follow these simple steps to ensure a smooth installation:
1. Start by carefully peeling off the protective film from the back of the tempered glass. Make sure to hold the glass by the edges to avoid leaving fingerprints on the adhesive side.
2. Carefully align the top edge of the tempered glass with the top edge of your Redmi Note 4’s screen. Take your time to ensure a perfect fit.
3. Once the top edge is aligned, gently press down on the tempered glass to make it stick to the screen. Use your fingers to smooth out any air bubbles that may appear.
4. Slowly work your way down, pressing the tempered glass onto the screen as you go. Be cautious not to apply too much pressure, as this might cause the glass to crack or chip.
5. If you notice any air bubbles or dust particles trapped under the glass, gently lift it up from the nearest edge and use a microfiber cloth or dust removal sticker to eliminate them. Then, carefully reapply the glass.
6. Once the tempered glass is fully applied, press down on it firmly to ensure a strong bond with the screen. This will help prevent any gaps between the glass and the screen, which may compromise the protection it provides.
7. Lastly, use a soft cloth to wipe away any fingerprints or smudges on the surface of the tempered glass. This will keep your Redmi Note 4 looking clean and pristine.
That’s it! You have successfully applied the tempered glass on your Redmi Note 4. Now you can enjoy enhanced protection for your smartphone’s screen, shielding it from scratches, cracks, and daily wear and tear.
Remember, it’s always a good idea to keep a spare tempered glass handy in case you need to replace it in the future. Additionally, if you encounter any issues during the installation process, don’t hesitate to seek assistance from a professional or refer to the manufacturer’s guidelines.
Conclusion
Applying tempered glass on your Redmi Note 4 is a simple yet effective way to protect the screen of your device from scratches, smudges, and damage caused by accidental drops. By following the step-by-step process outlined in this guide, you can ensure a seamless installation and enjoy the benefits of a clear and protected display.
Tempered glass not only provides a strong barrier against everyday wear and tear, but it also preserves the original touch sensitivity and clarity of your Redmi Note 4’s screen. With the added peace of mind that comes with having a tempered glass protector, you can confidently use your device without worrying about the integrity of the display.
Remember, taking the time to clean the screen thoroughly, align the tempered glass correctly, and firmly press it down will result in a flawless installation. So, go ahead and get your hands on a tempered glass protector for your Redmi Note 4 today, and keep your device looking and functioning like new for the long haul!
FAQs
1. Can I apply tempered glass on Redmi Note 4 by myself?
Certainly! Applying tempered glass on your Redmi Note 4 is a simple process that can be done by yourself. Just make sure to follow the proper steps and use the right tools to ensure a successful installation.
2. What are the benefits of using tempered glass on my Redmi Note 4?
Using tempered glass on your Redmi Note 4 offers several benefits. It provides an extra layer of protection for your device’s screen, preventing scratches, cracks, and fingerprints. Tempered glass also has a high degree of impact resistance, which means it can absorb and disperse the force of a drop or impact, minimizing the chances of screen damage.
3. Do I need to clean the screen before applying tempered glass?
Yes, it’s crucial to clean the screen thoroughly before applying tempered glass. Any dust, dirt, or fingerprints present on the screen can potentially affect the adhesion and clarity of the tempered glass. Use a microfiber cloth or screen cleaning solution to remove any smudges or debris before installation.
4. How do I apply tempered glass on my Redmi Note 4?
To apply tempered glass on your Redmi Note 4, follow these steps:
1. Clean the screen thoroughly.
2. Peel off the protective film from the tempered glass.
3. Align the glass with the screen, making sure the cutouts match correctly.
4. Gently press down on the center of the glass to initiate adhesion.
5. Use a soft cloth or squeegee to remove any air bubbles, starting from the center and moving towards the edges.
6. Allow the adhesive to dry completely.
5. Is it easy to remove the tempered glass from my Redmi Note 4?
Yes, removing tempered glass from your Redmi Note 4 is relatively easy. Start by lifting the corner of the glass gently. Once you have a grip, slowly peel off the tempered glass from one side to the other. If there is any residue left after removing the glass, you can clean it using a gentle adhesive remover and a microfiber cloth.