
Installing phone lines is a crucial step in ensuring connectivity and communication in both residential and commercial settings. Whether you are setting up a new phone system or expanding an existing one, knowing how to properly install phone lines is essential. With the evolution of technology, the process may seem daunting, but with the right knowledge and guidance, it can be a seamless experience.
In this article, we will dive into the world of phone line installation, providing you with a comprehensive guide on how to get started. From understanding the different types of phone lines to the step-by-step process of installation, we’ve got you covered. So, if you’re ready to connect to the world, let’s unravel the mysteries of phone line installation together!
Inside This Article
- Step 1: Prepare the Necessary Tools and Materials
- Step 2: Choose the Type of Phone Line
- Step 3: Plan and Map Out the Phone Line Installation
- Step 4: Install the Phone Line Jacks
- Step 5: Connect the Phone Line to the Network Interface Device
- Step 6: Test the Phone Line Connection
- Additional Tips and Considerations:
- Conclusion
- FAQs
Step 1: Prepare the Necessary Tools and Materials
Before you begin installing phone lines, it’s important to gather all the necessary tools and materials. This will ensure a smooth and efficient installation process. Here are the essential items you’ll need:
- Phone Line Jacks: Make sure you have enough phone line jacks for each room where you want to install a phone line. These jacks are essential for connecting your phones to the network.
- Phone Line Cables: You’ll need phone line cables to connect the phone line jacks to the network interface device. Measure the distance between the jacks and the device to determine the length of cable needed.
- Network Interface Device: This device acts as a central hub for your phone lines. It’s usually located outside your home or in a utility room. Ensure you have the device and any necessary mounting brackets or screws.
- Screwdriver: A screwdriver will be needed to secure the phone line jacks and network interface device in place. Make sure you have both a flathead and a Phillips screwdriver on hand.
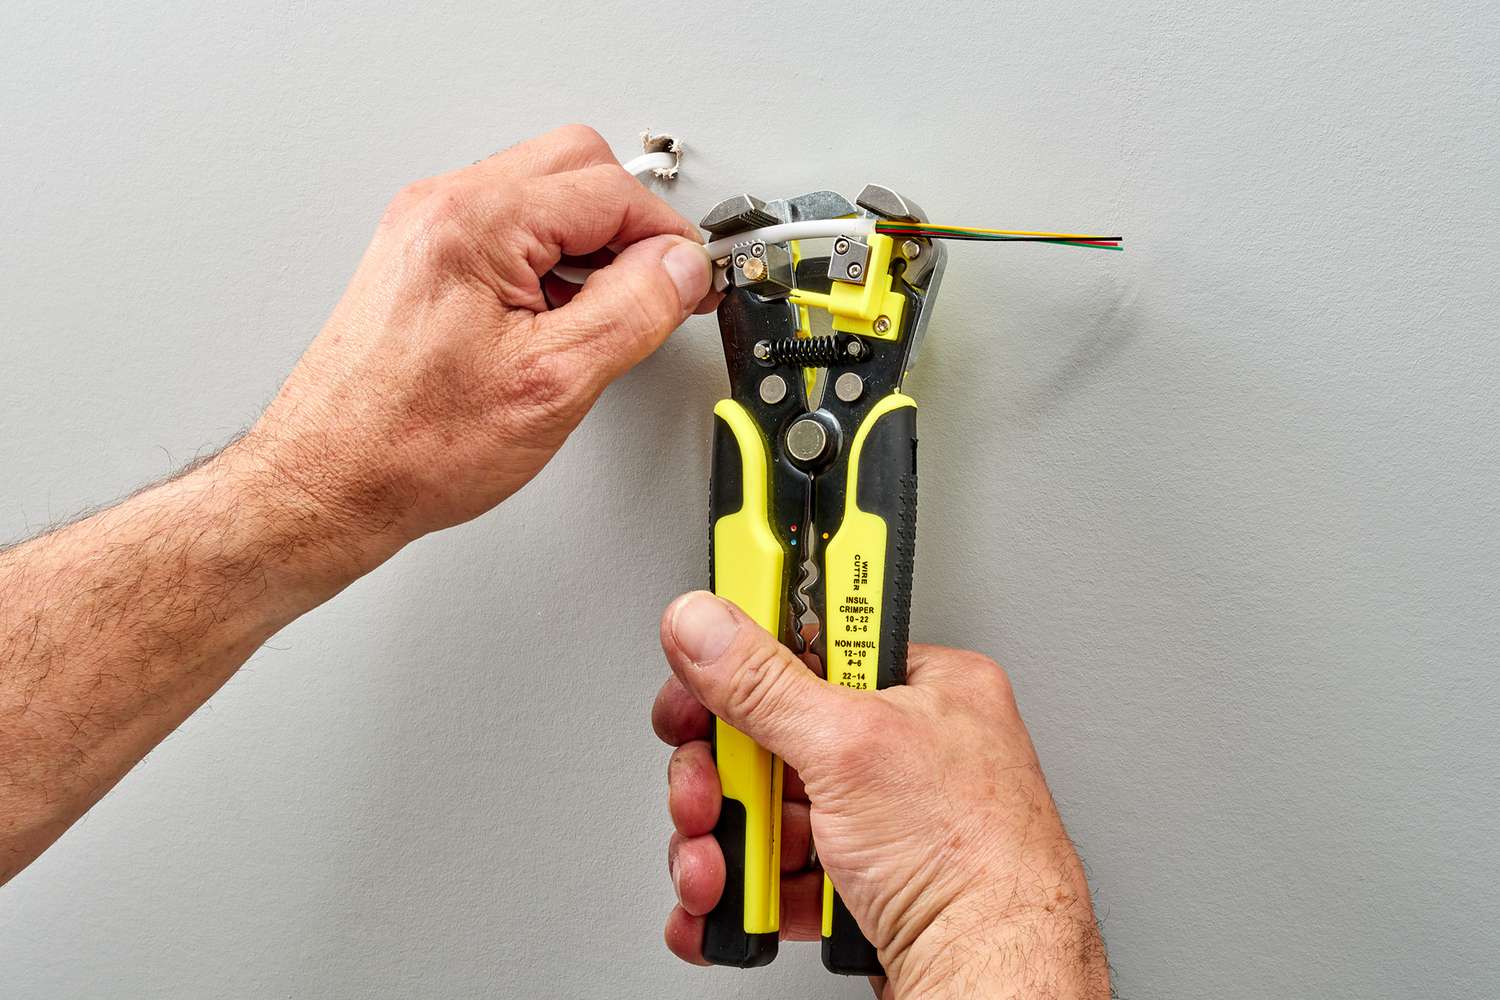
- Wire Strippers: Wire strippers are essential for removing the insulation from the phone line cables. This will allow you to properly connect the cables to the jacks and the network interface device.
- Electric Drill: An electric drill may be needed if you need to drill holes to mount the phone line jacks or the network interface device. Ensure you have the appropriate drill bits for the job.
- Level: A level can help ensure that the phone line jacks and network interface device are mounted correctly and are level with the ground. This will prevent any issues with stability or appearance.
- Tape Measure: Use a tape measure to accurately determine the lengths of phone line cable needed and to measure the distance between the jacks and the network interface device.
By gathering these tools and materials beforehand, you’ll be well-prepared to begin the phone line installation process. This will help minimize potential delays or interruptions during the installation, making the entire process more efficient and successful.
Step 2: Choose the Type of Phone Line
When it comes to installing phone lines, one of the crucial decisions you need to make is choosing the right type of phone line. The type of phone line you choose will determine how your phone system will function and the features it will support. Here are a few options to consider:
- Analog Phone Line: Analog phone lines, also known as Plain Old Telephone Service (POTS) lines, have been around for decades. They use traditional copper wiring and are compatible with most standard landline phones. Analog lines are reliable and can support voice calls, but their limited bandwidth may not be suitable for advanced features like faxing or high-speed internet access.
- Digital Phone Line: Digital phone lines, such as Integrated Services Digital Network (ISDN) lines, provide higher call quality and faster data transmission compared to analog lines. They can support multiple channels, allowing for simultaneous voice and data communication. However, ISDN lines are becoming less common and are being replaced by more advanced technologies.
- Voice over Internet Protocol (VoIP) Line: VoIP lines utilize an internet connection to transmit voice calls. They convert analog voice signals into digital data that can be transmitted over the internet. VoIP lines offer a wide range of features, including call forwarding, voicemail, and video conferencing. They are cost-effective and can support advanced applications like virtual phone numbers and call recording.
- Cellular Phone Line: If you are looking for a wireless alternative, cellular phone lines are worth considering. They use cellular networks to make and receive calls, eliminating the need for physical infrastructure. Cellular phone lines offer the flexibility of mobility and can support features like mobile hotspot and internet access. However, coverage and signal strength may vary depending on your location.
Before choosing a phone line type, assess your needs and consider factors such as call quality, reliability, cost, and required features. It’s also important to check with your service provider to ensure that the chosen type of phone line is available in your area.
Step 3: Plan and Map Out the Phone Line Installation
Before you begin installing phone lines, it’s important to have a well-thought-out plan in place. Proper planning and mapping out the installation process will help ensure a smooth and efficient installation. Here are the steps to follow:
1. Determine the Phone Line Configuration: Take some time to decide how many phone lines you need and where they will be located. Consider the layout of your home or office and factors such as the number of rooms, the need for dedicated phone lines in certain areas, and any future expansion plans.
2. Identify the Entry Point: Locate the entry point where the phone line will enter your building. This is typically where the network interface device (NID) or demarcation point is located. It’s important to choose a convenient and accessible location for ease of installation and future maintenance.
3. Plan the Route: Carefully plan the routing of the phone lines from the entry point to the desired locations. Consider factors such as the distance between rooms, the availability of wiring conduits or pathways, and any potential obstacles that may need to be navigated.
4. Decide on Wiring Method: Determine which wiring method you will use for your phone lines. Common options include running wires through walls, using surface-mounted wiring channels, or utilizing existing conduits if available. Choose the method that best suits your needs and the aesthetics of your space.
5. Consider Electrical Interference: Be mindful of potential sources of electrical interference that may affect phone line quality. Avoid running phone lines parallel to electrical wires or in close proximity to electrical equipment that may cause signal disturbances.
6. Create a Diagram: Map out the planned route of your phone lines on a diagram. Include the entry point, the locations of each phone line jack, and the wiring path. This visual representation will serve as a useful reference during the installation process and future troubleshooting.
7. Label and Document: As you plan your phone line installation, label each phone line and document the corresponding room or location it will serve. This will help you quickly identify and troubleshoot any issues that may arise in the future.
By taking the time to thoroughly plan and map out your phone line installation, you can avoid unnecessary headaches and ensure a successful installation process. Proper planning will save you time and effort, allowing for a smooth and efficient installation of your phone lines.
Step 4: Install the Phone Line Jacks
Installing phone line jacks is an essential step in setting up a functional phone line in your home or office. These jacks serve as the interface between your telephone equipment and the phone line that connects you to the telephone network. Follow these simple steps to install the phone line jacks successfully:
1. Determine the location: Firstly, decide where you want to install the phone line jack. It is typically installed in a central and convenient location, such as a living room or office. Make sure the area has easy access to the telephone network interface device (NID).
2. Gather the necessary tools and materials: Before you start the installation process, gather the required tools and materials. These may include a screwdriver, wire strippers, phone jack, telephone cable, wall plate, and screws.
3. Turn off the power: Before dealing with any electrical connection, ensure your safety by turning off the power in the area where you will be working. Locate the circuit breaker or fuse box and switch off the corresponding power supply.
4. Prepare the wall: Prepare the wall where you will be installing the phone line jack. Remove any existing wall plate or cover using the screwdriver. Ensure the area is clean and free of any debris that could interfere with the installation.
5. Strip the telephone cable: Take the telephone cable and use wire strippers to strip approximately two inches of the outer sheath from the cable. This will expose the individual wire pairs inside.
6. Connect the wires: Identify the color-coded wires within the telephone cable. Typically, the wires will be colored green, red, yellow, and black. Connect the corresponding colored wires to the appropriate terminals on the phone jack. Use a screwdriver to secure the connections.
7. Attach the jack to the wall plate: Once the wires are connected, attach the phone jack to the wall plate. Use the provided screws to secure it firmly in place. Ensure the jack is aligned properly and sits flush with the wall.
8. Test the installation: After you have installed the phone line jack, it’s important to test the connection. Connect a telephone handset or a phone tester to the jack and check if you have a dial tone. If the line is clear and you can make and receive calls, your installation was successful.
Remember, if you’re unsure about any step of the installation process, it’s always a good idea to consult with a professional. Improper phone line jack installation can lead to poor connection quality or even damage to your telephone equipment.
Step 5: Connect the Phone Line to the Network Interface Device
Once you have installed the phone line jacks, the next step is to connect the phone line to the network interface device (NID). The NID is usually located on the exterior wall of your house or building and serves as the point of demarcation between the telephone company’s wiring and your internal phone lines.
Before connecting the phone line, it’s important to ensure that the NID is accessible and free from any obstructions. Remove the cover of the NID by unscrewing the screws or using the provided tool.
Inside the NID, you will find a row of terminals or connectors. These terminals are labeled for each phone line in your home or office. Identify the terminal corresponding to the phone line you want to connect and prepare a length of suitable telephone cable.
Strip the outer jacket of the telephone cable to expose the individual wires. You will typically find four wires inside: red, green, yellow, and black. These wires correspond to the line, ring, tip, and ground, respectively.
Attach the stripped ends of the telephone cable wires to the appropriate terminals in the NID. The most common configuration is to connect the red and green wires to the screw terminals marked “Line” or “L1” and “L2,” and the yellow and black wires to the screw terminals marked “Ring” or “R1” and “R2.”
Carefully tighten the screws on each terminal to secure the connections. Double-check that the wires are tightly fastened and there is no cross-connection between terminals.
Once all the connections are made, carefully place the cover back on the NID and fasten the screws securely. This will protect the connections from dust, moisture, and other environmental factors.
It’s important to note that if you are not comfortable performing this step yourself, it is advisable to seek the assistance of a professional telephone technician. They have the experience and tools to ensure a proper and secure connection.
Step 6: Test the Phone Line Connection
After completing the installation of your phone line, it is important to test the connection to ensure everything is working properly. This step will help you verify if the phone line is properly installed and if there are any issues that need to be addressed. Here are some steps to follow when testing the phone line connection:
1. Pick up a phone receiver in one of the installed phone jacks. Check for a dial tone. A dial tone indicates that the phone line is connected and working. If you don’t hear a dial tone, there may be an issue with the installation or the wiring.
2. Make a test call to another phone or a mobile phone. Check if the call goes through and if you can hear the other person clearly. If you experience any distortion, noise, or connectivity issues, there may be a problem with the phone line quality or the wiring.
3. Test each phone jack in your home or office. Plug a phone into each jack and repeat the steps above to ensure that all the jacks are properly connected and functional. If any of the jacks don’t have a dial tone or have connectivity issues, it might be due to a wiring problem or a faulty jack.
4. Check for any interference or static. Move away from any electronic devices or appliances that might be causing interference with the phone line signal. These devices can include routers, cordless phones, microwaves, or fluorescent lights. If the interference persists, you may need to adjust the location of the phone line or consult a professional for further assistance.
5. Repeat the test periodically. Even after successfully testing the phone line connection, it is a good practice to test it periodically to ensure it continues to work efficiently and reliably. This will help you identify any potential issues early on.
By following these steps to test your phone line connection, you can ensure that your installation is successful and that your phone line is functioning properly. If you encounter any issues during the testing process, it is recommended to consult a professional or reach out to your phone service provider for assistance.
Additional Tips and Considerations:
When it comes to installing phone lines, there are a few extra tips and considerations that you should keep in mind to ensure a successful installation. Here are some additional factors to consider:
1.
Labeling: Make sure to label each phone line jack with the corresponding room or area. This will help you easily identify and troubleshoot any issues that may arise later on.
2.
Safety Precautions: Always prioritize safety when working with phone lines. Disconnect the power before installing or repairing phone lines and use proper safety equipment, such as gloves and safety glasses.
3.
Wire Placement: Avoid running phone lines parallel to electrical lines or near sources of interference, such as fluorescent lights or large appliances. This can help reduce the chances of signal interference or noise on the phone line.
4.
Proper Terminations: Ensure that all phone line connections are properly terminated. Loose or poorly terminated connections can lead to interruptions or loss of signal quality.
5.
Test and Troubleshoot: After completing the installation, test each phone line to ensure it is functioning properly. Use a phone line tester or plug in a working telephone to check for dial tone and clear audio quality.
6.
Document the Installation: Keep detailed notes and documentation of the phone line installation, including diagrams, labeling, and any specific configurations or customizations. This can be helpful for future reference or if you need to make changes or additions to the phone line setup.
7.
Consider Professional Assistance: If you’re not confident in your abilities or face complex installation requirements, it may be best to seek the help of a professional phone line technician. They can ensure a proper installation and troubleshoot any issues that may arise.
By following these additional tips and considerations, you can enhance the overall efficiency and effectiveness of your phone line installation. Taking the time to plan and execute the installation properly will lead to a reliable and well-functioning phone line system in your home or office.
Installing phone lines can be a complex process, but with the right knowledge and tools, it can be accomplished successfully. By following the steps outlined in this article and ensuring that you have the necessary equipment, you will be well-equipped to install phone lines in your home or office.
Remember to plan the layout of your phone lines, determine the best wiring method, and make sure to test the connections once everything is set up. If you encounter any difficulties along the way, consult the manufacturer’s instructions or consider seeking professional assistance.
Having a functional phone line is essential for communication and connectivity. With the right techniques, you can enjoy clear and reliable phone service in your desired locations. Now that you know how to install phone lines, go ahead and get started on your installation project. Good luck!
FAQs
1. Can I install phone lines by myself?
Yes, you can install phone lines by yourself. However, it is important to have a basic understanding of electrical wiring and telecommunications systems. It is recommended to consult with a professional or follow a step-by-step guide to ensure proper installation and avoid any accidents or damaging your phone system.
2. What tools do I need to install phone lines?
The tools you will need to install phone lines include a telephone wiring tool, wire strippers/cutters, a telephone jack/connector, telephone wire, and a screwdriver. It is important to have the right tools for the job to ensure a smooth installation process.
3. How do I install a telephone jack?
To install a telephone jack, start by disconnecting the phone line from the main distribution point. Then, strip the outer covering of the telephone wire and expose the individual wires inside. Connect each wire to the corresponding terminals in the telephone jack, following the color-coded scheme. Finally, secure the telephone jack to the wall using screws and test the connection.
4. Can I use existing telephone wires for new phone line installation?
In most cases, you can use existing telephone wires for new phone line installation. However, it is important to check the condition of the existing wires to ensure they are not damaged or faulty. If the wires are in good condition, you can utilize them for your new phone line installation. If not, it is recommended to replace them with new wiring.
5. How can I troubleshoot phone line installation issues?
If you encounter issues with your phone line installation, first double-check all the connections and ensure they are properly secured. Make sure you have followed the correct wiring scheme and that there are no loose or damaged wires. If the problem persists, it is recommended to consult with a professional or contact your service provider for further assistance.