
As technology continues to advance, our smartphones have become more than just devices for making calls and sending messages. With their high-quality cameras and powerful processing capabilities, our mobile phones are now capable of serving as versatile tools for various tasks. One such task is video conferencing, which has become increasingly important in today’s digital age.
Whether you’re working remotely, attending online classes, or simply catching up with family and friends, using your phone as a webcam can bring a whole new level of convenience and flexibility to your video calls. In this article, we will guide you through the process of setting up your phone as a webcam for video conferencing, allowing you to take advantage of its superior camera quality and mobility.
Inside This Article
- Compatibility and Requirements
- Step 1: Download Webcam App
- Step 2: Connect Your Phone to Computer
- Step 3: Configure Settings
- Step 4: Select Phone as Webcam
- Step 5: Test Your Webcam
- Conclusion
- FAQs
Compatibility and Requirements
Before you dive into using your phone as a webcam, it’s important to ensure that your device meets the necessary requirements. Here are the key factors to consider:
Operating System: Your mobile device should be running either iOS or Android, as these are the most commonly supported operating systems for webcam apps.
App Compatibility: Make sure to check if your preferred webcam app is compatible with your specific phone model. While many webcam apps are versatile and work across different devices, it’s always a good idea to double-check for compatibility issues.
Connectivity: To use your phone as a webcam, you’ll need a stable internet connection. Whether you’re connecting your phone to your computer via USB or using a wireless connection, ensure that your internet speed is sufficient for video conferencing.
Computer Compatibility: Alongside mobile device compatibility, you need to ensure that your computer can support the webcam app and properly interface with your phone. Check the system requirements of the webcam app to ensure compatibility with your computer’s operating system.
Camera Quality: The camera quality on your mobile device is another crucial aspect to consider. While most modern smartphones have excellent cameras, it’s worth noting that the quality of the webcam experience will largely depend on the capabilities of your phone’s camera.
Additional Accessories: Depending on the setup you choose, you may require additional accessories such as a tripod or a phone stand to position your device at the desired angle. While not mandatory, these accessories can greatly improve the overall webcam experience.
By taking these compatibility and requirements into account, you’ll be better prepared to effectively use your phone as a webcam and ensure a smooth video conferencing experience.
Step 1: Download Webcam App
The first step in using your phone as a webcam for video conferencing is to download a reliable webcam app. There are several options available for both Android and iOS devices that can turn your smartphone into a high-quality webcam.
When selecting a webcam app, consider factors such as ease of use, compatibility with your computer’s operating system, and the features it offers. Some popular webcam apps include EpocCam, DroidCam, and iVCam.
To download the webcam app, simply visit the respective app store on your phone (Google Play Store for Android or Apple App Store for iOS) and search for the desired app. Once you find it, click on the “Download” or “Install” button, and the app will be installed on your phone.
After the app is installed, make sure to grant it the necessary permissions it requires to access your camera and microphone. These permissions are crucial for the app to function properly as a webcam.
Remember to check if the webcam app is compatible with your computer’s operating system. Most of these apps have companion software that needs to be installed on your computer to establish a connection between the phone and the computer.
Once you have successfully downloaded and installed the webcam app on your phone, you are ready to move on to the next step of connecting your phone to the computer.
Step 2: Connect Your Phone to Computer
Once you have downloaded the webcam app on your phone, the next step is to connect your phone to your computer. This is a crucial step as it allows your computer to recognize your phone as a webcam device.
There are several ways you can connect your phone to your computer:
- USB Cable: The most common method is to use a USB cable to establish a physical connection between your phone and computer. Most modern phones come with a USB cable that you can use for this purpose. Simply plug one end of the cable into your phone and the other end into a USB port on your computer. Once connected, your computer should detect your phone as a new device.
- Wireless Connection: Some phones and computers support wireless connectivity options such as Wi-Fi or Bluetooth. If your phone and computer have these capabilities, you can establish a wireless connection between them. Check the settings on both devices to enable the wireless connection and follow the prompts to pair your phone with your computer.
Regardless of the method you choose, make sure that your phone is set to transfer files or enable file sharing mode. This will allow your computer to access the necessary files and data from your phone. Consult your phone’s user manual or settings menu to find the appropriate options.
Once your phone is connected to your computer, take a moment to ensure that the connection is stable and reliable. Check if your computer recognizes your phone as a webcam device or if any additional drivers need to be installed. This will ensure a smooth and uninterrupted video conferencing experience.
Step 3: Configure Settings
Once you have downloaded the webcam app and connected your phone to your computer, it’s time to configure the settings for optimal video conferencing. Follow these steps to get your phone ready to be used as a webcam:
1. Open the webcam app: Locate the app on your phone and open it. You may need to grant permissions for the app to access your camera and microphone.
2. Adjust video resolution: Check the settings within the app to ensure that the video resolution is suitable for video conferencing. Higher resolutions provide better image quality, but they also require more bandwidth. It’s best to choose a resolution that strikes a balance between quality and performance.
3. Set FPS (Frames per second): The FPS determines how smoothly the video will appear during the conference. Higher FPS values result in a smoother video, but they also require more processing power. Aim for a value between 24-30 FPS for optimal video conferencing.
4. Enable auto-focus: Activate the auto-focus feature within the app to ensure that the camera adjusts the focus automatically. This will help keep the video clear and crisp, especially if you move around during the conference.
5. Check audio settings: In addition to video settings, make sure to check the audio settings within the app. Ensure that the microphone is enabled, and the volume is set to an appropriate level. Test the audio before the conference to ensure that it is working properly.
6. Adjust lighting: Proper lighting is crucial for good video quality. Make sure you are in a well-lit environment and position yourself in a way that avoids harsh shadows. You can also experiment with adjusting the exposure settings in the webcam app to optimize the lighting conditions.
7. Enable noise cancellation: If your webcam app has a noise cancellation feature, enable it to reduce background noise and enhance the audio quality. This will ensure that your voice comes through clearly during the conference without any distractions.
8. Test the settings: Before joining the actual video conference, it is recommended to test your settings. Use the webcam app to record a short video or take a snapshot to check the quality of both the video and audio. Make any necessary adjustments to the settings until you are satisfied with the results.
By properly configuring the settings of your phone as a webcam, you will be able to have a smooth and professional video conferencing experience. Take the time to fine-tune these settings, and you’ll impress your colleagues or clients with high-quality audio and video during your online meetings.
Step 4: Select Phone as Webcam
Now that you have downloaded the webcam app and connected your phone to your computer, it’s time to select your phone as the webcam. Follow these steps to get started:
1. Launch the webcam app on your computer. This will open the app’s main interface where you can configure various settings.
2. Within the app, navigate to the “Settings” or “Preferences” section. This is where you can choose the webcam source.
3. Look for an option like “Select Camera” or “Camera Source”. Click on it to view the available webcam sources.
4. In the list of available sources, you should see your connected phone listed as an option. It may be named after your phone model or appear as a generic “Android” or “iOS” device.
5. Select your phone as the webcam source by clicking on it. The app will recognize your phone’s camera and enable it for use during video conferencing.
6. Once you have selected your phone as the webcam source, make sure to save the settings or apply the changes.
7. Close the settings or preferences window and return to the main interface of the webcam app.
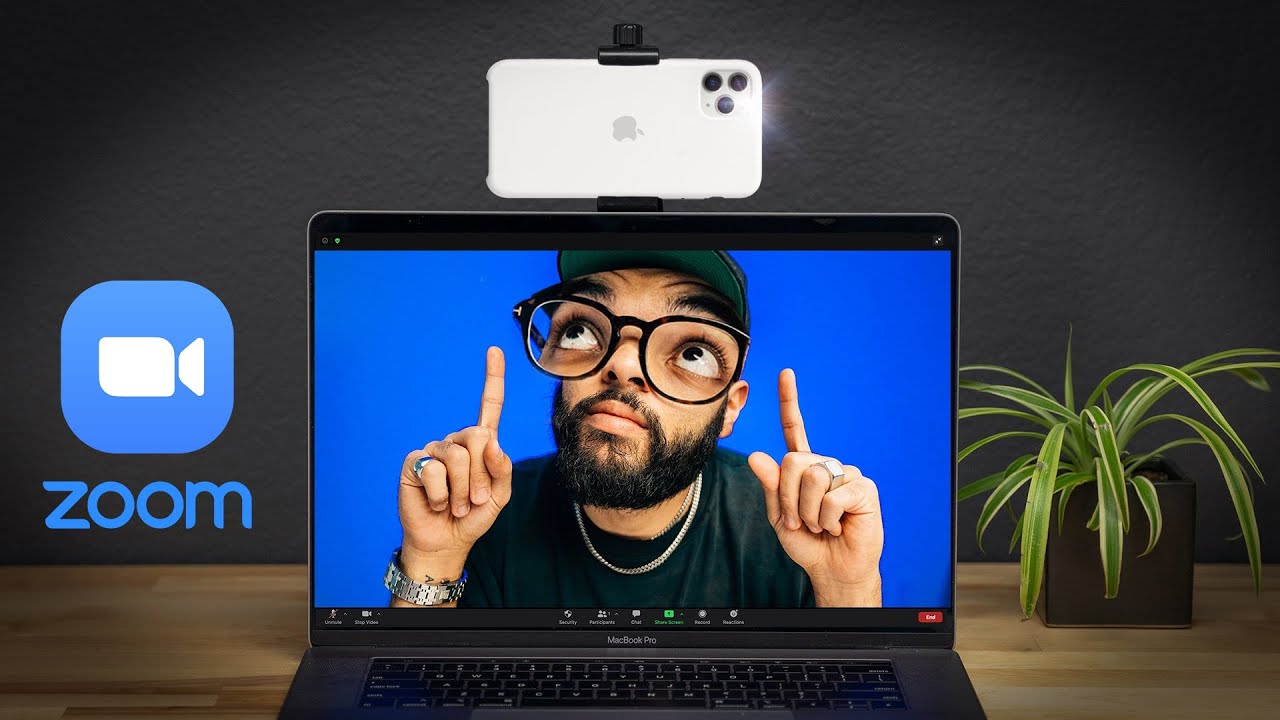
8. Your phone is now set up as the webcam for video conferencing! You can proceed to use it in your preferred video conferencing platform, such as Zoom, Skype, or Microsoft Teams.
Remember to keep your phone connected to your computer throughout the video conferencing session to maintain the webcam functionality.
By selecting your phone as the webcam source, you can take advantage of its superior camera quality and features for a professional video conferencing experience.
Step 5: Test Your Webcam
After configuring the settings and selecting your phone as the webcam on your computer, it’s time to test your webcam and ensure everything is working properly. Follow these steps to make sure your phone is functioning as a webcam:
1. Open the video conferencing or webcam testing application that you plan to use. It could be Zoom, Skype, Microsoft Teams, or any other app that supports webcam functionality.
2. In the settings or preferences section of the application, navigate to the webcam options. Look for the camera settings or webcam selection area.
3. Here, you should see your phone listed as an available camera option. Select your phone from the list.
4. Once you’ve selected your phone as the webcam, the application should display the camera feed from your phone. You may see a preview of the video or a pop-up window showing your video stream.
5. Move your phone around or situate it to test the camera’s full range of motion. Check if the video quality is clear and if there are any issues with focus or lighting.
6. Additionally, you can test the microphone on your phone to ensure the audio is captured properly. Speak into your phone and check if your voice is coming through clearly in the video conferencing app.
7. Finally, ask a friend or colleague to join a video call with you to verify that they can see and hear you clearly. This will allow you to get real-time feedback and make any necessary adjustments to improve the quality of your webcam experience.
By following these steps to test your webcam, you can ensure that your phone is successfully functioning as a webcam for your video conferencing needs. It’s important to regularly test your setup to troubleshoot any issues and make adjustments as needed.
Conclusion
Using your phone as a webcam for video conferencing is a convenient and effective way to improve your online communication. With the right tools and settings, you can easily turn your smartphone into a high-quality webcam that rivals dedicated webcam devices. Not only does this save you money, but it also gives you the freedom to move around and use your phone’s superior camera capabilities.
In this article, we discussed different methods to use your phone as a webcam for video conferencing. Whether you choose to use dedicated apps, third-party software, or wireless solutions, the key is to ensure you have a stable internet connection and proper positioning of your phone for optimal video quality.
Remember to consider factors like lighting, background, and audio quality to create a professional and engaging video conferencing experience. With the growing need for remote work and online communication, utilizing your phone as a webcam can greatly enhance your virtual meetings, interviews, and professional interactions.
So, why settle for a subpar webcam when you have a powerful device in your pocket? Take full advantage of your phone’s capabilities and elevate your video conferencing game!
FAQs
Q: Can I use my mobile phone as a webcam for video conferencing?
Yes, absolutely! With the advancements in technology, you can now use your mobile phone as a webcam for video conferencing. Not only is it convenient, but it also eliminates the need for an additional webcam investment.
Q: What do I need to use my phone as a webcam?
To use your mobile phone as a webcam, you will need a compatible app that can turn your phone’s camera into a webcam. There are various apps available for both Android and iOS devices that can fulfill this requirement.
Q: Which apps can I use to turn my phone into a webcam?
There are several apps available for both Android and iOS devices that can transform your mobile phone into a webcam. Some popular options include DroidCam, iCam, EpocCam, and ManyCam. These apps allow you to connect your phone to your computer and use it as a webcam for video conferencing.
Q: Do I need any additional equipment to use my phone as a webcam?
Using your phone as a webcam typically does not require any additional equipment. As long as you have a stable internet connection and the necessary app installed on your phone and computer, you should be able to use your phone as a webcam seamlessly.
Q: Are there any limitations to using a mobile phone as a webcam?
While using your mobile phone as a webcam is a convenient solution, there are a few limitations to keep in mind. The video quality may not be as high as dedicated webcams, especially if you have an older phone. Additionally, battery life can be a concern when using your phone as a webcam for prolonged periods, so it’s a good idea to keep it connected to a power source during video conferencing sessions.